
The short version
Landscaping lives in the tree icon on the left toolbar. Sculpt tools reshape height with visible contour rings; paint tools replace the default grass with gravel, flowers or paths; foliage brushes cluster plants when you drag instead of clicking one at a time.
- Flatten uneven ground before walls — misaligned terrain breaks wall snaps
- Brush size and strength sit in the floating panel while sculpting
- Paint weeds away before laying gravel or paths
- Hold and drag on foliage to scatter clusters, not rows
Step 1–3
Sculpt the height
Raise, lower, smooth and flatten change the lot mesh itself. White contour rings show how steep the slope is — use them to judge when a hill is tall enough before you paint over it.
- 1
Raise a hill with the sculpt brush
Open Landscaping → Terrain Tools and pick the raise brush. Click and hold on flat ground — white contour rings appear as the hill grows. The official demo builds a gentle mound in three or four passes; bigger brush size covers more area per click.
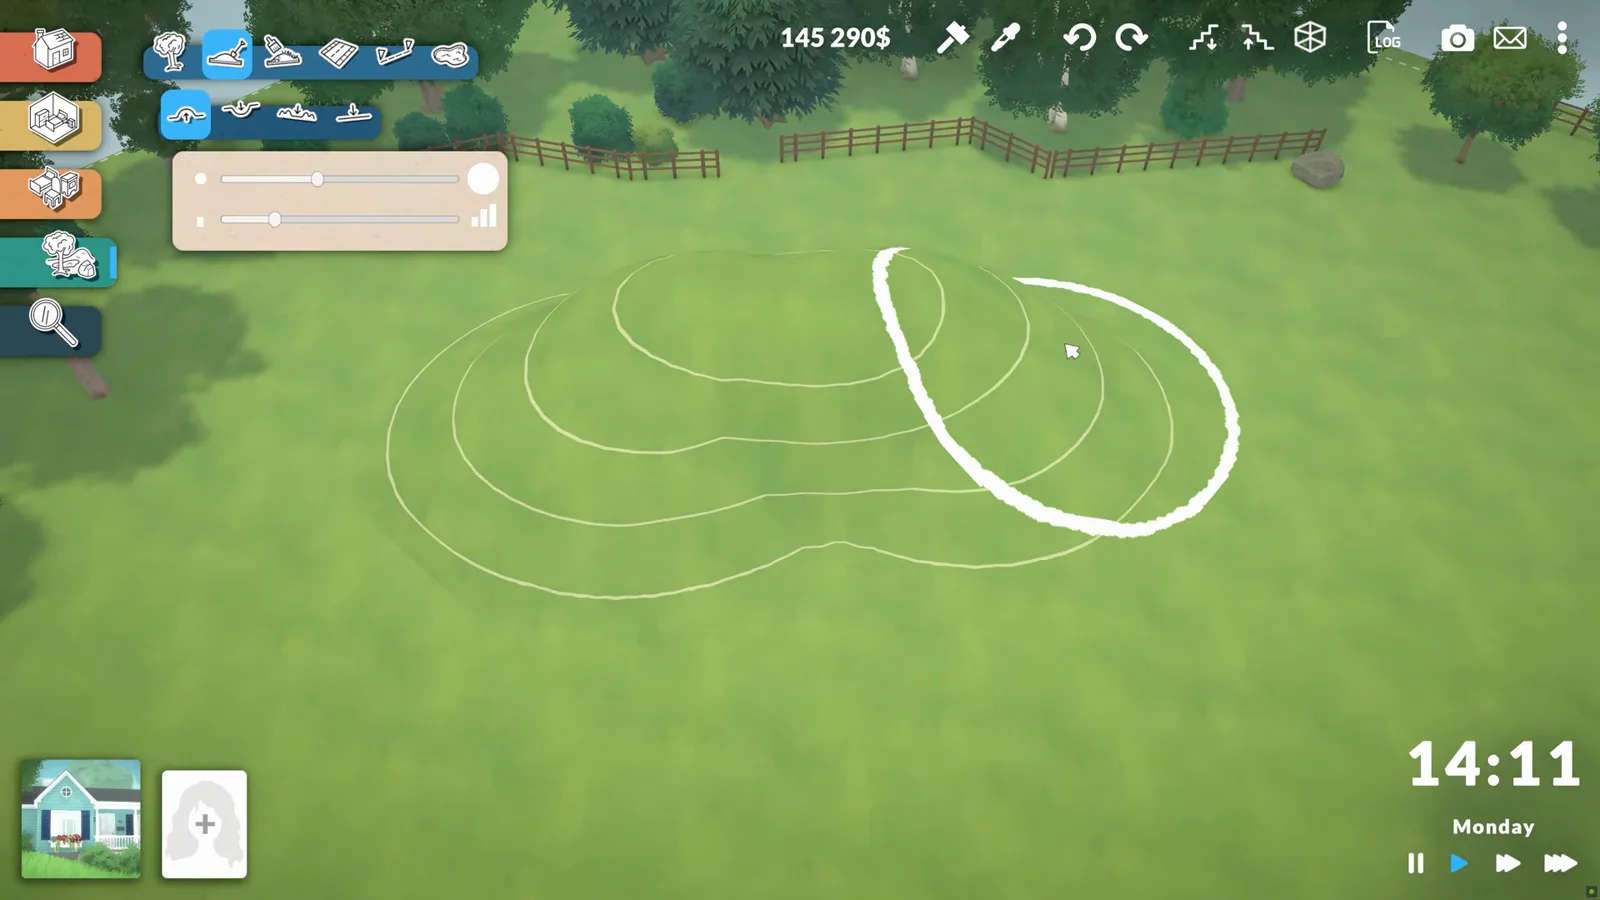
Contour rings = height readout while you sculpt.Watch at 0:05 - 2
Read the contour rings while you shape
Each ring is a height step. Tight rings mean a steep face; wide rings mean a gentle slope. Switch to smooth or lower if a face gets too sharp, then raise again to add a plateau on top.
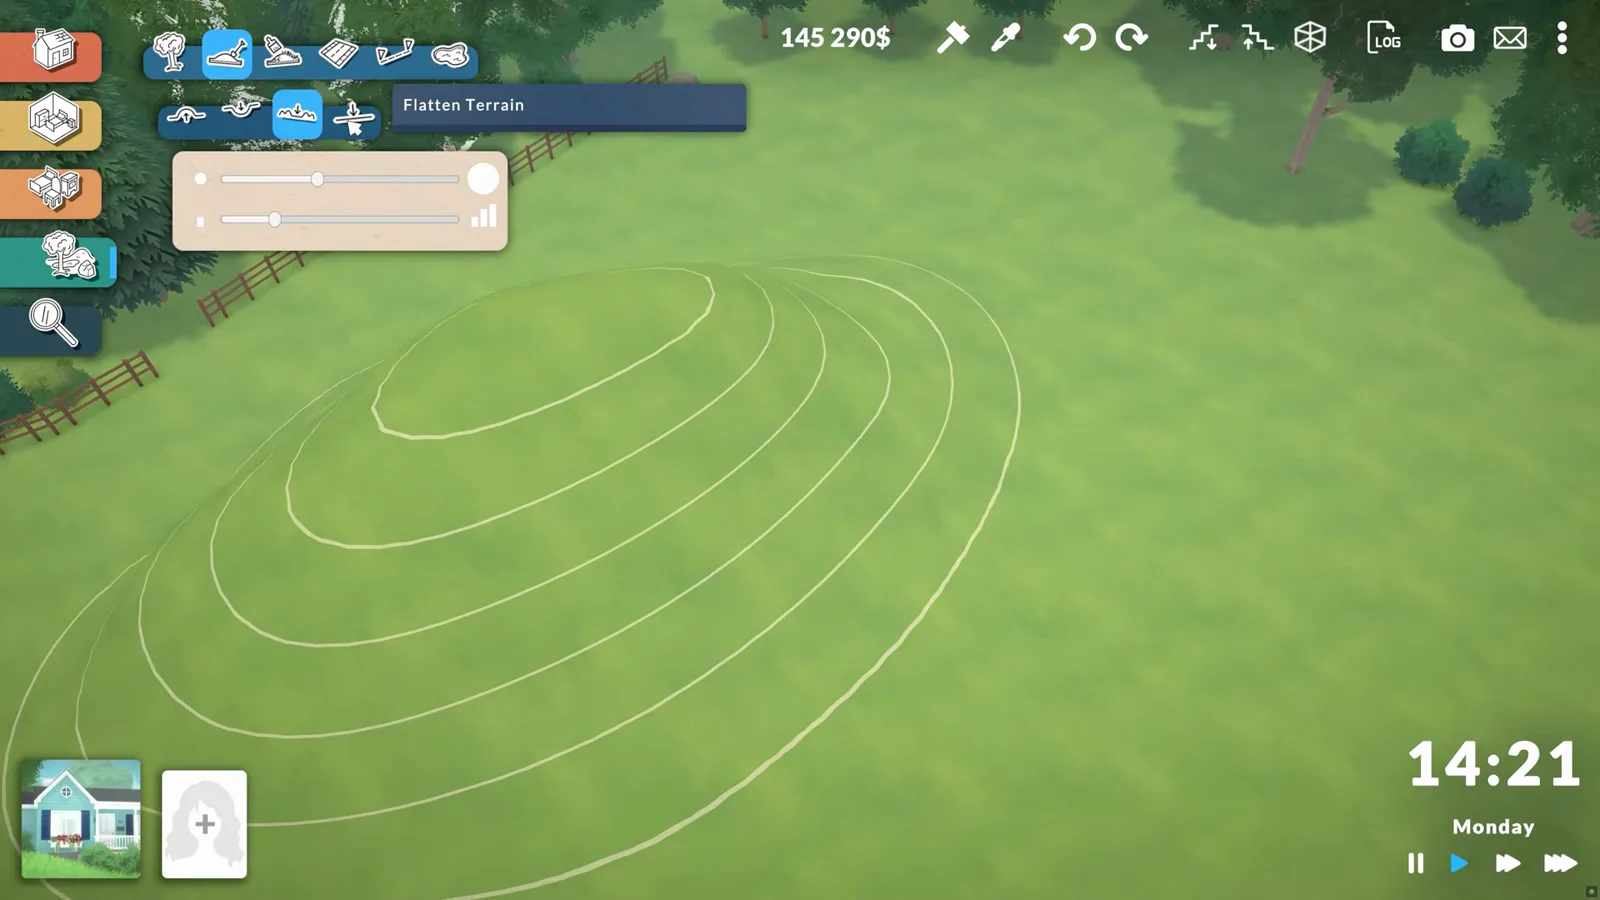
Steep slope = rings close together.Watch at 0:25
Step 4–6
Paint textures
Once the height is right, terrain paint replaces the default grass with long grass, wildflowers and dirt paths. Paint these layers before gravel aprons and foliage.
- 3
Lay a second grass texture
The paint palette includes short grass, long grass and dry variants. Layer a longer texture on top of the base coat around the foundation — the official demo paints the mound with lush grass before adding flowers. Brush strength controls how opaque the overlay is.
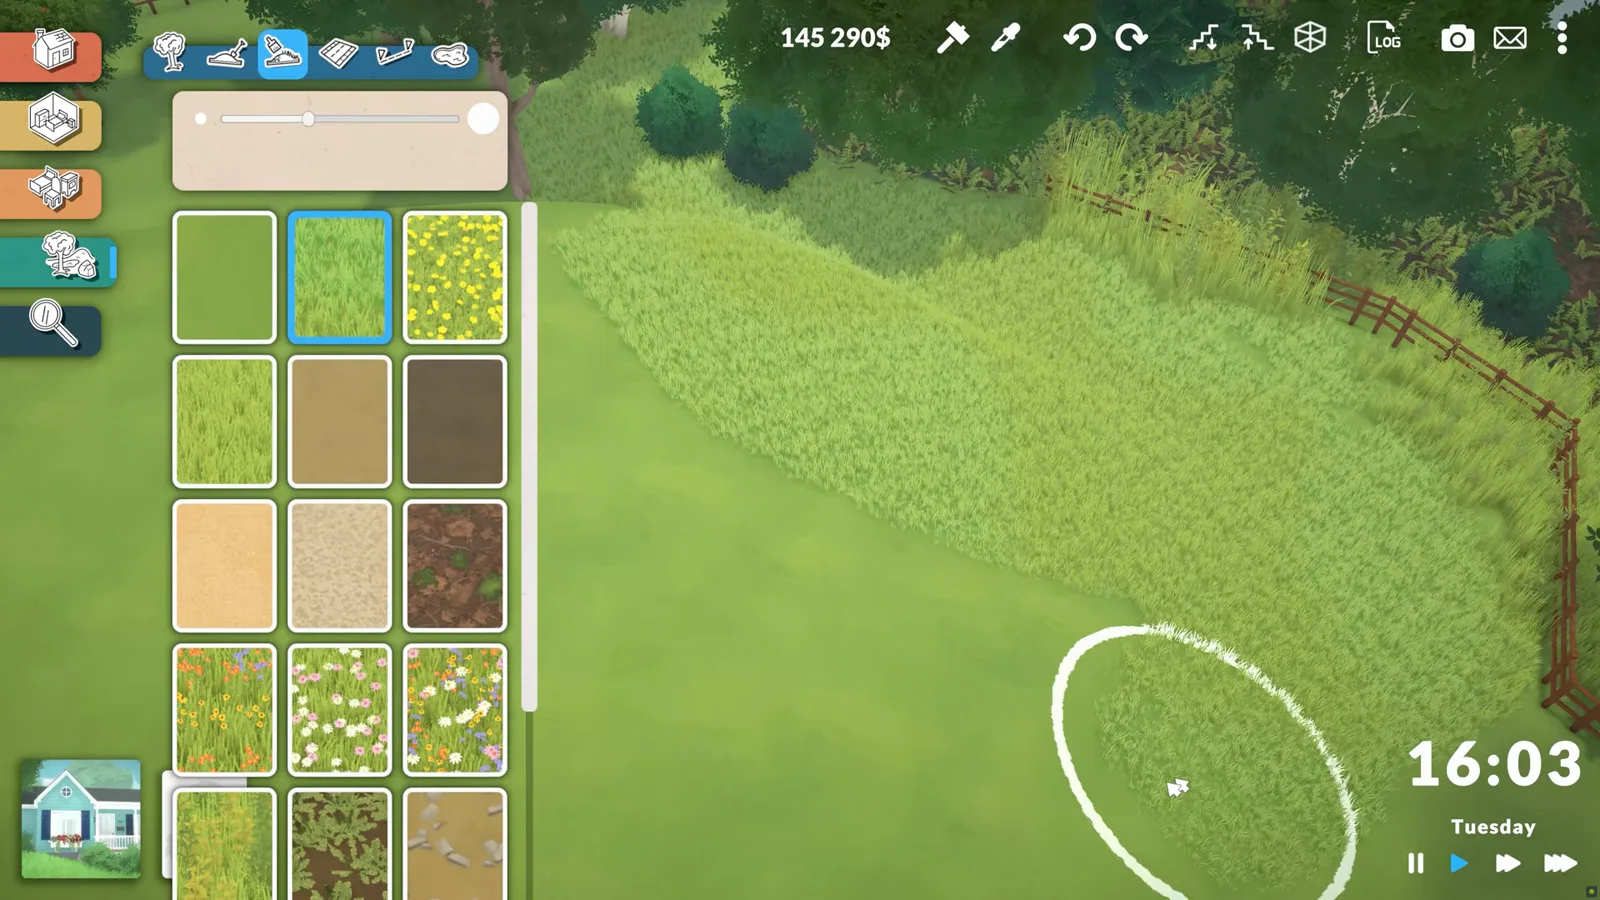
Mix textures — short grass under, long grass on the mound.Watch at 0:50 - 4
Add wildflower patches
Select a wildflower swatch and paint patches on the long-grass areas. Yellow, pink and white clusters are separate textures, not individual plants, so you can drag a loose border rather than placing flowers one at a time.
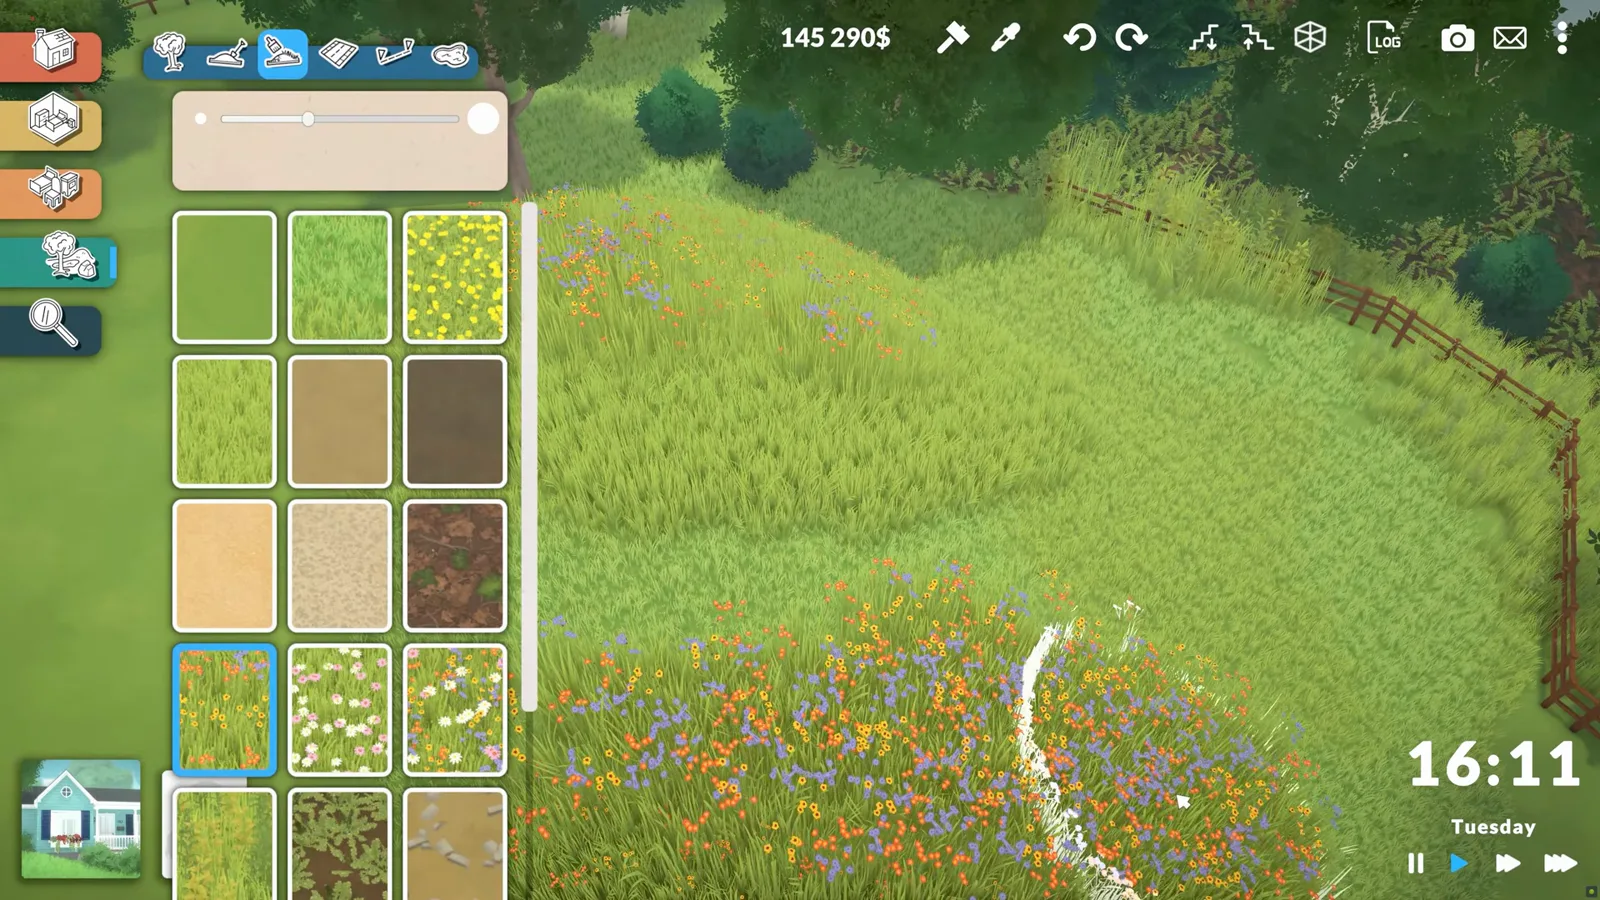
Flower swatches are textures — paint them like grass.Watch at 1:05 - 5
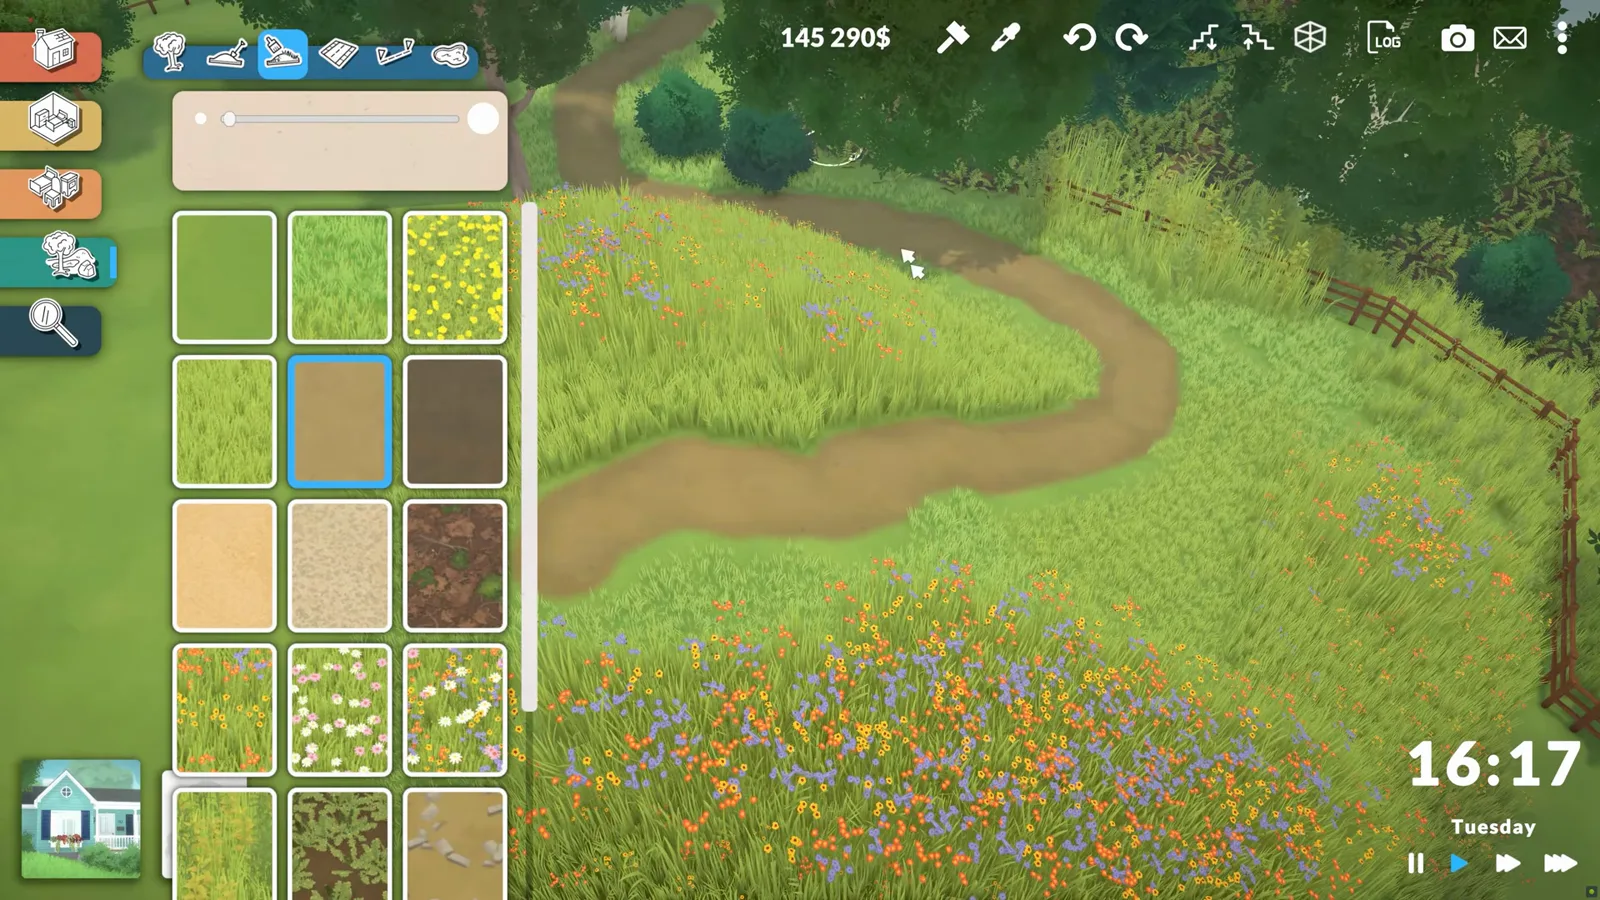
Paint a winding path last
Pick a dirt or paving swatch and draw a curving path through the flowers down to the street or porch. Paths go on last so they sit on top of the grass and flower layers. Vary the brush size to taper the trail at the doorway.
Path last — it cuts through the textures underneath.Watch at 1:18
Step 4–9
Paint and plant
Once the height is right, terrain paint replaces the default grass, and foliage brushes scatter shrubs and flowers. A gravel apron and a painted path are the fastest way to make a new build stop looking like a box on a field.
- 6
Lower, smooth and flatten the footprint
The same terrain panel offers lower, smooth and flatten beside raise. Flatten is not just cosmetic — walls on uneven ground often refuse to connect, so level the footprint before you draw rooms. Lower digs sunken patios; smooth blends harsh seams between sculpted sections.
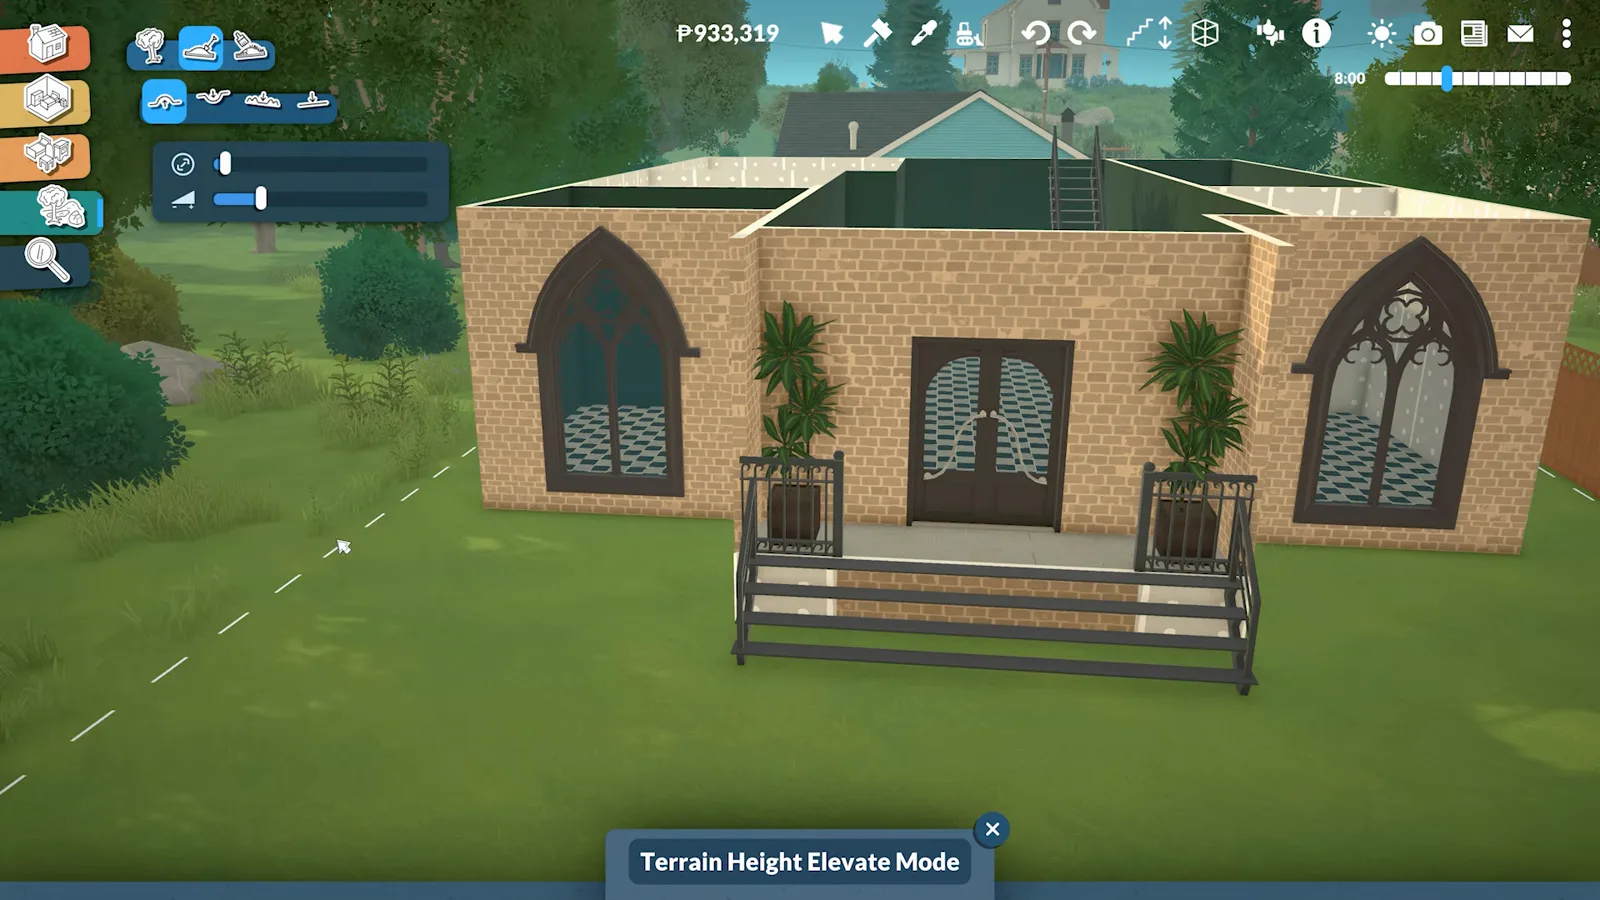
Flatten before walls; sculpt hills after the shell is done.Watch at 9:12 - 7
Brush away the default weeds
Terrain paint mode lists grass, weeds, dirt and paving swatches. Crank the brush size up and paint plain grass over the default weed mix around the house. Clearing the lot edge first makes every texture you lay afterwards read more deliberately.
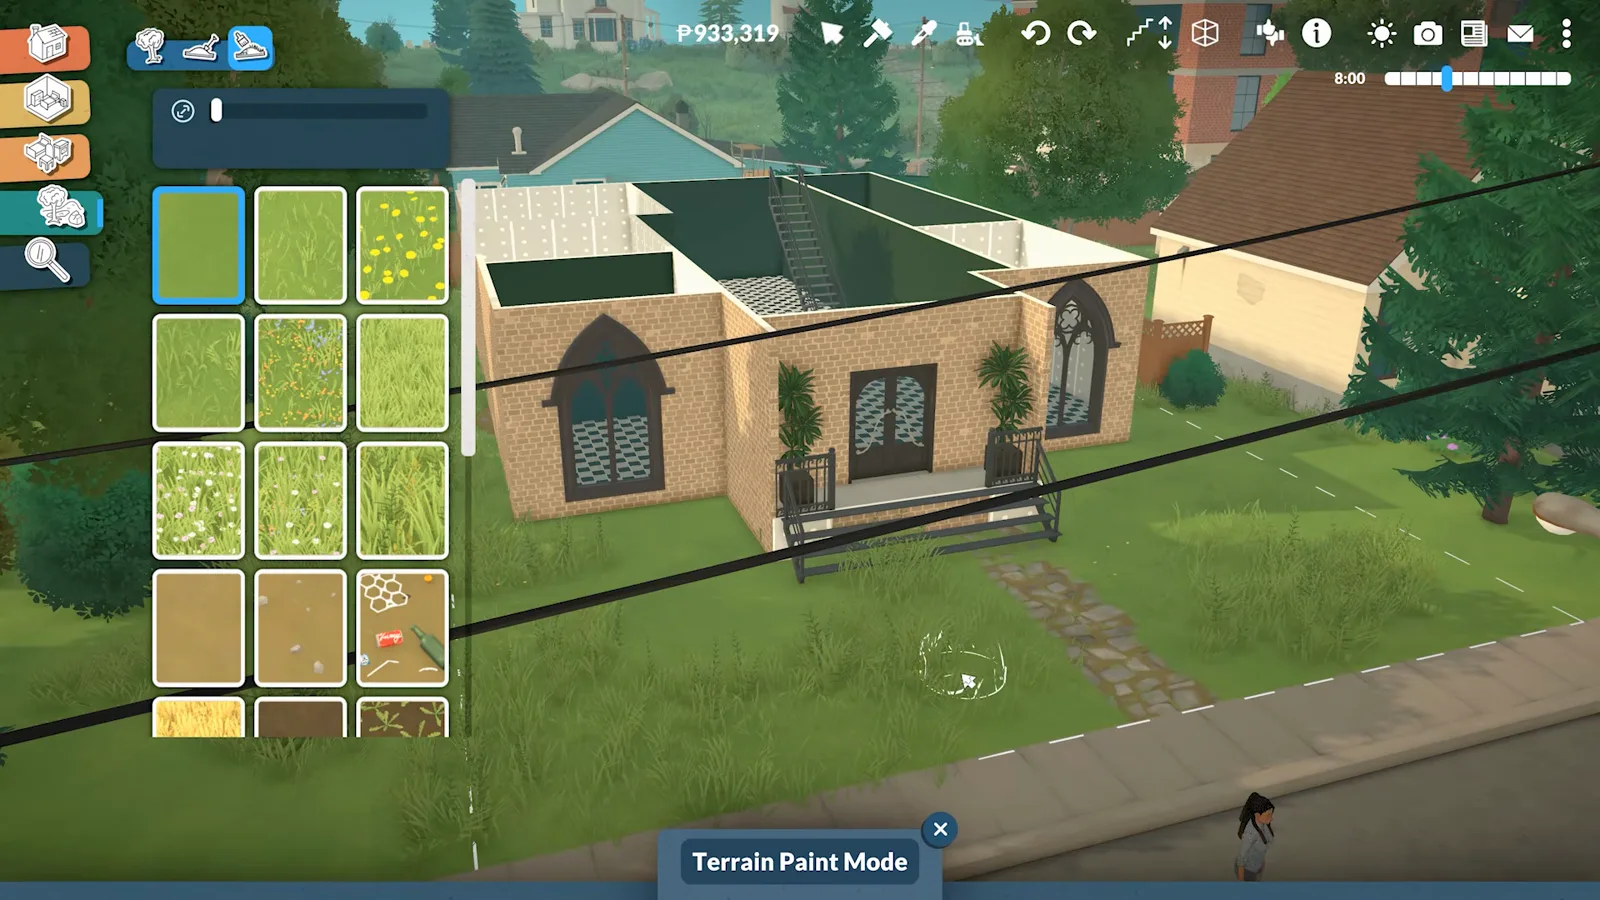
Large brush + plain grass = clean canvas.Watch at 8:41 - 8
Swap grass for gravel near the house
Gravel, dirt and stone paving sit in the same paint list as grass. Brush a band along the foundation instead of leaving the default turf against the walls — it reads as a deliberate apron and stops rain-streak dirt from clipping the siding.
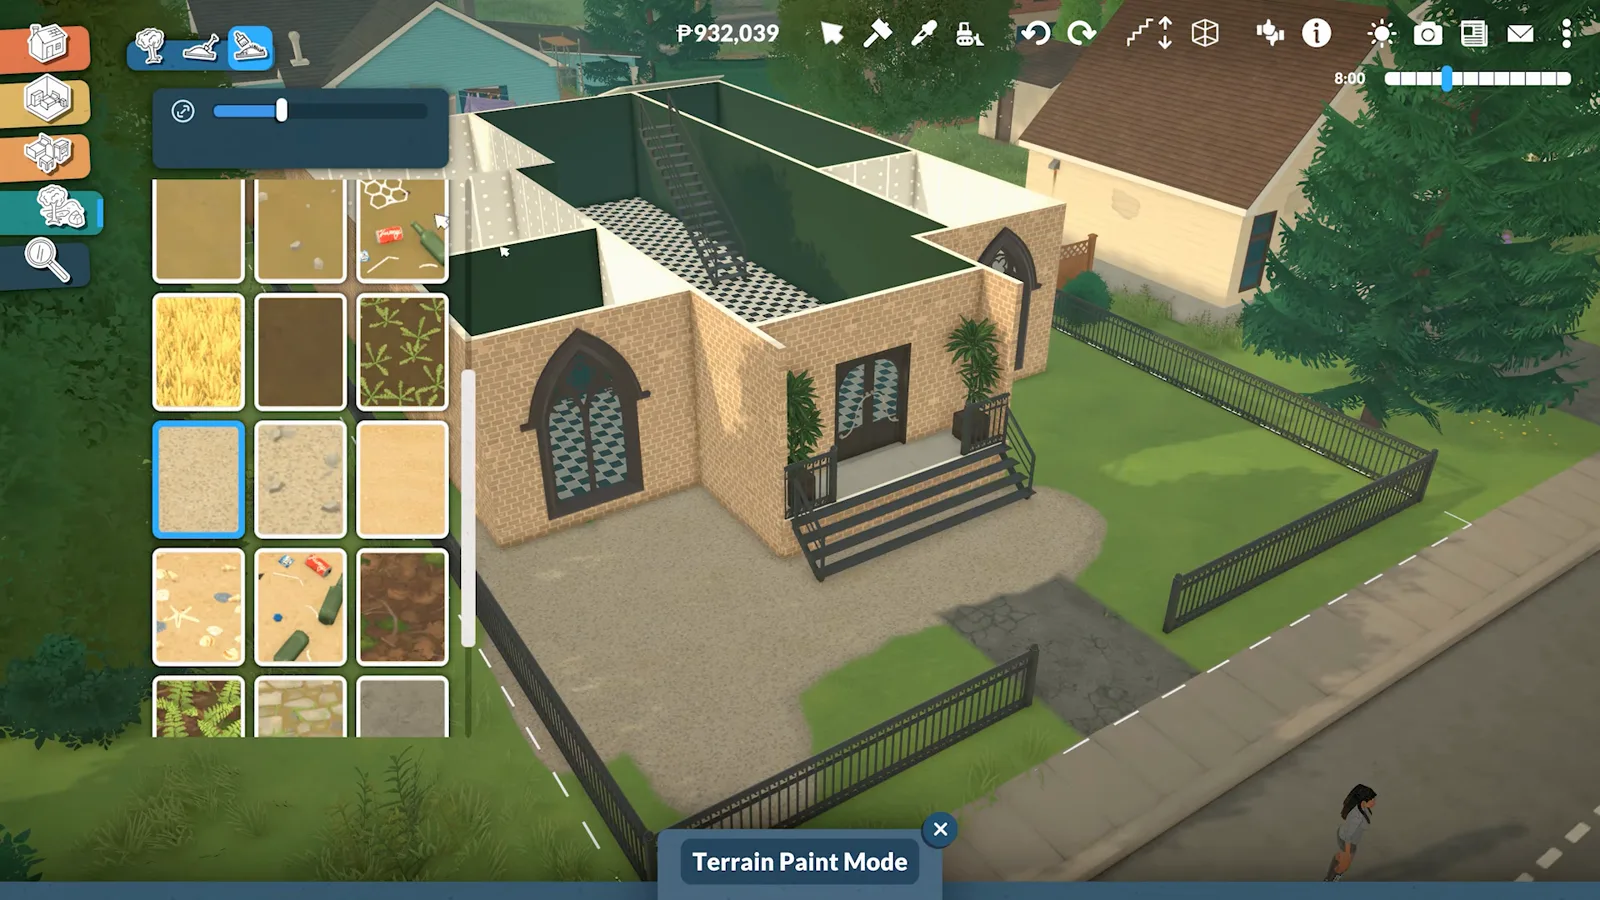
Gravel against the walls sells the landscaping faster than more furniture.Watch at 9:43 - 9
Cluster shrubs and flowers with the foliage brush
Trees, shrubs and potted plants live in the landscaping catalogue. Hold and drag on the ground and the game scatters a natural cluster instead of a straight line. Individual plants can still be selected afterwards to resize or recolour.
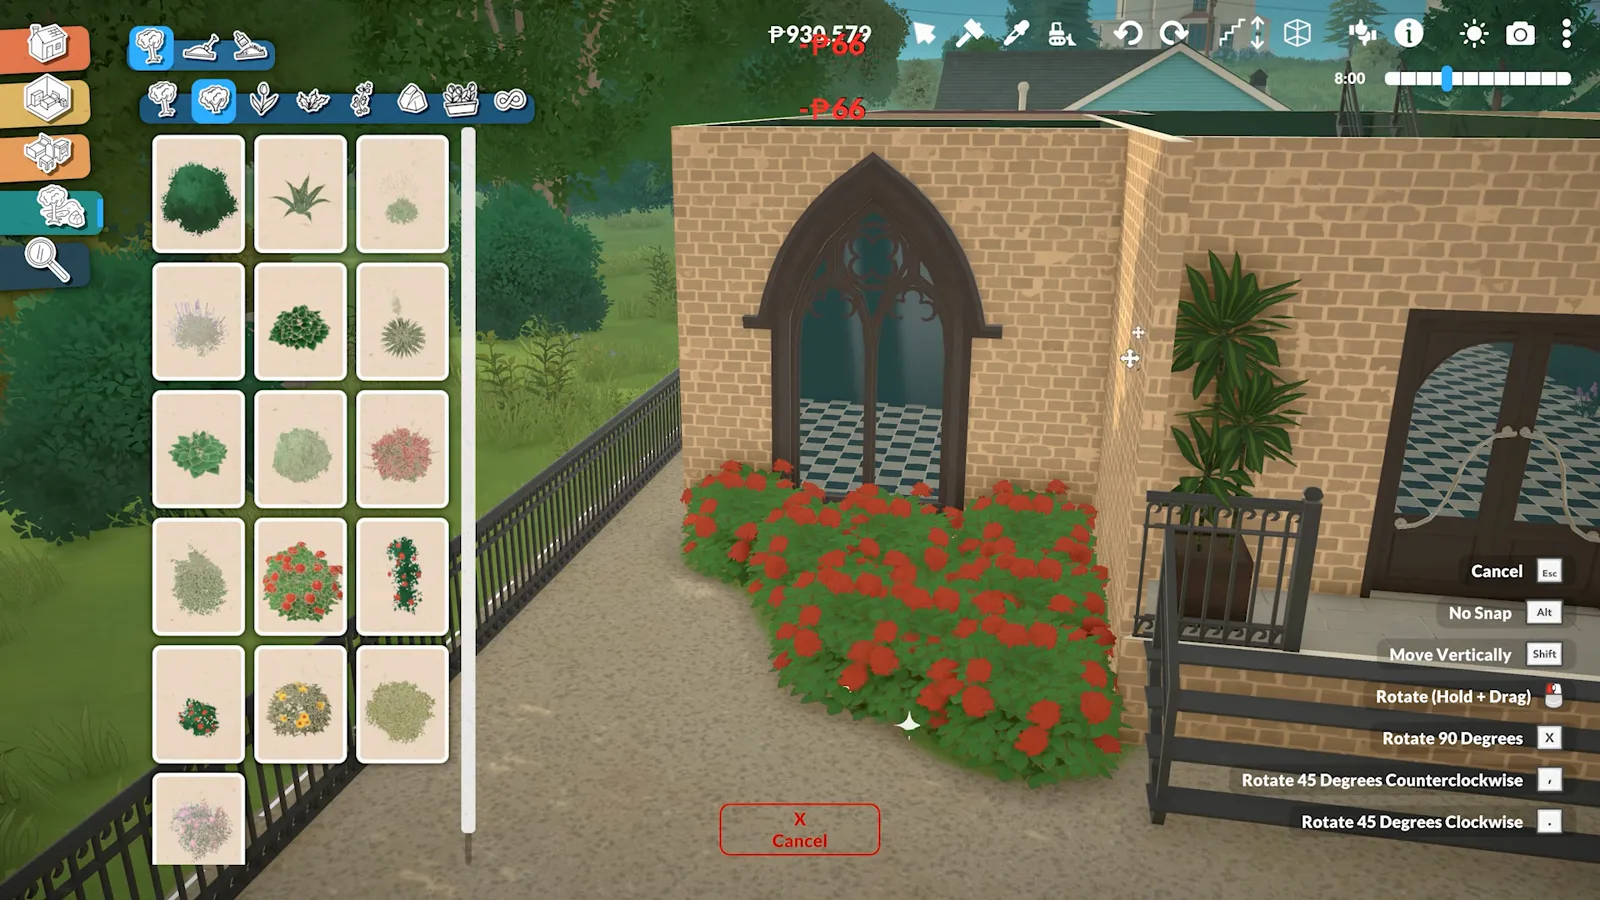
Drag to cluster — click only when you need one precise pot.Watch at 10:13
Beyond the lawn
Garden ideas with terrain tools
A garden in Paralives today is pure landscaping — there is no planting, growing or harvesting system (the wiki lists gardening as a future activity), so the sculpt, paint and foliage passes above are the entire toolkit. Treated that way, the same three passes produce most garden looks:
- Wildflower borders — drag flower swatches in loose fringes along paths and fences; the textures are clusters, not plants, so irregular edges look intentional.
- Gravel and paving aprons — a pale band against the foundation reads as a tended bed and keeps the default turf off the walls.
- Layered meadow — long grass over the short base coat, then wildflowers punched through, keeps big lots from looking flat.
- Sculpted beds — raise a low berm along the garden side before painting; the contour rings keep the slope gentle enough for walls to stay safe.
Finish with the landscaping catalogue — trees, shrubs and potted plants cluster naturally with the foliage brush, and individual pots mark corners and doorways. When you want structure over paint, decking and patios are the other half of outdoor design.
Terrain questions
- Where are terrain tools in Paralives build mode?
- Click the tree icon on the left toolbar, then the terrain-tools sub-icon. Sculpt brushes (raise, lower, smooth, flatten) and paint swatches (grass, gravel, flowers) share that panel. Foliage plants are one icon further down the same landscaping section.
- Should I sculpt terrain before or after building the house?
- Flatten the footprint before you draw walls — uneven ground is a common reason walls refuse to connect. Decorative hills and paths can wait until the shell is done so you do not accidentally bury a doorway.
- Can terrain paint go inside rooms?
- Terrain paint affects the outdoor lot mesh. Interior floors use the floor paint tool in the construction section. Outdoor patios can use either depending on whether you raised a platform first.
- Do terrain changes cost money?
- Sculpting and terrain paint are free. Individual trees, shrubs and potted plants from the foliage catalogue deduct from the household budget the same way furniture does.
- Can you sculpt terrain after the house is built?
- Yes, but flatten the footprint before drawing walls — uneven ground breaks wall snaps. Sculpt hills and paint paths after the shell is done so you do not bury foundations.
Keep building
Full build tutorial
Terrain paint and foliage also appear in the seventeen-step first-house walkthrough.
Decks & patios
Raised outdoor floors when you want stone or wood decking instead of painted grass.
Create a World
What the unreleased world editor can and cannot sculpt at map scale.
15 build tips
Separator porches, colour codes and the other tricks that pair well with landscaping.
All build guides
Split-level, curved walls, garages and the rest of the build cluster.