
The short version
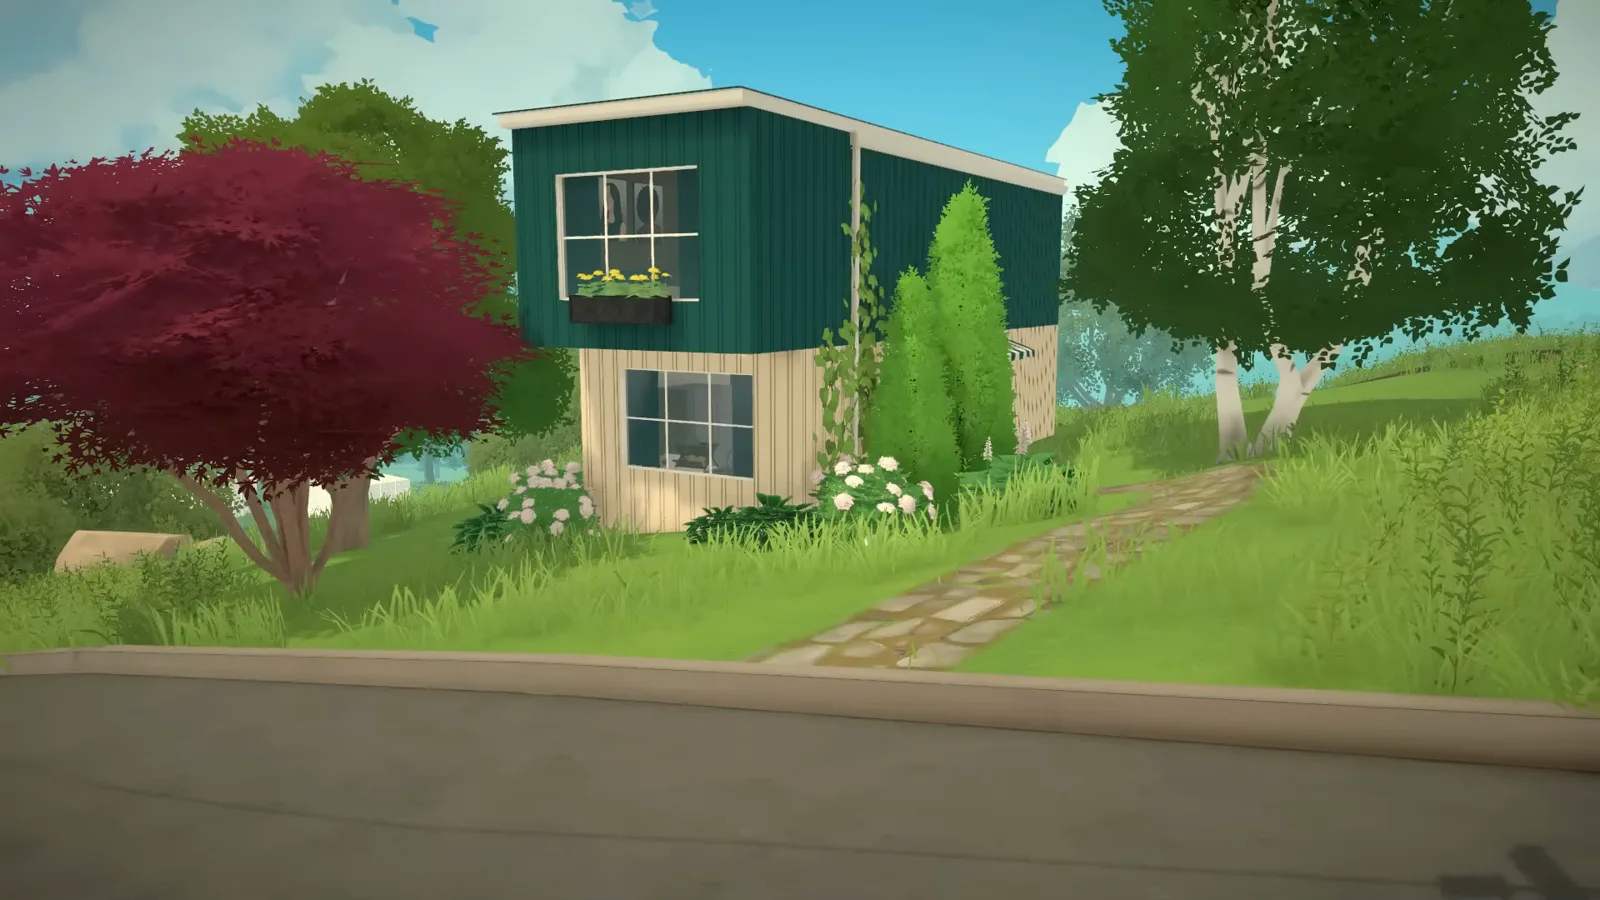
A Paralives shipping container house is ordinary boxes plus one paint decision. Two container-shaped volumes stack with the upper one overhanging, the ribbed corrugated pattern from Wall Painting Mode does the entire “container” look, and the rooms fold around a single central staircase — kitchen at the front, living at the back, bedroom and bathroom upstairs.
- No container prefab exists — the ripple is a corrugated pattern painted on in Wall Painting Mode
- Two stacked boxes with the top one longer: the overhang is the silhouette
- Paint the lot with Terrain Paint Mode first so the front door lands on walkable ground
- Stairs first, then kitchen front, living back, bedroom and bathroom upstairs
- One creator's variant: bathroom at the far end of the box, so no floor is wasted on a hallway
- No verified cost or build time: nothing in either video prints one
The container shell
Stack raw boxes into the silhouette
Four decisions make the shell before any furniture exists: the boxes themselves, their colour, the ground they sit on, and the offset between the two storeys.
- 1
Place the first box and roof it flat
The build opens with the container itself: one long rectangular volume dropped on the lot, then a flat slab pressed on top from the roof catalogue. As the creator demonstrates, two containers become the house — the second stacked later and left a little longer, so it overhangs. A flat top is the point; anything pitched would break the box.
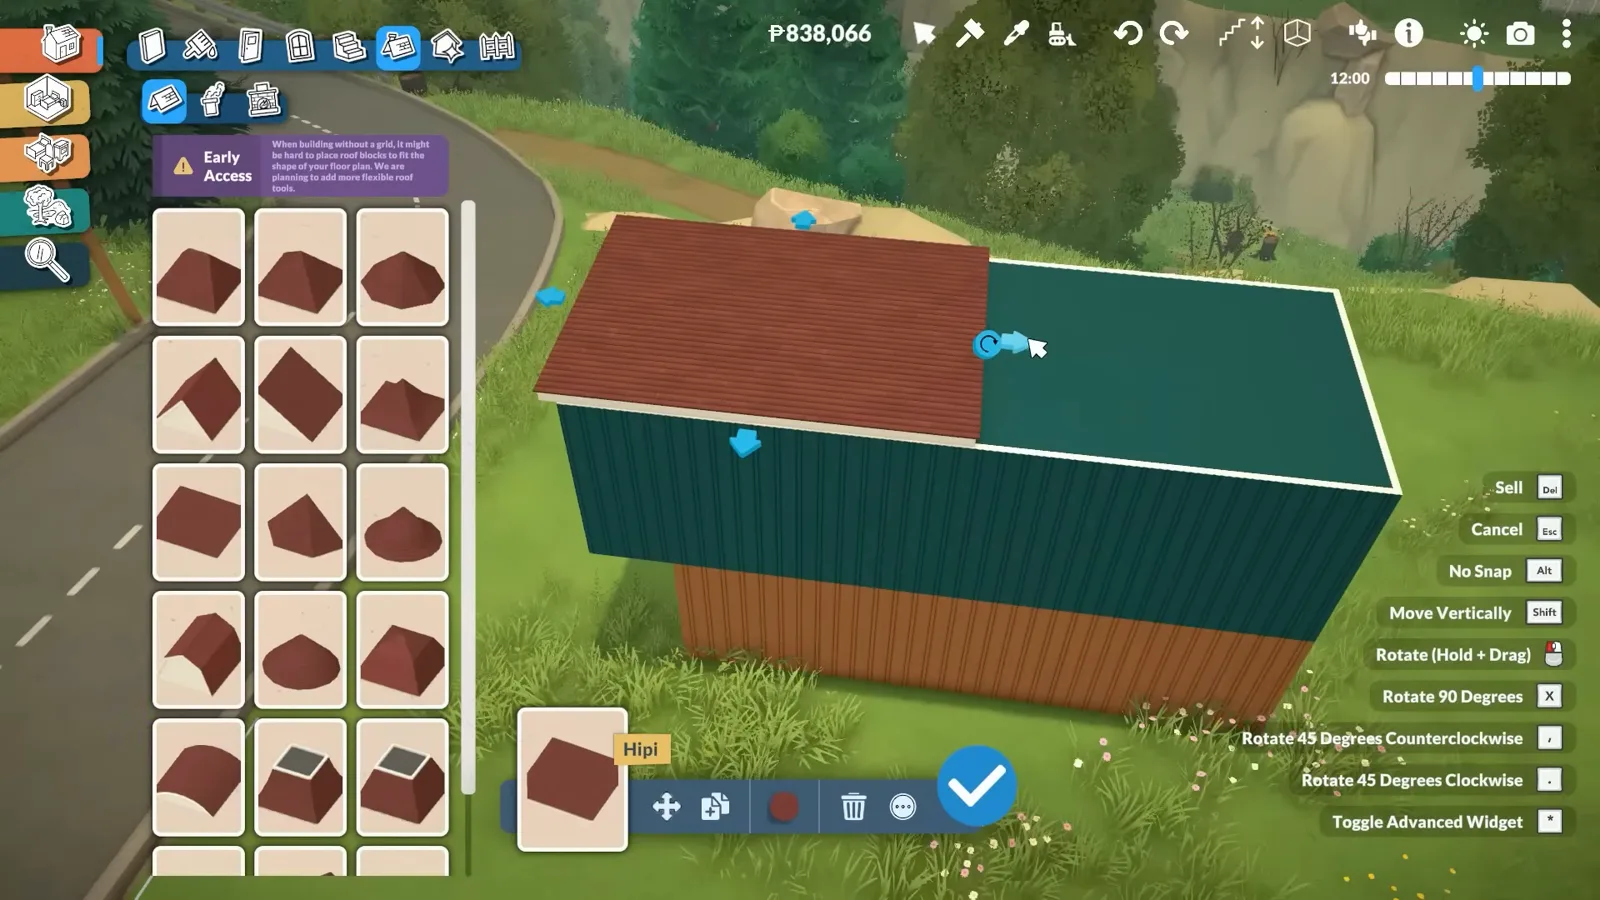
Box first, flat roof on top — the pitched catalogue can wait.Watch at 0:30 - 2
Recolour the raw steel before the walls go up
Fresh from the catalogue the volume reads as bare blue-and-rust steel. The colour swatch panel sits open over the body while the whole box takes its finished palette — cream below, dark green up top once the second container lands. The colour wheel makes every shade free, so this is a taste decision rather than a constraint.
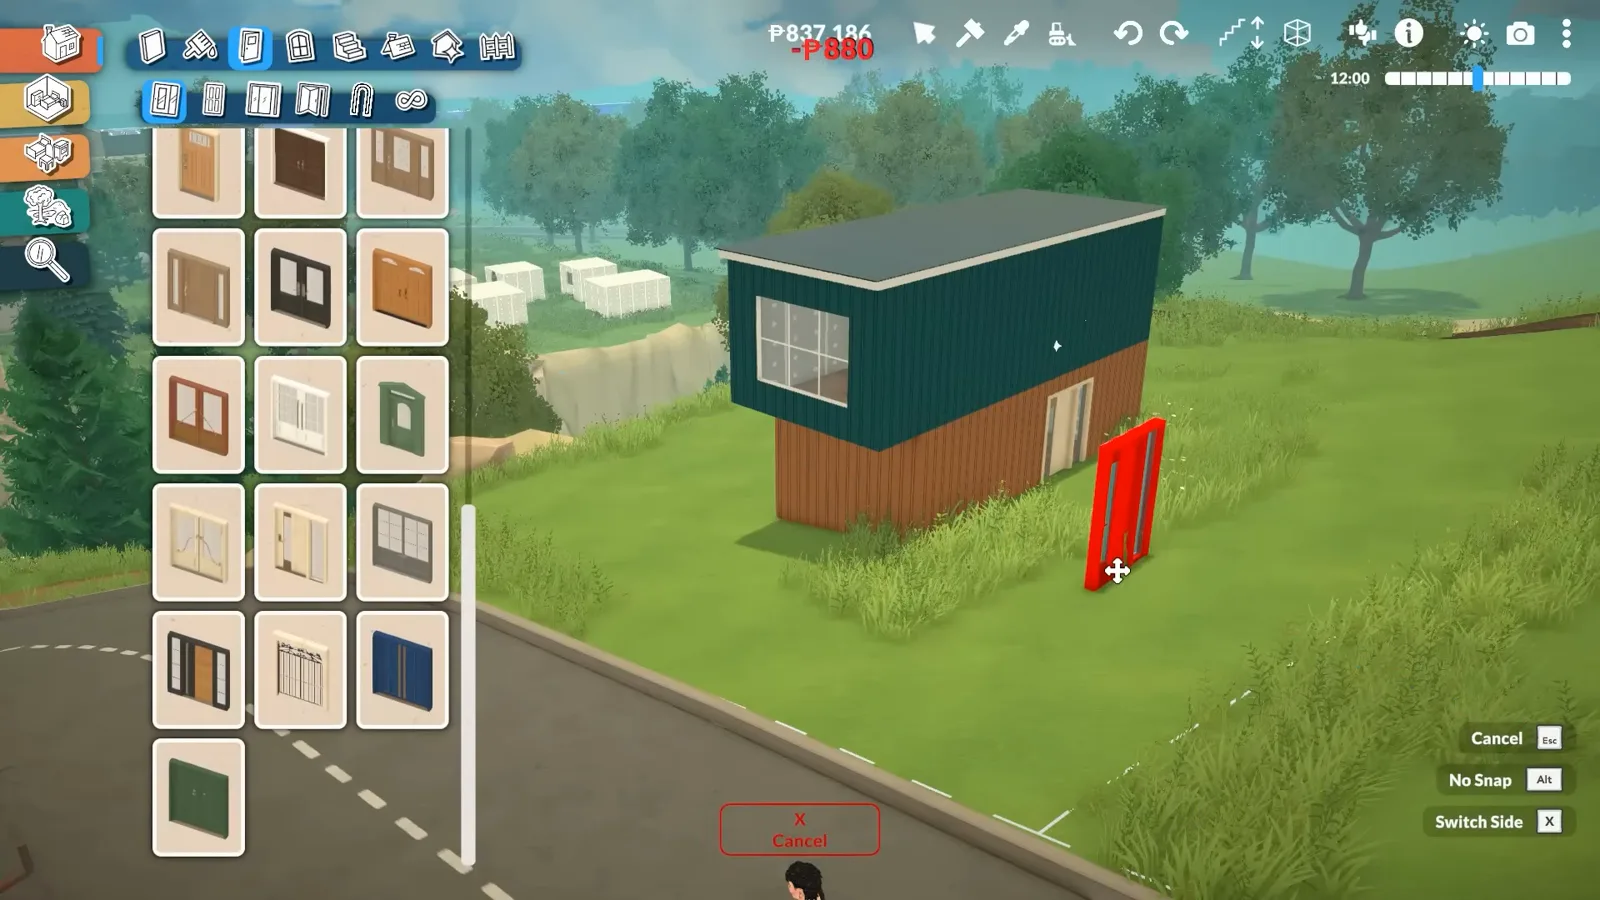
Raw steel in, house palette out — one swatch panel.Watch at 0:40 - 3
Paint the lot so the door lands on walkable ground
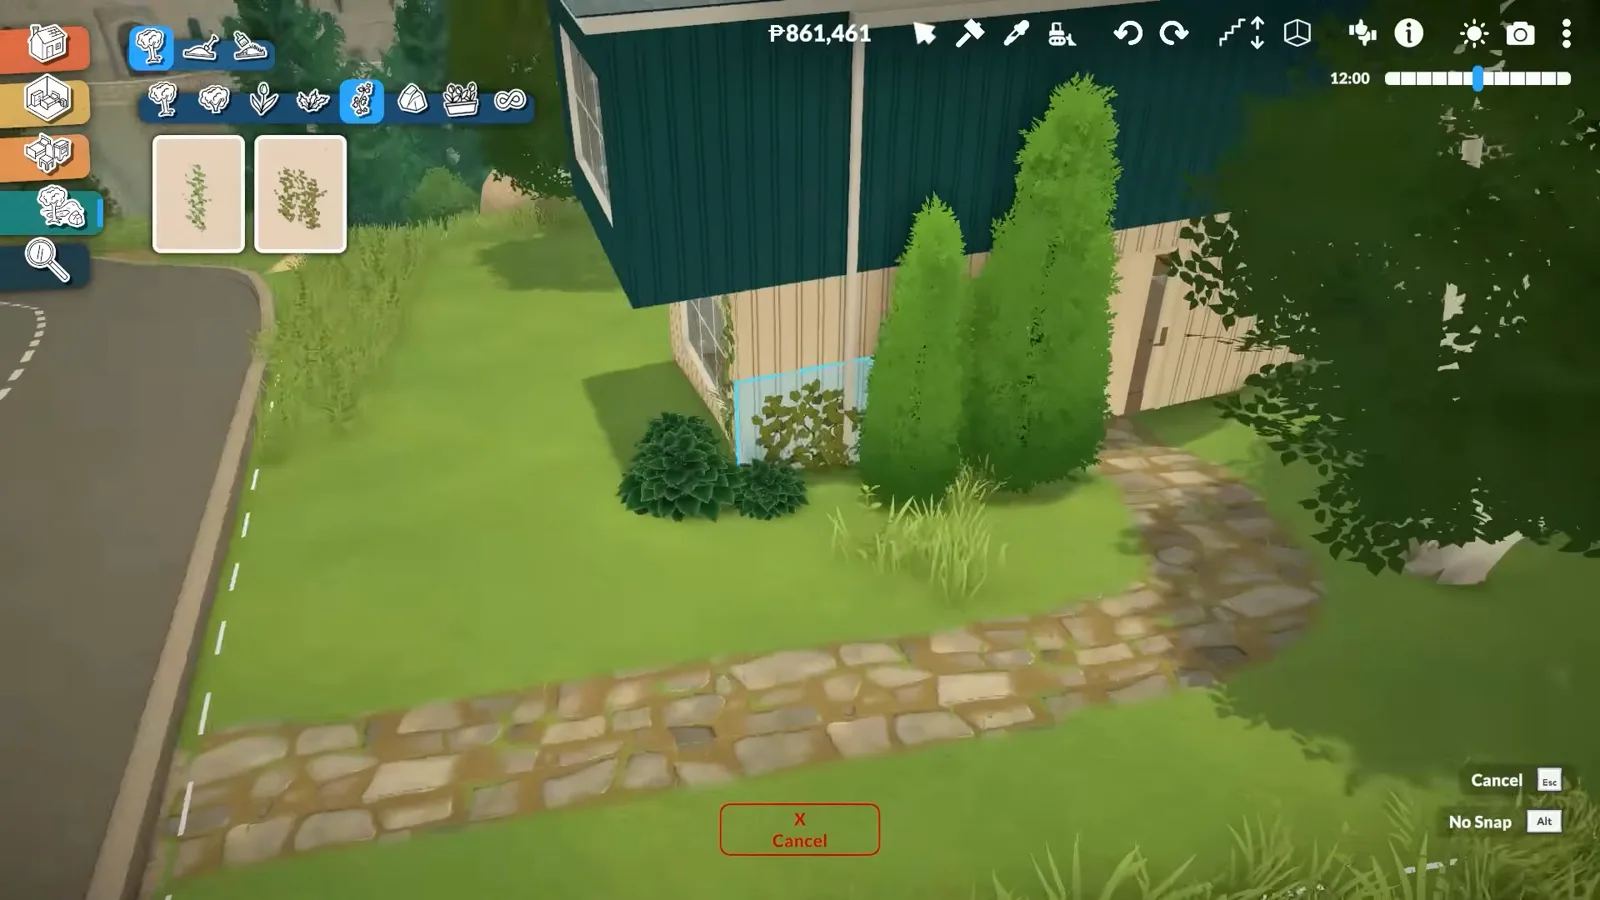
This home sits on a cliffside lot, and as the creator notes, the terrain has to be adjusted so a Para can actually walk in the front door. Terrain Paint Mode — the tooltip sits bottom-centre — repaints and evens out the approach before the door is placed, and the stone path gets shaped around the same siting decision.
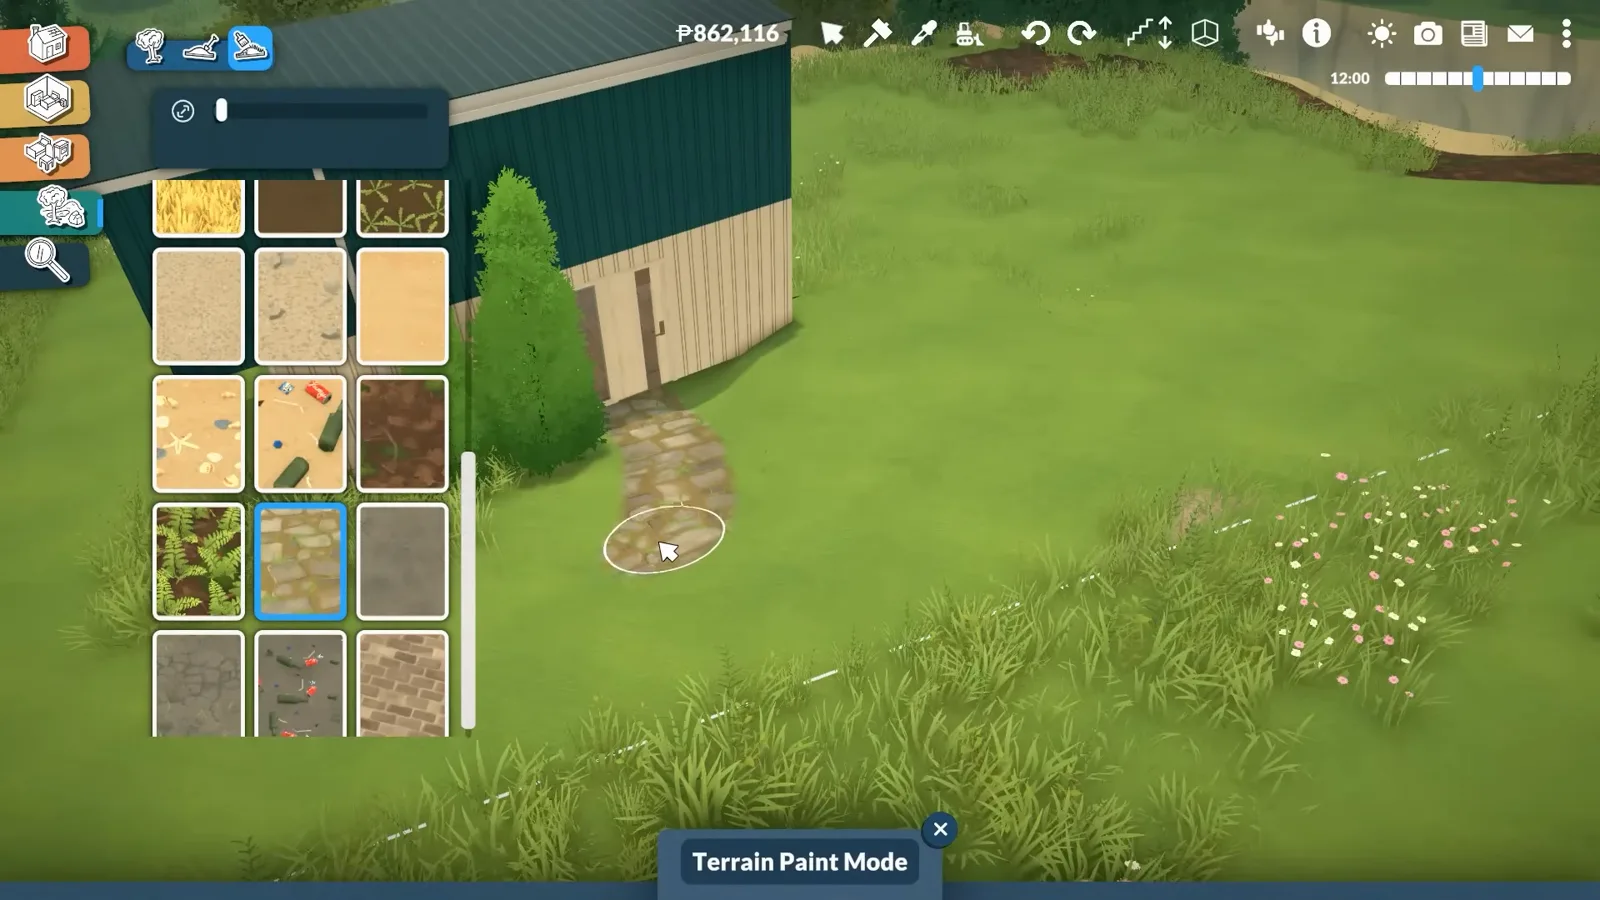
Siting first: the door needs walkable ground, not a cliff edge.Watch at 1:35 - 4
Stack the second box and let it overhang
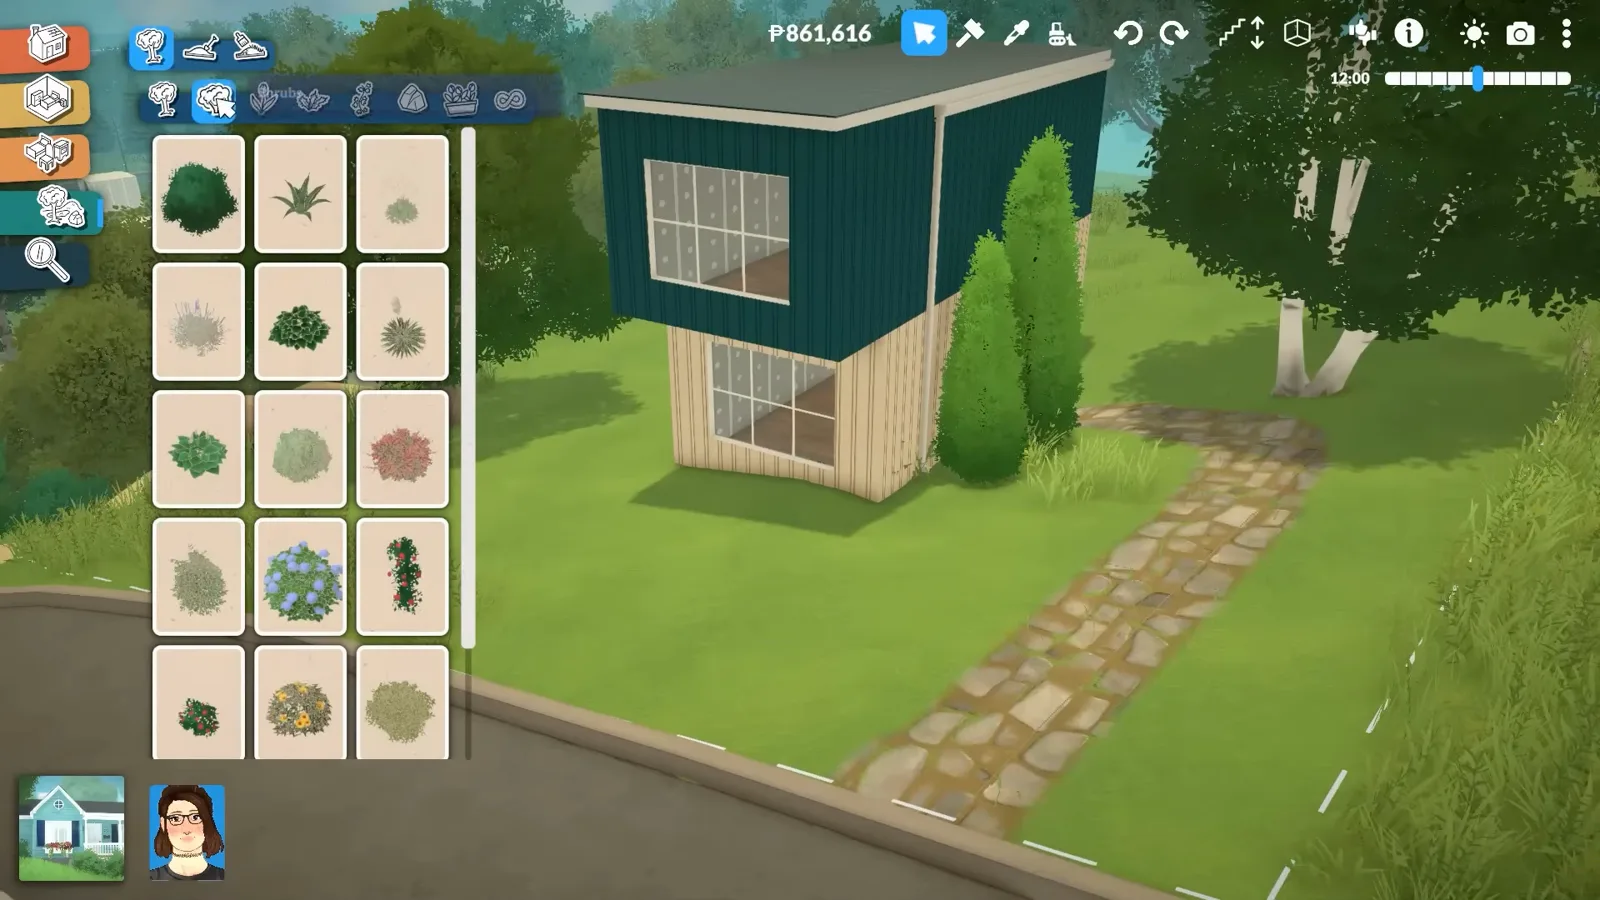
The signature silhouette is two containers with the upper one slightly longer. As the creator explains, she simply liked the way the overhang looked — and it doubles as cover for the entry below. The stacked pair turns one box into a two-storey home with the upper floor cantilevered over the lower facade.
Two boxes, one offset — the overhang is the whole silhouette.Watch at 2:00
Corrugated walls & openings
Paint the ripple, then dress the facade
The container look is one paint mode away — and everything that cuts or softens the steel, from window openings to vines and awnings, hangs on that painted surface.
- 5
The corrugated look is Wall Painting Mode
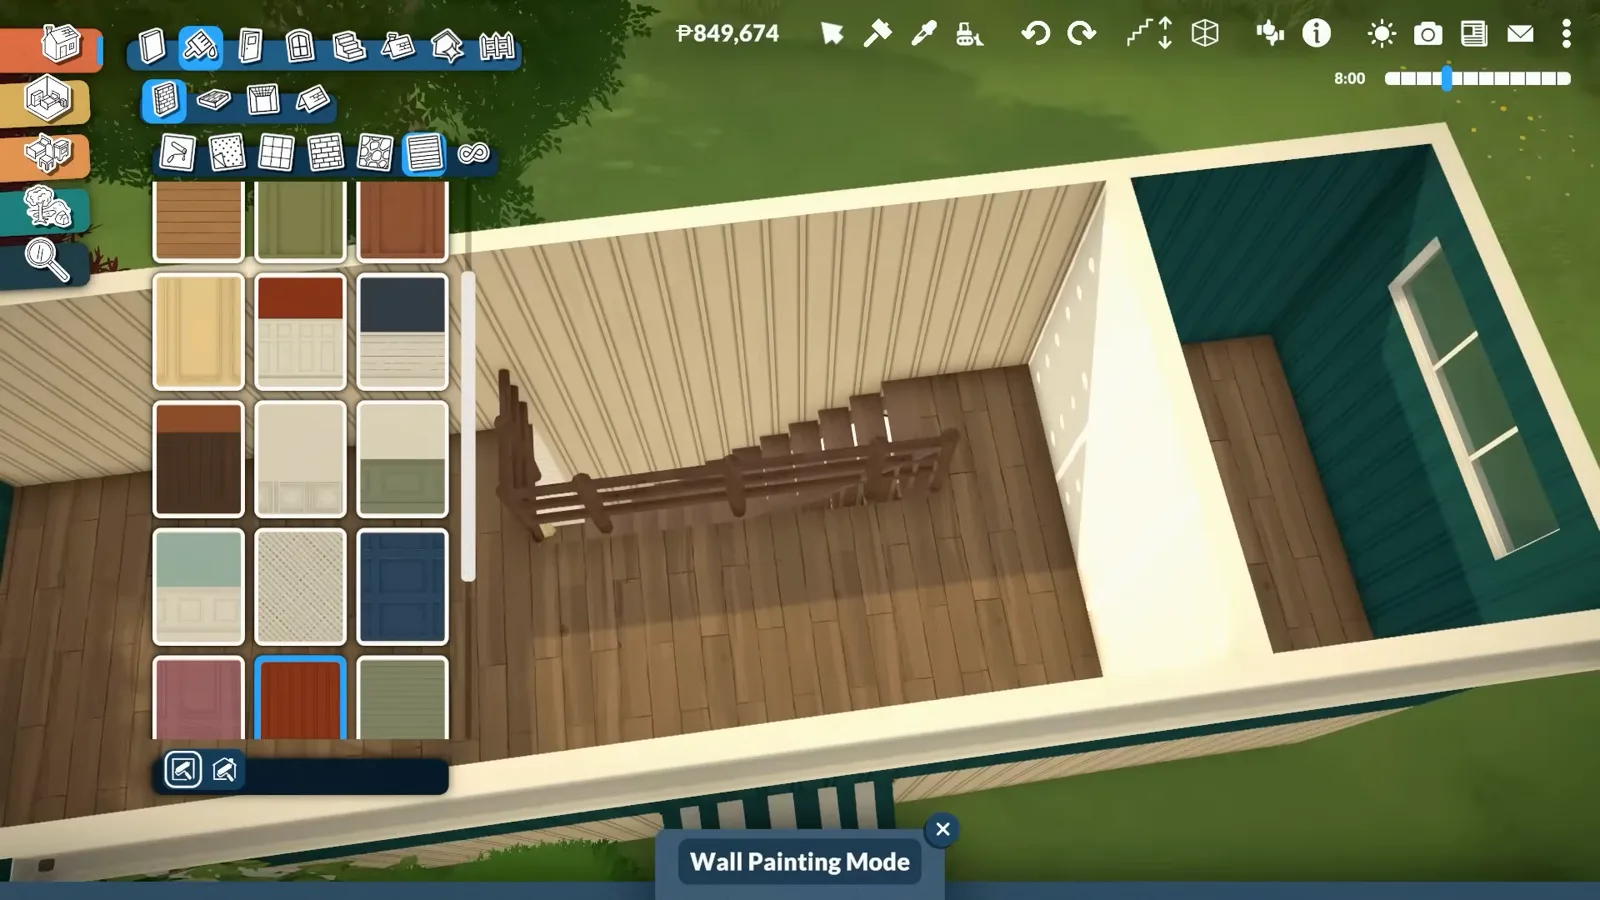
There is no “container” preset on the wall catalogue — the ripple is a paint decision. Wall Painting Mode, flagged by the tooltip at the bottom of the screen, opens the pattern grid and the ribbed swatch goes on every face that should read as steel. This is the step that turns an ordinary box house into a container house.
The ripple is paint, not a part — Wall Painting Mode does the whole look.Watch at 7:58 - 6
Read the whole plan top-down before furnishing
From above, the long box divides itself the way the creator describes while building: kitchen toward the front, living and dining toward the back downstairs, bedroom and bathroom upstairs. The top-down camera also makes the container problem obvious — every zone is a corner or an end wall, so the splits have to be decided before furniture lands.
One long box, zones in a row — the top-down view keeps the plan honest.Watch at 2:35 - 7
Dress the corrugated facade with vines and flower boxes
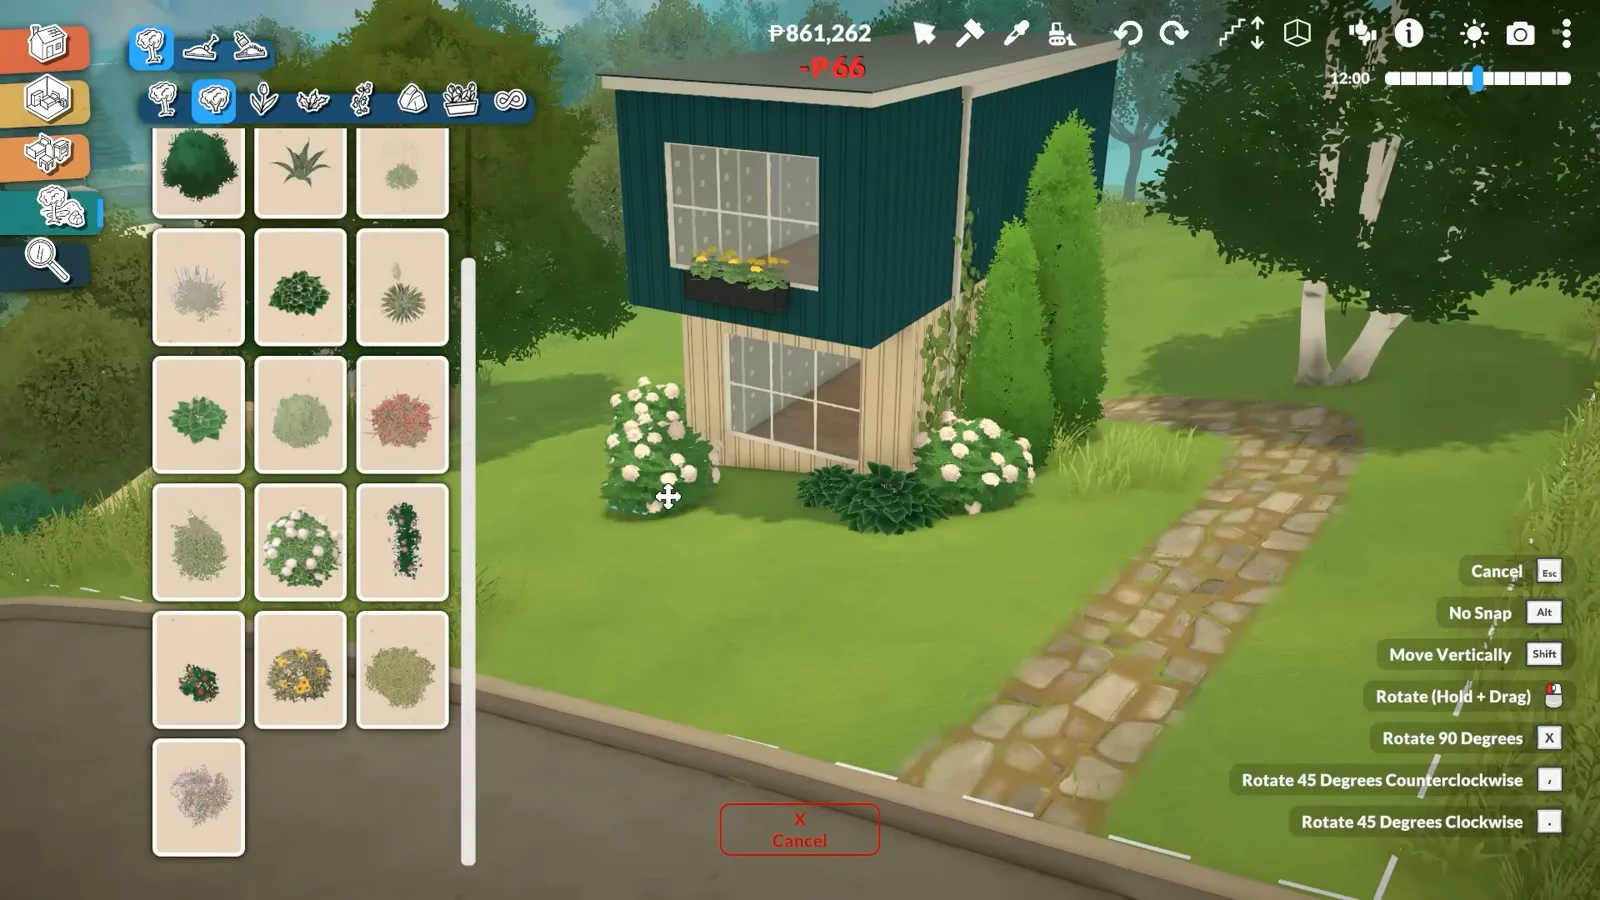
The industrial read of corrugated steel softens as soon as plants land on it. Climbing vines go up the side of the box, flower boxes hang under the upper windows, and the surrounding shrubs come from the plant catalogue on the left. As the creator notes, the same trailing plant ships in two sizes with mismatched swatches — the colour wheel lines them back up.
Vines up the ripple, flower boxes under the windows.Watch at 1:50 - 8
One striped awning, resized with the drag arrows
The front door gets a green-striped awning — placed twice at first because the catalogue piece was too narrow, until the click-and-drag resize made the second one redundant. The drag arrows on the awning stretch it to whatever width the doorway needs; as the creator admits, she is still not used to being able to rescale anything.
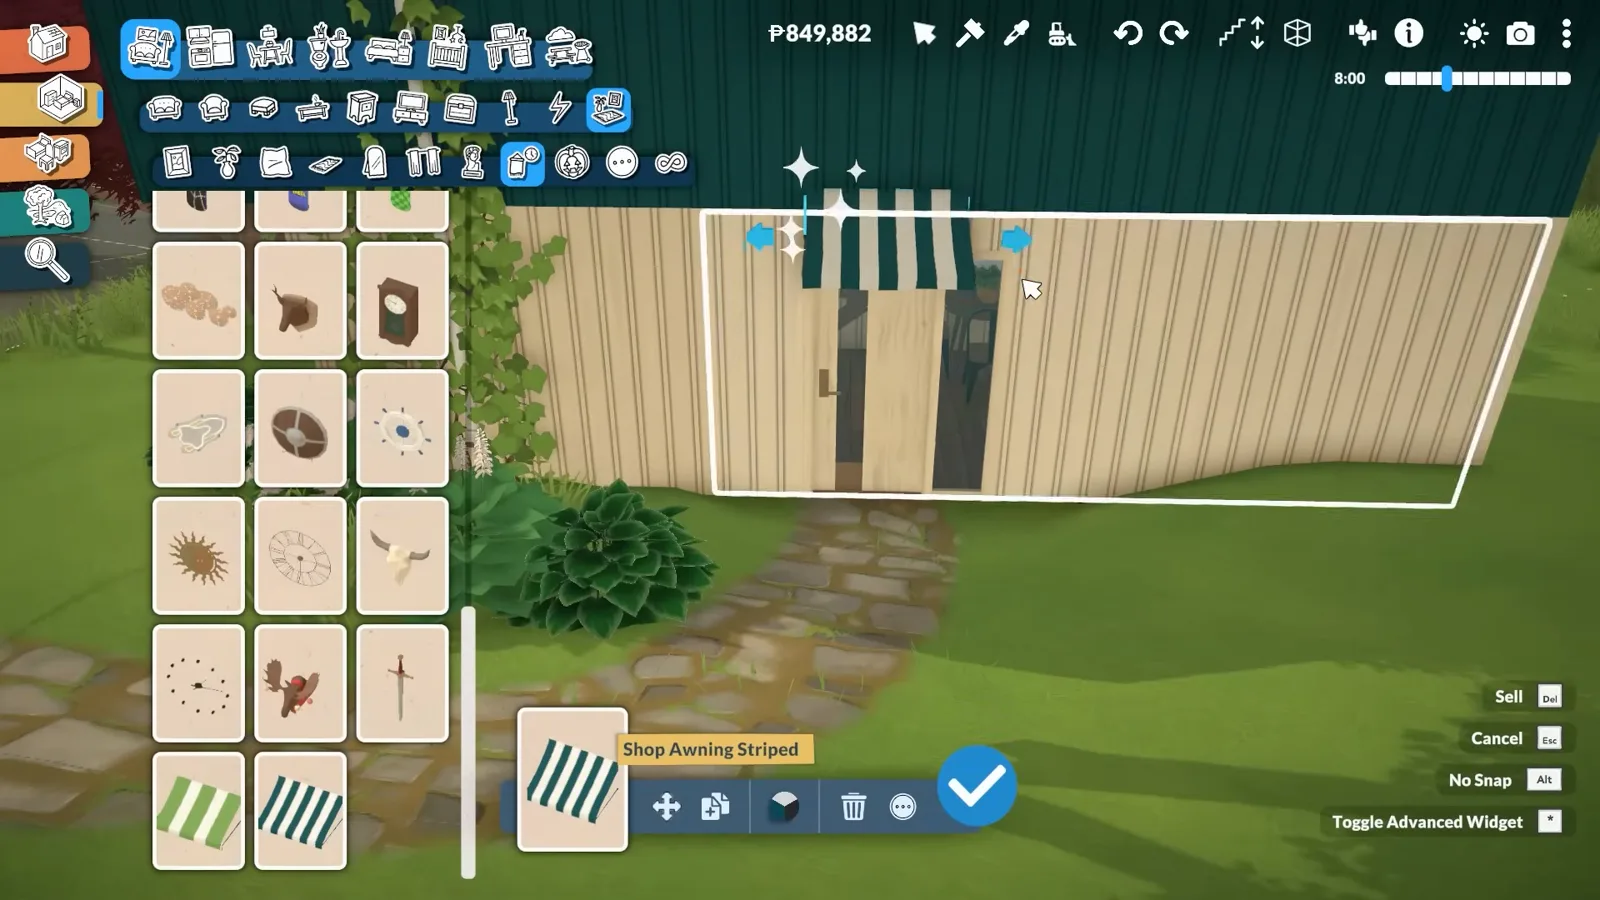
Too narrow? Drag it wider — the spare awning gets deleted.Watch at 7:31
Interior zones
Stairs first, rooms folded around them
A container gives you one long strip per floor. The walkthrough orders it: staircase, kitchen run, appliances, and the colour code that holds it all together.
- 9
Fix the staircase before anything else inside
The first thing placed indoors is the staircase — as the creator explains, she works out where it goes and builds around it. Its timber tone then sets the flooring for the whole lower floor. In a container-width plan the stair eats the centre, so deciding it first keeps the kitchen and living zones from fighting over the same strip.
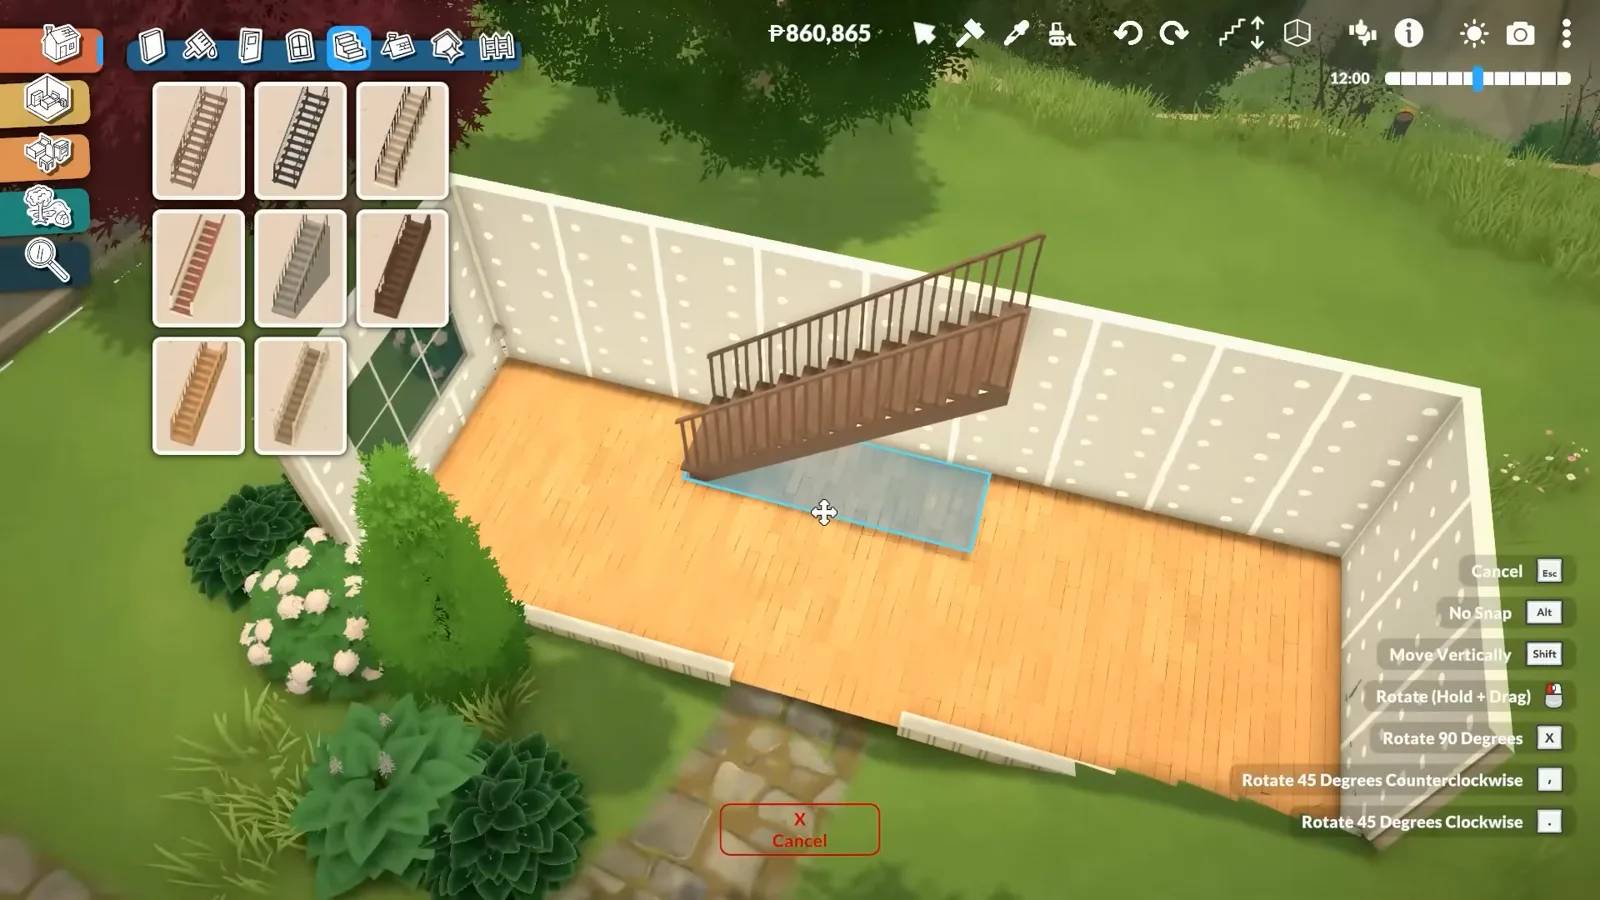
Stairs first, flooring matched to them, everything else negotiates.Watch at 3:12 - 10
Run the kitchen counter along the corrugated wall
The kitchen claims the front of the box. The L-shaped counter run hugs the corrugated wall with the sink under the window, and the pieces are placed individually rather than drag-built so the mix of drawer and door units lands exactly where wanted. Timber floor, cream counters, ripple walls — the interior reads warm, not industrial.
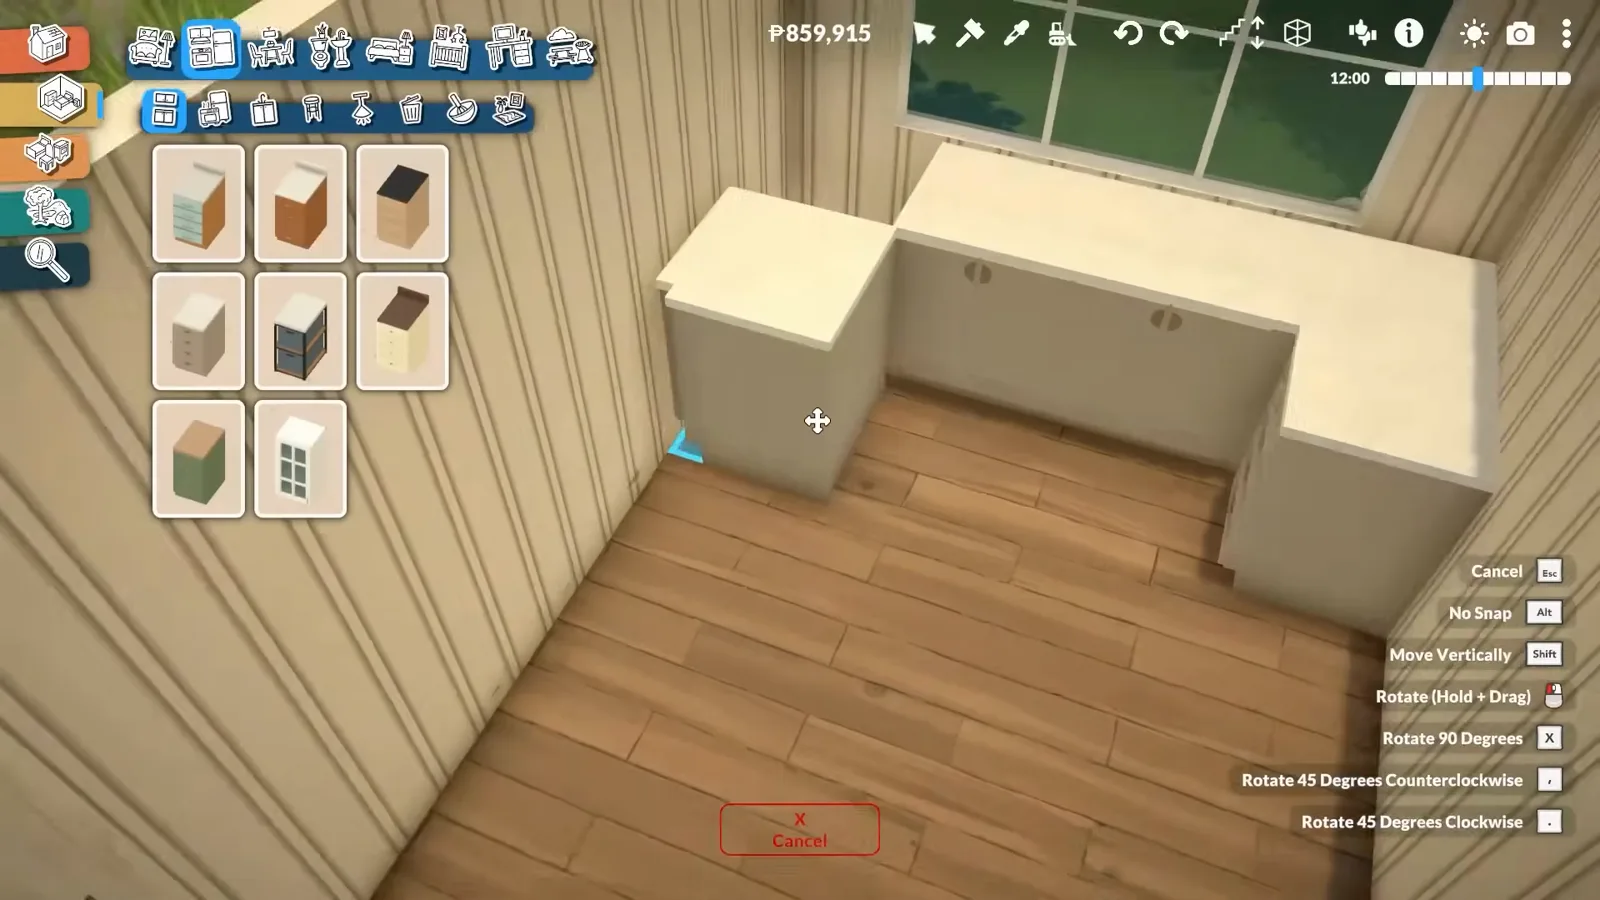
Counter run first — drawers and doors picked piece by piece.Watch at 3:40 - 11
Match every kitchen tone with one hex code
The palette trick: pick the flooring first, copy its hex code, and paste the same value onto the cabinets and counters — the wood swatch grid open over this kitchen is that matching pass in progress. As the creator notes, the separator tool carves the kitchen's tiled section out of the surrounding walls and floor, though she warns it does not always want to cooperate.
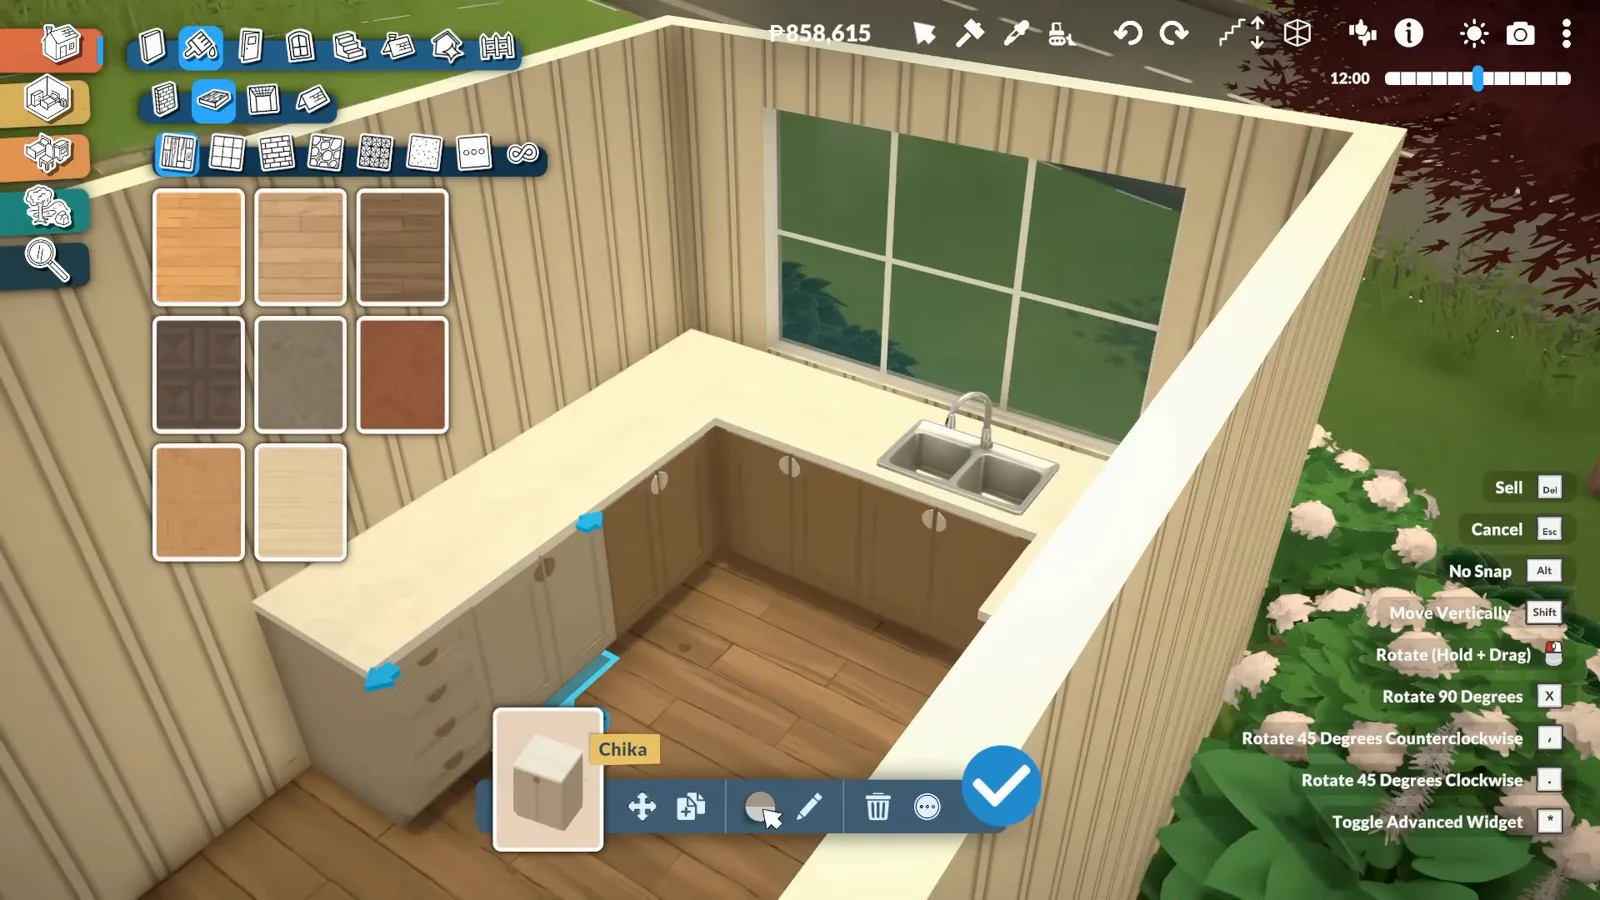
One hex code lifted from the flooring, pasted across the kitchen.Watch at 4:00 - 12
Line up sink, stove and fridge — then one silly rug
Appliances slot into the counter run: sink under the window, stove and fridge completing the line. The personality comes from the decor layer — an egg-shaped rug lands on the timber floor and a chicken-shaped planter takes the counter. As the creator notes, the built-ins stay neutral on purpose so the fun patterns carry the character.
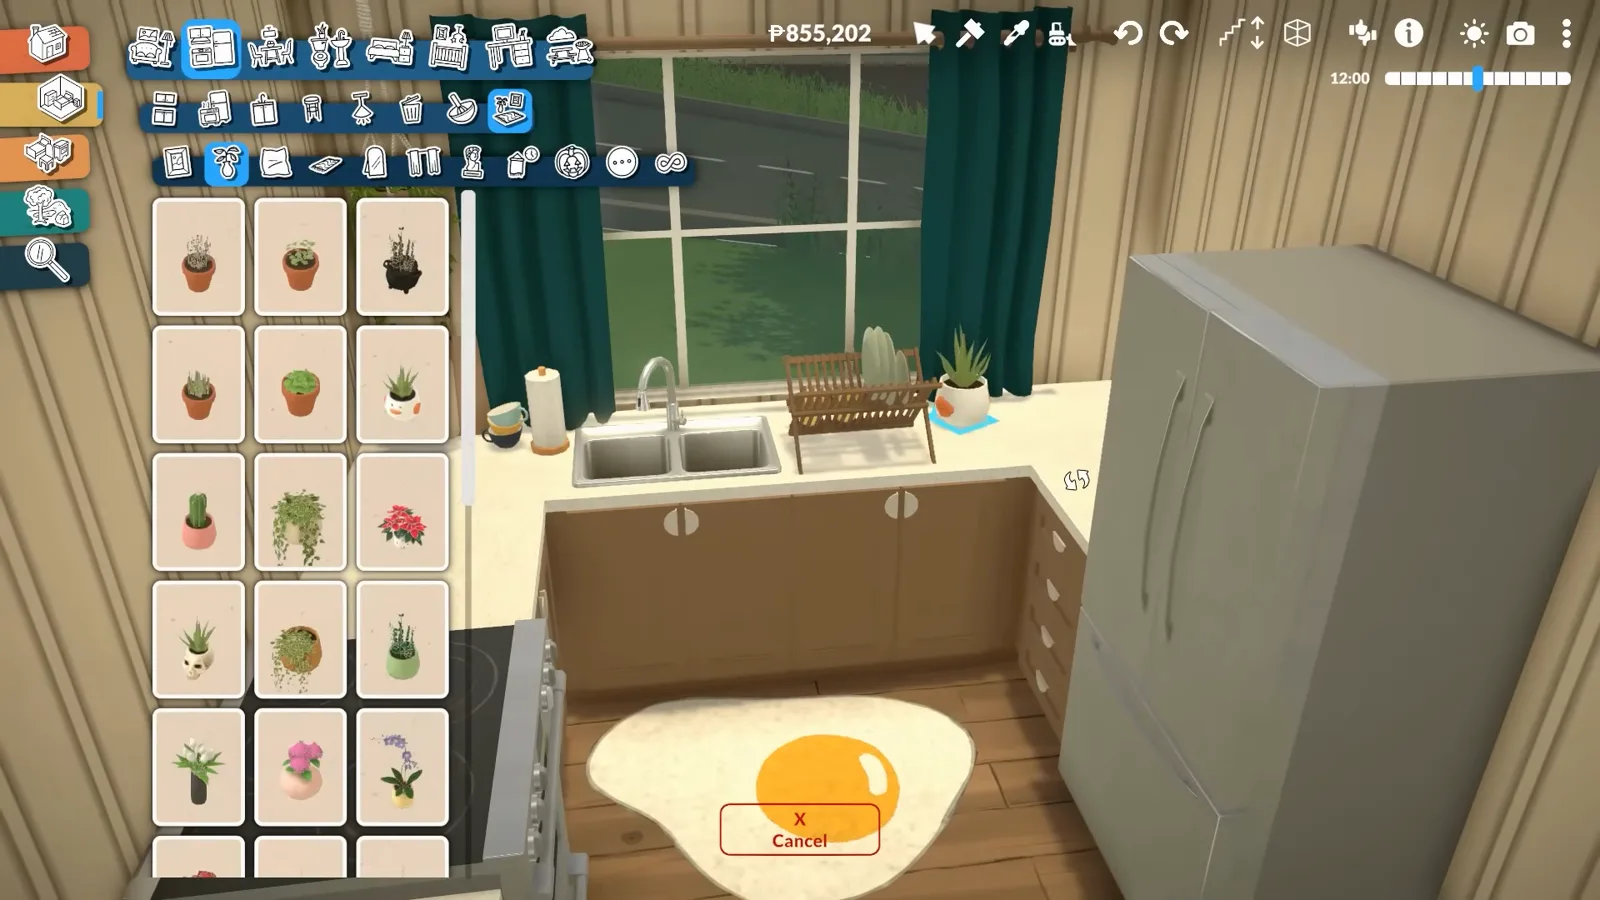
Neutral appliances, one egg rug — personality lives in the decor.Watch at 4:55
Living, sleeping & the wet rooms
Furnish the box, then compare a variant
The main build finishes upstairs with bedroom and bathroom; a second creator's single-module layout shows the other way to spend the same rectangle.
- 13
Ground the living zone with a checker rug
The back half of the box becomes the living room: cream couch against the corrugated wall, TV unit opposite, and the dark teal checker print rug anchoring it all. Pillows land in the same teal plus a flower print and a yellow circle — the pops of colour the neutral sofa was chosen to carry.
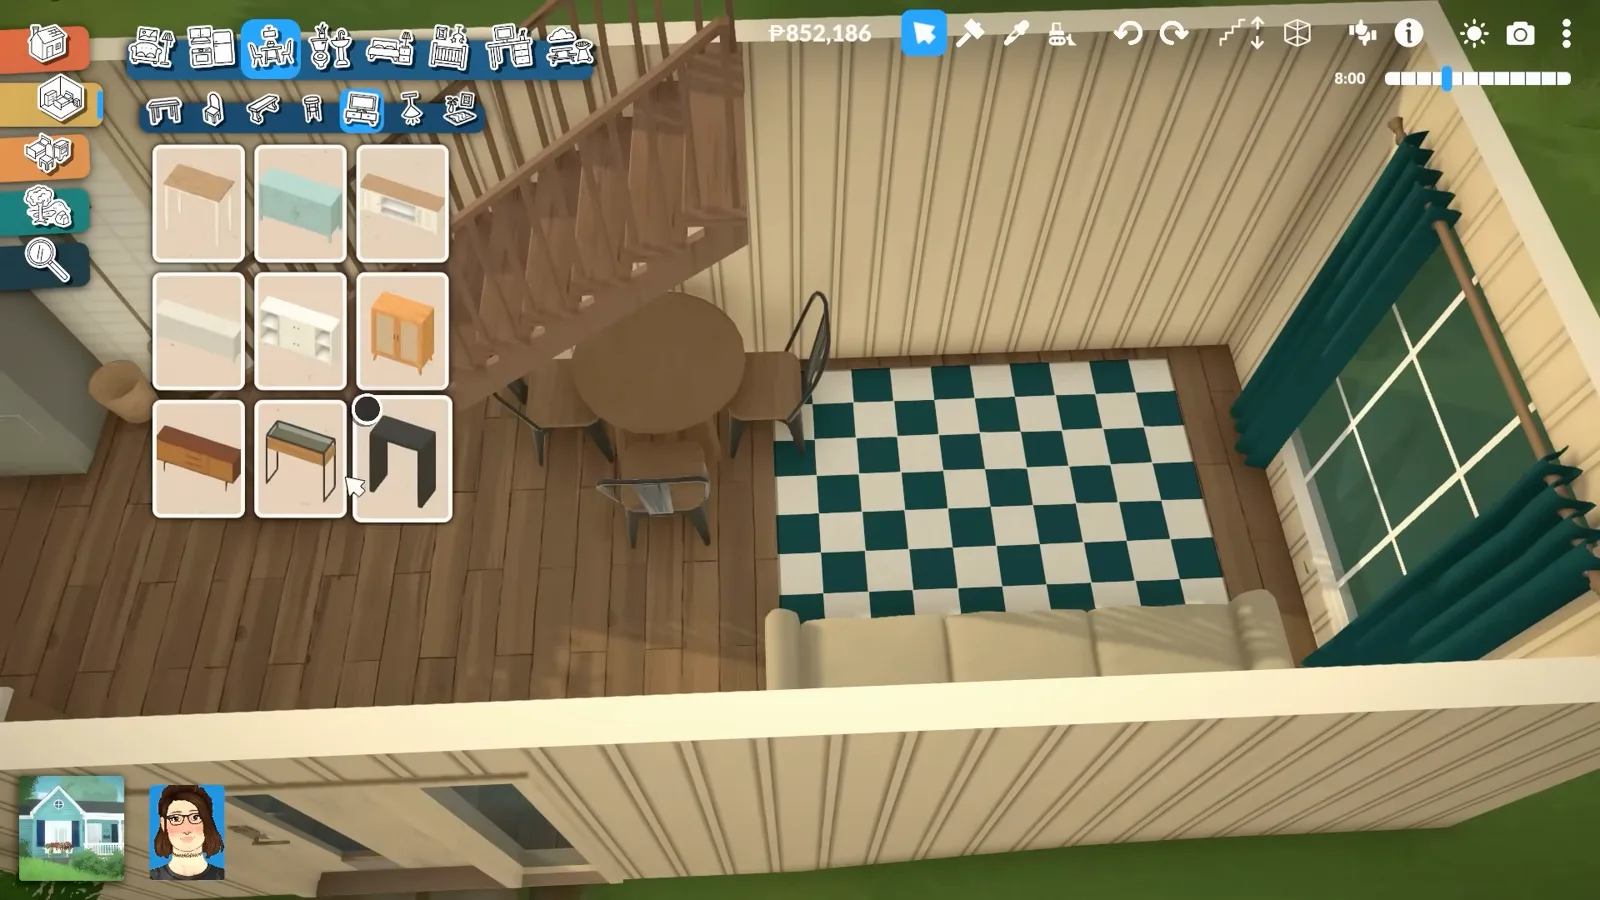
Checker rug down, dining table under the stairs — the back half of the box anchors itself.Watch at 6:25 - 14
Loft the bedroom into the upper container
Upstairs is the private half: a bed with teal sheets against the corrugated wall and mismatched bedside tables — one ordinary, one a single die in yellow. Portraits of the couple who live here hang above the bed, a small desk squeezes onto the far wall, and the wardrobe gets recoloured to match the wood tones. The top-down view shows how little room a container bedroom needs.
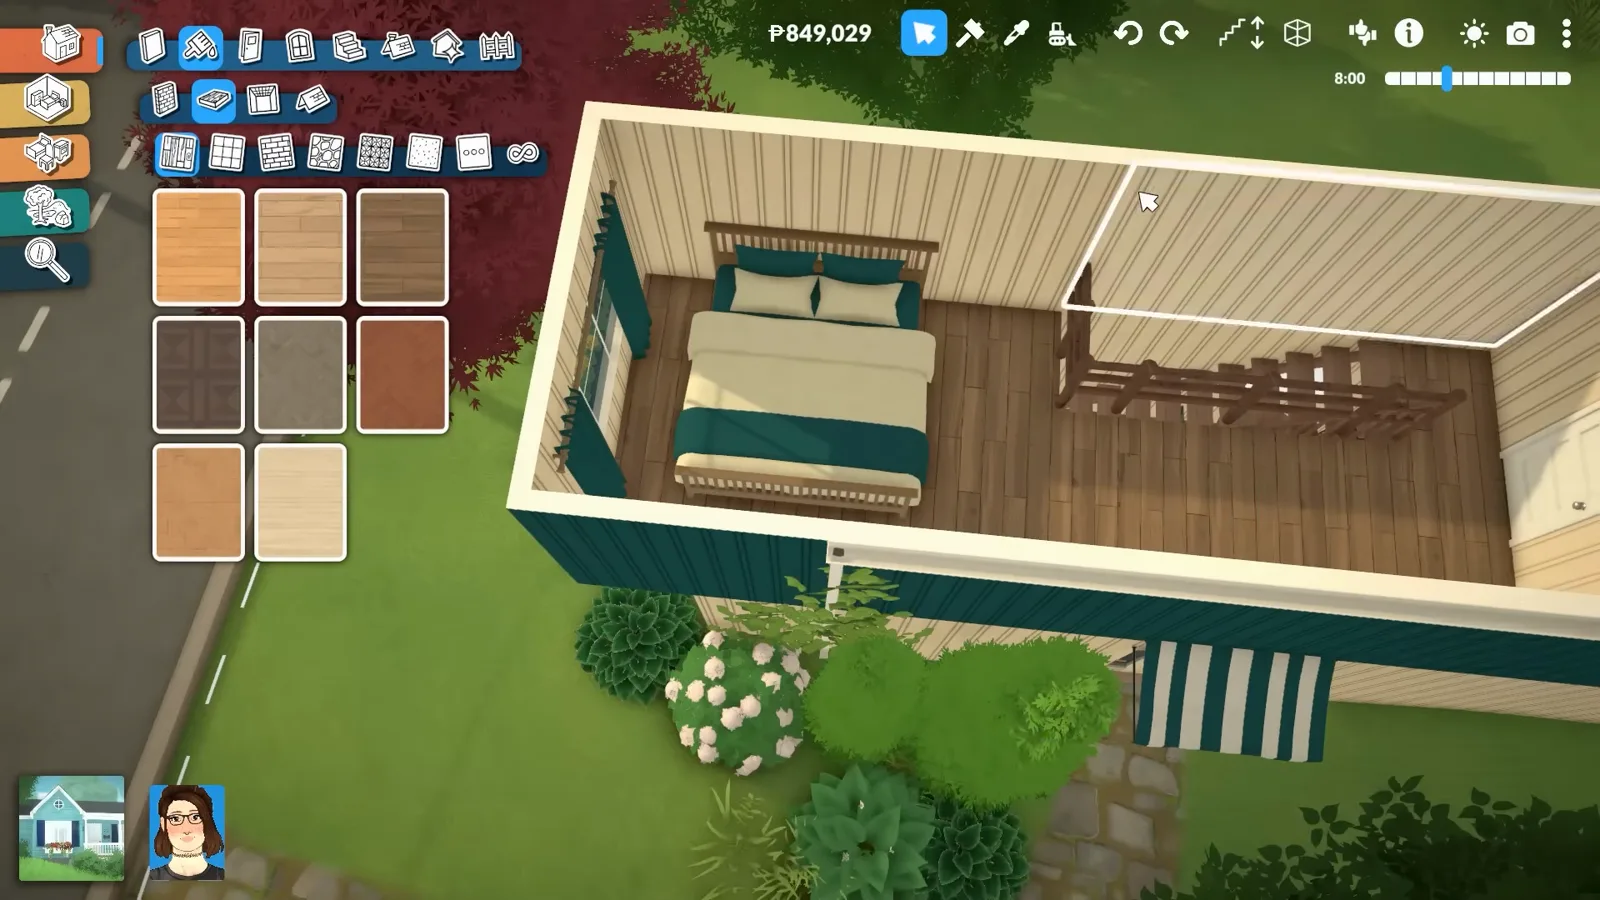
Bedroom upstairs: teal bedding, a die for a nightstand.Watch at 8:25 - 15
Keep the bathroom minimal, tile included
The bathroom stays deliberately spare: a modern sink, toilet and standing glass shower, steel-toned tile on the floor, and a cactus on the counter for the only joke. As the creator notes, it is everything a bathroom needs and nothing more — the patterned tile does the decorating.
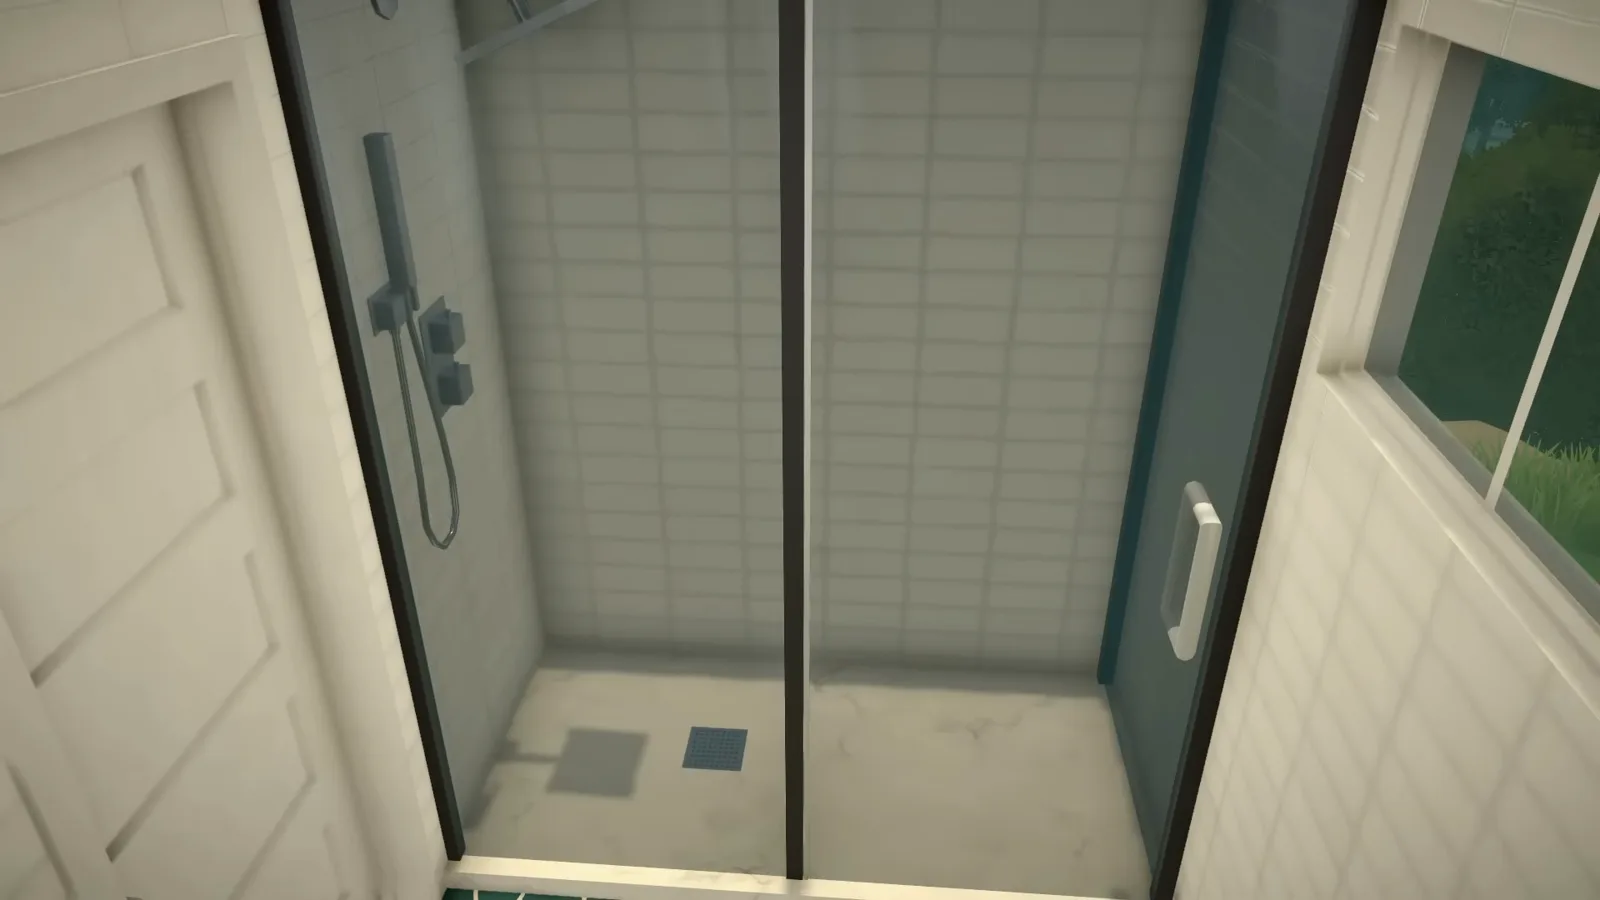
Sink, toilet, glass shower — the tile does the decorating.Watch at 11:35 - 16
Variant: push the bathroom to the far end
A second take on the same idea at its most essential: one single container module, white walls, a warm wood ceiling overhead, and the toilet and vanity pushed all the way to the far end of the box. With the wet room at the end, none of the remaining floor is spent on a hallway — the kitchen and living area keep the full width instead.
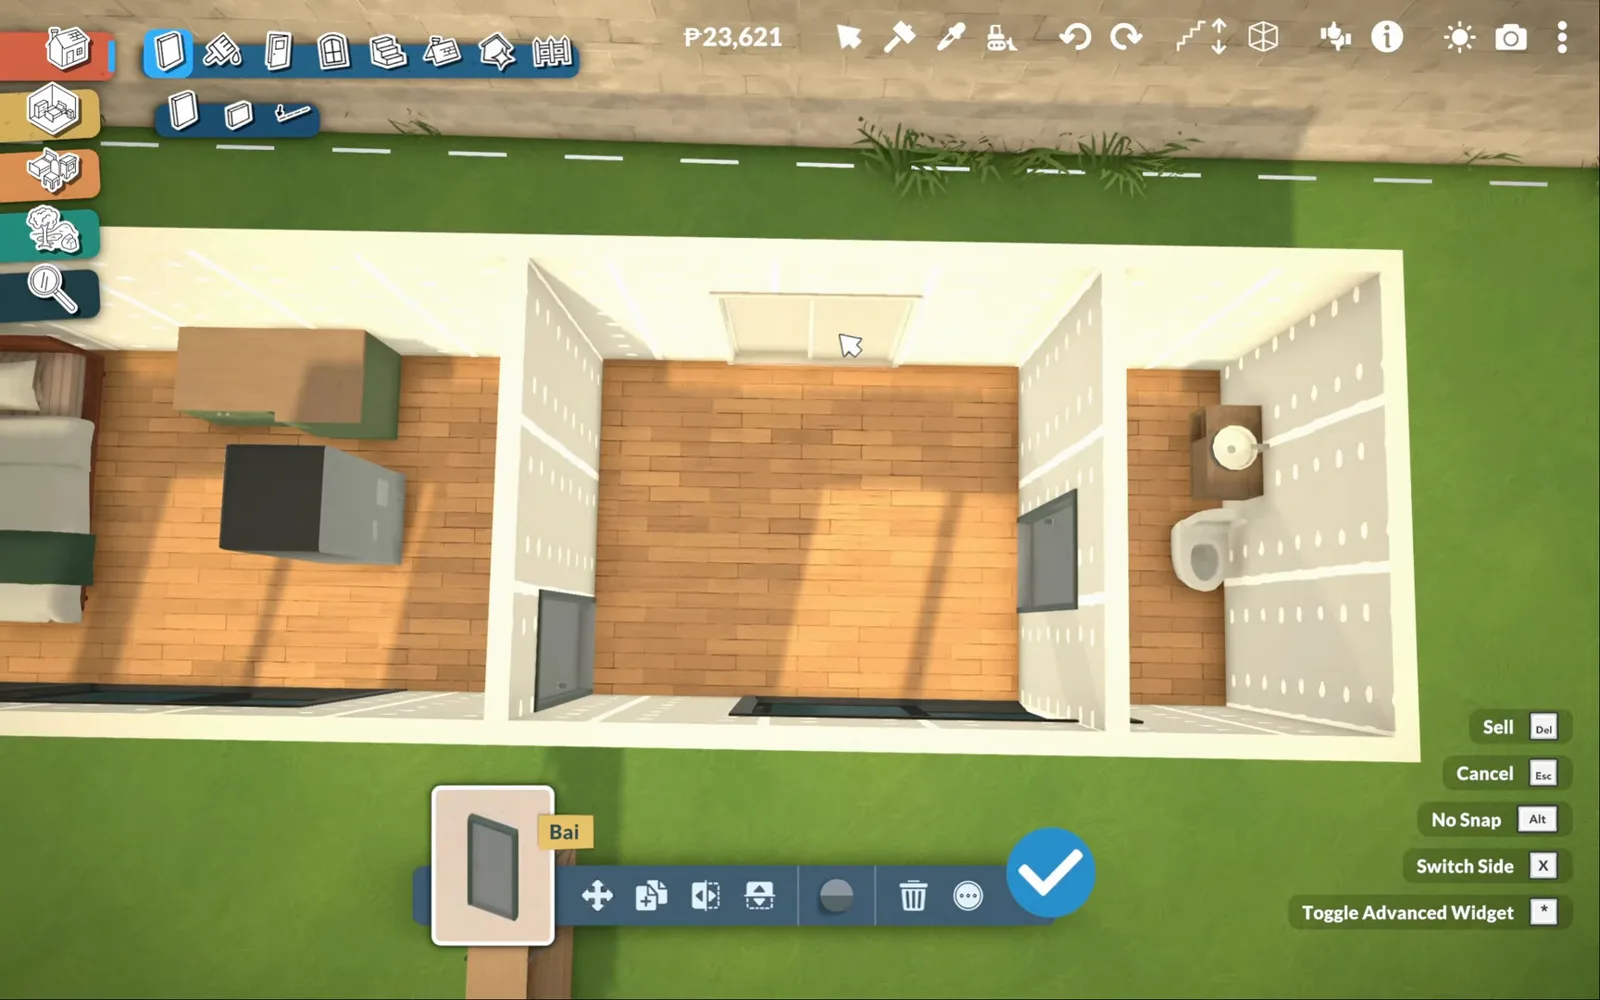
Variant build: bathroom at the far end of the box, hallway deleted.Watch at 2:15
Container house FAQ
- How do you build a shipping container house in Paralives?
- There is no container object in the catalogue — the look is built, not bought. Place ordinary rectangular volumes, stack a second one offset so it overhangs, then open Wall Painting Mode and paint the ribbed corrugated pattern onto the walls, which is exactly how the walkthrough on this page proceeds. Everything after that — flat roof, striped awning, climbing vines — is stock build mode.
- Can you stretch the container texture across a whole wall or ceiling?
- One creator demonstrates a rougher variant: paint a wall fully with the container texture, then use the advanced placement tools (* (numpad)) to stretch that single image across an entire wall — or even the ceiling — so the ripple reads at architectural scale. The same demonstration notes two catches they ran into: a wall fully covered in the texture would not accept a door, so the door opening had to be widened, and the surrounding frame was painted black to read as container trim. Treat all of that as a creator-observed workaround rather than an official rule — Early Access placement behaviour changes, and the source video is linked below.
- How big should a Paralives container house be?
- The game imposes no size, but one creator sizes the module to a real residential shipping container — about 12 m long and 2.9 m high — and then sets the width to 2.9 m as well, so the single module keeps a true container's proportions instead of reading as a stretched box. It is a creator's rule of thumb rather than a game measurement, but it is a useful check before the free drag tools tempt you into making everything bigger.
- How is a container house different from a modern flat-roof house?
- Both are boxy, but the intent differs. A modern house in Paralives is ordinary walls with a flat roof and an emphasis on glazing — our modern house guide builds exactly that. A container house leans on the corrugated paint, on stacked boxes with visible overhangs, and on industrial details like the striped awning; it reads as steel even when the interior is warm wood. The boundary in one line: no ripple, no stack — otherwise you are just building a modern house.
- Where should the bathroom go in a container layout?
- Two working answers come out of these builds. Put it upstairs with the bedroom, as the main walkthrough here does, which keeps the whole ground floor for living space. Or push it to the far end of the box on the ground floor — the second creator's layout — so the bathroom fills the dead end instead of forcing a hallway. Both approaches keep the kitchen and living zone continuous along the long walls.
Go deeper on the parts
Walls
Wall tools, patterns and painting modes — the corrugated container look is one swatch inside this system.
Windows & doors
Cutting openings into painted walls, sizing them, and where flower boxes and awnings attach.
Roofs
Flat slabs, pitches and the roof catalogue the container's top slab came from.
Related builds
Platforms
Raised slabs and level tricks — the other way to make a small box feel tall inside.
Attic rooms
The room under the roof, built without clipping — stairs-first zoning, same as this container build.
Modern house
The flat-roof take with no ripple and no stack — see where the container look begins and ends.
House ideas
More whole-house silhouettes to steal proportions from, containers included.