
The short version
Paralives has no skylight button. Every skylight you have seen is the same three moves: cut a hole, frame the roof around it, tilt a window into the slope. Here is the whole pipeline, with every trick the three tutorials use.
- Cut the hole with the separator tool — draw a square, delete its ceiling, and that hole is your skylight.
- Frame the slope from flat-sided gables and half-gables; duplicate item keeps both sides identical.
- The advanced widget from the three-dot menu does the rotating: red ring pitches the glass, green arrow lifts roofs and posts.
- Roof-lookalike decoration panels shell slopes the regular roof tool can't — and hide the wall sliver that appears when you extend a window.
- Gaps are normal: stretch a wood post under a floating roof edge, and keep a lower window beneath full-height glass.
- One story works fine; two stories get you the merged glass-roof room.
Hole first
Cut the opening
Every Paralives skylight starts as a hole in the roof plane. The three tutorials open that hole three different ways — a separator square on a one-story house, a built-up skylight floor on a loft, a door-frame opening on a two-story wall — so pick the one that matches your house.
- 1
Mark the opening with the separator tool
Into The Simulation opens his one-story room (9x11 in the video — he picked the size because the roof angle lines up) by drawing a 3x3 square against one wall with the separator tool. Going up a level and deleting that square's ceiling leaves exactly one thing behind: the hole the skylight will sit in.
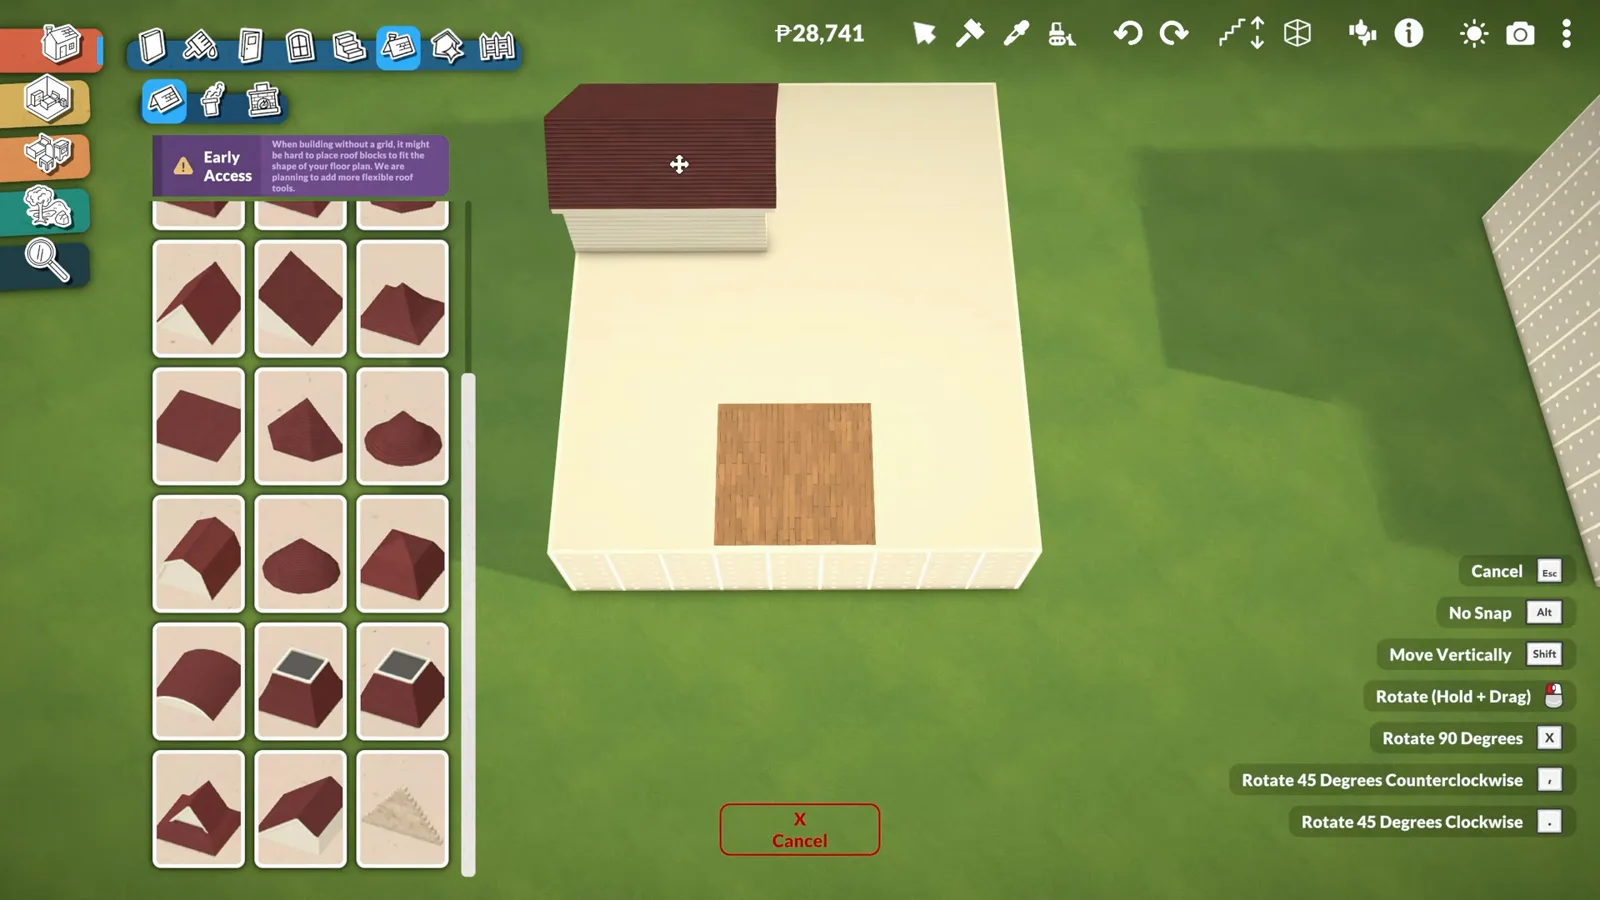
The little square is the future hole in the roof.Watch at 0:52 - 2
Add the skylight floor and triangular guides
Aanlix builds his loft skylight on a floor added on top of the roof, and he places triangular windows first — in his words, to understand the slope of the skylight windows. Every flat window that follows gets centered on the top wall, and he keeps repeating that rule: off-center pieces end up showing through on the floor below.
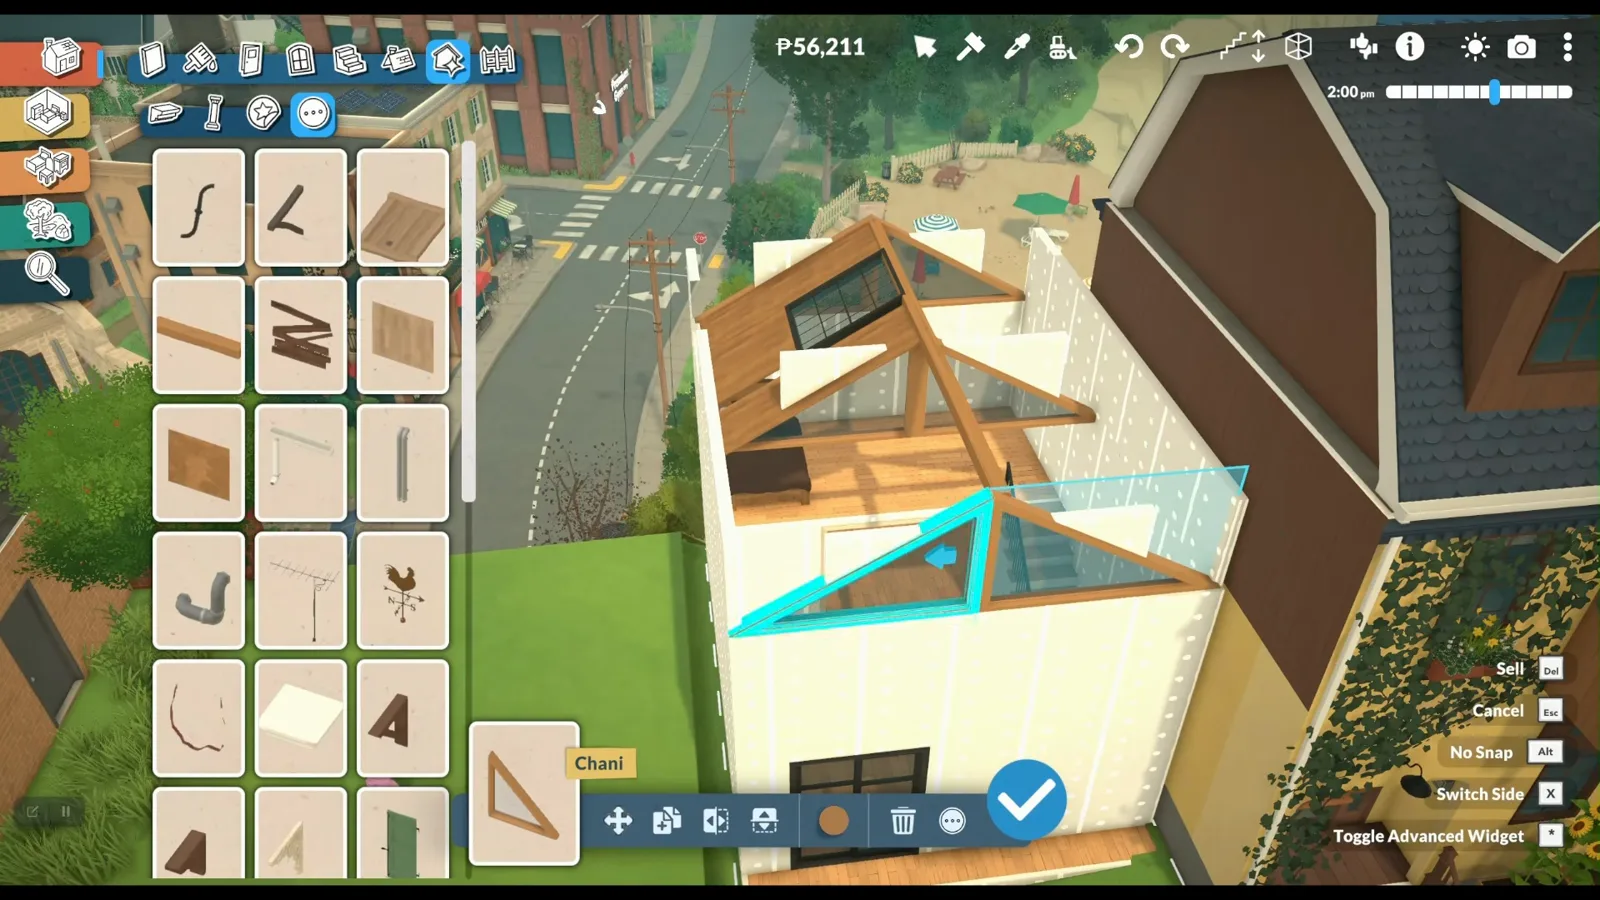
Triangles first — they set the angle every skylight window follows.Watch at 4:18 - 3
Open the wall strip with a door-frame opening
Pixela's two-story build needs the wall open under the roof hole. From the doors category she drags a frameless opening across the full width of the wall — chosen because it reads seamless — and the strip under the hole turns into clear glass with no frame to break it up.
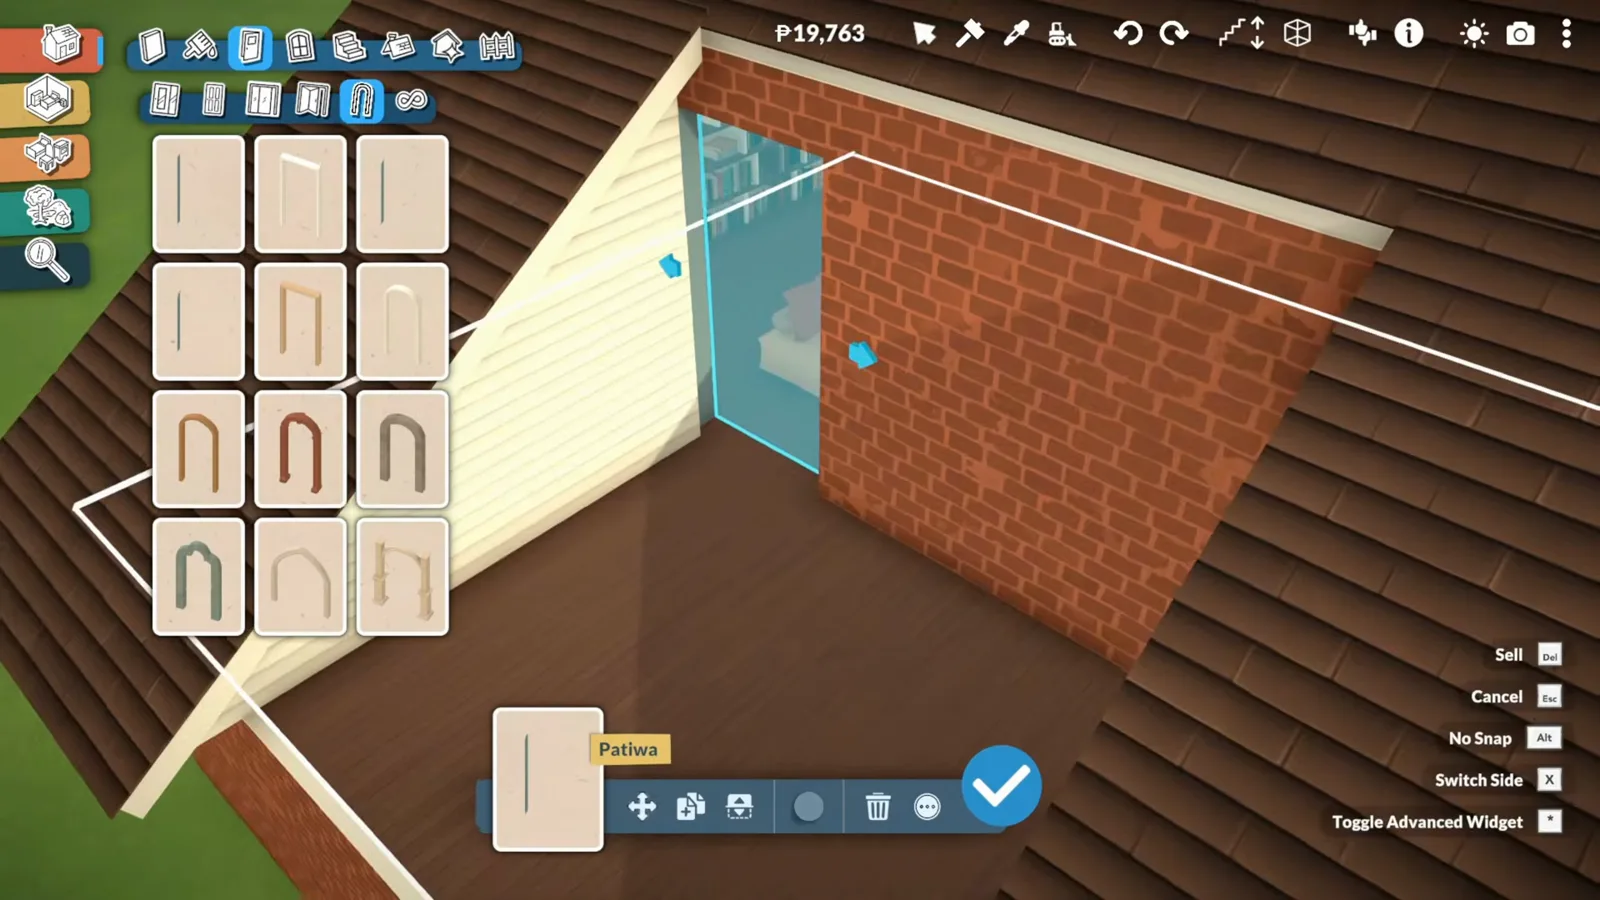
A doorway with no door: just a clean strip of glass under the hole.Watch at 1:04
Frame it
Build the roof around the hole
With the opening marked, the roof plane has to walk around it. Flat-sided gables, half-gables and duplicate item do the framing; the advanced widget rescues any segment that lands low; and a roof-lookalike decoration panel shells the parts the regular roof tool can't reach.
- 4
Bring a flat-sided gable to the edge of the hole
With the hole marked, Into The Simulation places a gable roof that has one flat side at the back of the room and drags it up to the edge of the opening. Half-gable segments fill the sides: place, resize to the bay, duplicate item for the far side, then resize one more to bridge the middle — overlaps are fine, and the arrows pull the edges down flush.
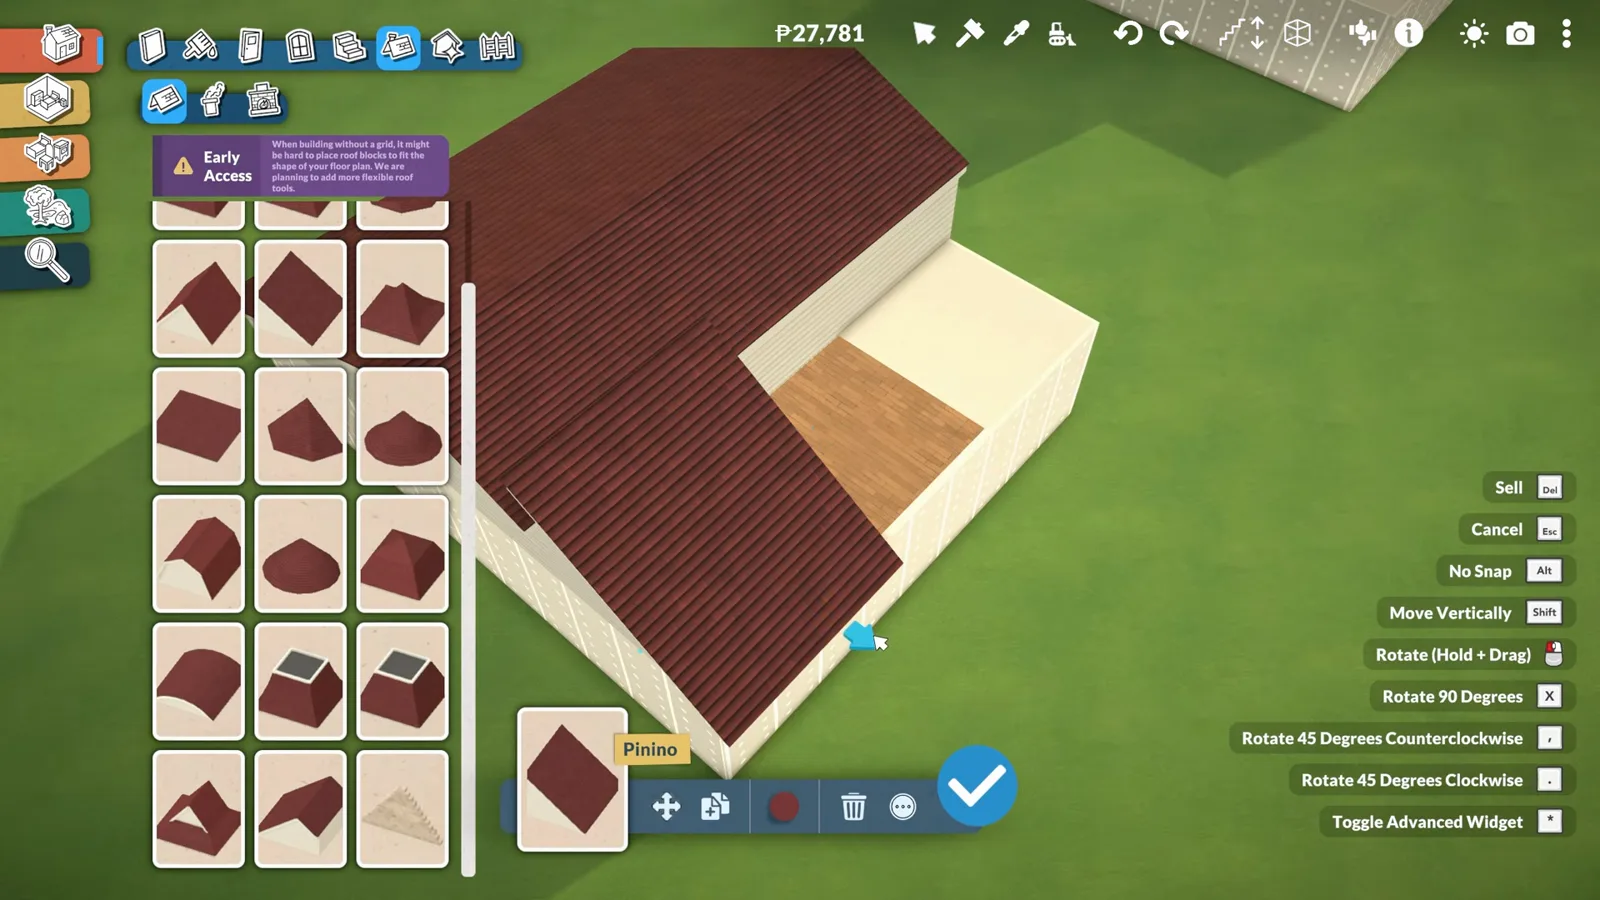
Flat side to the room, pitch to the street — the working roof around the hole.Watch at 1:14 - 5
Raise a low roof segment with the advanced widget
The bridging piece lands lower than its neighbors. Open the three-dot menu, toggle on the advanced widget (* (numpad)), and pull the green arrow until the ridge lines up with the roofs on either side — then toggle it off again. The same move comes back in every one of these tutorials, wherever a segment sits too low.
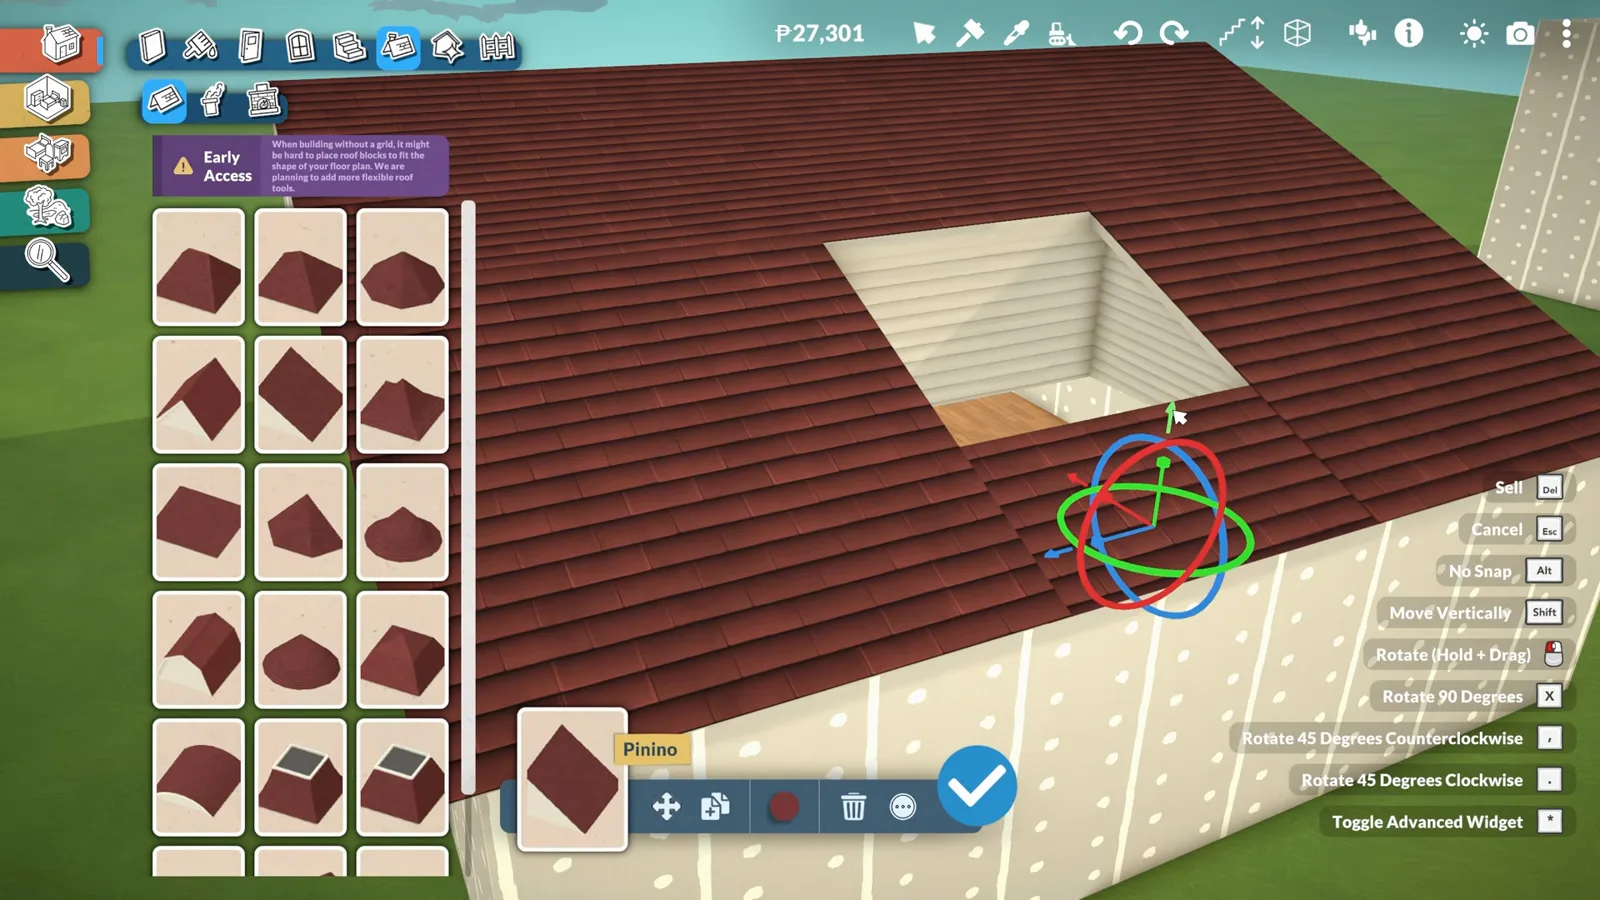
One green-arrow pull and the stray segment joins the ridge.Watch at 2:01 - 6
Shell the slope with roof-lookalike panels
Aanlix skips the regular roof tool for his loft slope. His roofing is a decoration item that, as he puts it, looks like a roof but isn't one, placed panel by panel around the skylight window. It doubles as the patch for a quirk he demonstrates: extending the window makes a sliver of wall vanish, and one of these panels hides the missing piece.
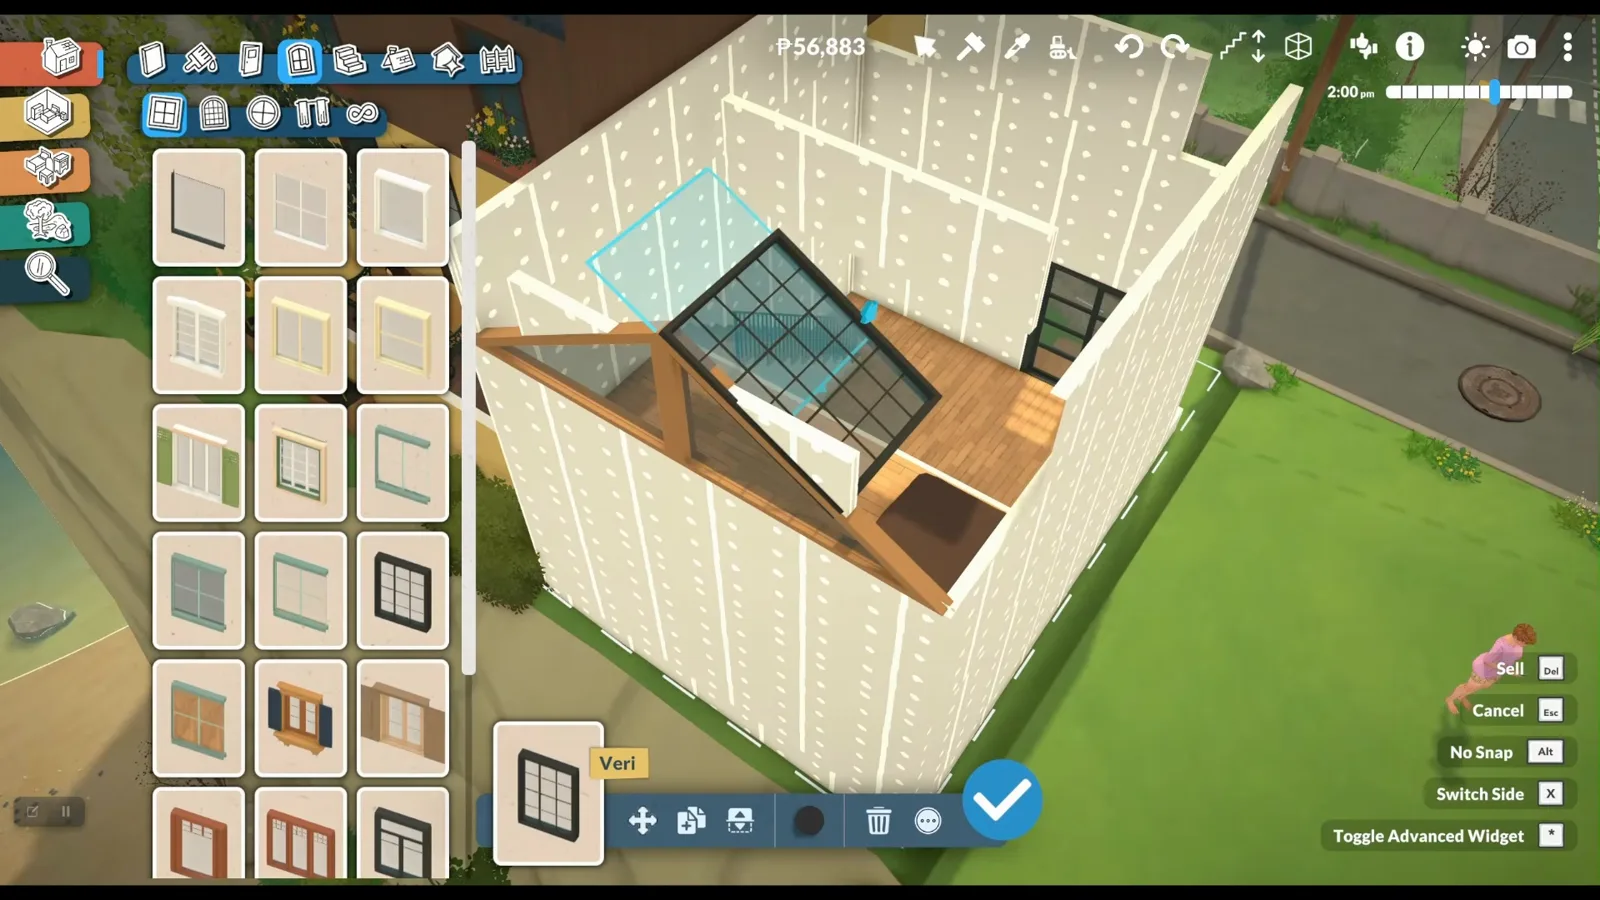
A decoration item pretending to be a roof — and doing it well.Watch at 2:42 - 7
Repeat the bay down the roof
The rest of the roof is the same bay again: triangular guide, centered window, panels, next pitch. Aanlix also found one improvement after the fact — lowering the top wall to the minimum stops drywall poking out between the triangular shapes, and the windows still sit centered on the top wall.
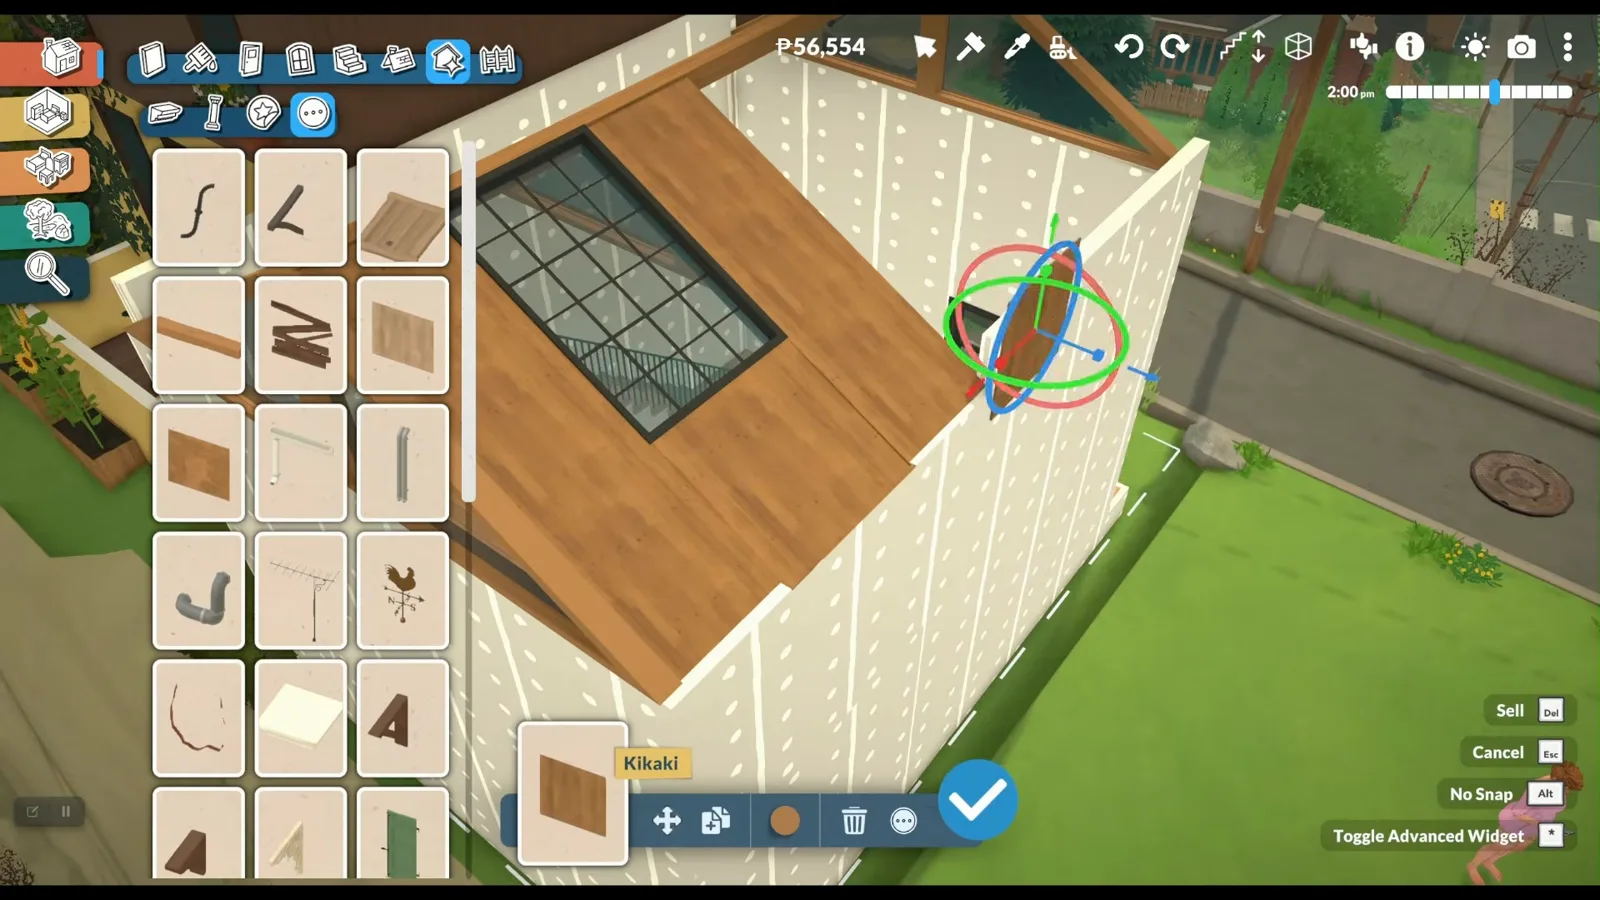
Same bay, next pitch — guide, window, panels, repeat.Watch at 4:35
Glass goes in
Tilt the window into the slope
The glass is an ordinary window — the trick is the rotation. Place it high, tilt it with the advanced widget's rings until it matches the pitch, then stretch it until the frame meets the roof on every side.
- 8
Set a window high on the wall
Any window works here, says Into The Simulation — the one in the video goes on the wall directly under the opening, as high as the game allows. The high seat matters: it gives the rotation step the headroom to swing the glass up into the slope.
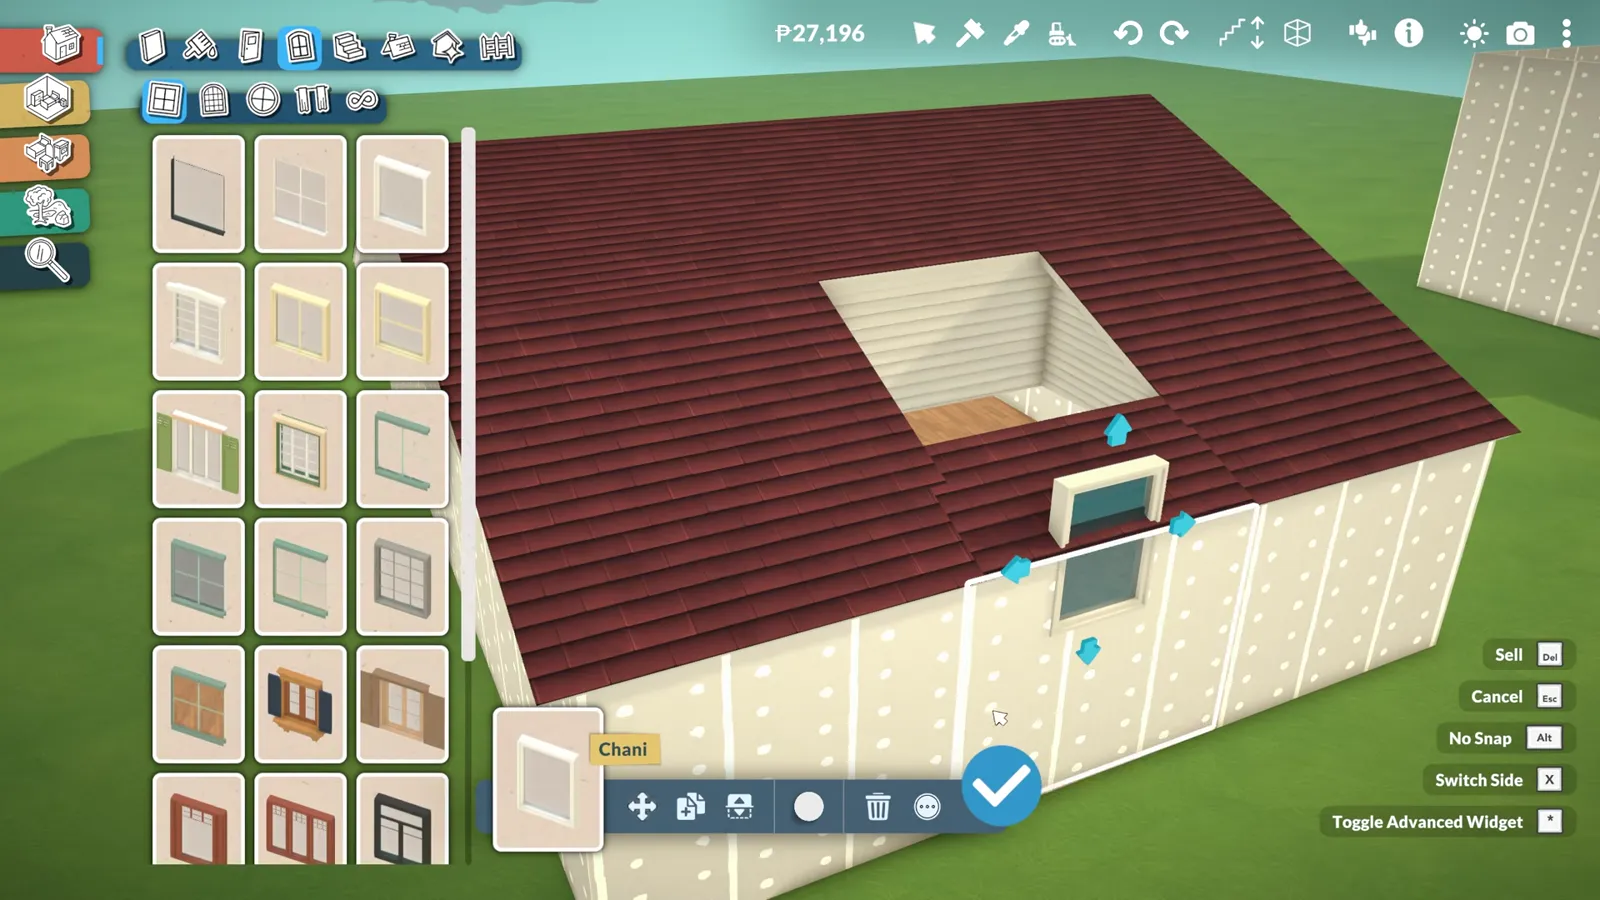
As high as the wall allows — the rotate step needs the headroom.Watch at 2:20 - 9
Rotate the glass to match the pitch
Toggle the advanced widget and the window gains rotation rings. The advice repeats across all three videos: push the glass all the way to the roof edge, bring it down a touch, then match the pitch by eye — Pixela tilts with the red ring and merges the window into the roof with the blue arrow, while Aanlix aligns his to the triangular guides in advanced build mode.
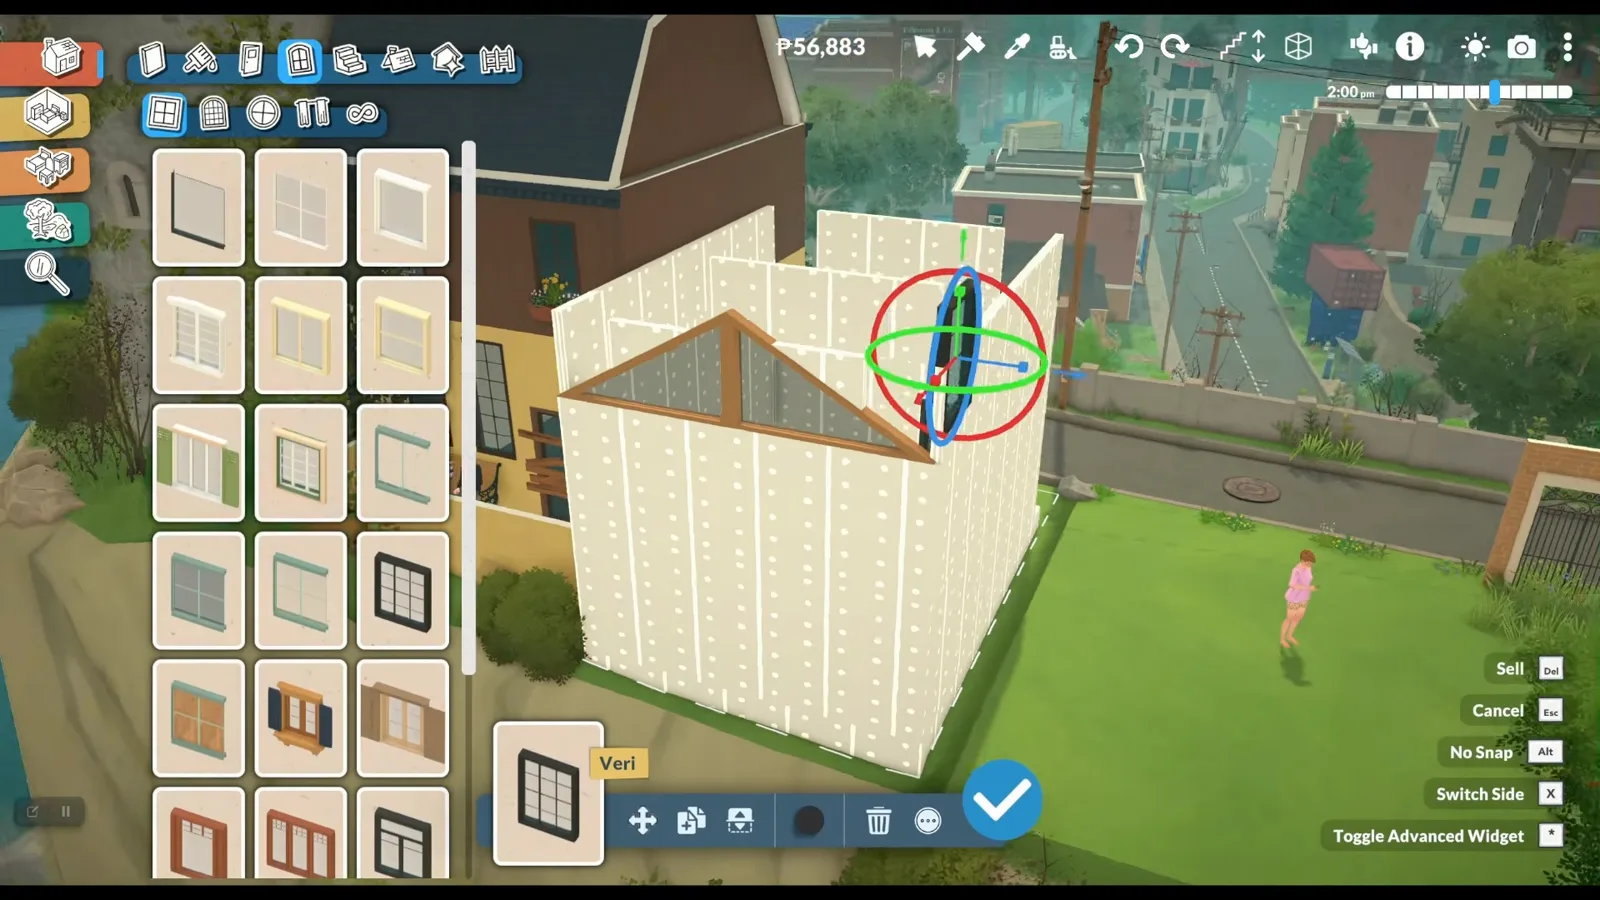
Red ring to tilt, arrows to slide, eyes to match the pitch.Watch at 2:26 - 10
Extend the window across the opening
Once the angle is right, the window gets stretched until it fills the bay — Aanlix centers his on the top wall and extends it edge to edge, then backs out of the widget and resizes so the frame meets the roof on all sides. That is the whole trick: an ordinary window, seated flush in the slope.
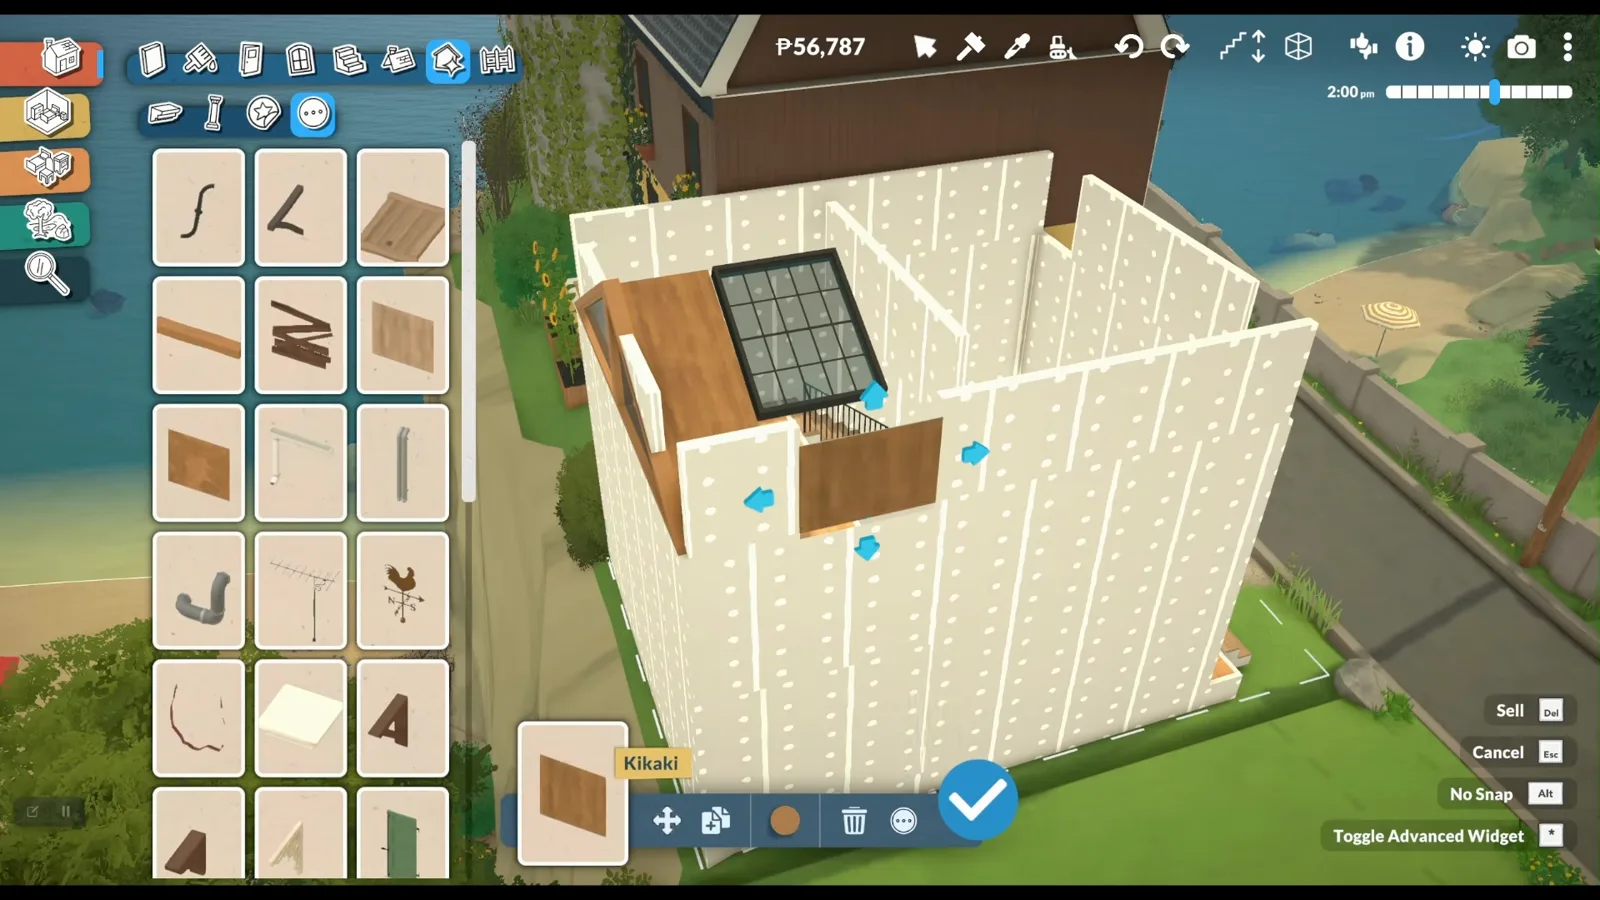
Resized to meet the roof on every side: a working skylight.Watch at 3:16
Seams and daylight
Close the gaps and step back
Skylights leave seams: a vanishing sliver of wall here, a gap between roof and wall there, a bare hole above full-height glass. Each tutorial ends with its own patch — and then the part you actually built it for.
- 11
Fill the roof-wall gap with a wood post
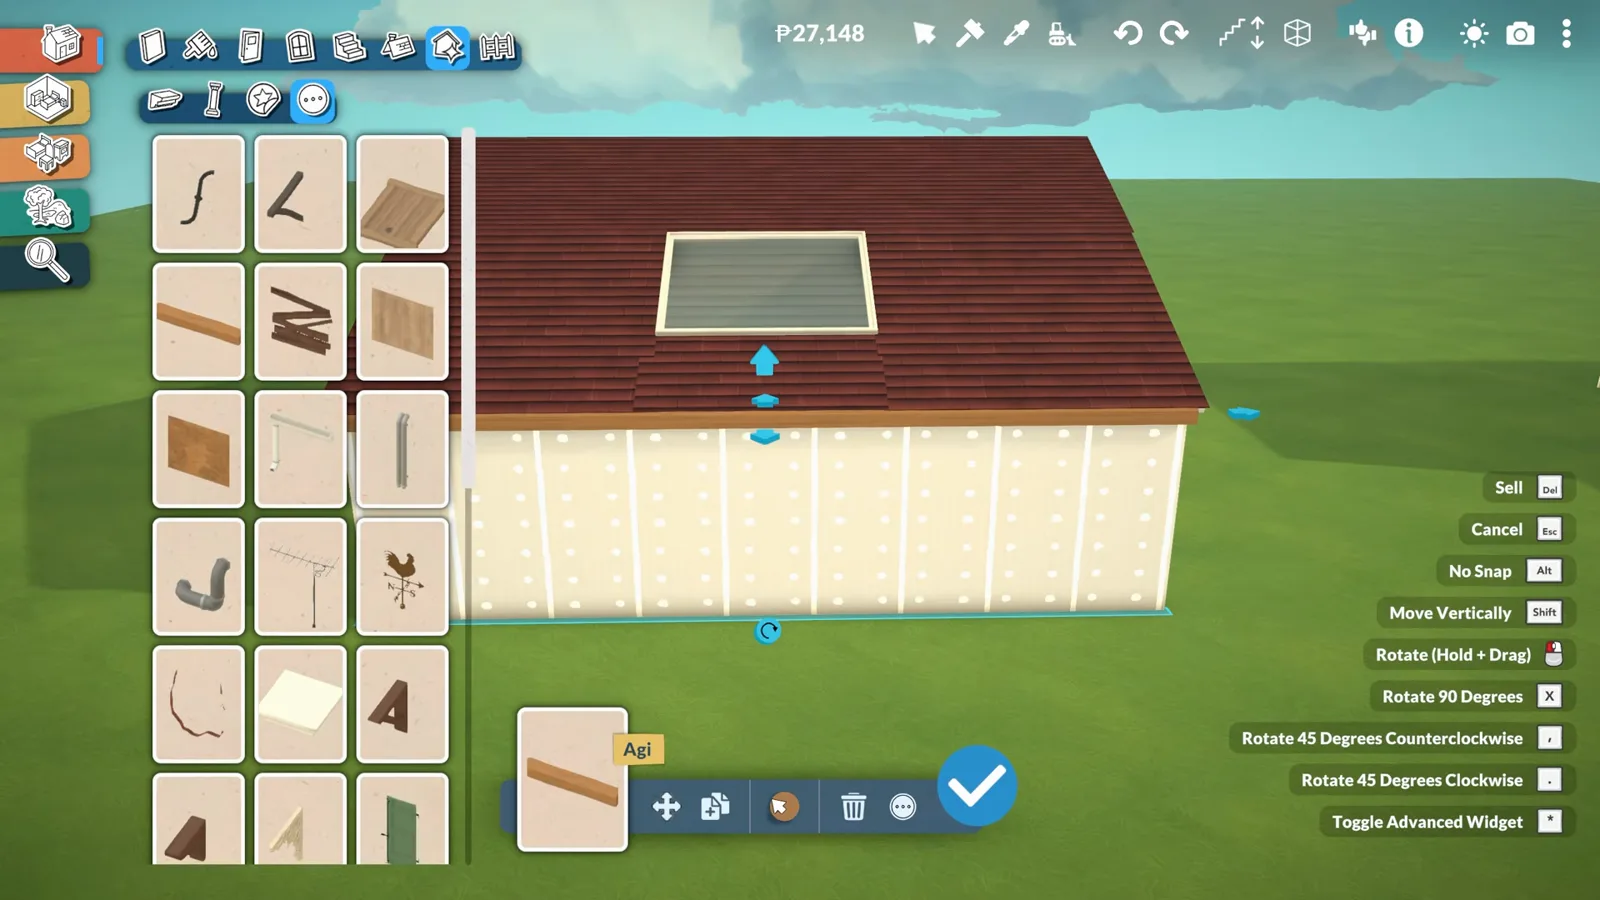
The one-story build leaves a gap where the roof edge floats clear of the wall. Into The Simulation grabs a wood post from Architectural Details → Architecture Miscellaneous, rotates it with the arrow keys, lifts it just under the roof with the advanced widget's green arrow, then stretches it across the whole span. A lighter recolor helps it stop drawing the eye.
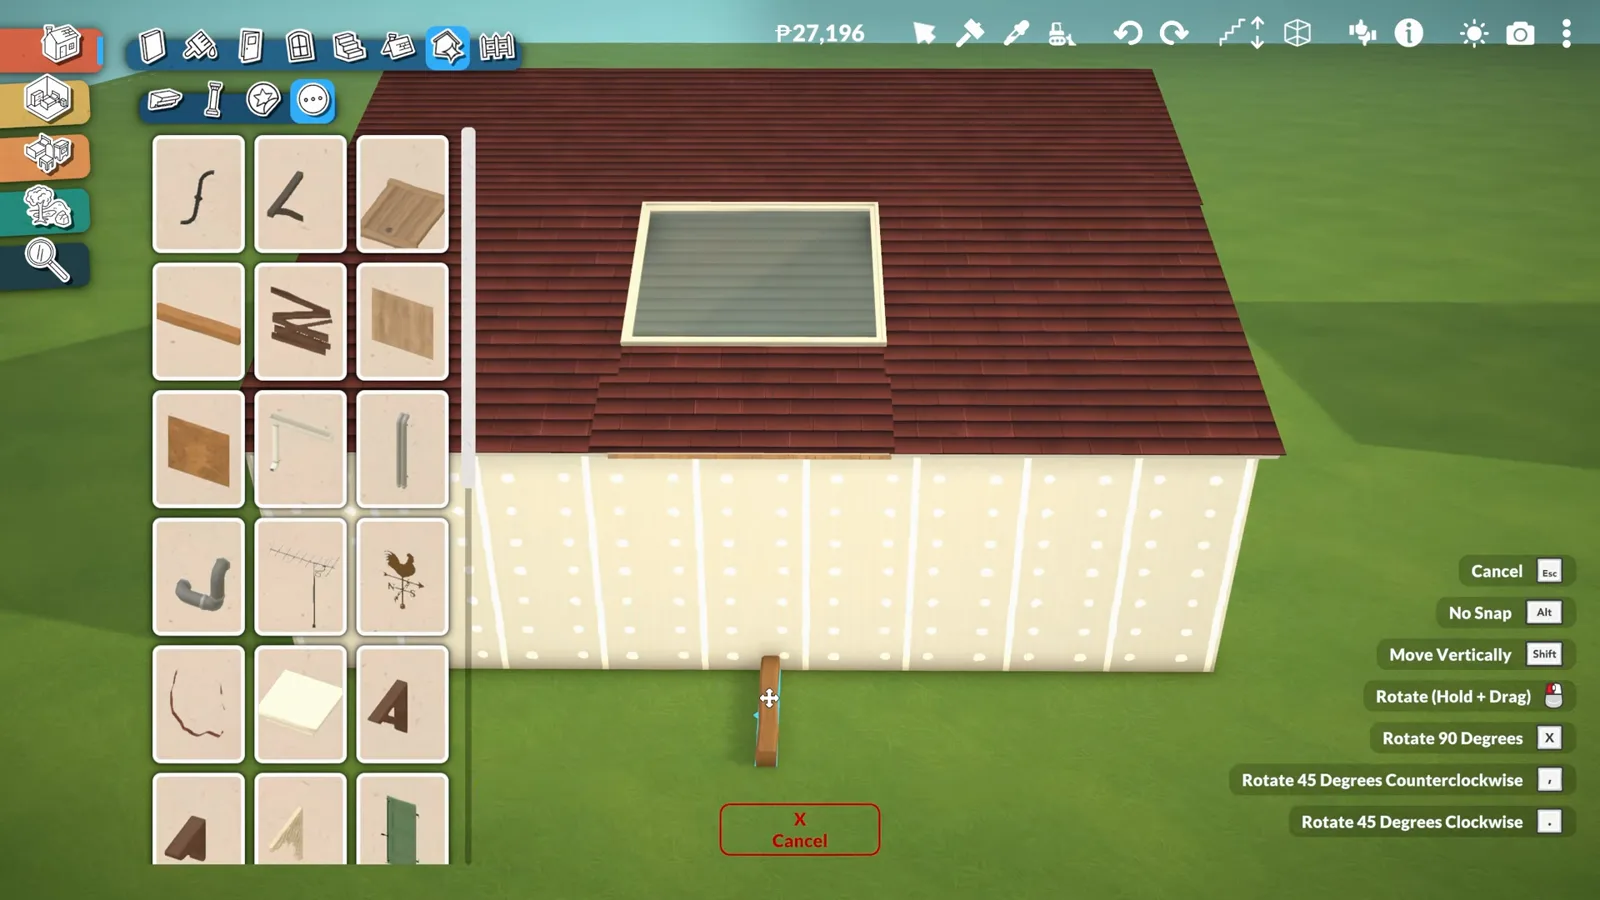
One post — lifted, stretched, recolored. Gap gone.Watch at 3:16 - 12
Or turn the whole section into a glass wall
The two-story variant makes the skylight the room. A regular gable sits on top, half-gables run below, and a window is copied, stacked as high as it goes and rotated until the glass flows with the roof. The lower window isn't decoration — without it, dragging the upper glass down to the wall edge would leave a hole in the wall.
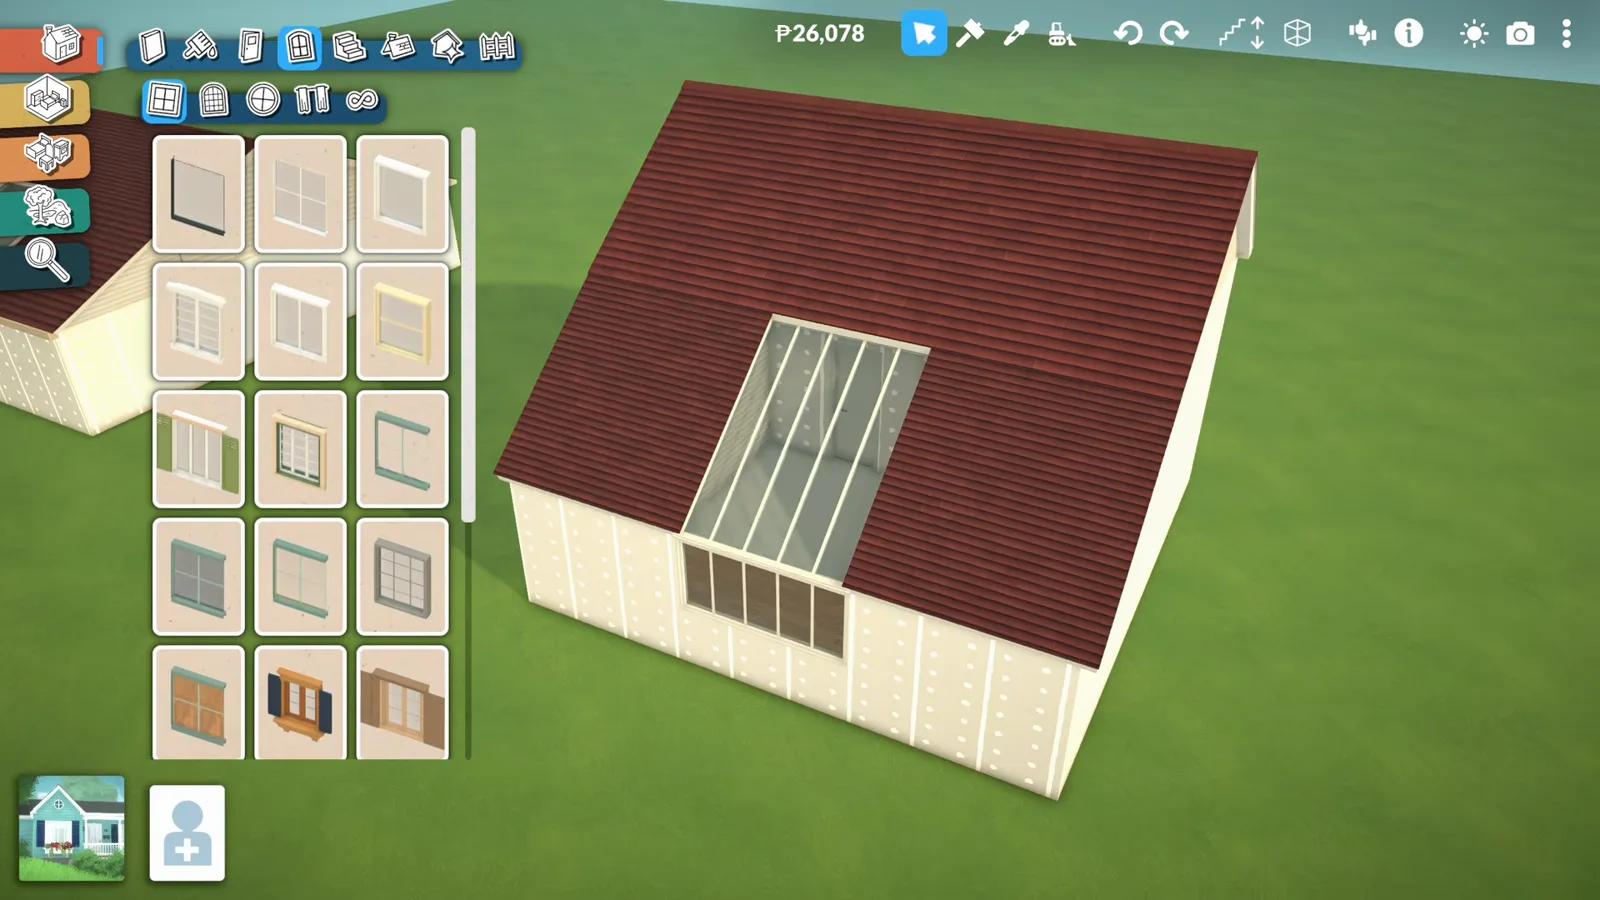
The two-story version: a room whose ceiling is glass.Watch at 6:00 - 13
Finish the room under the light
Aanlix's finished loft bedroom sits directly under the skylight: a double bed, layered rugs and a gallery wall, all color-matched with the color wheel while the glass works overhead. No one quotes lighting numbers in any of these builds — the demonstration is the point. The room reads like a room with daylight in it.
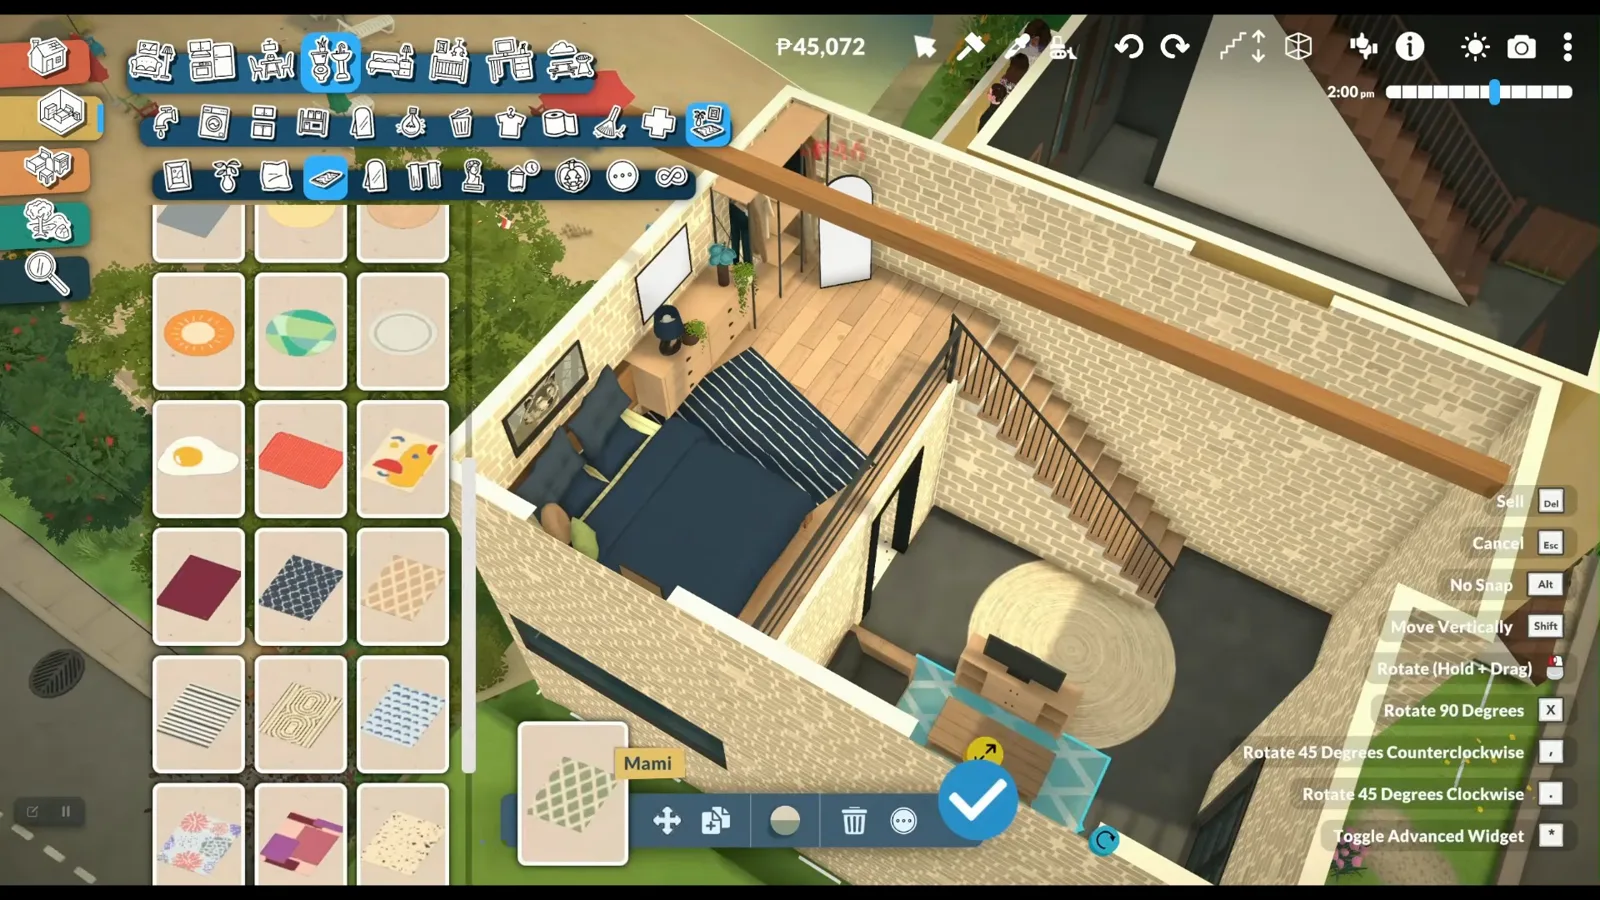
The bedroom ends up directly under the glass.Watch at 9:30 - 14
Walk the roofline before you call it done
The last pass is from the street: bays of glass set flush in the slope, a ridge that reads clean, no floating edges. From here both creators just recolor — roof planes, glass and trim — until the skylight stops looking like a trick and starts looking like architecture.
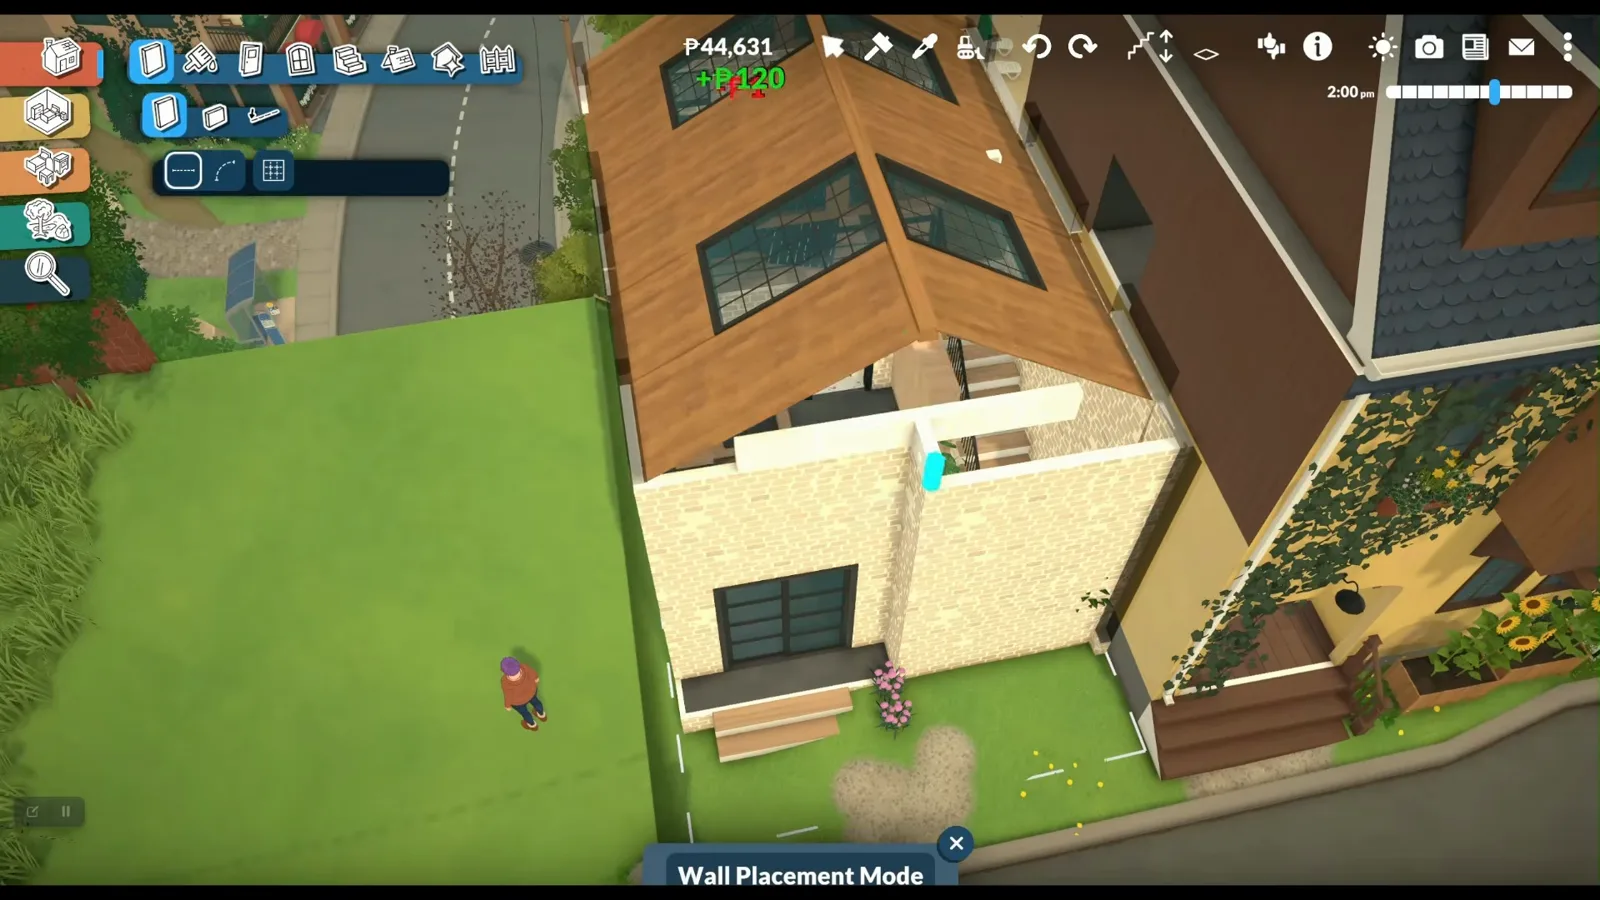
Flush bays, clean ridge — it reads as architecture, not a trick.Watch at 9:50
Skylight questions
- Can you make a skylight in Paralives?
- Yes — but not with a dedicated tool. All three tutorials build one from ordinary pieces: open a hole in the roof (a separator-square ceiling deleted from above, or a gap framed between roof segments), then tilt an ordinary window into that hole with the advanced widget until it sits flush in the slope.
- How do you make a skylight in Paralives step by step?
- The short recipe: mark the opening with the separator tool and delete its ceiling; frame the hole with a flat-sided gable and half-gable segments, raising any low piece with the advanced widget; place a window as high as the wall allows; rotate it with the advanced widget until it matches the roof pitch; then resize it to fill the opening. The walkthrough above shows every move with a frame from the videos.
- Do skylights let light in in Paralives?
- That is what the finished builds demonstrate. In Aanlix's loft the bedroom sits directly under the glass, and Into The Simulation's two-story glass-roof room shows the whole space through it. Neither creator quotes lighting values — but both favor frameless or near-frameless glass, which is what makes the opening read as real daylight.
- Why is there a gap around my Paralives skylight?
- Three gaps come up in the tutorials, each with a fix. A sliver of wall vanishes when you extend a window — Aanlix hides it behind a roof-lookalike decoration panel. The roof edge floats clear of the wall on one-story builds — Into The Simulation stretches a wood post from Architectural Details under it. And on two-story glass walls, dragging the upper window to the wall edge leaves a hole — solved by keeping a lower window in place.
- Do you need a second floor for a skylight in Paralives?
- No. Into The Simulation builds his first skylight on a single-story 9x11 room — the hole is cut in the only roof the house has. A second floor just changes the look: Pixela recommends two floors so the skylight merges into a connecting roof, which is what produces the glass-roof room style.
Keep building
Paralives roofs guide
Pitches, half-gables and the flat-sided gable this page frames skylights with — plus the classic roof fixes.
Attic rooms
The room-under-the-roof companion build: place the roof high, drag it down, keep the space walkable.
Loft floors
Raised sleeping lofts like Aanlix's — the floor the skylight lights up in this guide.
Curved walls
When straight walls get boring: the advanced-widget habits from this page transfer directly.
Windows and doors
The window catalogue this guide tilts into the roof, and the frameless openings Pixela drags across walls.
Build hub
Every Paralives build guide on the site, from foundations to full house walkthroughs.