
The short answer
Paralives is not a demanding game by strategy-genre standards, but Early Access builds reward a few deliberate choices. If you read nothing else:
- Fullscreen on, resolution matched to your monitor's native panel
- Frame Rate Cap 60 Hz — a life sim wants stability, not extremes
- Environment Texture Quality High if your PC allows it; textures carry the game's look
- On a low end PC, drop Object and Grass Rendering Distance to Low first
- Lower camera sensitivity one notch for precise building
- Keep tutorials and tooltips on for your first days; audio is pure preference
First launch
Open settings before your first world
Five minutes in the settings menu saves hours of friction later. The three panels below are worth visiting before you create a Para — there are no wrong answers here, just preferences that shape how the game feels.
- 1
Open Settings from the main menu
Before you create a Para or build a world, the Settings entry on the title screen is where this tour starts. It is worth checking settings first because they quietly shape everything that follows — and you can come back at any time without loading a save.
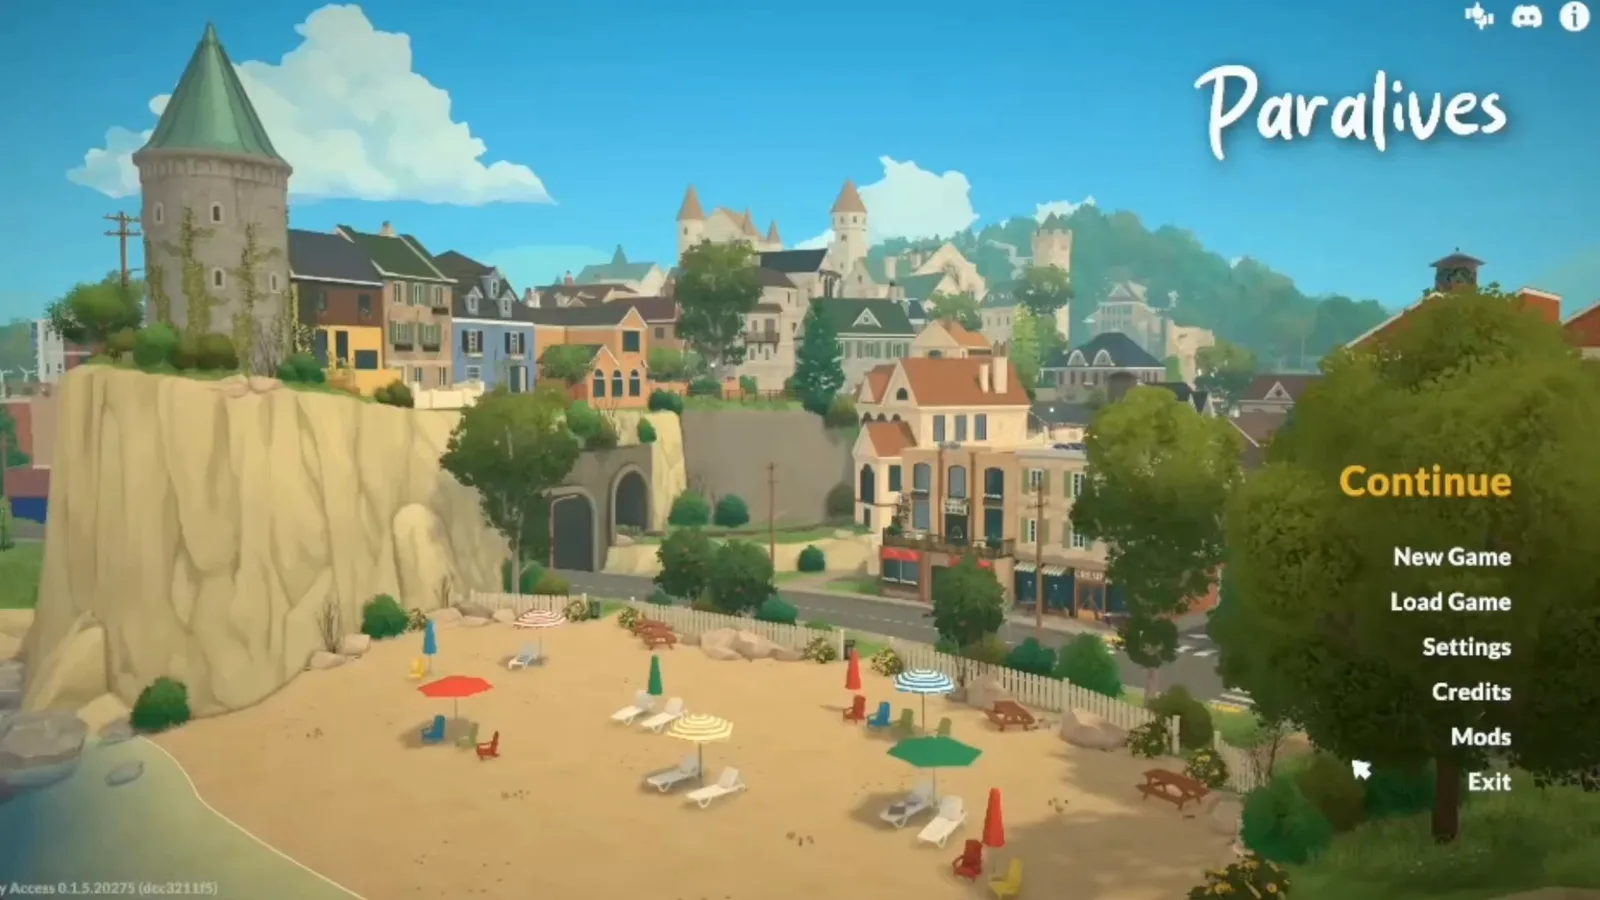
Settings sits right on the title screen — no save file needed.Watch at 0:18 - 2
General tab: language, clock and autosave
The General tab holds the housekeeping: language, the 24-hour clock toggle, measurement units, and Enable Autosave with its interval. There is no wrong answer here — one of the two creators behind this guide plays with autosave off, the other saves every 10 minutes. Pick what matches how you play.
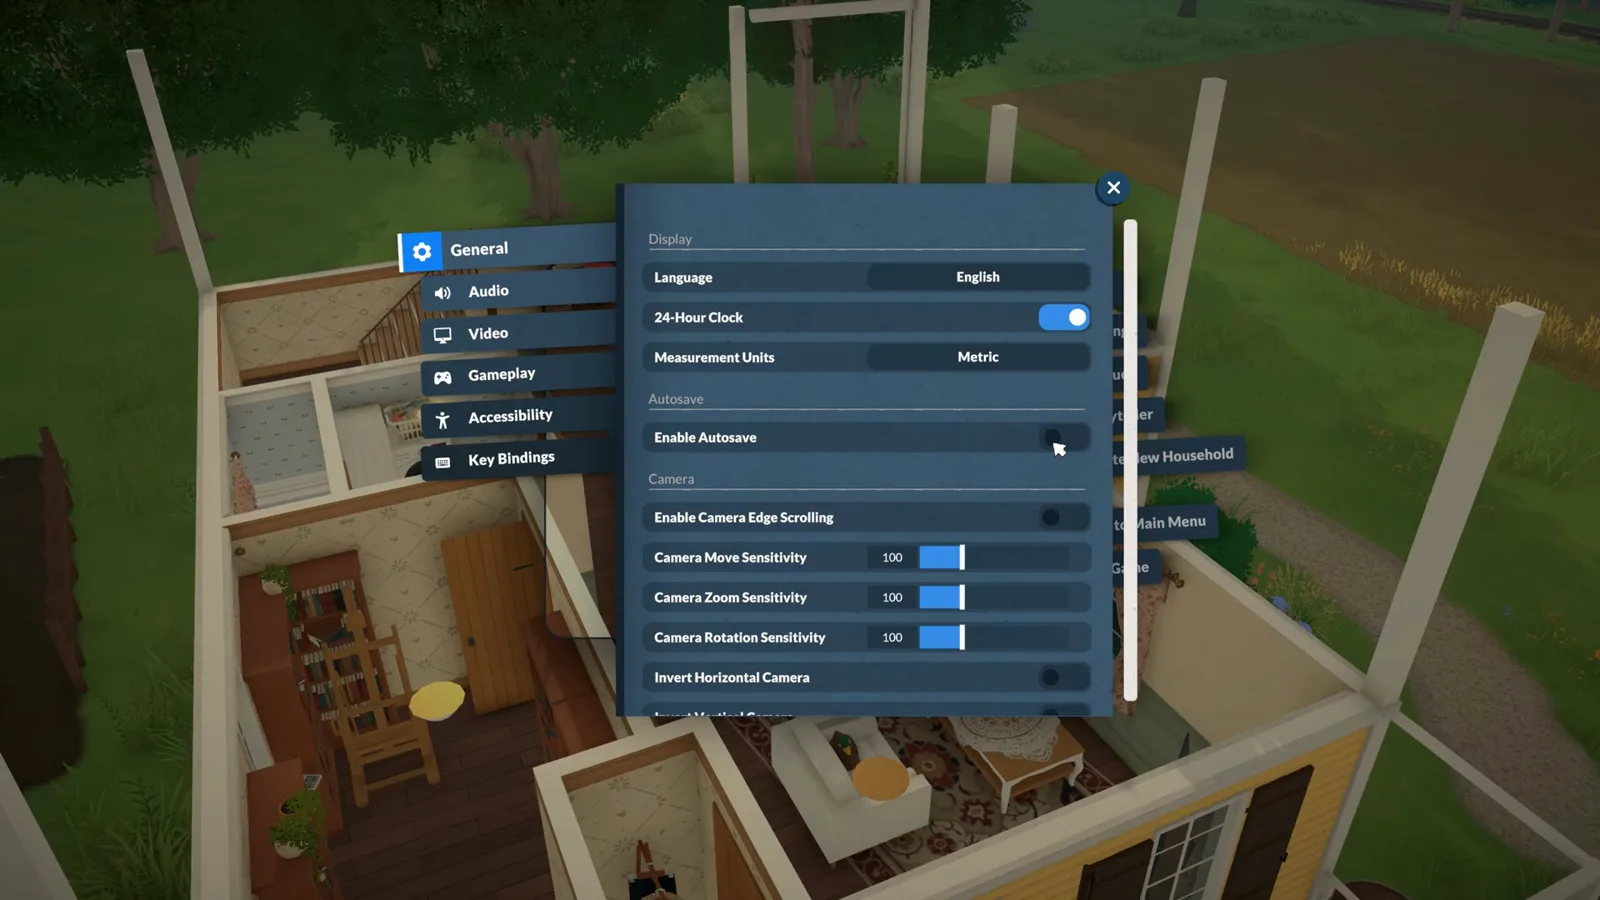
Autosave, units and clock format are pure preference — this tab looks different for every player.Watch at 0:36 - 3
Gameplay tab: comfort toggles
Gameplay is where comfort lives. Enable Autonomy for selected and non-selected Parafolks keeps the town moving on its own, Show Para Paths draws where everyone is headed, and Pause Time While In Build Mode stops the clock while you build. Keep the helper features on for your first days — letting the game teach you gradually beats hunting through menus.
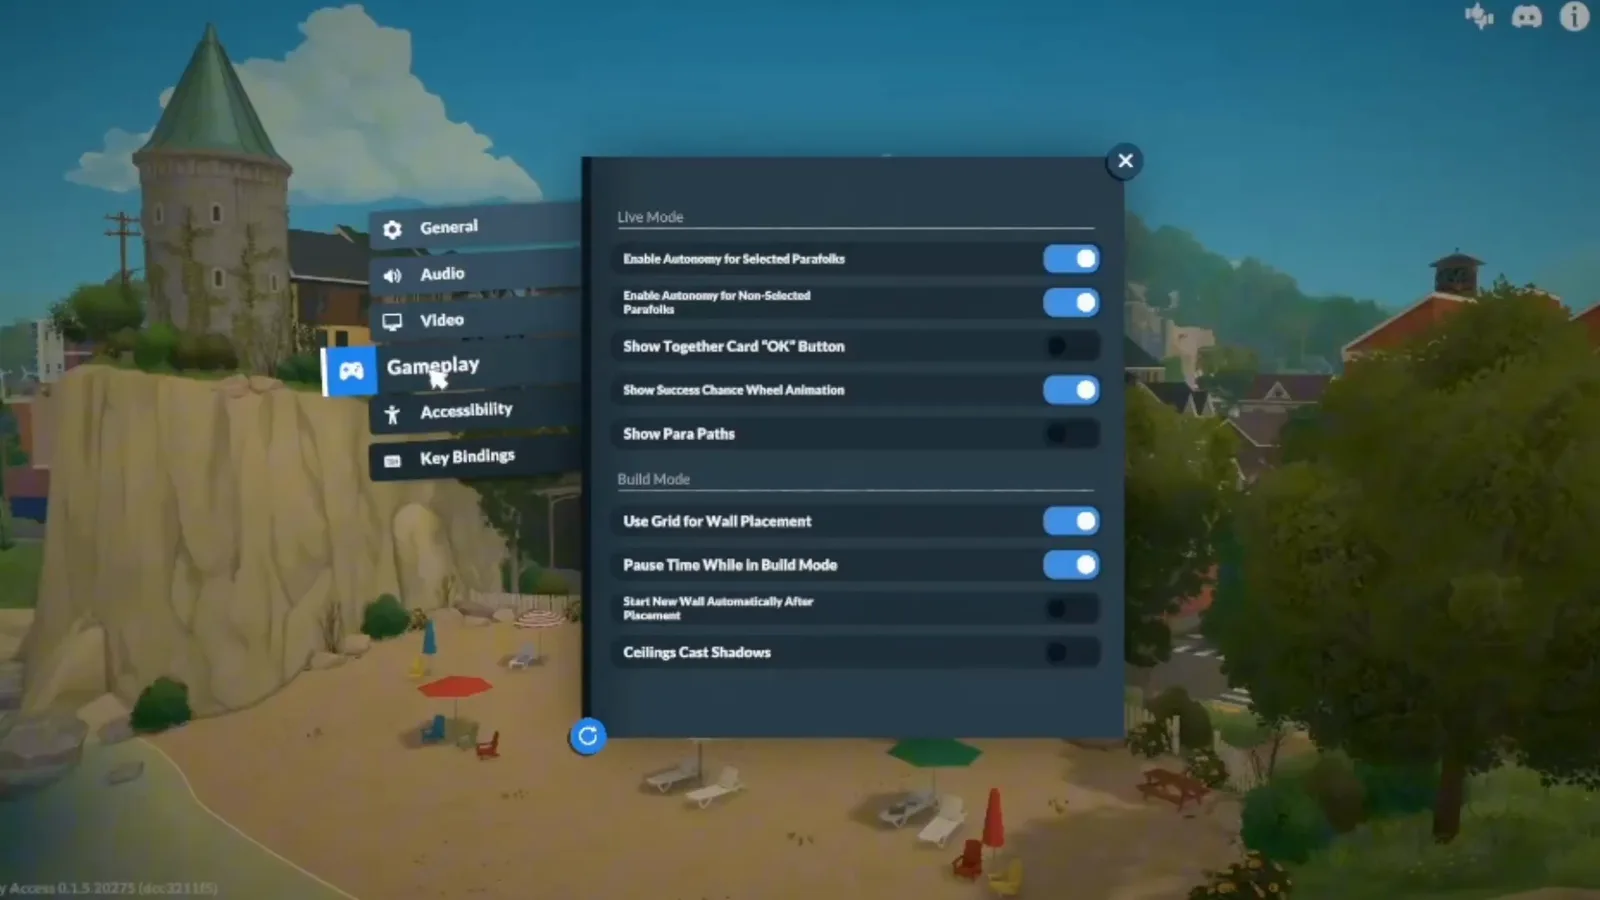
Autonomy on means your town keeps living even when you are not looking.Watch at 3:20
Display & quality
Display and quality, setting by setting
The Video tab is where Paralives decides between its soft, detailed look and your frame rate. Three steps cover every control on it, in the order experienced players adjust them.
- 4
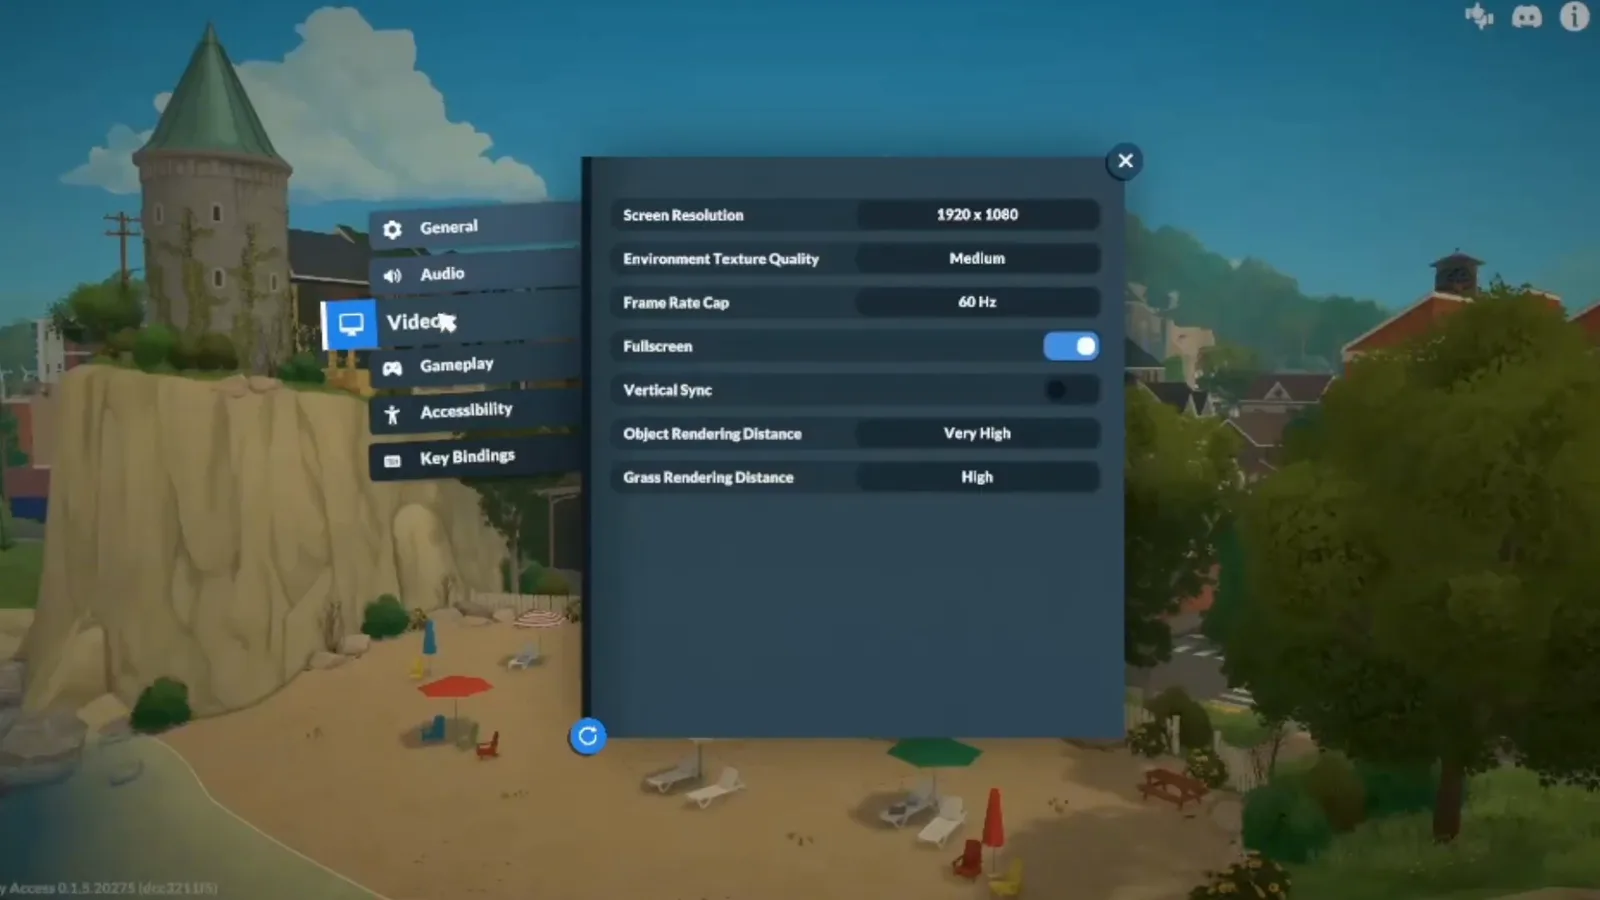
Video tab: fullscreen and native resolution
The Video tab matters most. Fullscreen feels the most immersive in a life sim, and Screen Resolution should match your monitor's native panel — going lower costs the game its soft detail and it never quite looks right again. Vertical Sync lives here too: leave it on unless you notice it adding input lag.
Fullscreen plus native resolution is the baseline every other setting builds on.Watch at 2:33 - 5
Environment Texture Quality: the big lever
Environment Texture Quality is the quickest way to change how heavy the game feels. High preserves the soft, detailed look that makes Paralives charming; if your system struggles, Medium makes a big difference without flattening the world. The dropdown only offers three steps — Low, Medium and High — so the decision stays simple.
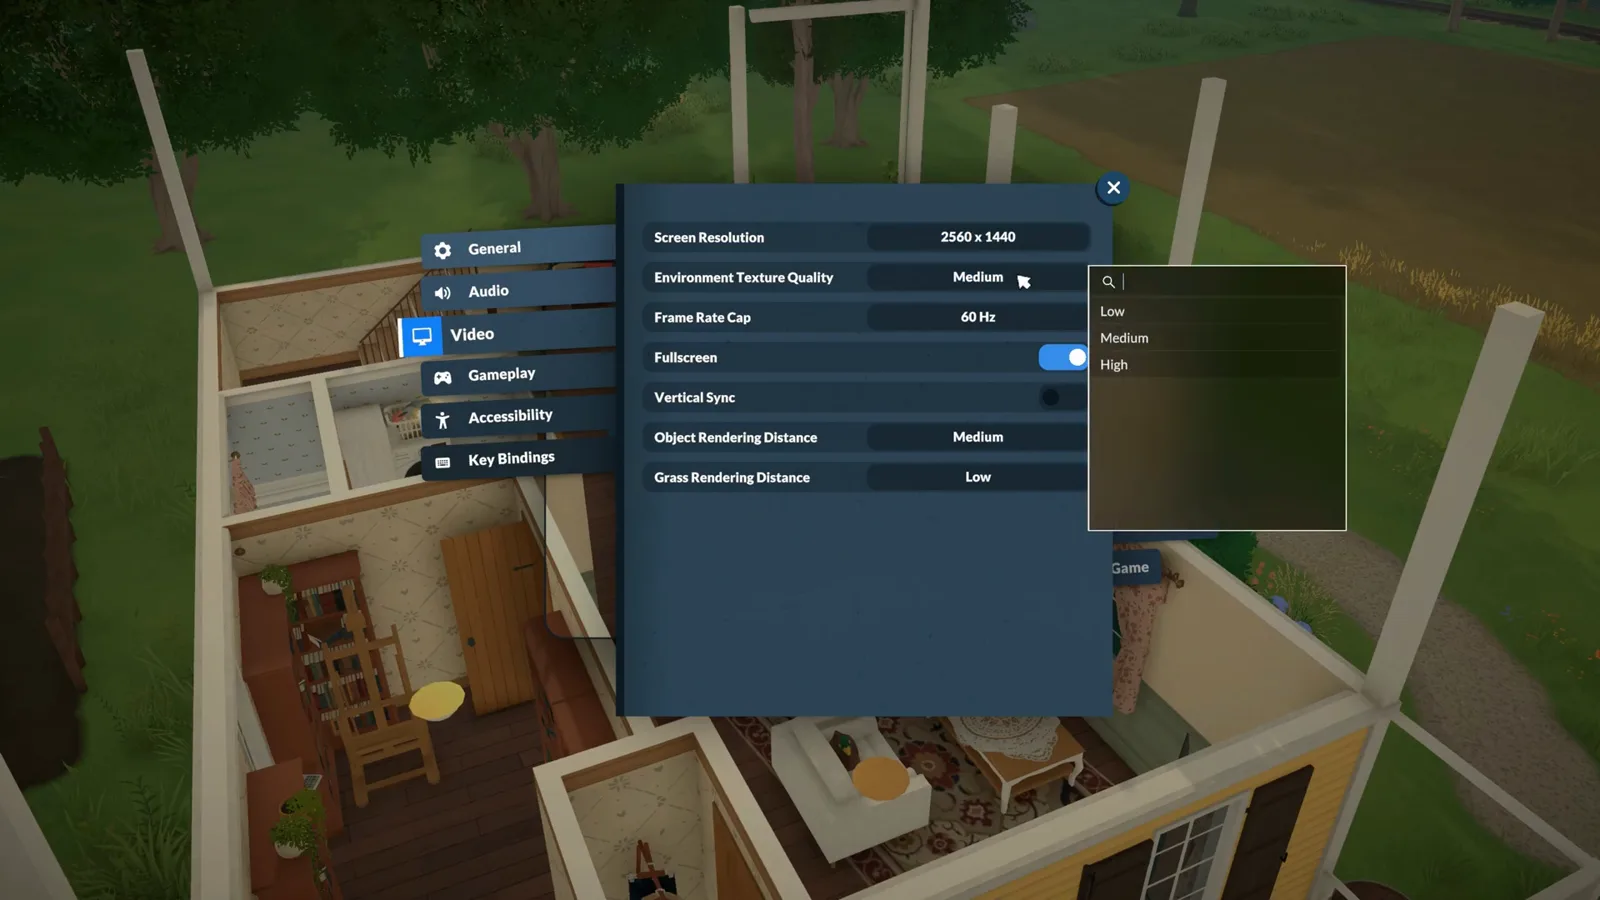
Three steps only: Low, Medium, High. Textures carry the look, so lower them last.Watch at 0:50 - 6
Object Rendering Distance: balance vs. frames
Object Rendering Distance decides how much of the world renders at once. Higher shows more detail across neighbouring lots; lower keeps things smooth. It is the first setting to trade away on a weak PC, because you rarely miss what it removes — bushes two lots over cost frames you could spend on textures.
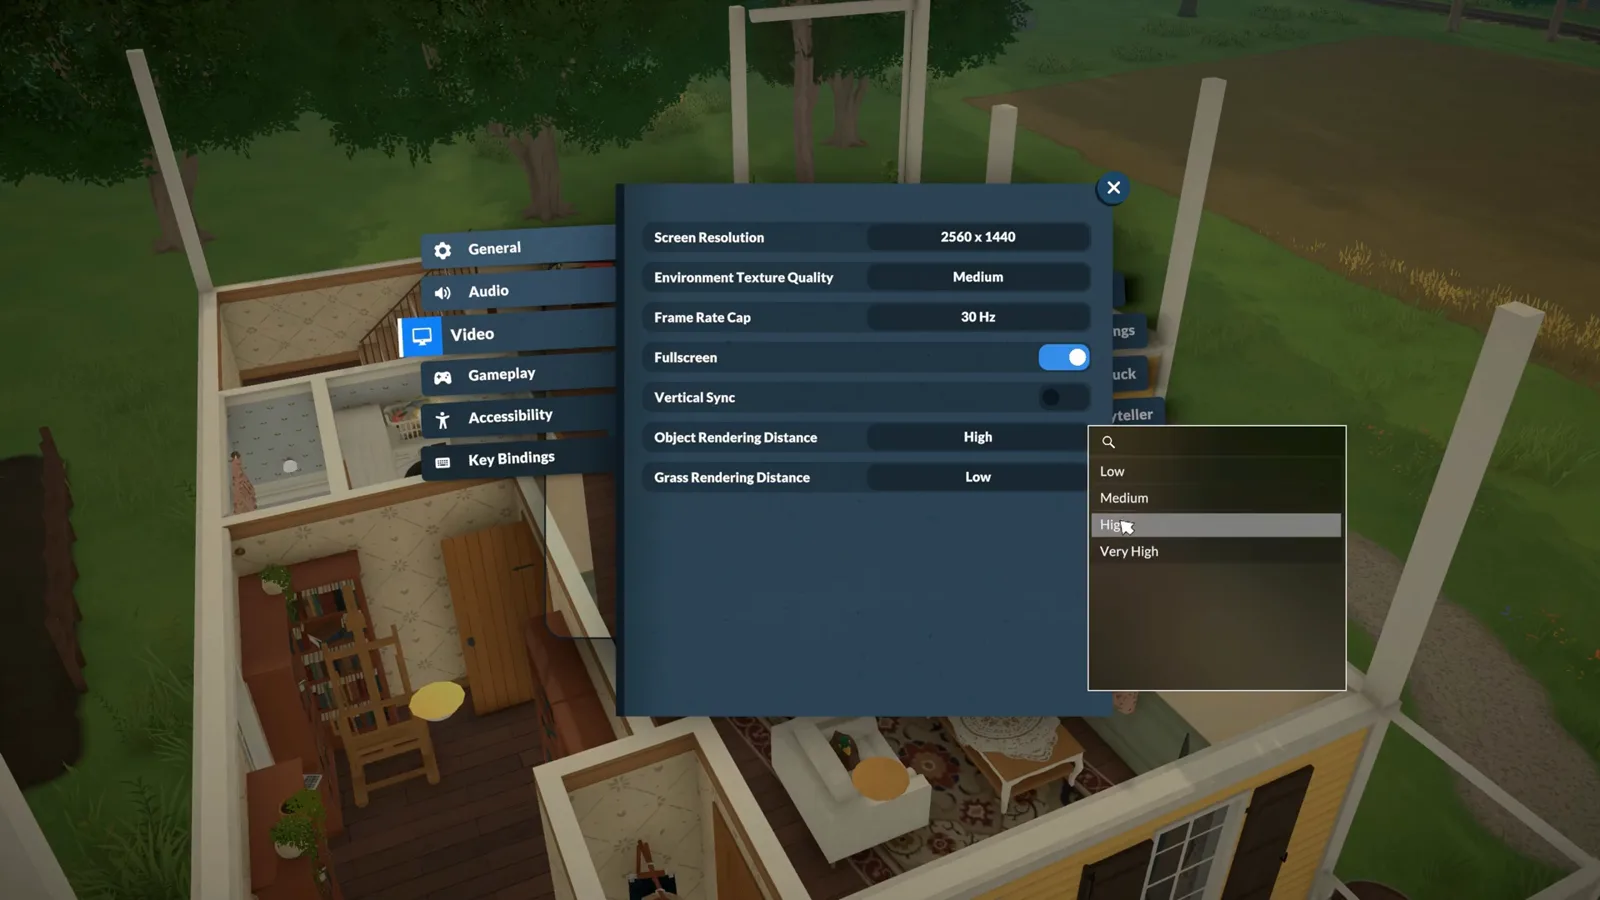
View distance is the classic performance dial: more world, or more frames.Watch at 1:10
Low end PC & Mac
The low end preset: what to drop first
Integrated graphics, an older laptop or an Apple Silicon Mac? This preset trades the settings you will not miss for a frame rate you can actually play on. The panel values below come straight from a second creator's machine, captured while demonstrating them.
- 7
Cap the frame rate at 60 Hz
The Frame Rate Cap dropdown runs in steps from 30 Hz upward. For a life simulation game, 60 Hz is the sweet spot — smooth without pushing the computer hard, because stability matters more than extremes. On a low end machine, capping at 30 Hz makes the game feel consistent instead of stuttering between loads.
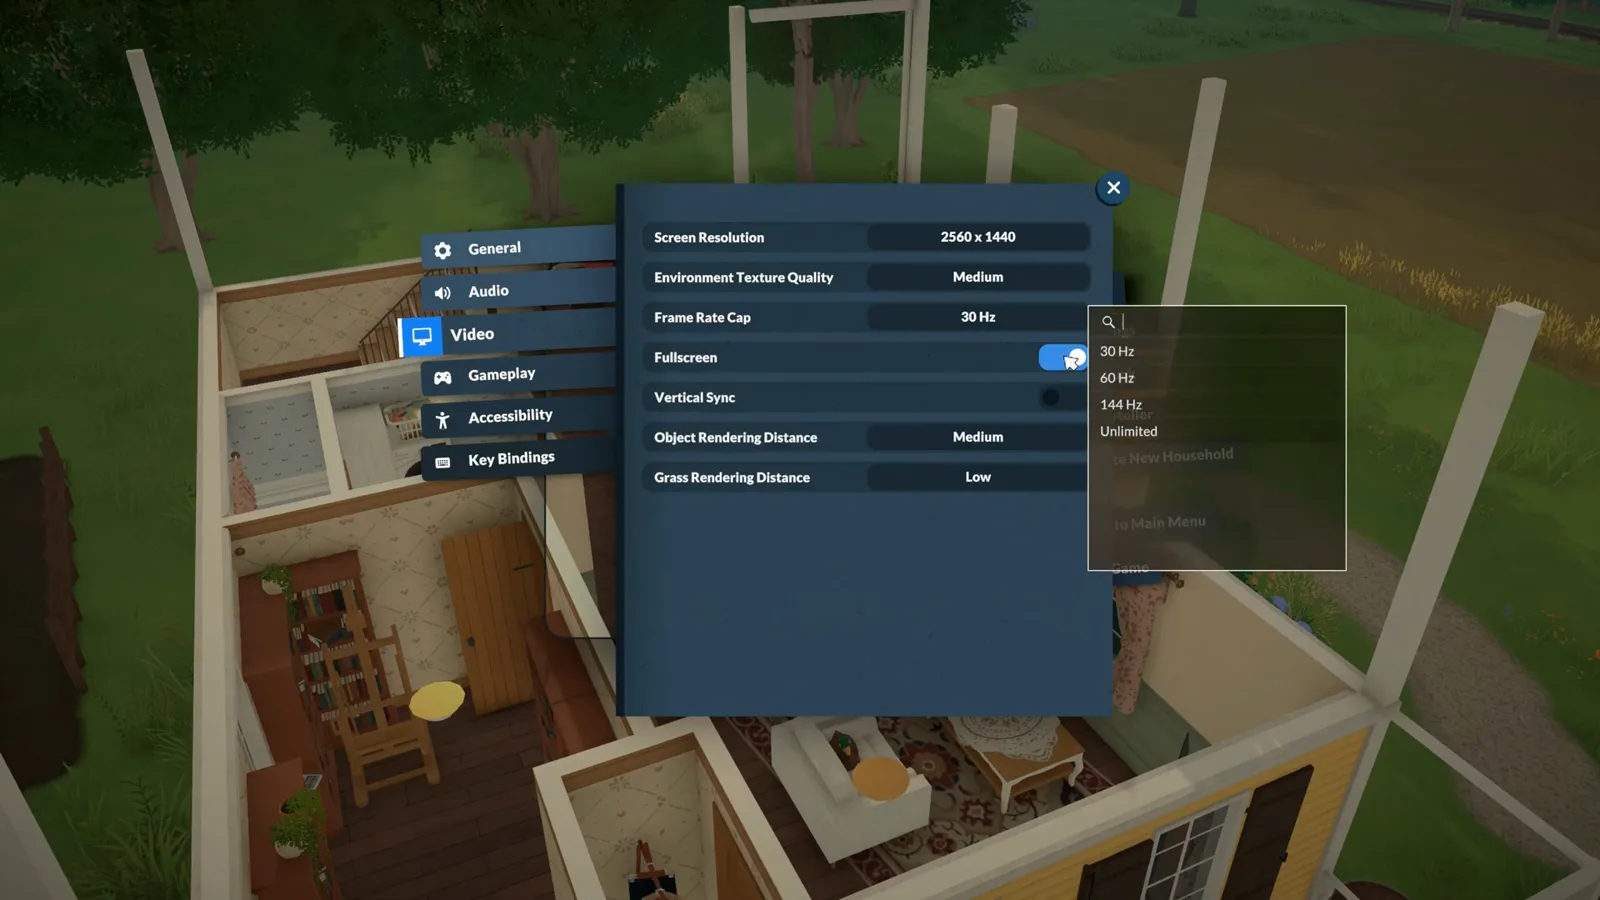
Pick the number your machine can hold — 60 for most, 30 for weaker hardware.Watch at 0:57 - 8
Grass Rendering Distance: the stealthy cost
Grass Rendering Distance is the setting most players overlook. Vegetation drawn across every lot is surprisingly demanding, and dropping it barely changes how your own house looks — only how far into the distance the lawn keeps growing. Together with Object Rendering Distance, this is where a low end PC gets its frames back.
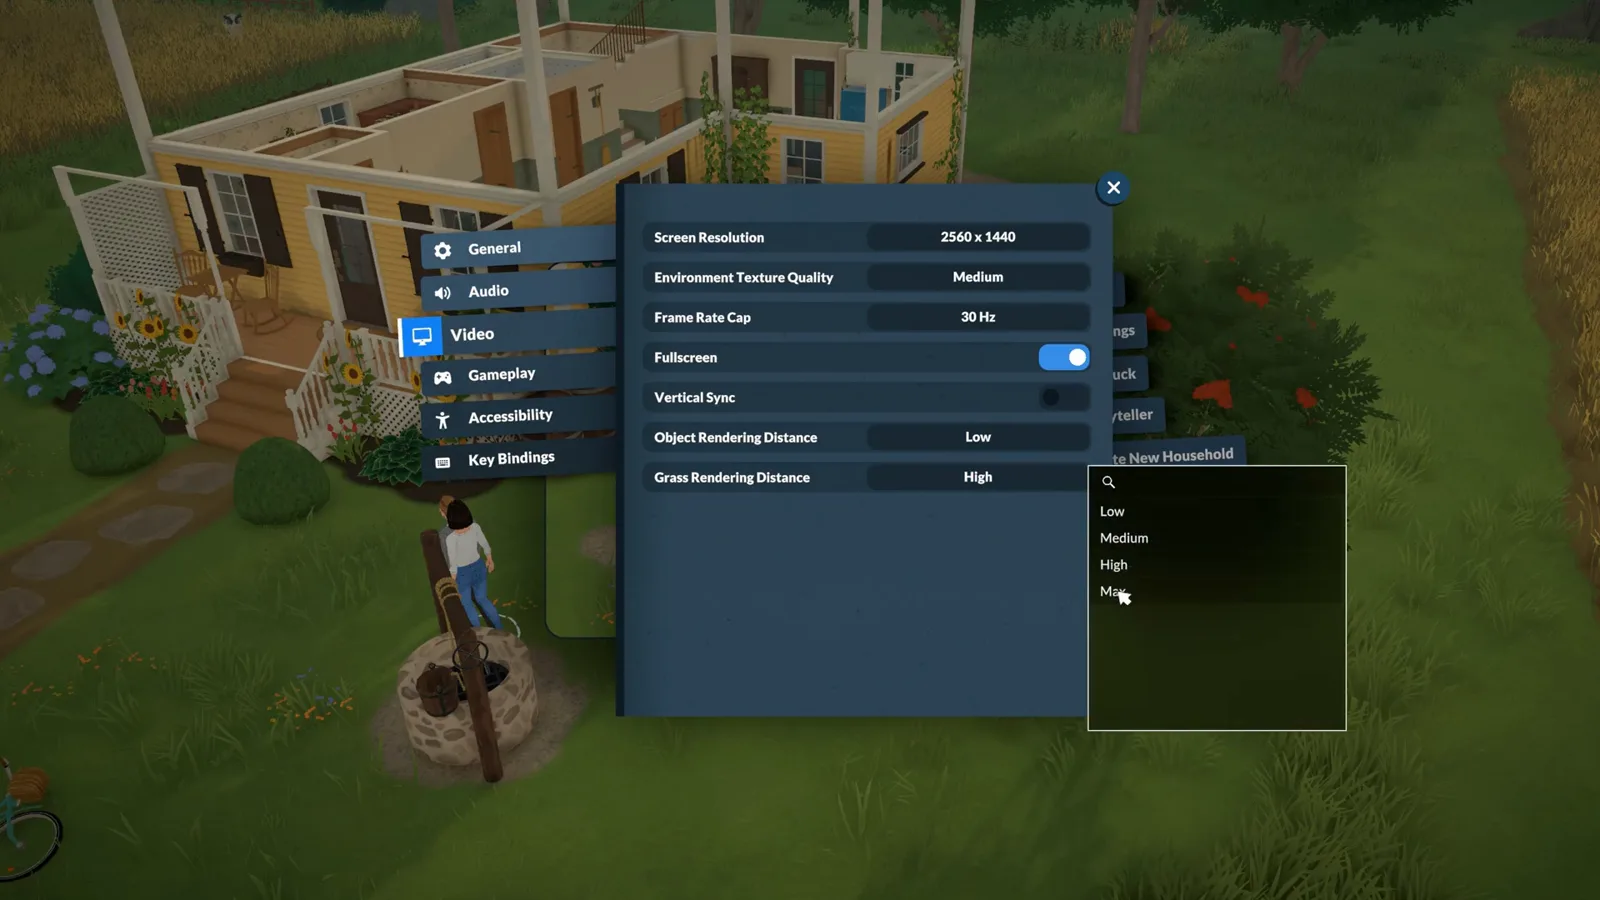
Grass runs one step further than objects — Max — and that extra step costs real frames.Watch at 1:33 - 9
The low end preset, in one screen
Here is the whole recipe in the order that matters: Frame Rate Cap 30 Hz, Environment Texture Quality Medium, Object Rendering Distance Low, Grass Rendering Distance Low — and the game still looks like Paralives. Apple Silicon Mac owners follow the same preset. If frames still sag afterwards, the console commands on our low FPS page squeeze out the rest, and Steam Deck players have their own tested setup.
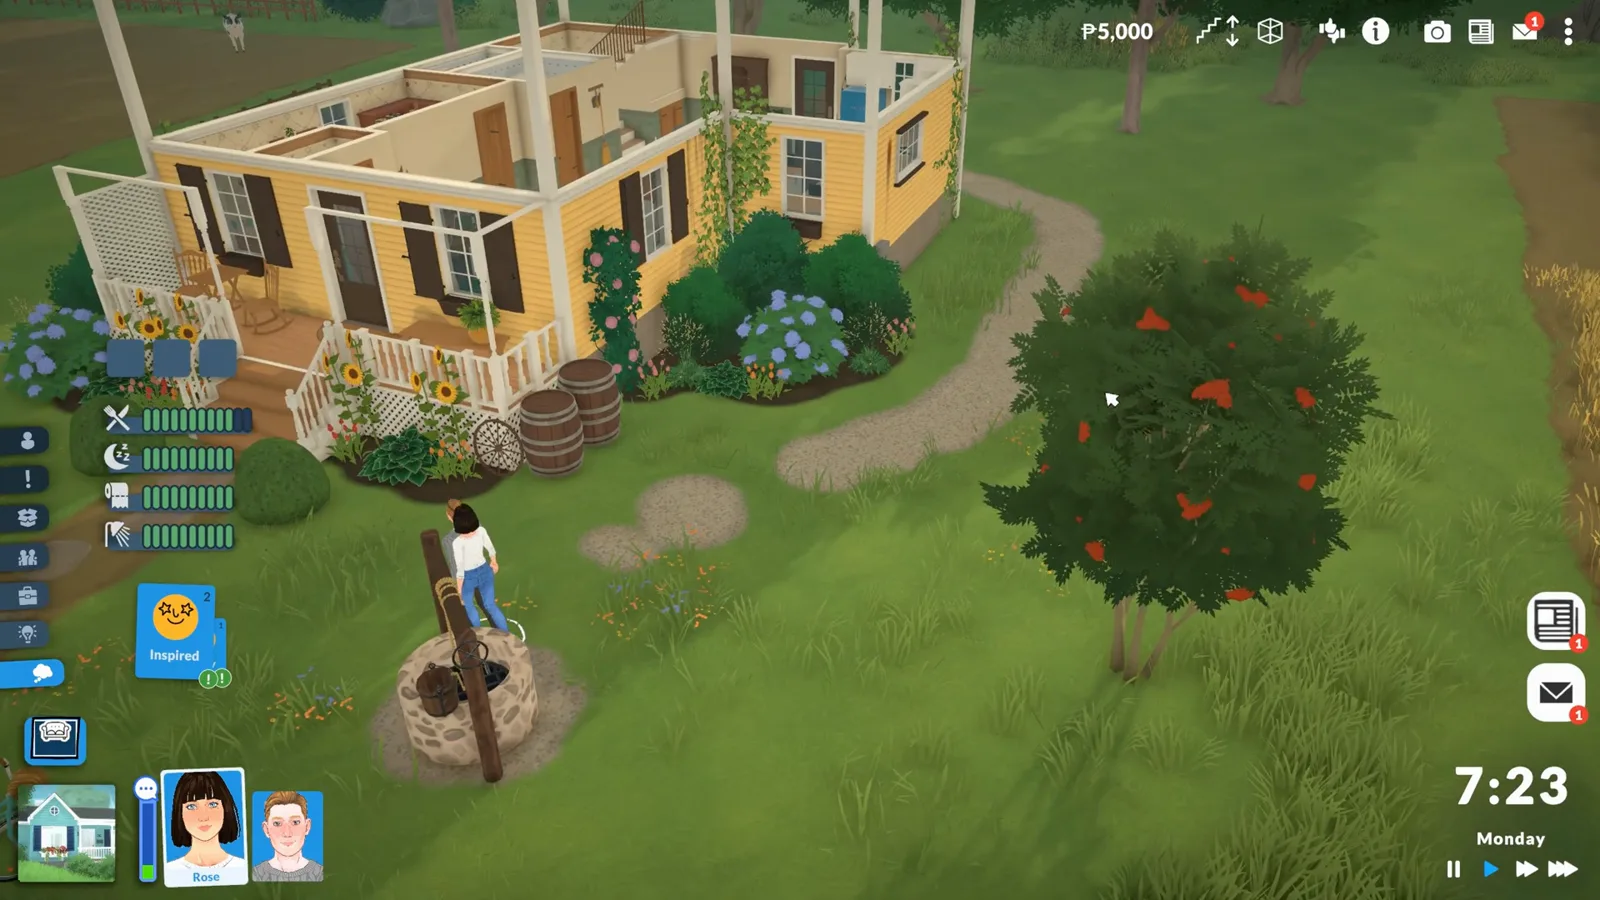
Medium textures, Low distances — and it still looks like the game on the store page.Watch at 1:25
Camera & controls
Camera feel and key bindings
The camera is the tool you touch every single second of Paralives. Two panels decide whether it fights you or flows — and both are quick to set once, then forget.
- 10
Camera sensitivity: slow it down a touch
The Camera section at the bottom of the General tab is the one people skip. If the camera feels too fast, lower Camera Move and Camera Rotation Sensitivity slightly — building and navigating get much easier when you zoom in and out all day. Enable Camera Edge Scrolling and the invert toggles live here too. Every default camera key is listed on our controls page.
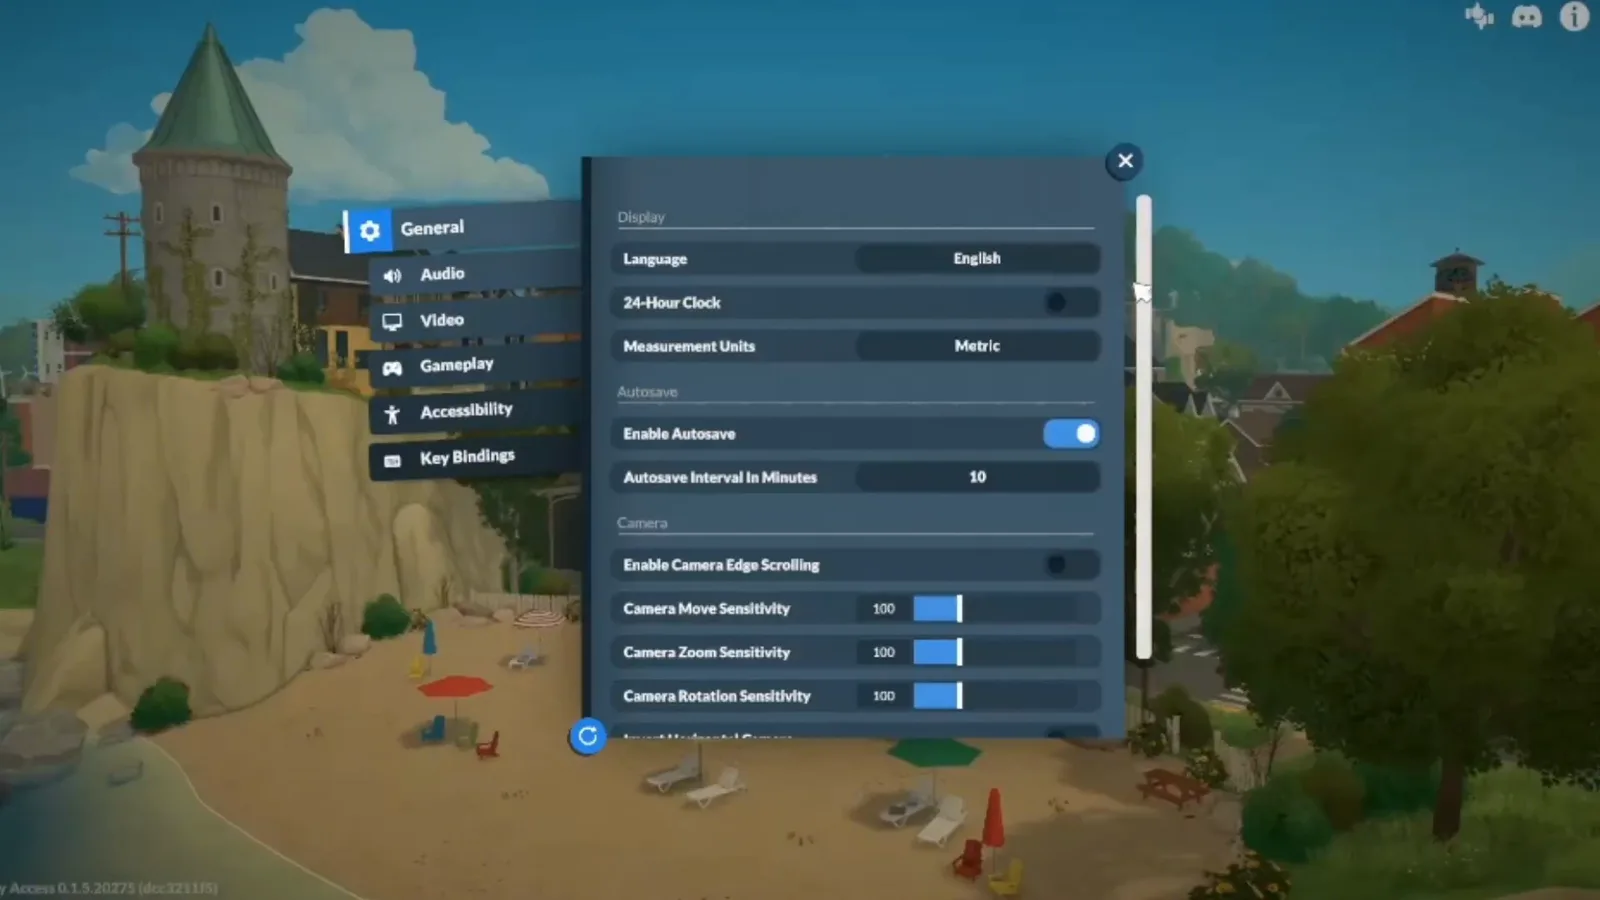
Sensitivity is personal — nudge it until the camera stops fighting you.Watch at 0:38 - 11
Key Bindings: defaults are fine, remapping is there
The Key Bindings tab lists every binding for camera, time and build tools, each one rebindable, with a Reset to Default button at the top. Both creators behind this guide leave the panel untouched at first — relearning controls mid-game creates confusion that is not worth it. Browse it once so you know it exists; the full annotated table lives on our controls page.
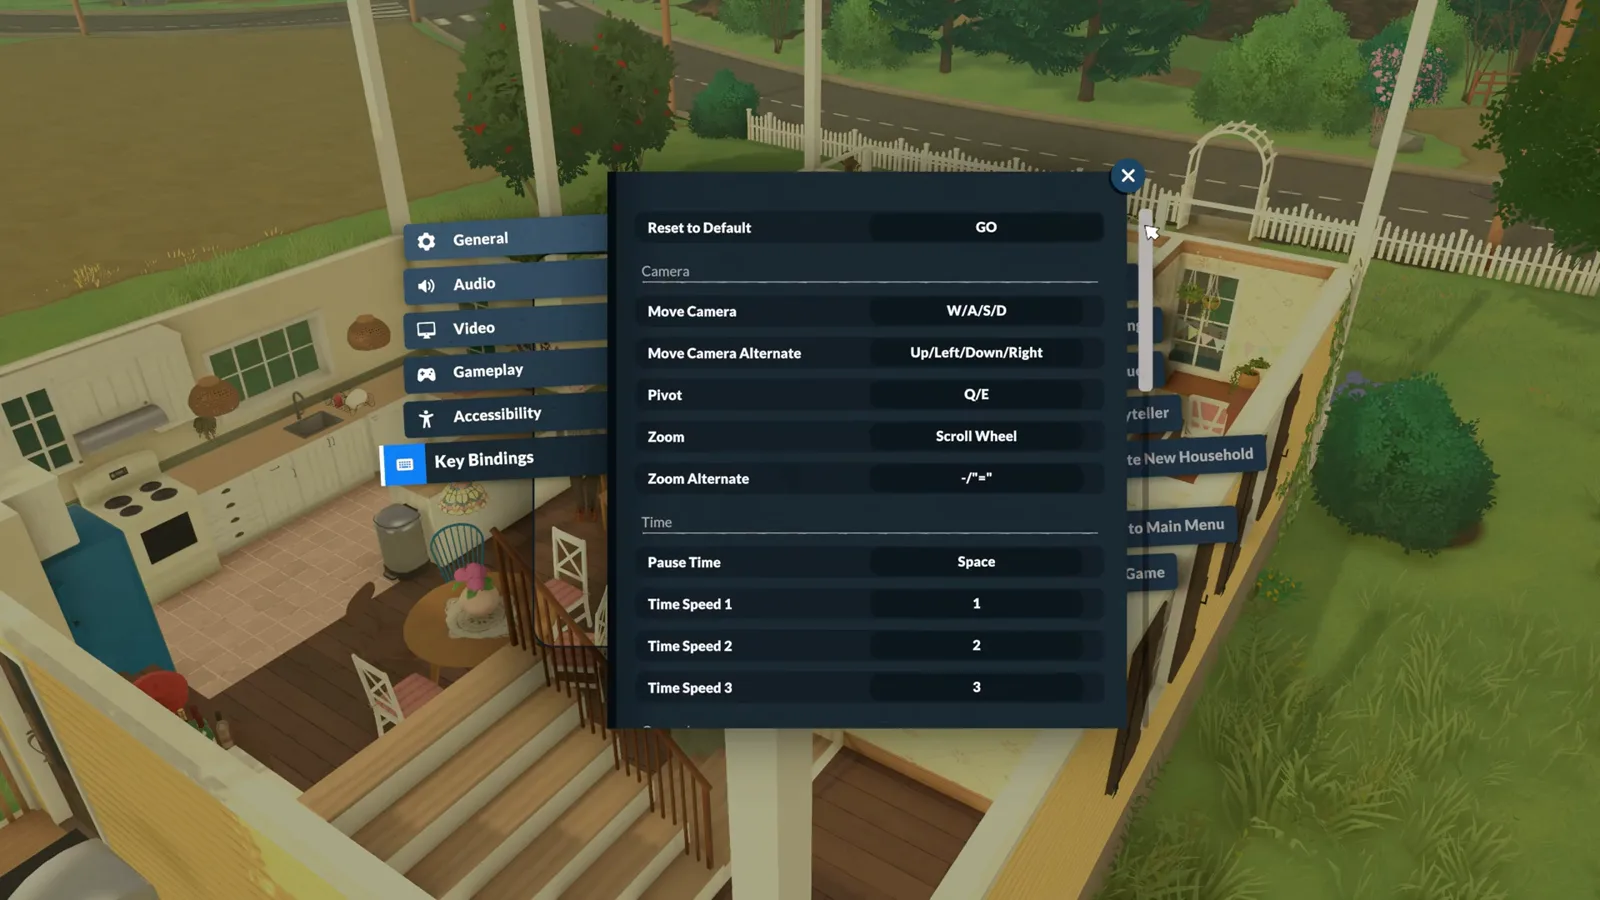
Every binding can be remapped — but there is no shame in leaving the defaults.Watch at 4:22
Audio & accessibility
Audio, accessibility and color filters
The last two panels are the personal ones — sound balance and comfort. They are also where Paralives is quietly generous: real colorblind support, a UI scale slider and camera comfort toggles that most players never find.
- 12
Audio: music down, ambience up
Five sliders: Master Volume, Music, Sound Effects, Voice Over and Ambient Sounds. Audio is pure preference, but one tweak works for almost everyone — pull Music down a notch so the small ambient sounds carry. Those background details make the world feel more alive than any soundtrack.
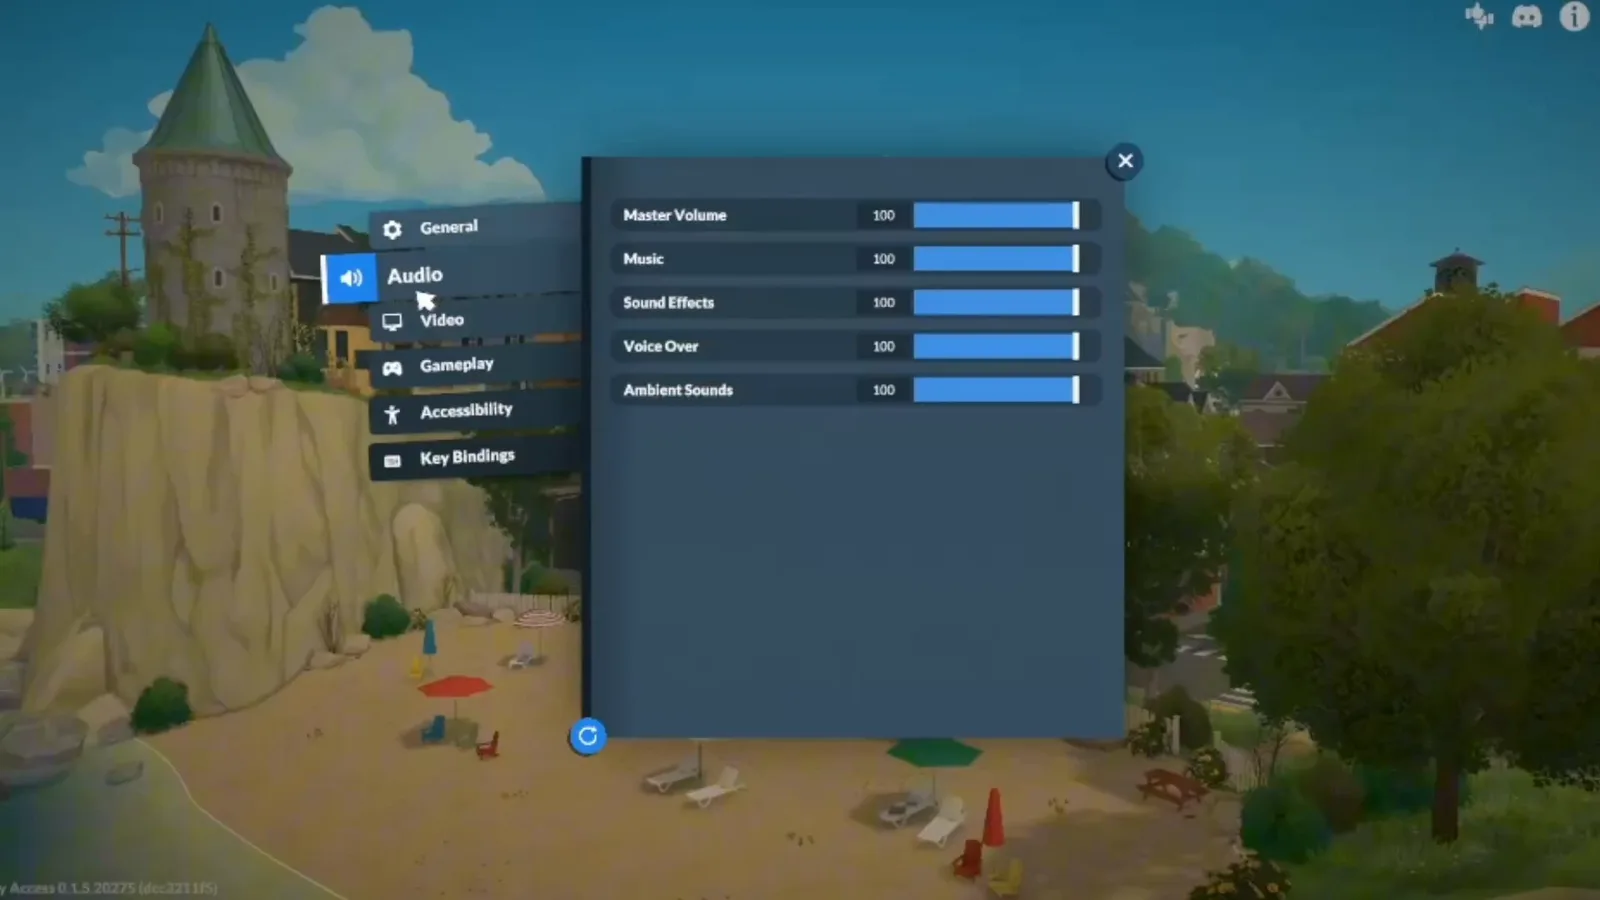
The one audio tweak worth making: music down, ambient sounds up.Watch at 1:48 - 13
Accessibility: UI scale and camera comfort
The Accessibility tab holds Interface Size for scaling the whole UI, Right-Click to Close Windows, Tooltip Delay, Camera Shake Intensity, Foliage Movement Intensity and the fade-out speed of objects blocking your view. If the default camera makes you motion-sick, this tab is the cure. If not, the defaults are genuinely fine — one of our two creators never touches it.
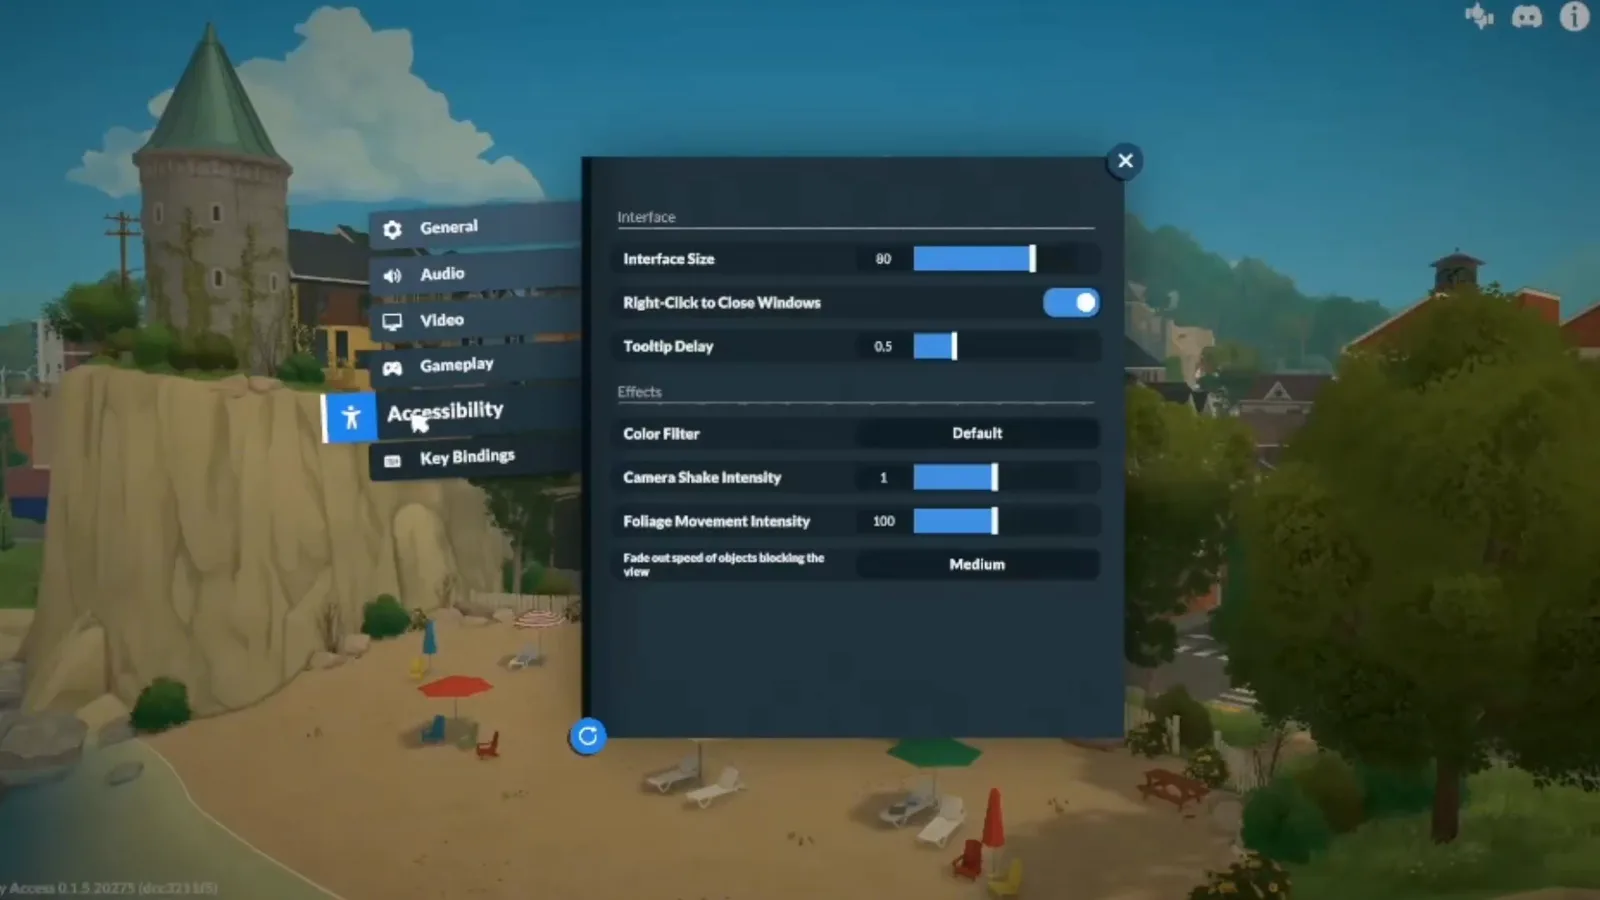
UI scale and camera shake — the two sliders most players wish they had found sooner.Watch at 4:15 - 14
Color Filter: more than colorblind modes
The Color Filter dropdown starts at Default and lists six Color Blindness presets, Black and White, and a shelf of playful looks beyond them. This is accessibility done generously — each filter re-tints the entire world the instant you pick it, no restart required.
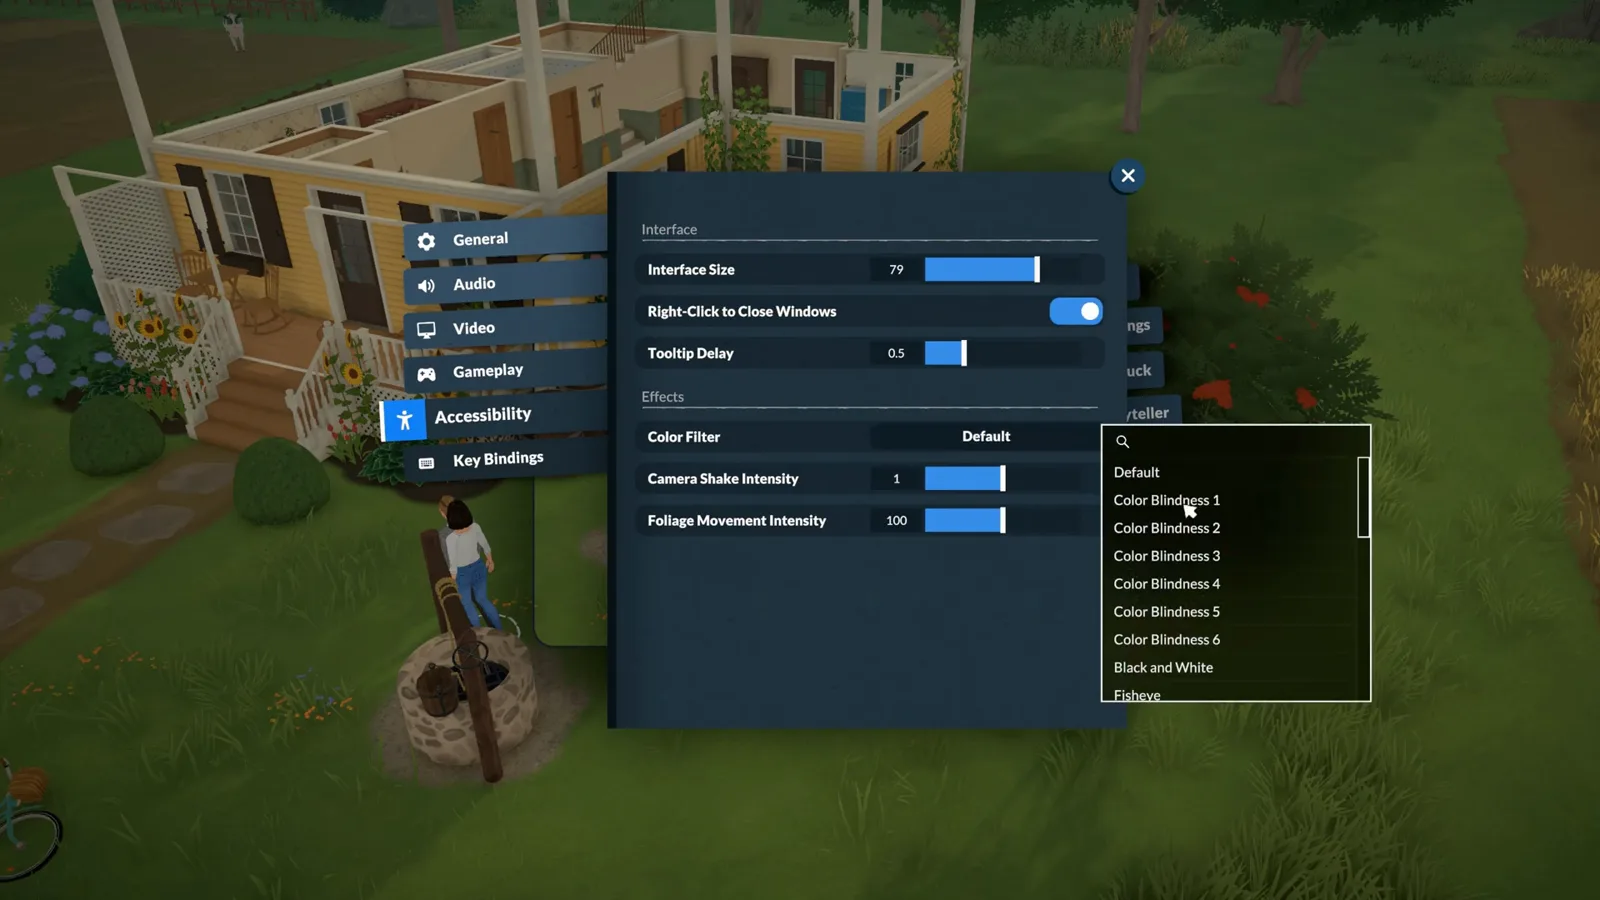
Color Blindness 1 through 6, Black and White and more — applied instantly.Watch at 2:03 - 15
What a filter actually looks like
With Black and White selected, the entire world re-renders in grayscale — the cottage, the garden, even the needs bars in the corner. It is a real accessibility feature rather than a photo filter, and switching back to Default is just as instant.
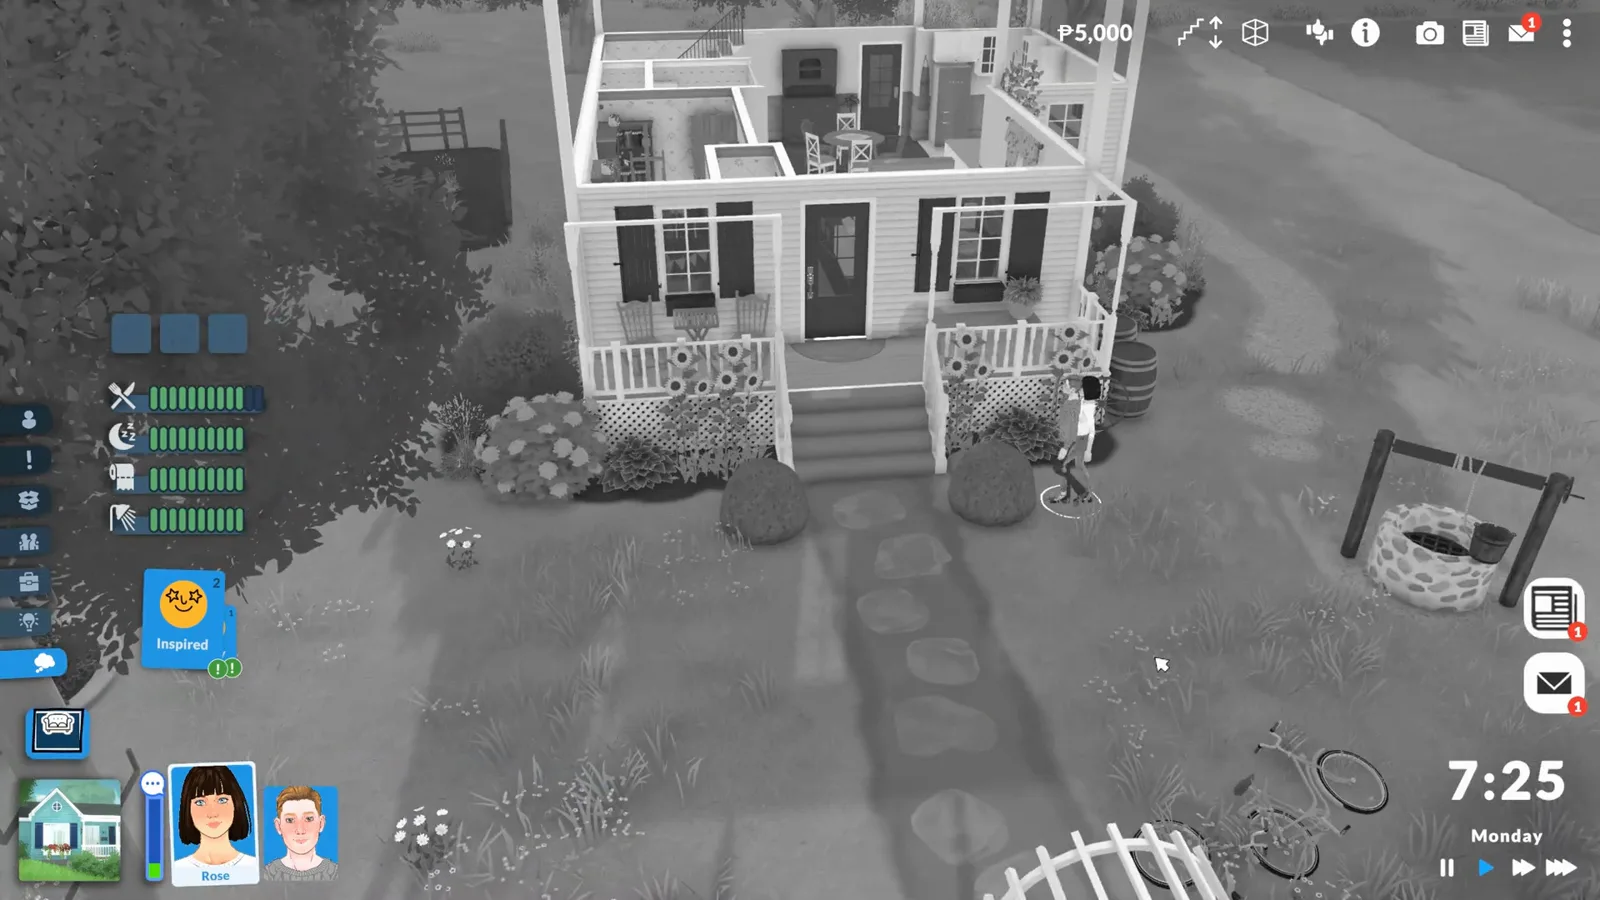
Black and White mode touches everything — needs bars included.Watch at 2:19
Best settings FAQ
- What are the best settings for Paralives?
- Fullscreen at your monitor's native resolution, a 60 Hz frame rate cap, Environment Texture Quality as high as your PC allows, and Object plus Grass Rendering Distance at High or Very High on a strong machine. Nudge camera sensitivity down one notch if building feels twitchy, and keep tutorials and tooltips on for your first days. Every panel is walked through above.
- What are the best Paralives settings for a low-end PC?
- Frame Rate Cap 30 Hz, Environment Texture Quality Medium, Object Rendering Distance Low and Grass Rendering Distance Low — the preset shown above keeps the game looking like Paralives while freeing up most of the headroom a weak machine needs. Textures are the last thing you lower. Mac players on Apple Silicon use the same preset.
- How do I stop Paralives from lagging?
- Lower the frame rate cap first, then the rendering distances, then texture quality — in that order. If the game still stutters after the low end preset, the low FPS fixes page collects the checklist and console commands that reclaim the rest.
- Does Paralives run on Steam Deck?
- Yes, with the settings tuned down. The low end preset above is the right starting point on Deck; our Steam Deck page has the full tested setup and what Valve's Unsupported badge actually means here.
Fix the hardware, or learn the keys
Low FPS fixes
The full desktop performance checklist, plus the console commands that squeeze out the last frames when settings alone are not enough.
Steam Deck settings
The tested Deck combination and what Valve's Unsupported badge means — built from the same low end preset as above.
Paralives on Mac
Apple Silicon model-by-model verdicts, and how the low end preset maps onto M-series chips.
Controls & shortcuts
Every default binding with the macOS column — the annotated version of the Key Bindings panel above.
Keep reading
Platforms & console status
PS5, Xbox, Switch, Steam Deck and controller support — the per-platform verdicts in one place.
Beginner's guide
The 16-step first-hour walkthrough — pair it with these settings on a fresh save.
System requirements
Official minimum and recommended specs, so you know whether your PC clears the minimum or the recommended specs.
Should I buy Paralives?
What Early Access includes today — and whether your hardware is the deciding factor.