
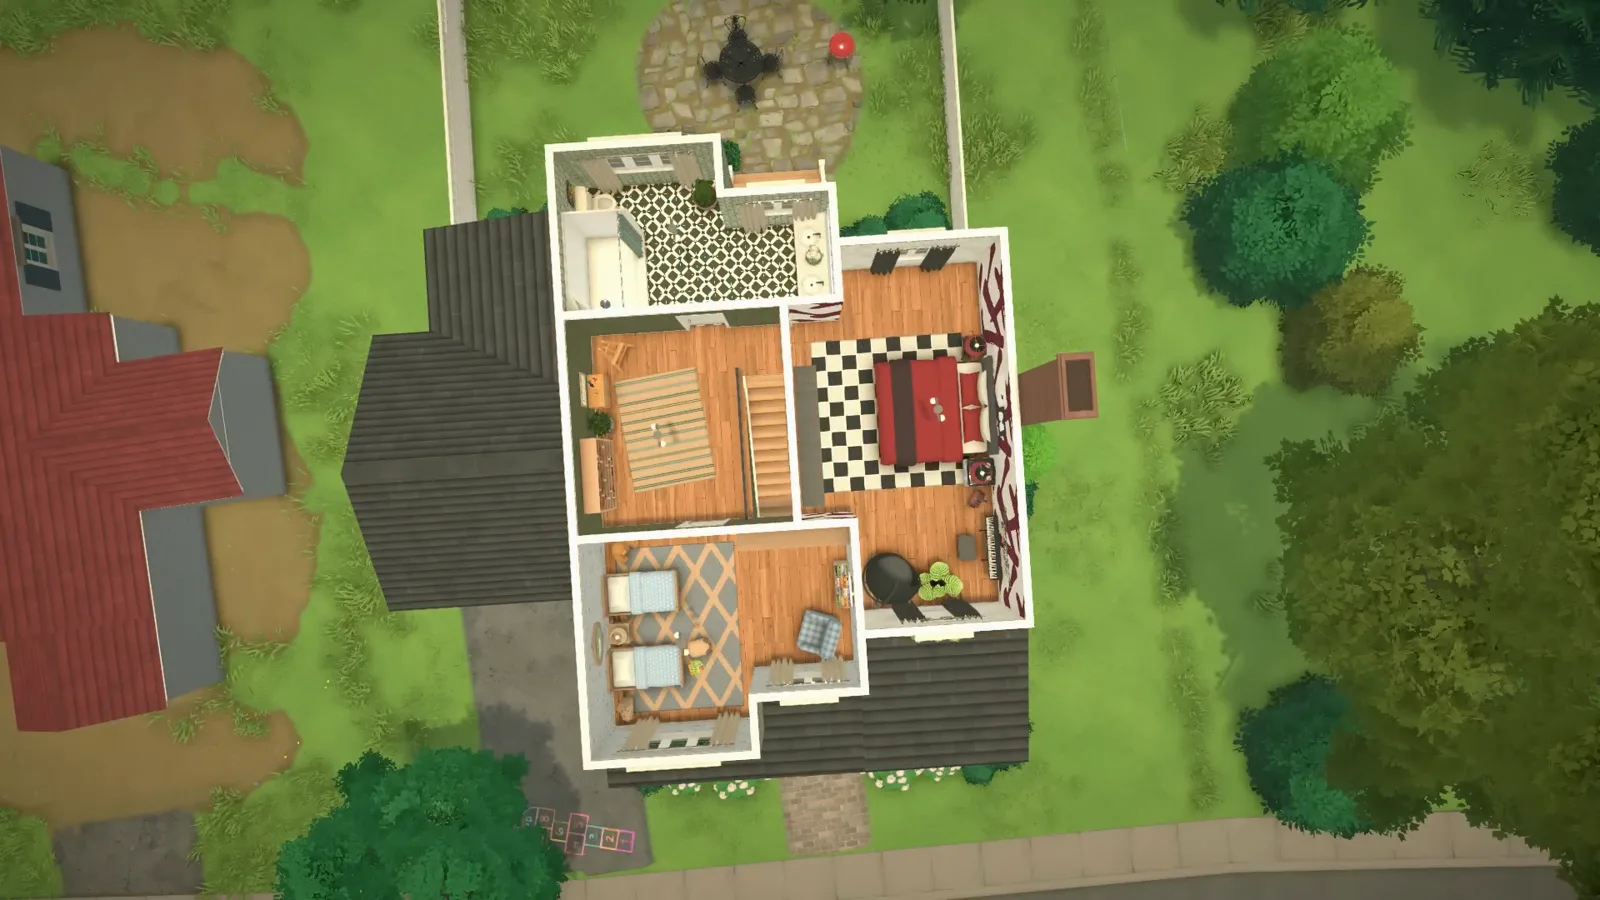
The short version
Everything below is demonstrated in Paralives 0.1.8b in one continuous speed build and was verified frame by frame in 2026. This is a program build, not a budget build: the goal is a house any family could move into — and every technique here transfers to whatever you build next.
- Three bedrooms, two bathrooms: the primary downstairs, two kids' rooms and a second bathroom upstairs.
- There is no foundation button — draw the floor with the room separator tool, then drag the room up by its height arrow.
- Roofing is the hardest part, and the roof catalogue itself warns that free-form roof placement is Early Access.
- Stairs misbehave: they vanished and punched a floor hole in this build — replace them, don't nudge them.
- One white window with black shutters repeated across the facade, brick below and green siding above is the whole suburban look.
- Backyards stay simple until the game grows outdoor activities: barbecue, table and chairs, one tree, tall grass.
Steps 1–4
Draw the shell, then wrestle the roof
The suburban silhouette is a boring rectangle with a front bump-out, a porch across the street side and roof planes that meet the walls cleanly. Make those four decisions early and everything afterwards is decoration.
- 1
Draw the ground floor as one boring rectangle
Start in wall placement mode and draw the main block, then a smaller bump-out where the front door will sit. The shell here is an L-shape with a wood floor inside — plain on purpose, because the suburban character comes from the roof, the porch and the paint rather than the footprint.
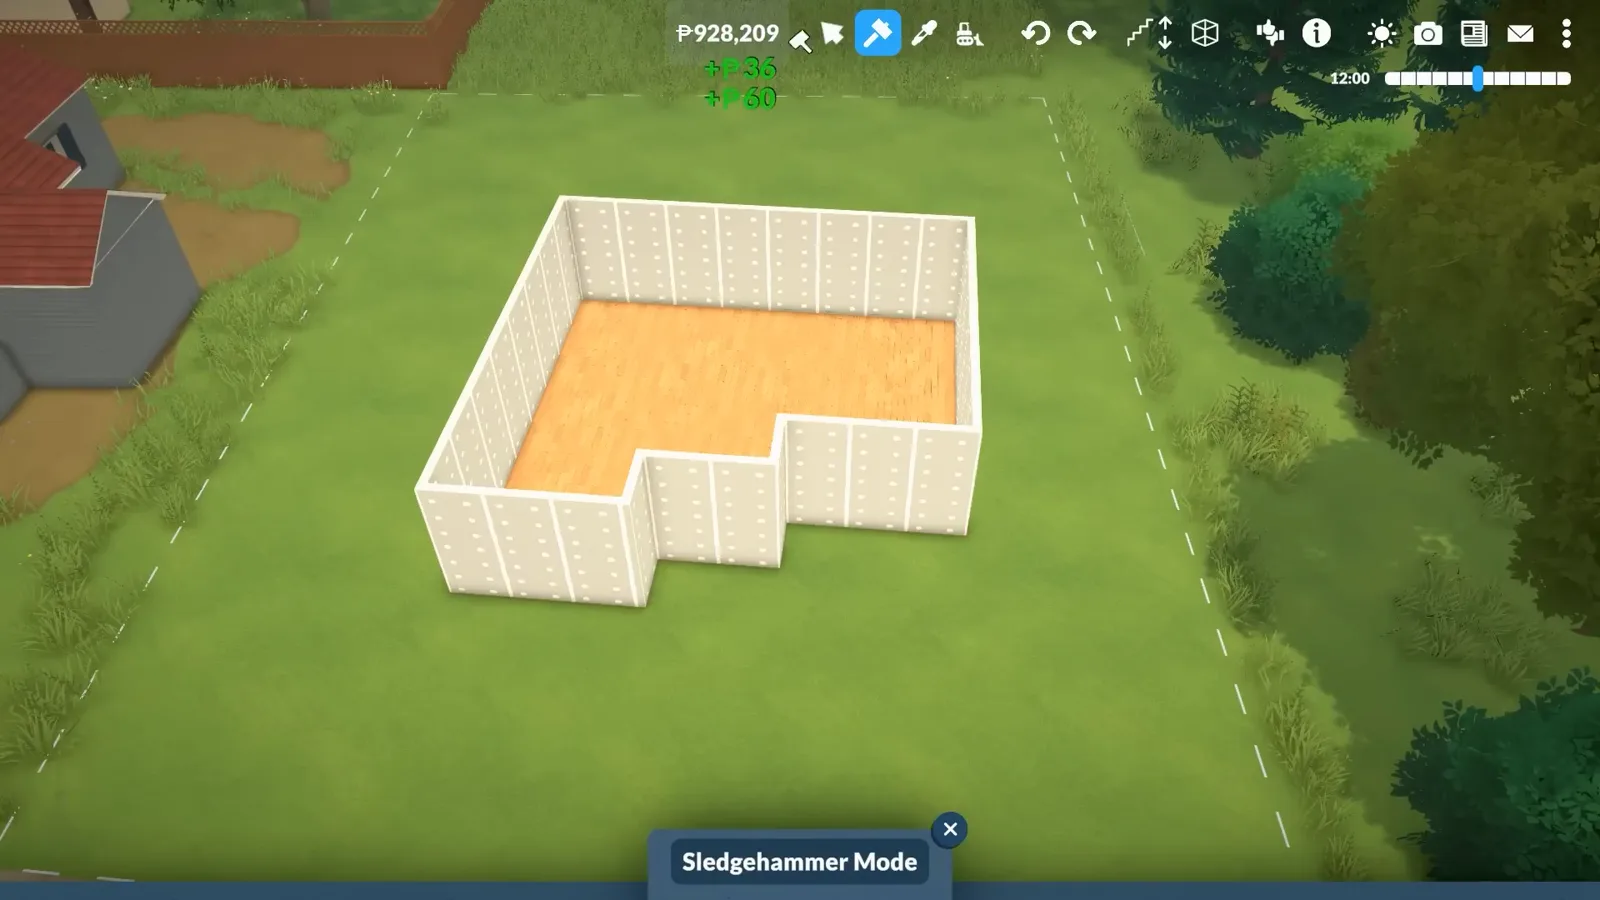
The footprint is plain on purpose — character comes later.Watch at 0:18 - 2
Roof the porch from the roof catalogue
Pick roof pieces from the catalogue and stretch them across the porch until the edges meet the walls. Note the catalogue's own Early Access warning: placing roof blocks free-form is still rough, which is why the narrator calls roofing the hardest part of the build. Keep roof planes simple while you can still see the walls.
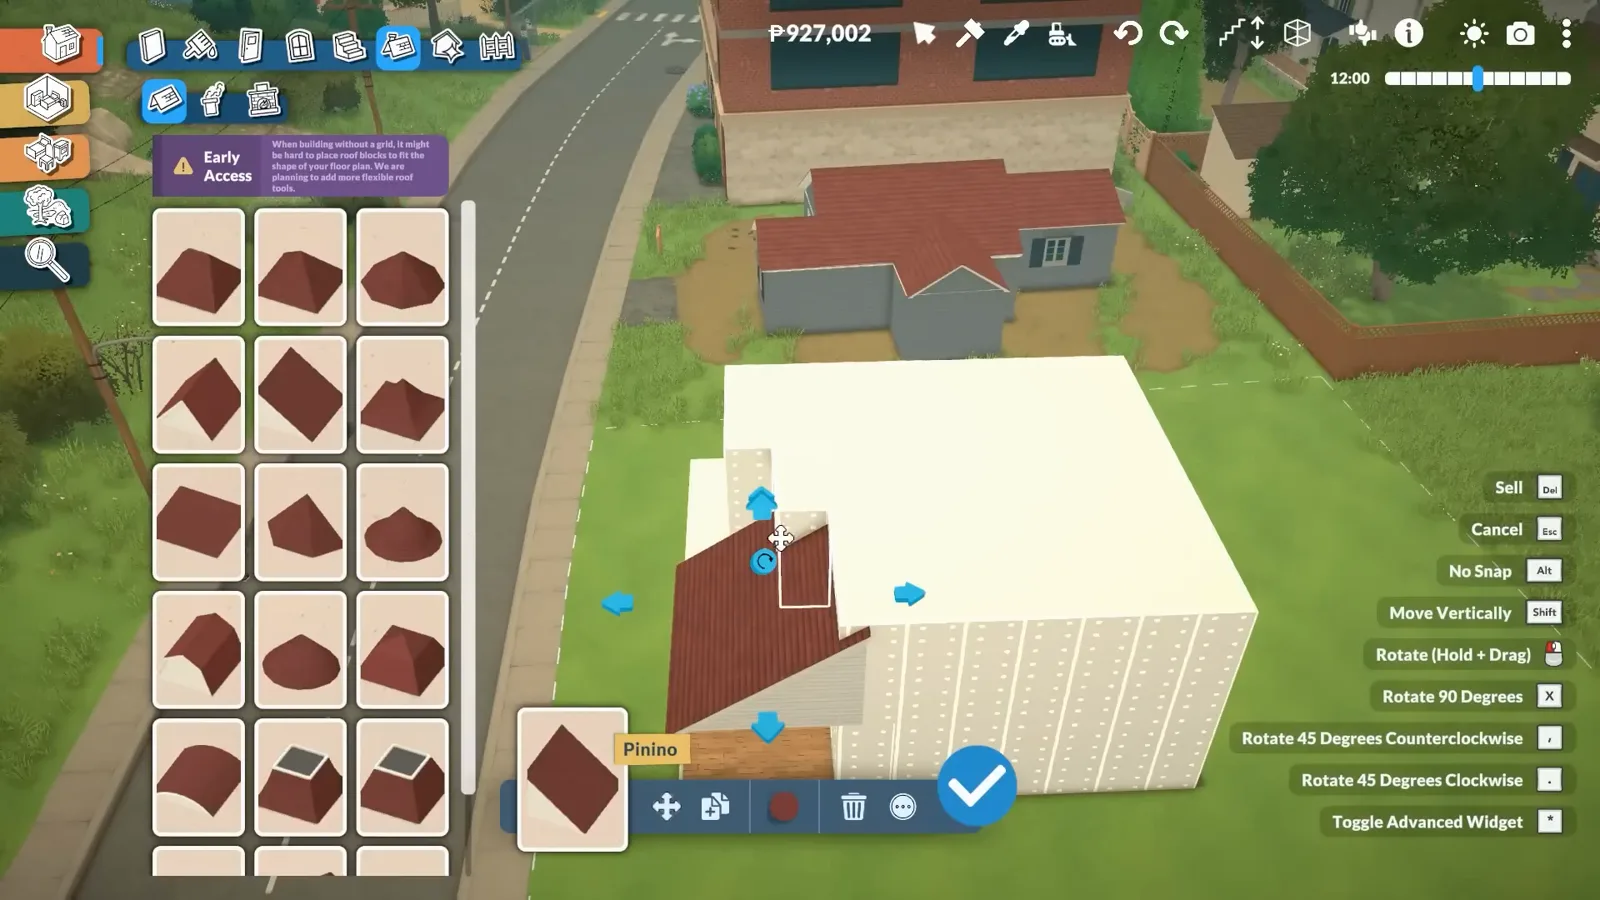
A Pinino piece going down; the catalogue admits roof tools are Early Access.Watch at 0:45 - 3
Drop a chimney over the future living room
Chimneys come in their own catalogue — brick, stucco, metal flues — and they free-place rather than snap, so put one above the wall you plan to make the living room and raise it to clear the future roof line. Repaint it once the siding is chosen so it blends in.
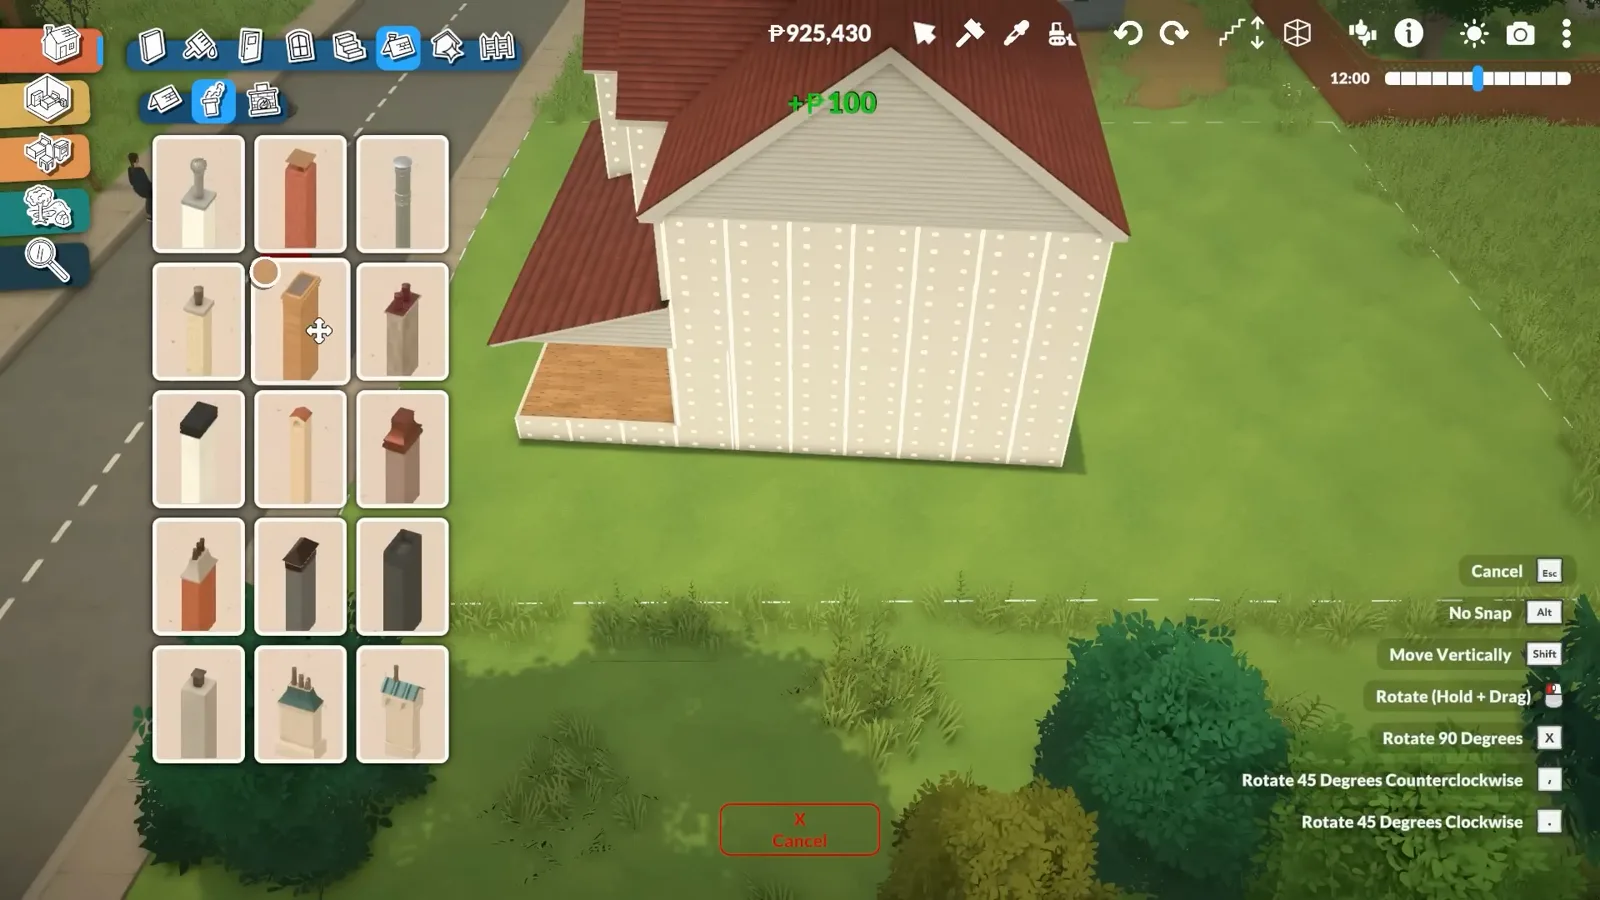
Free-placed, not snapped — raise it now, repaint it after the siding.Watch at 1:40 - 4
Split the materials: shingles, porch metal, brick, siding
In roof painting mode, take the big planes to a dark shingle swatch and leave the porch roof in red metal. Then split the walls: brick on the ground floor, green lap siding above. That three-material split is what turns a plain two-story box into a suburban house.
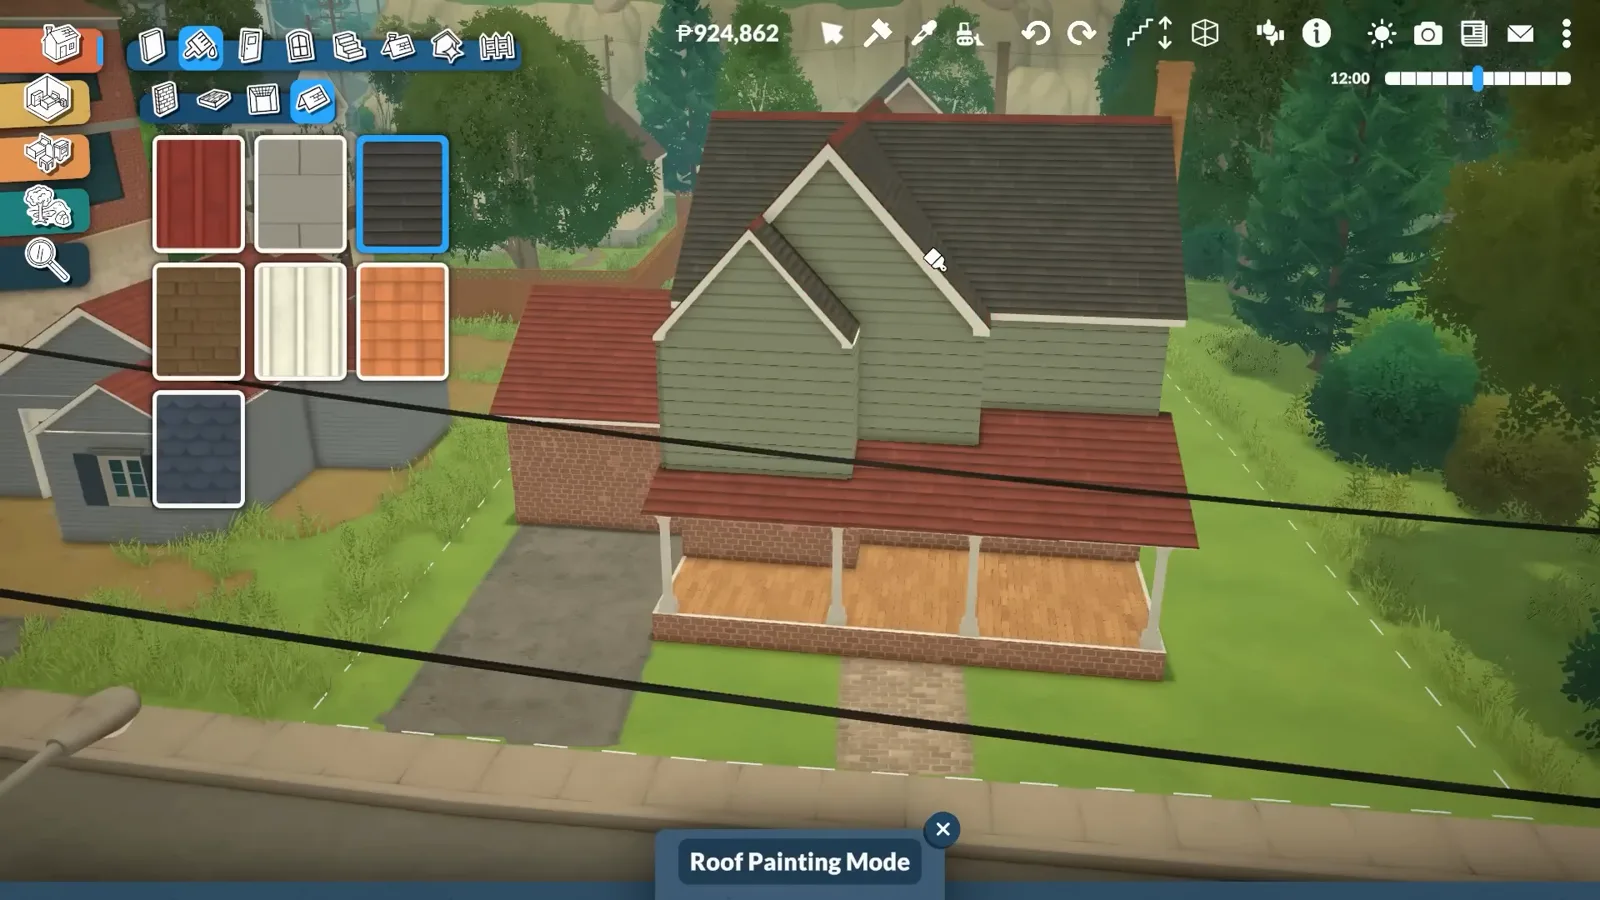
Dark shingles up top, red metal on the porch, brick and green siding below.Watch at 2:48
Steps 5–8
Curb appeal: windows, driveway, front yard and back
A suburban house is judged from the street. One window style repeated, a painted driveway, round shrubs and a chalk hopscotch do more for the look than any amount of extra roof geometry.
- 5
Repeat one window: white frame, black shutters, flower box
The whole facade runs on a single catalogue window — the Oidli, white with black shutters and a flower box — repeated across the front and stretched slightly larger for the gable. Repeating one window is the cheapest way to make a facade look intentional.
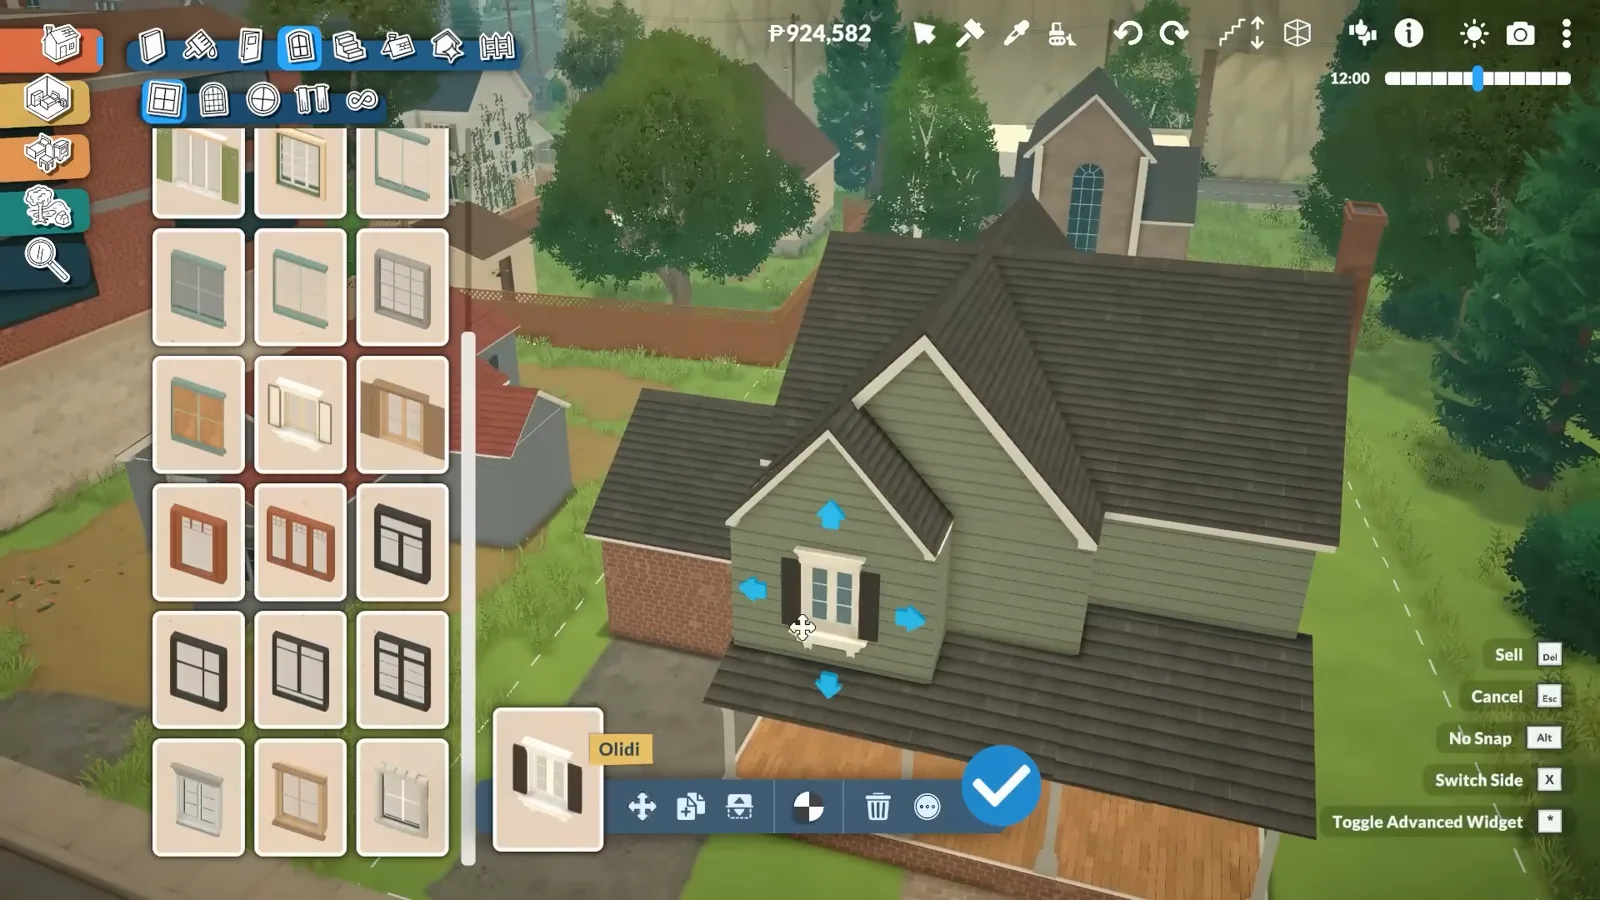
Blue arrows stretch the Oidli to gable size; everywhere else it stays default.Watch at 3:08 - 6
Paint the driveway and path with terrain tools
Terrain paint has no opacity slider — every stroke lands at full strength — and the grass textures are three-dimensional, which is why the driveway and the walkway to the porch read almost like geometry. The same aerial shows the wall angle badges: walls snap at 90 degrees, and the shortcut list shows how to break the snap when you need to.
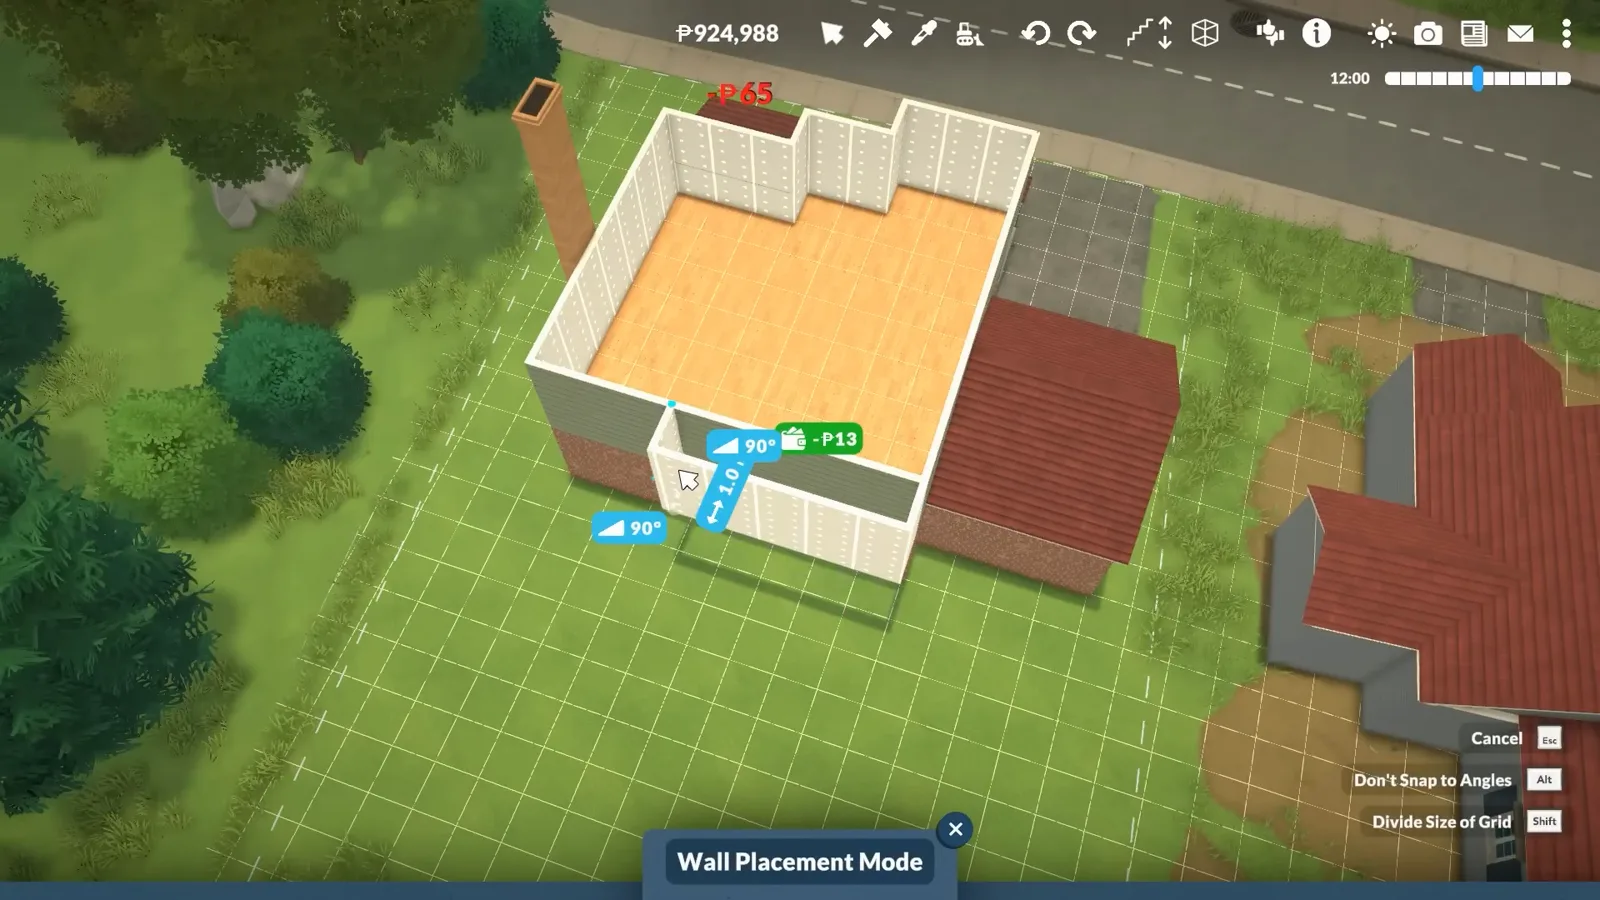
All-or-nothing terrain paint, 3D grass — and 90-degree wall snapping in the same frame.Watch at 2:28 - 7
Round shrubs out front — plus a chalk hopscotch
Ring the walkway with round shrubs from the plant catalogue and leave the lot edges overgrown. The hopscotch grid on the driveway was a last-minute yes in the source build, and it is exactly the kind of one-item detail that makes a lawn read as a family's.
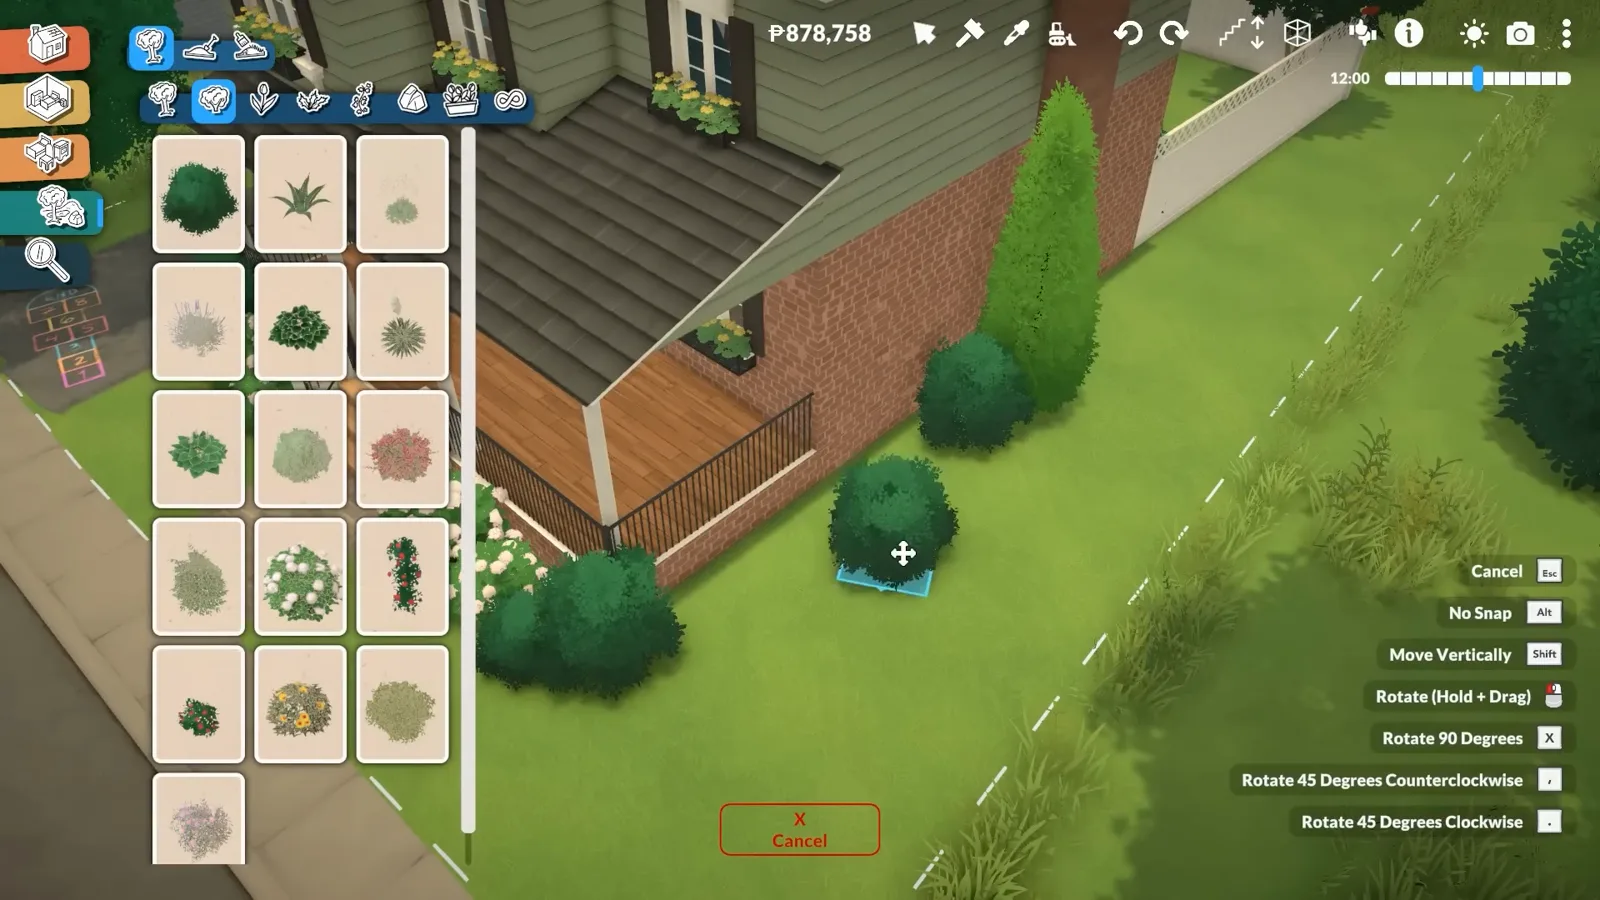
One shrub being placed; the hopscotch stayed in.Watch at 17:40 - 8
Keep the backyard to patio, barbecue, tree, tall grass
A round stone patio, a wrought-iron table for four, a red kettle barbecue, one flowering tree and overgrown grass — that is the entire backyard. Paralives does not have many outdoor activities yet, so over-building the back lot buys nothing; the narrator considered a telescope and skipped it.
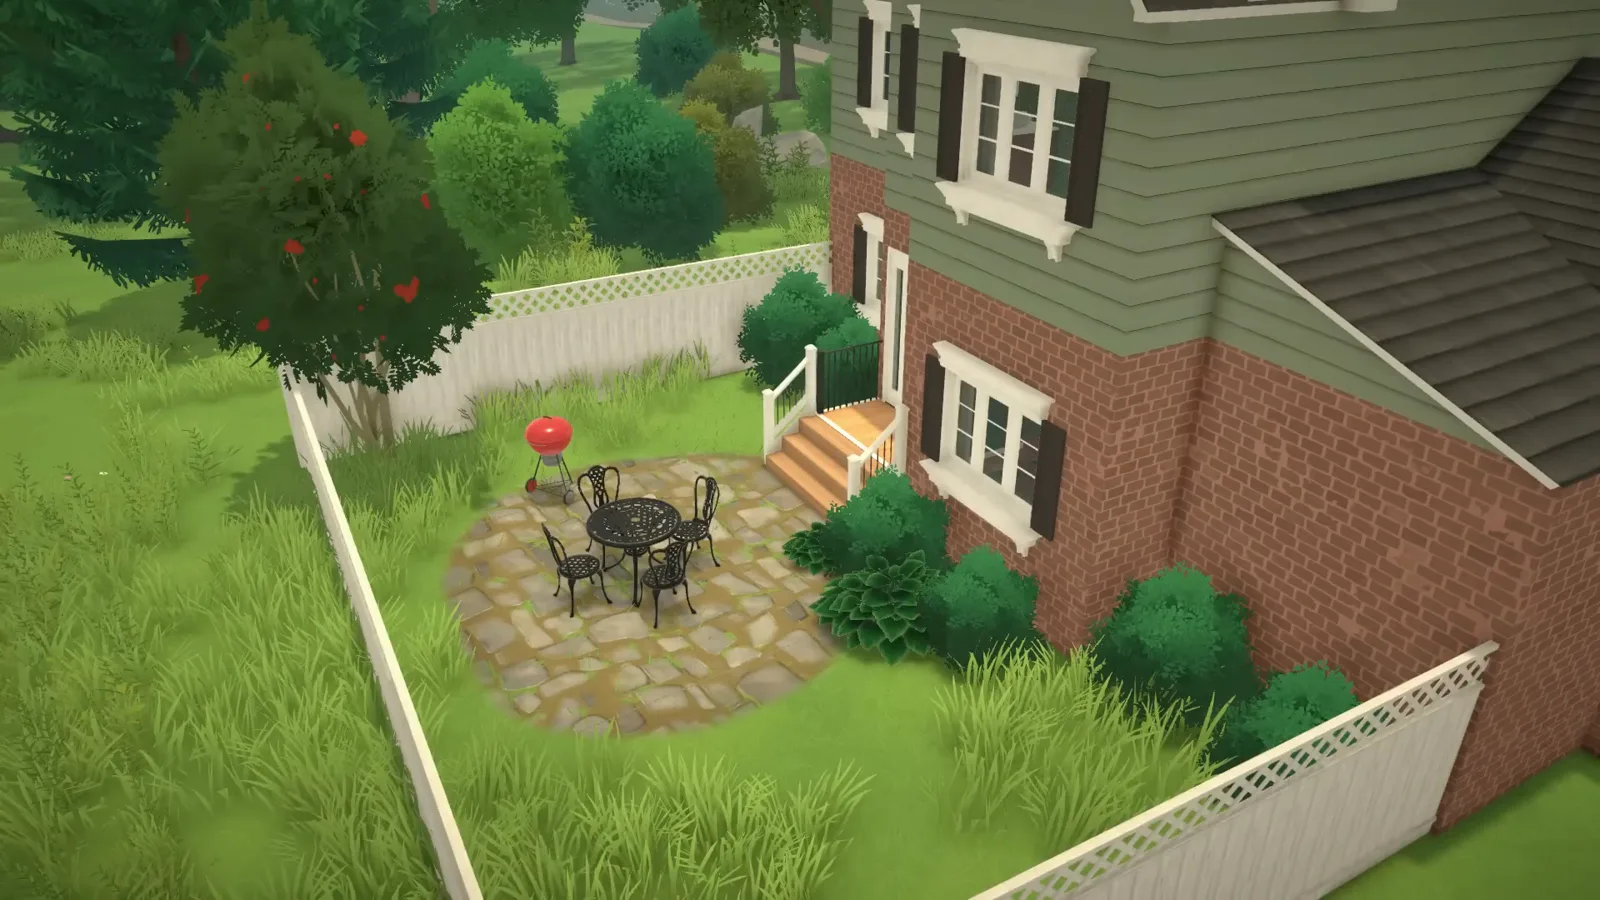
The full backyard brief in one shot — no UI, just the result.Watch at 18:25
Steps 9–11
Raise the foundation, then negotiate with the stairs
This is the technical heart of the build and the part the community asks about most: foundations without a foundation tool, and stairs that are still early access. Do this before furnishing — the whole floor plan depends on it.
- 9
No foundation button: separator tool, then drag the arrow
Draw the footprint with the room separator tool so the game lays down a floor, then grab the arrow in the middle of the room and drag it up — the same gesture as changing wall height. This answers the community's most-asked foundation question, and it is how both the ground floor and the front porch of this house sit up off the lot.
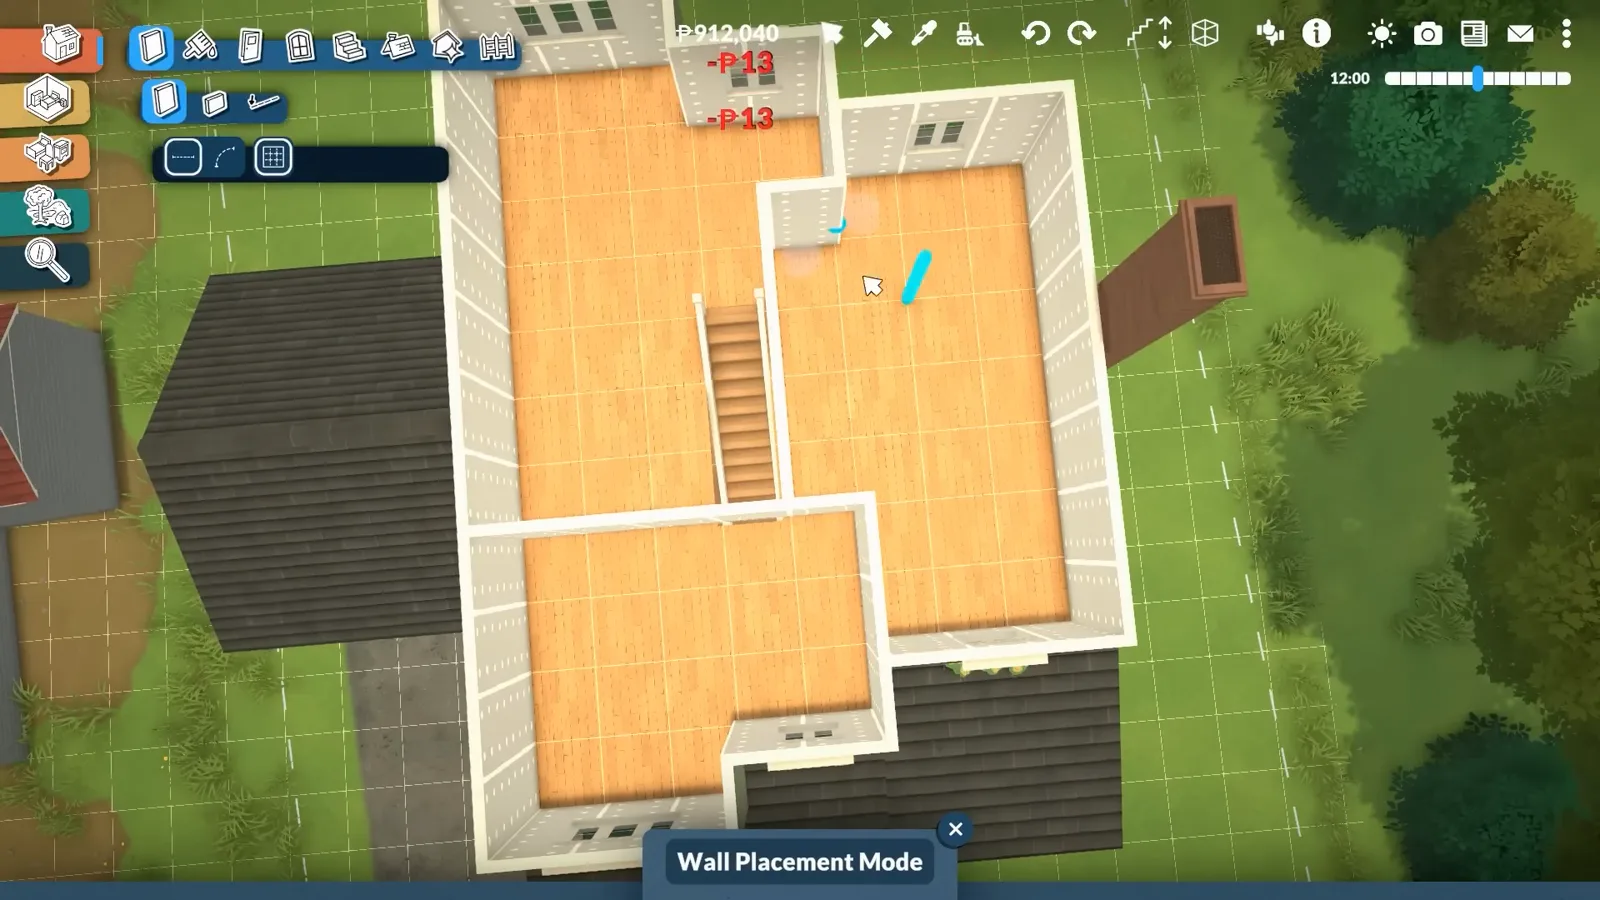
The separator tool lays the floor; the cyan arrow raises the room.Watch at 5:00 - 10
Place stairs early — and expect to replace them
Stairs are among the buggiest items in build mode, and this build documents it live: flights vanished, jumped to the wrong height, and once cut a hole through the floor into the next room. Place yours while the plan is still open, check the floors above and below, and re-place rather than nudge a glitched flight.
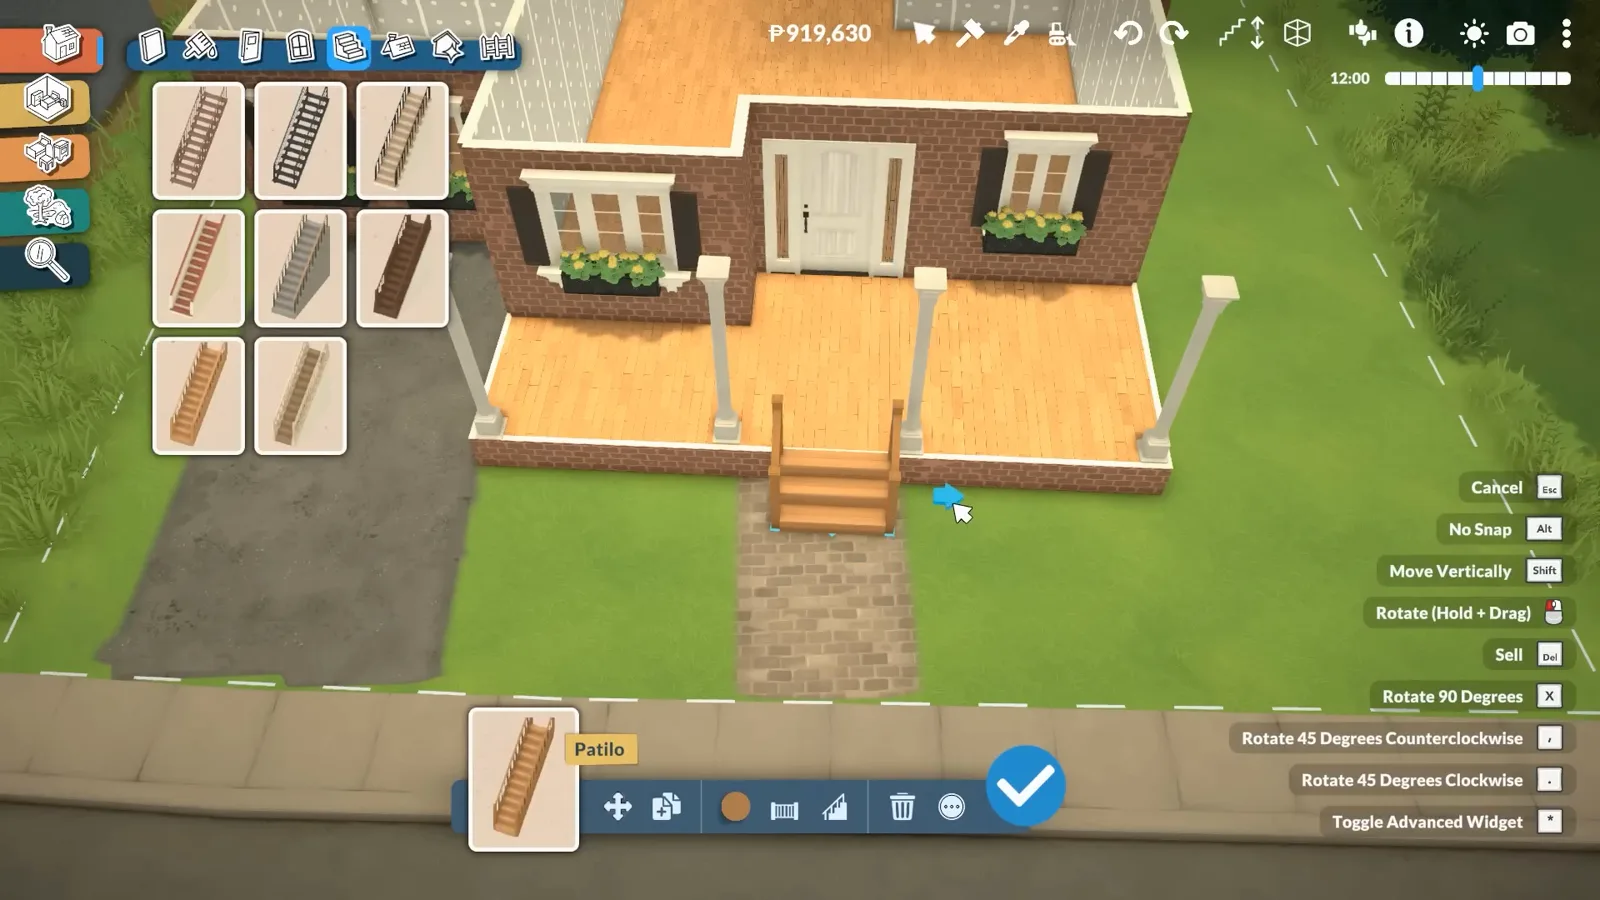
A preview flight held mid-air — in this build, stairs had to be replaced more than once.Watch at 4:04 - 11
Snap porch steps onto the raised deck
The raised porch needs its own short flight of patio stairs, snapped to the deck edge and checked against the walkway below. The shortcut list on the right — no-snap, move vertically, rotate 90 degrees — is what fine-tunes the landing.
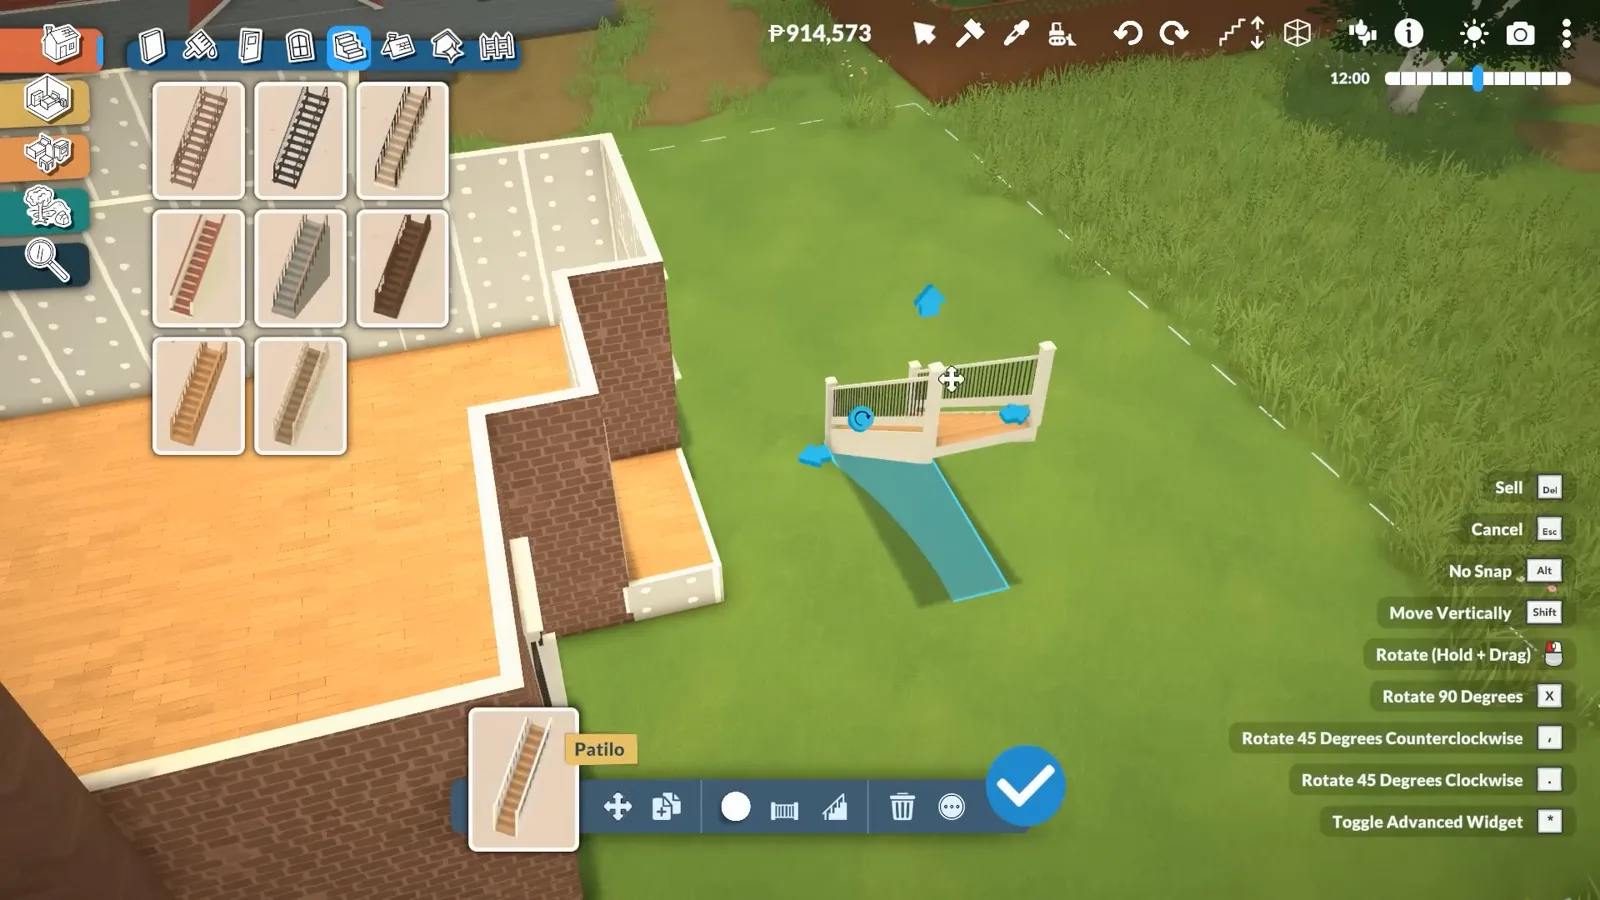
Patio stairs at the deck edge; the shortcuts do the fine-tuning.Watch at 4:34
Steps 12–18
Inside: rooms a family actually uses
The program is the point of a family home: an open kitchen-dining-living core, a downstairs primary bedroom, two kids' rooms and a bathroom upstairs. Green paint carries the house; the kids' rooms are the deliberate exceptions.
- 12
Run traditional counters under the kitchen window
Pick one traditional counter style — here the wood Mili line — and run it along the wall under the window, with fridge and stove closing the run. The narrator rearranged and stretched these counters again and again trying to center the sink under the window and never managed it; counters snap to their own logic, and the house is better off once you stop fighting.
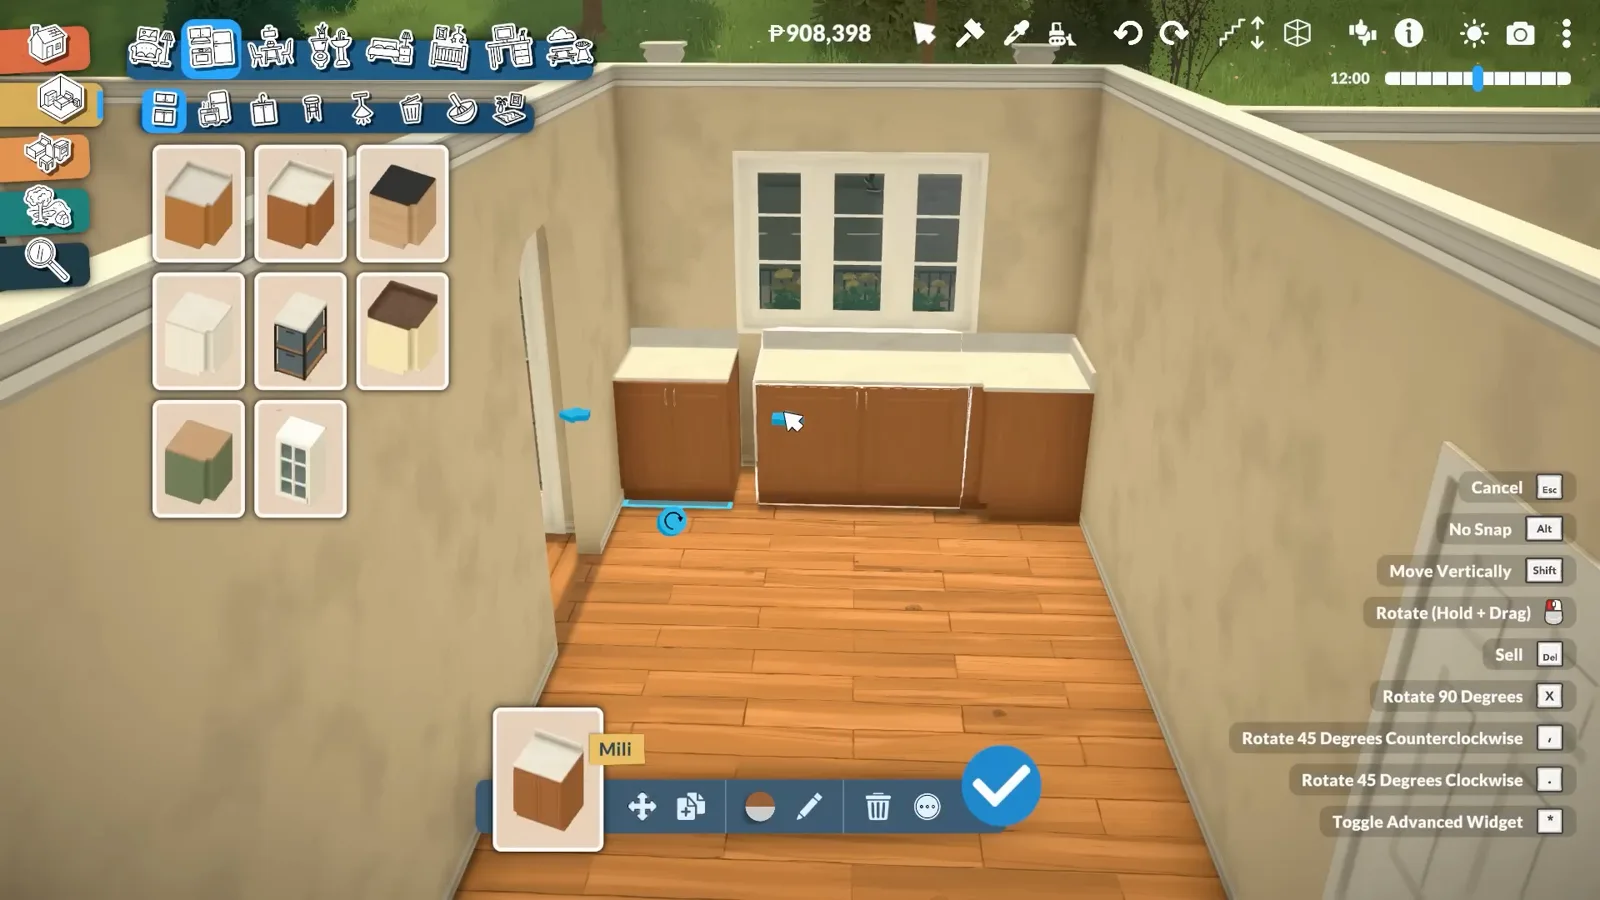
Mili counters in — the sink never centered, and the build moved on.Watch at 6:25 - 13
Use the catalogue search for clutter
Type the thing you want into the catalogue search — here, literally "sponge" — instead of browsing categories. It is the fast route to lived-in clutter: a sponge by the sink, utensils by the stove, a green rug against the green tile, a trash can beside the fridge.
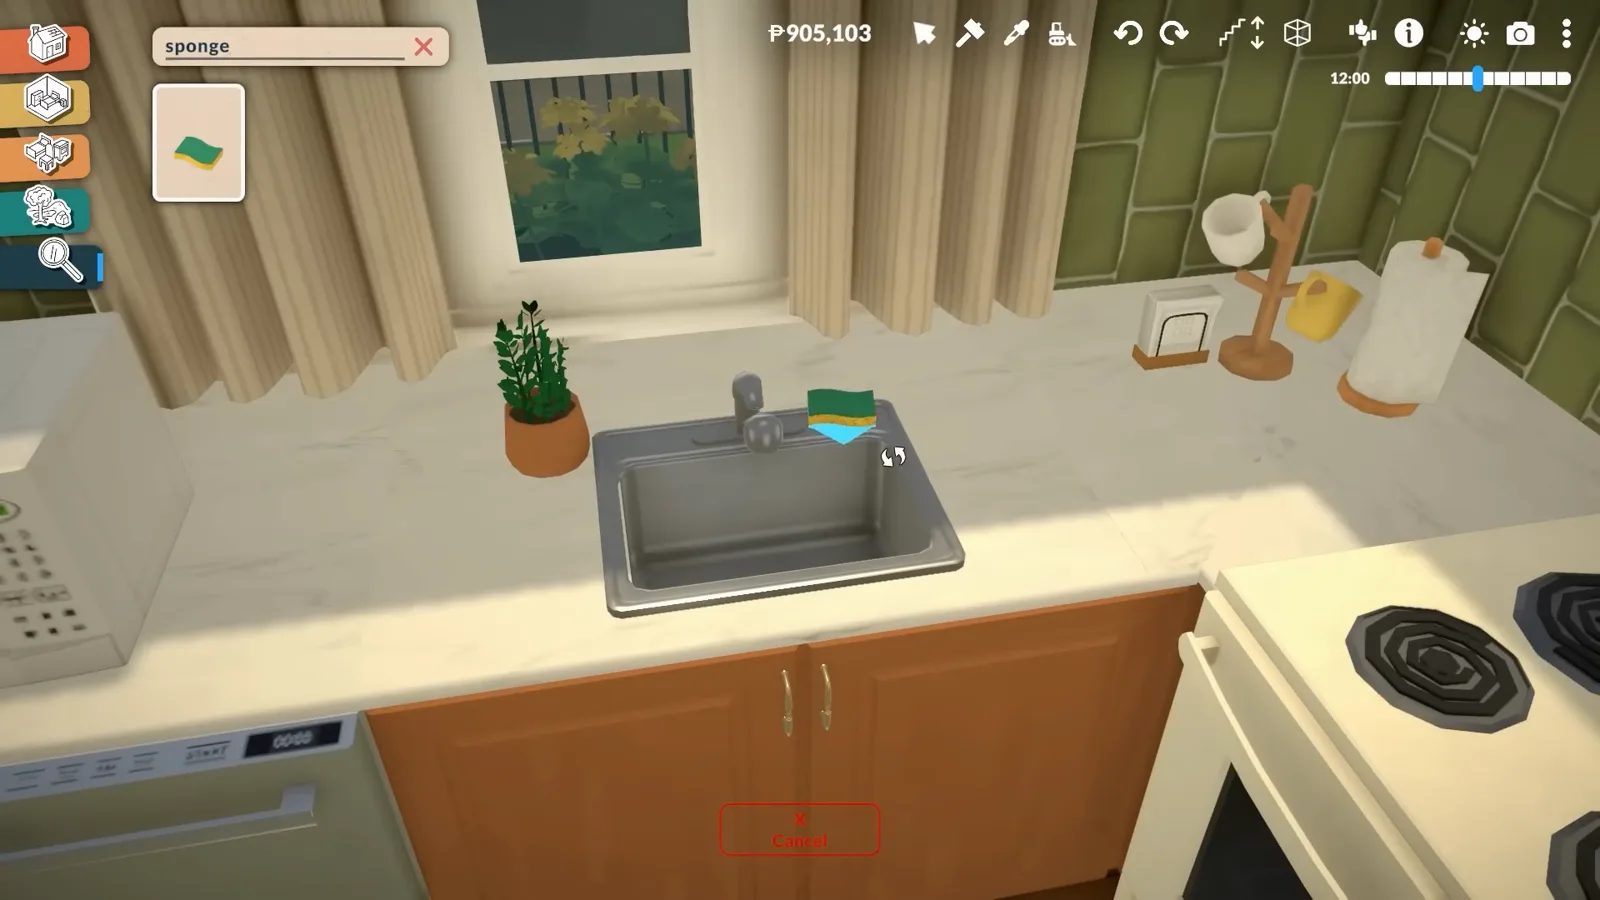
Search "sponge", click, place — clutter does not need browsing.Watch at 7:50 - 14
Brick accent wall, then retint the rug one shade off
The downstairs primary bedroom pairs a brick accent wall with the house's green. Choose a rug from the catalogue, open the color swatches and nudge the shade until it fits the room without matching it exactly — the narrator's rule is that too-matchy-matchy is the thing to avoid. Wood tones get copied onto the headboard for the same reason.
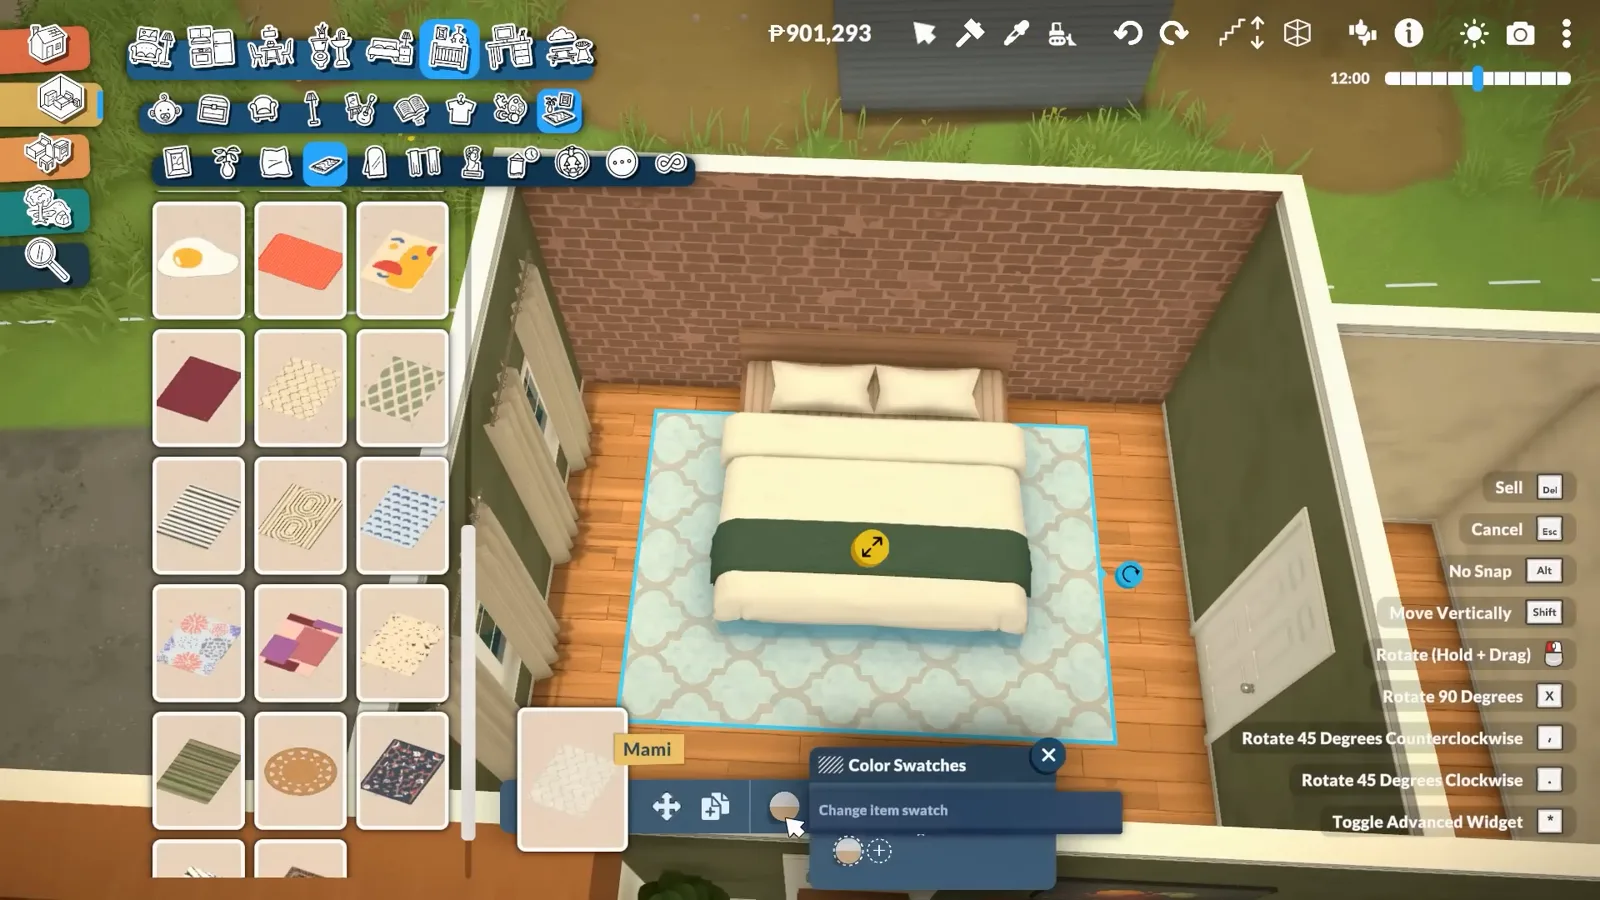
Color Swatches open on the Mami rug — a shade off the wall, not an exact match.Watch at 10:12 - 15
Anchor the living room on the chimney wall
The chimney from step 3 lands here: fireplace on the brick accent wall, a wall-mounted TV above, sofa and loveseat on a green Greek-key rug, and a two-level coffee table — the Farimi, price tag visible in the frame — swapped in after a first pick did not fit. This is the room the household actually lives in, so it gets the chimney spot.
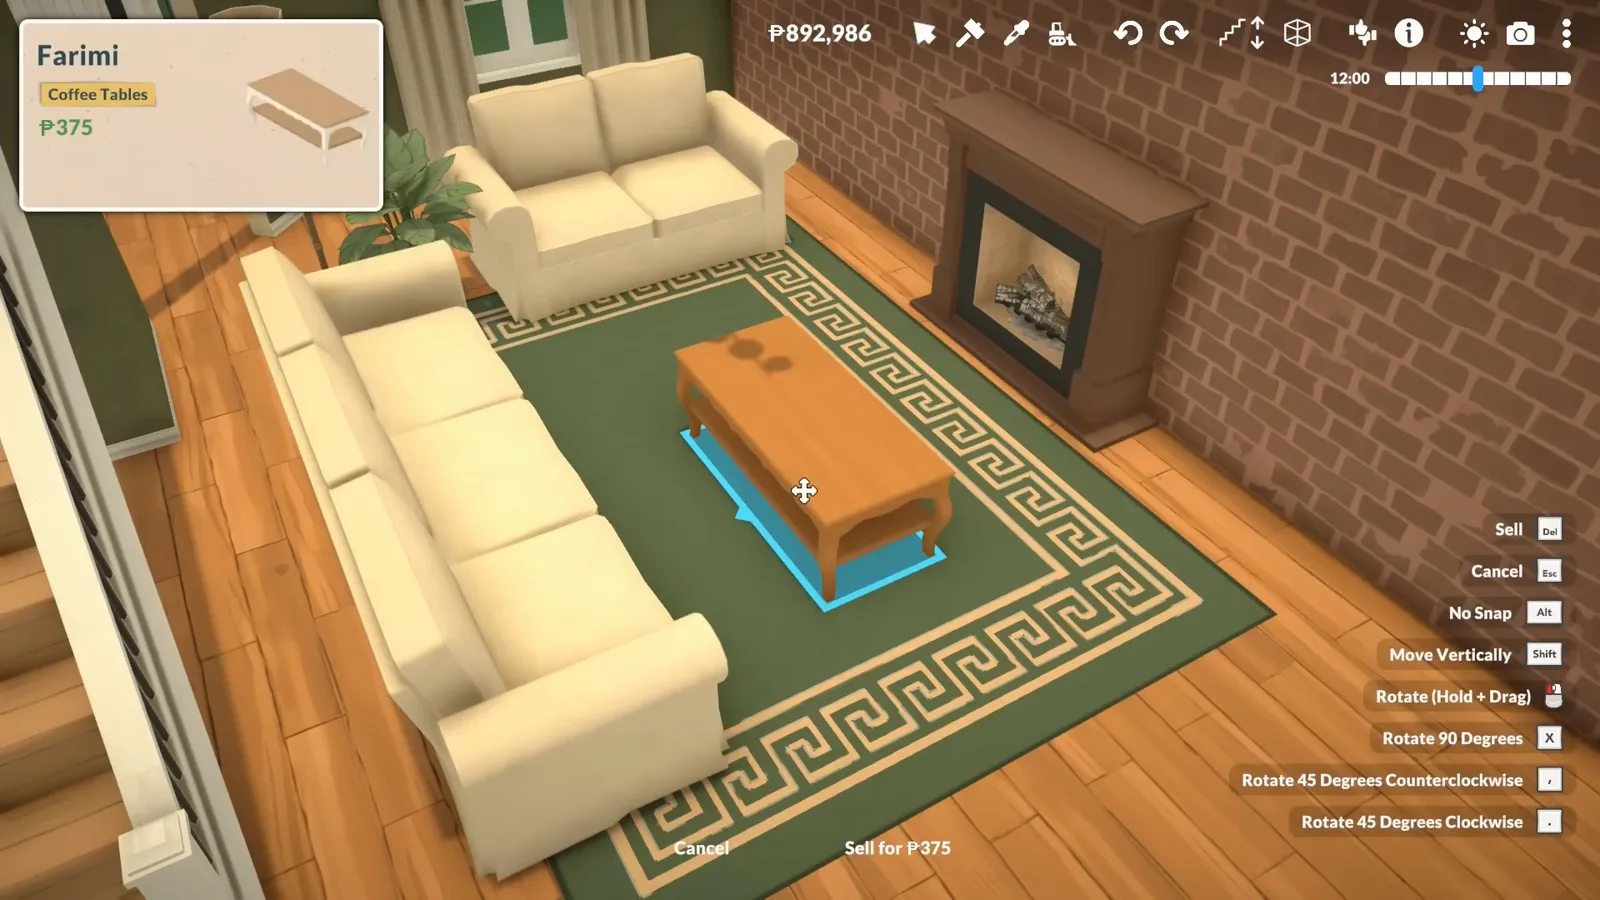
Farimi coffee table mid-move; the fireplace wall was planned since step 3.Watch at 12:10 - 16
One bathroom recipe, used twice
Both bathrooms run the same recipe: green tile on the walls, patterned floor tiles, a wood vanity, and a mirror stretched to size over it — mirrors click and drag to any dimensions. The upstairs version gets two sinks for the kids; downstairs keeps the full shower and tub.
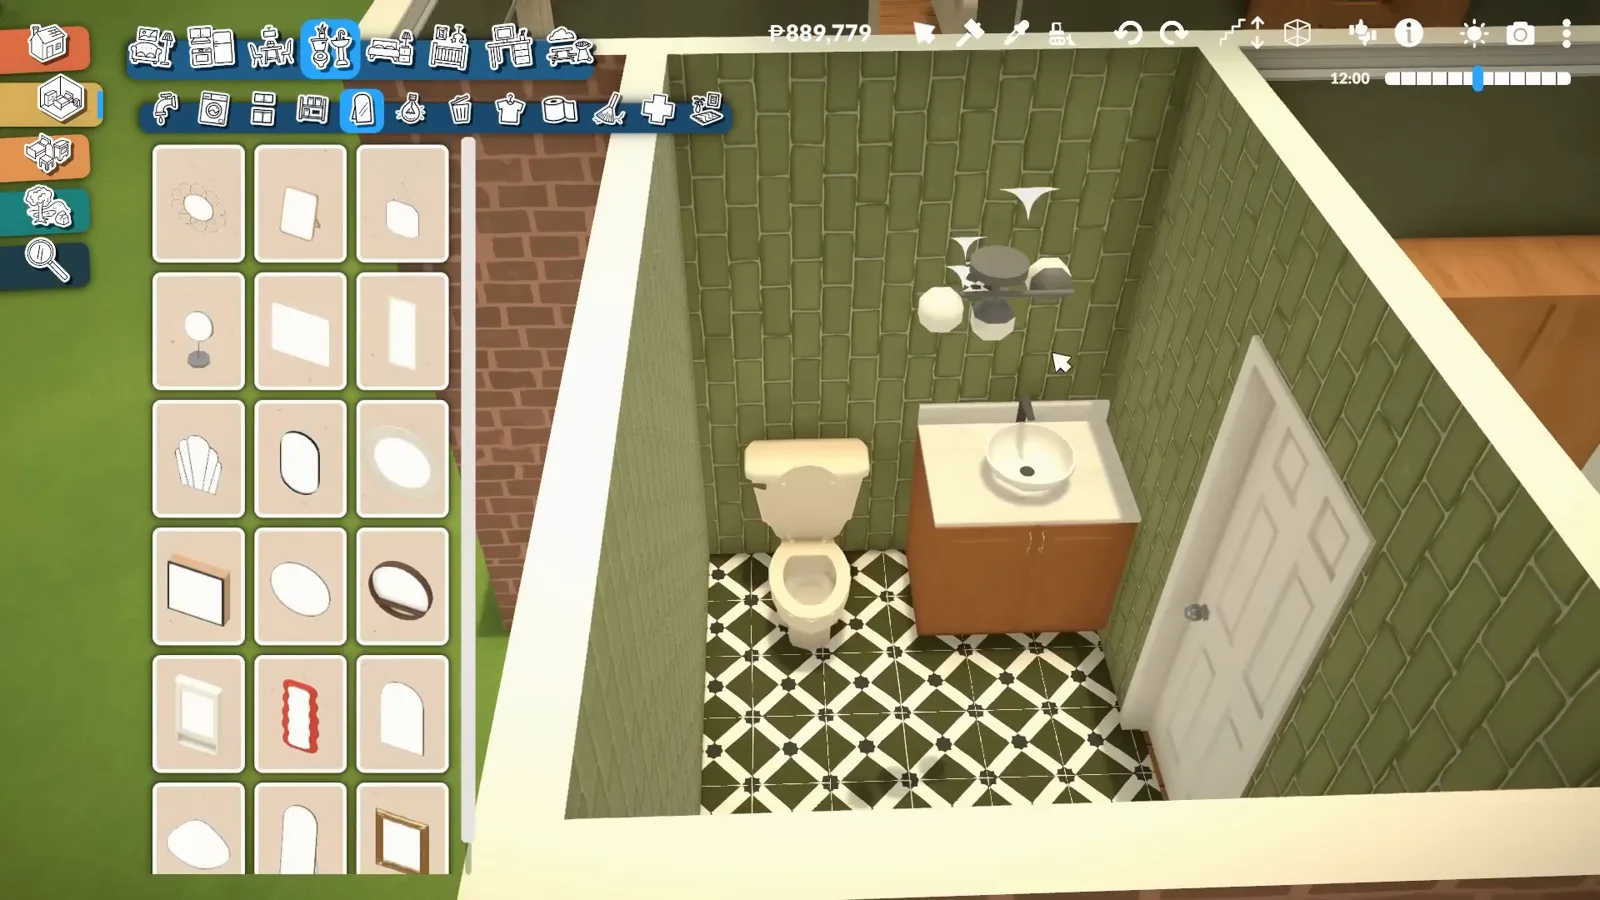
Green tile, patterned floor, vanity — the mirror catalogue is open to finish it.Watch at 12:55 - 17
Build the toddler room around the bear beds
Two bear-head toddler beds in blue, a diamond rug between them, heart wallpaper behind, and then plush clutter from the kids catalogue — the Puchi giraffe, a pug, a teddy. Matching every wood tone to the beds is what keeps the room deliberate instead of crowded.
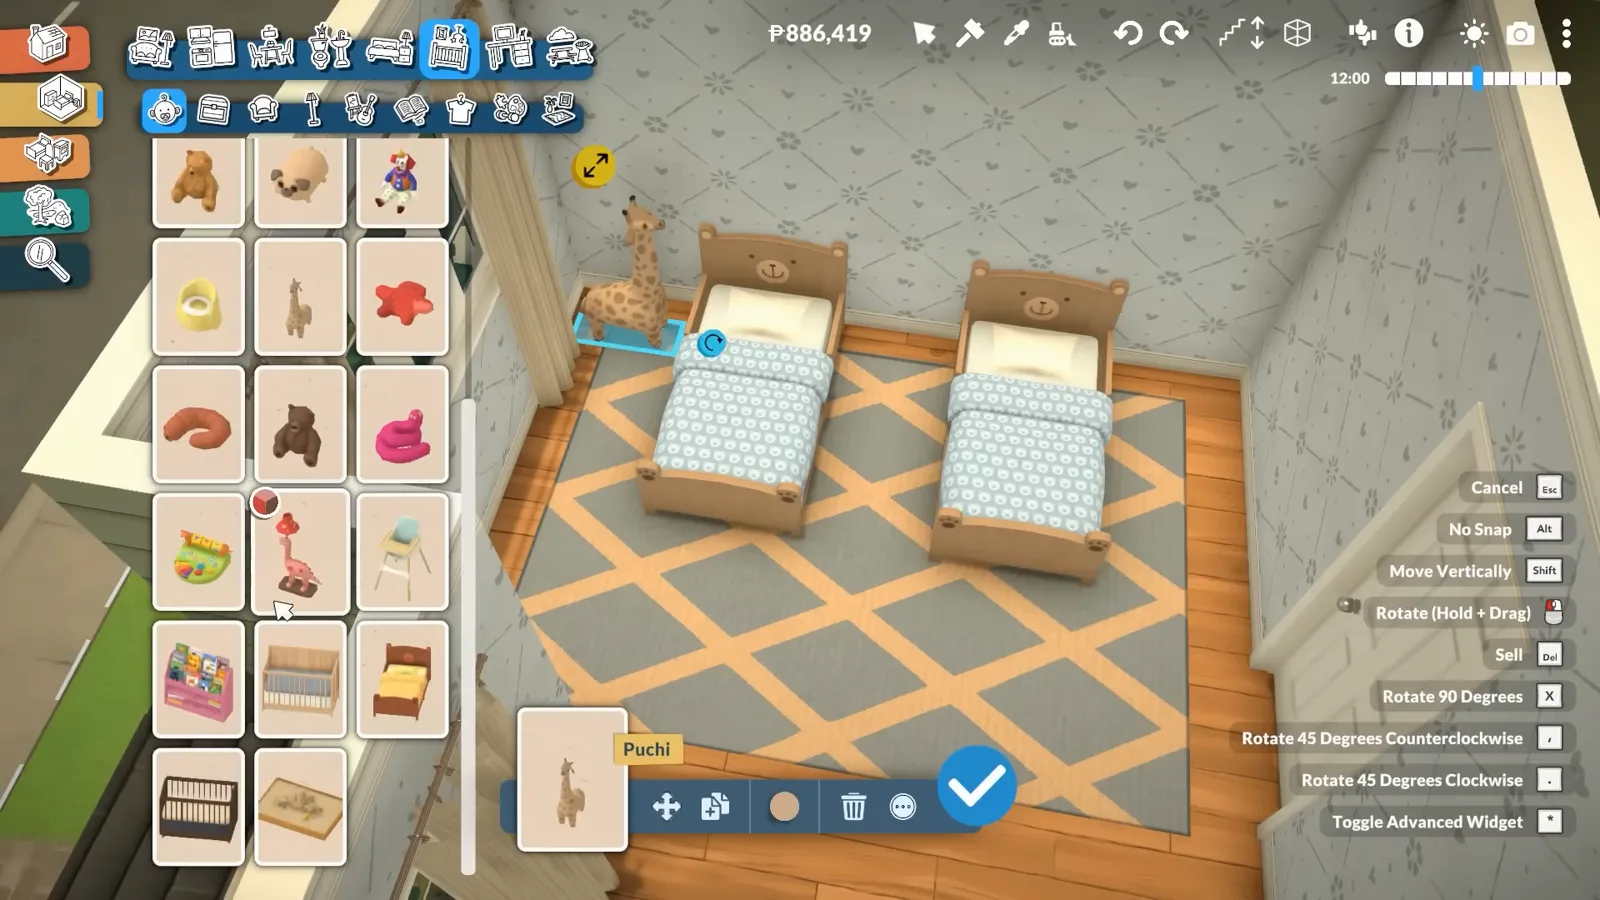
Puchi the giraffe joining the bear beds — the narrator's favorite room.Watch at 14:35 - 18
Let the teen room go full goth, instruments included
The counterweight to the green house: red brushstroke wallpaper, a black-and-white checkerboard rug, a ghost poster, a dice side table, a black egg chair — and a keyboard plus guitar for a teenager the narrator imagined as full 2012 emo. One loud room per house is a feature.
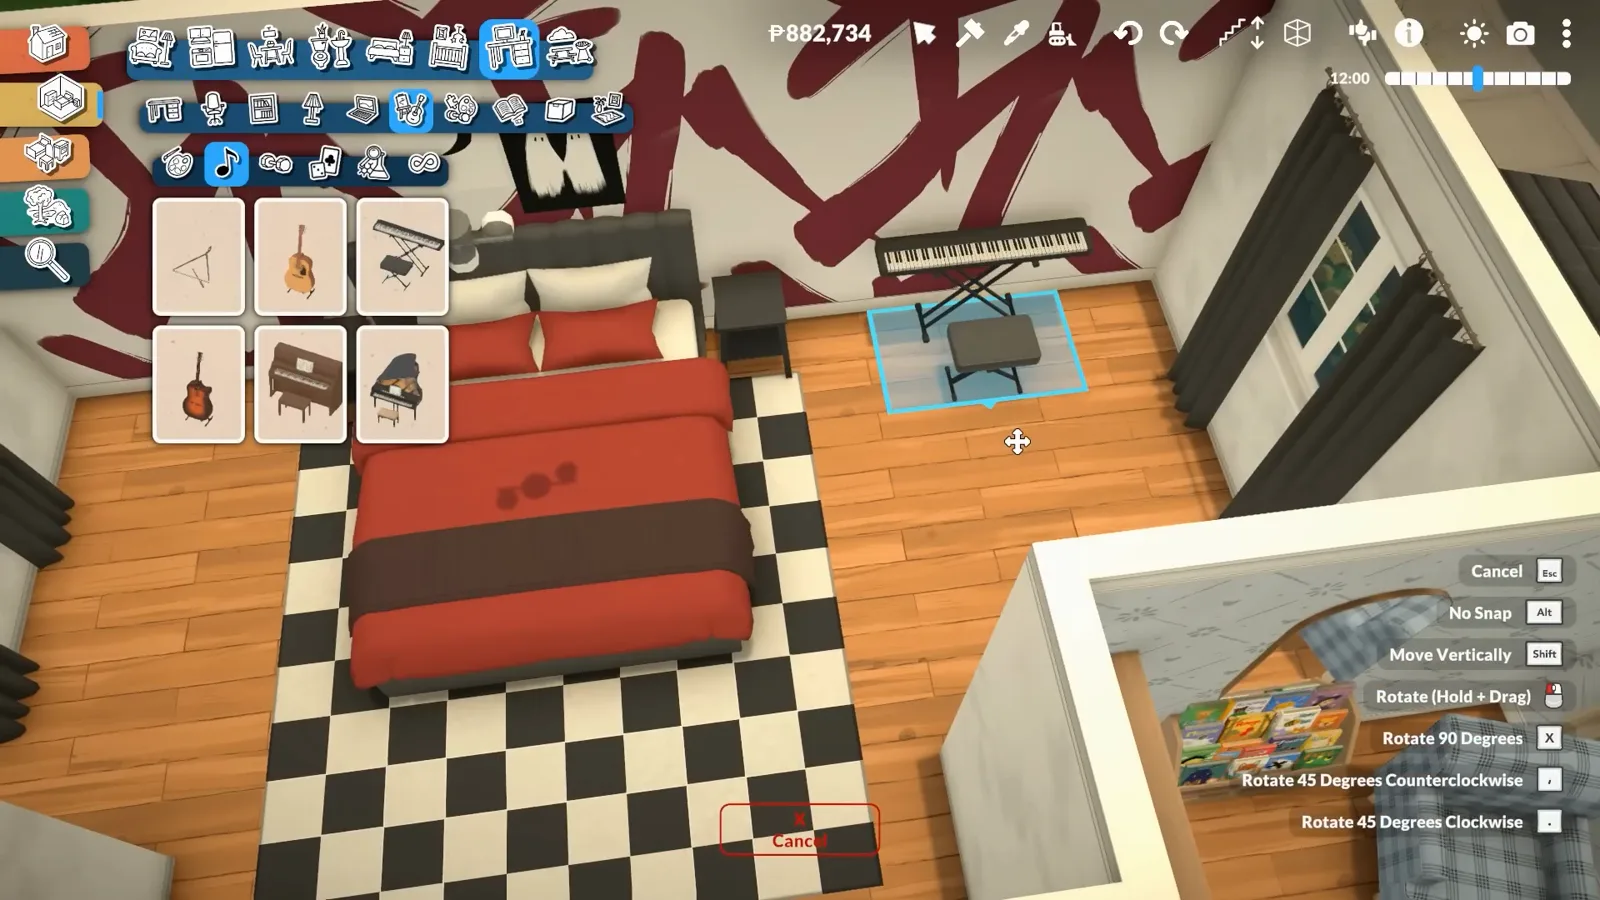
Keyboard placed, guitar next — the one loud room in a green house.Watch at 16:15
Suburban house or starter home — which build is yours?
A starter home is a budget exercise: one story, one bedroom, whatever the cheapest catalogue items allow, sized for a single Para. A suburban family house is a program exercise: two stories, three bedrooms, two bathrooms, an open kitchen-dining-living core, a porch and a driveway — sized for a household. If you have followed our starter home guide, you already know every tool this page uses.
The real difference is sequencing. Once a house is two stories, the foundation and the stairwell must be decided before any furniture is placed, and the roof plan has to survive being seen from the back. That is why this guide finishes roofs and foundations before placing a single sofa.
If you want the result without the work, the finished house is on the Steam Workshop under the creator's name, Gryphi. If you want the same techniques in a different shape, the bungalow runs the family program on one floor and the townhouse squeezes it onto a narrow lot — and the foundations guide expands the separator-tool trick from step 9.
Suburban house FAQ
- How do you build a suburban family house in Paralives?
- Draw a two-story shell with a front bump-out, roof it with individual roof pieces, raise the ground floor on a separator-tool foundation, then fit the family program inside: three bedrooms, two bathrooms, an open kitchen-dining-living core, and a porch plus driveway outside. The eighteen steps above follow one real speed build, each linked to its exact moment.
- What is the difference between a suburban house and a starter home in Paralives?
- Starter homes are budget builds sized for one Para — small, minimal, cheap to furnish. A suburban house is a family program: two stories, three bedrooms, two bathrooms, a porch and a driveway. The build tools are identical; the suburban house simply forces you to plan the roof and stairs earlier and spend much more on rooms and clutter.
- How do you raise a foundation in Paralives?
- There is no dedicated foundation tool. Draw the footprint with the room separator tool so the game places a floor, then drag the arrow in the middle of the room upward — the same gesture as changing wall height. The front porch in this build sits on the same kind of raised floor, with patio stairs snapped to its deck edge.
- Are stairs still buggy in Paralives?
- They can be: in this very build, staircases vanished, jumped to the wrong height, and once cut a hole through the floor into the next room — the narrator calls stairs one of the buggiest items in build mode. Place yours while the plan is open, walk the floors above and below, and replace a glitched flight instead of adjusting it.
- How do you build a roof like this in Paralives?
- From individual roof pieces stretched until their edges meet the walls; the front bump-outs continue through to the back so the planes read as one roof. Two things to know: in this build, shingles rendered larger at low pitches and smaller as the pitch rose, and the roof catalogue itself warns that free-form roof placement is still Early Access.
- Can you download this suburban house?
- Yes — the creator shares the finished house on the Steam Workshop under the name Gryphi (capital G). Walk the exact house pictured here in your own game, or download it to study the floor plan before building your own version.
Keep building
Starter home guide
The budget first purchase: a small, cheap house for one Para — the budget exercise this page's program exercise leans against.
House ideas
Six written layouts — starter, family, cottage and more — to borrow a floor plan from before you draw a wall.
Bungalow build
The family program on one floor: a continuous slab, separating walls and one wide hip roof over the whole plan.
Townhouse build
The same idea squeezed onto a narrow British corner lot with a mansard.
Foundations
More ways to get a raised floor without a foundation tool — the step 9 technique, expanded.
Garage
Give the painted driveway a proper garage volume to end at.
Mid-century modern guide
A ranch-style take on the family house — carport, stone walls and a sunken living room from one narrated build.
Brownstone build guide
The brown-faced cousin of the row house: stoop, cornice and brown brick, step by step.