
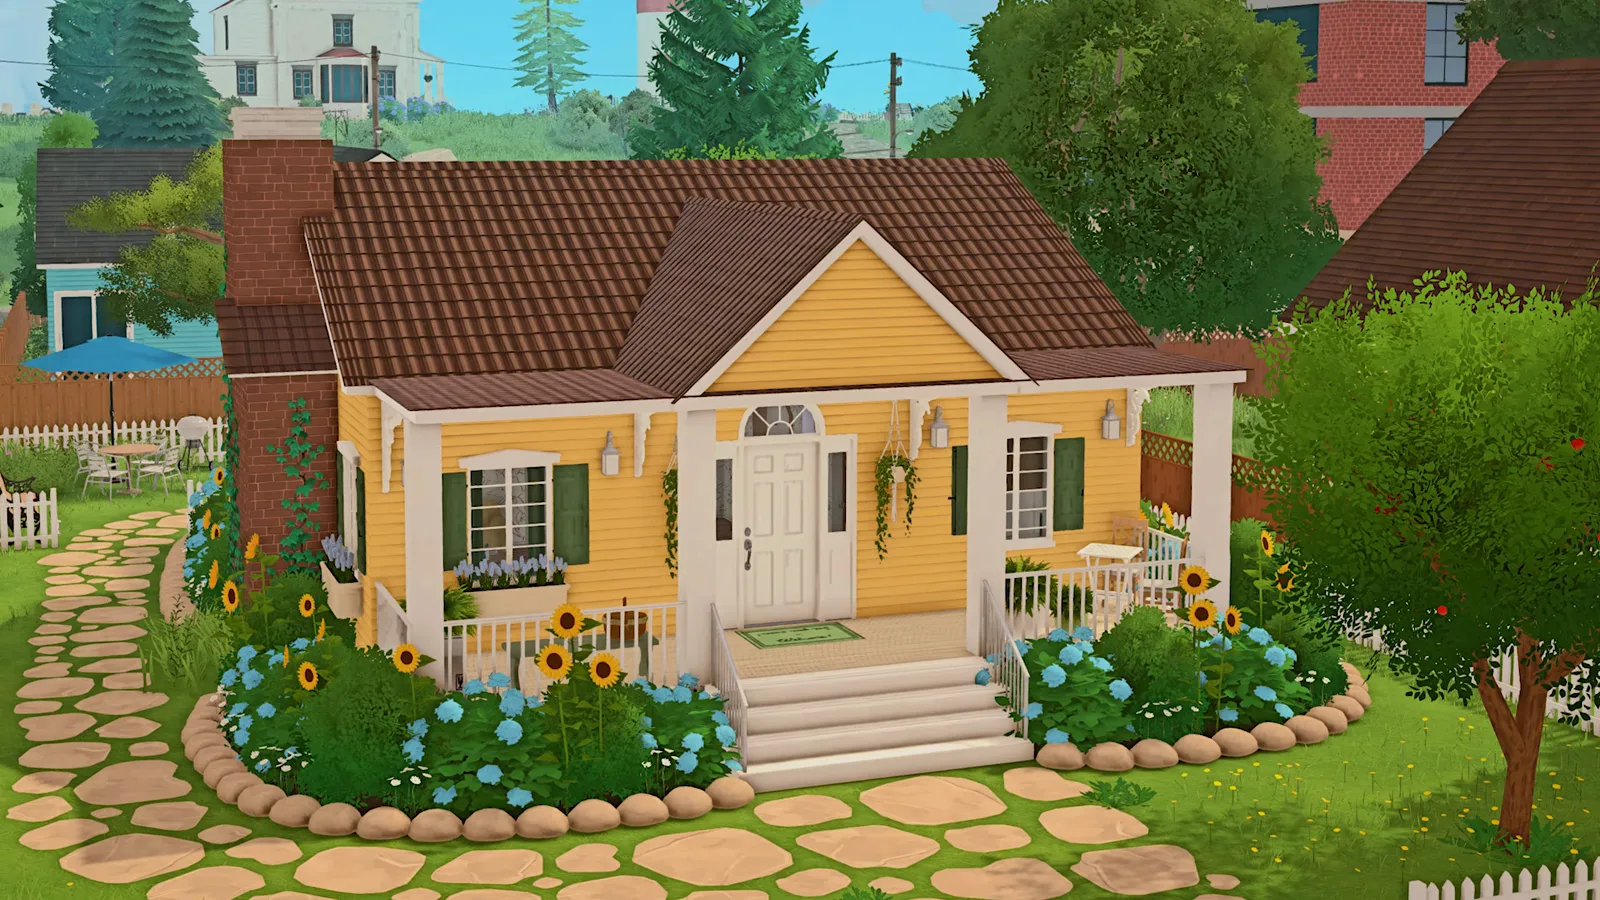
The short version
A bungalow in Paralives is not a preset — it is a decision to spend floor area sideways instead of upwards. Lay one continuous floor plate, carve the rooms out of it with separator walls, then break the wide hip roof with a chimney, a second siding colour and shed dormers so the house does not read as a low box.
- No bungalow preset exists — you build the one-storey shell yourself
- One continuous floor plate: no stair well, no landing to plan around
- Interior rooms come from Separator Wall Placement Mode, not new footprints
- A single wide hip roof needs a chimney and dormers to stop reading as a box
- A raised porch deck with posts and lattice buys an entry without a storey
- The game prints wall length in metres, but never the lot area
The footprint
Spread the plan instead of stacking it
A two-storey house solves space by going up; a bungalow has to solve it sideways. These four steps set the floor plate, the partitions and the span before a single roof piece exists.
- 1
Set the front of the plan with the first wall run
The build starts on a bare lot with only a terrain-paint scar where the house will sit. The first wall is laid along the street edge, which fixes which side of the plan is public and which side opens to the garden — every room decision after this one follows from it.
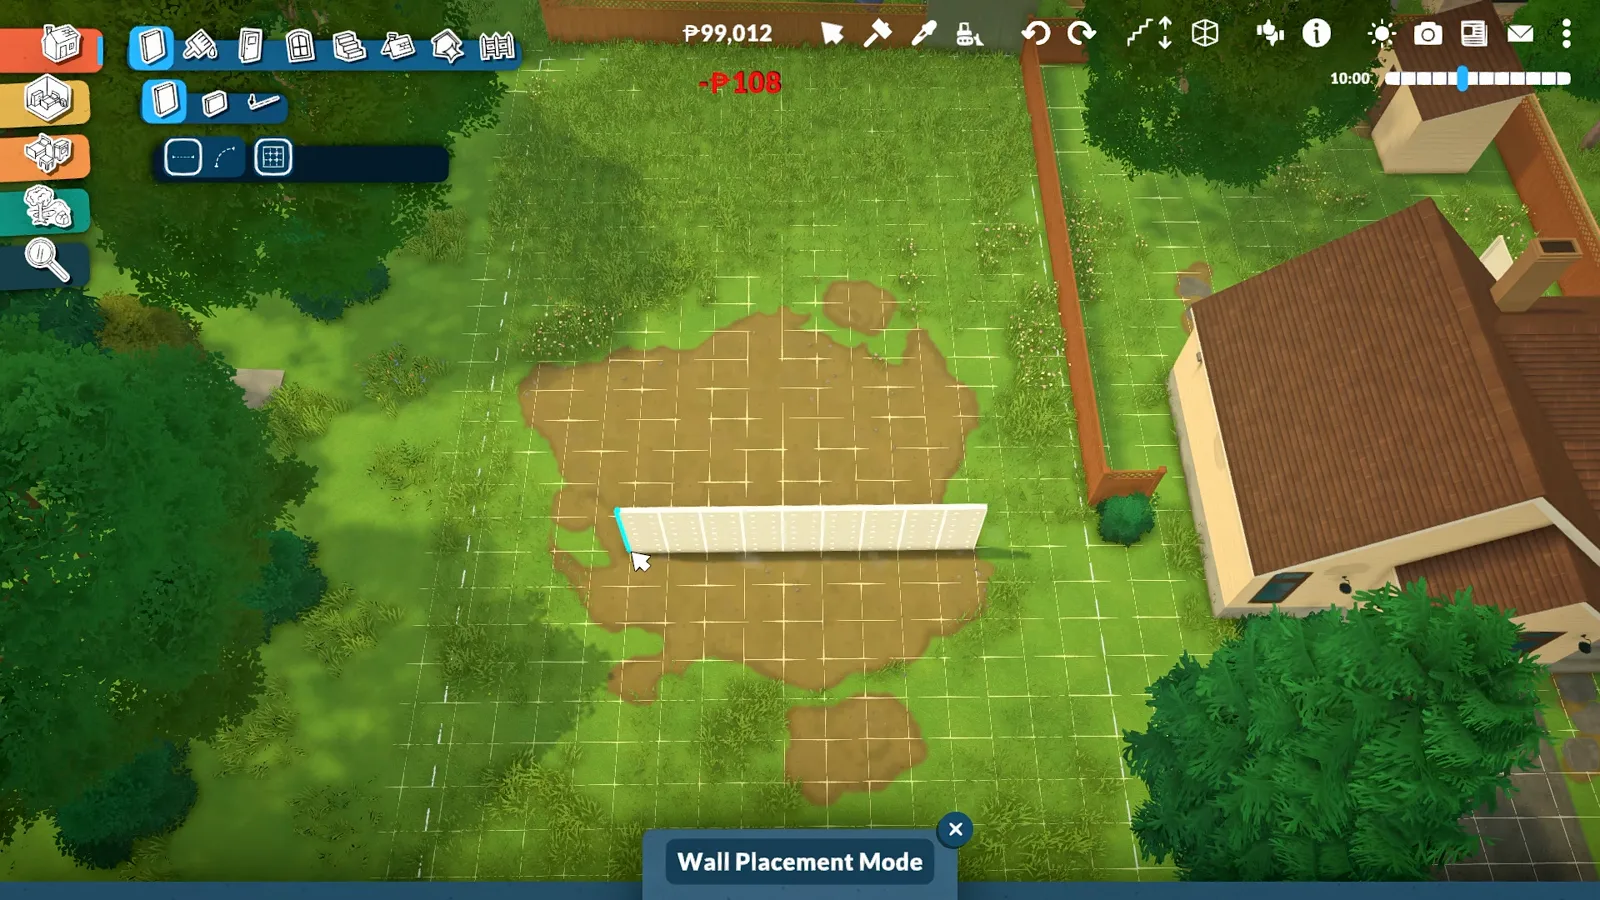
First wall run on the bare lot — the front of the plan is set here.Watch at 0:08 - 2
Lay one continuous floor plate
A bungalow lives or dies by its footprint, so the floor goes down as a single unbroken surface with the exterior walls tracing it. The tooltip confirms the surface is Hardwood; the walls are still the plain starter material and get painted last. Notice there is no stair well cut into the plate — that freed space is the whole point of going one storey.
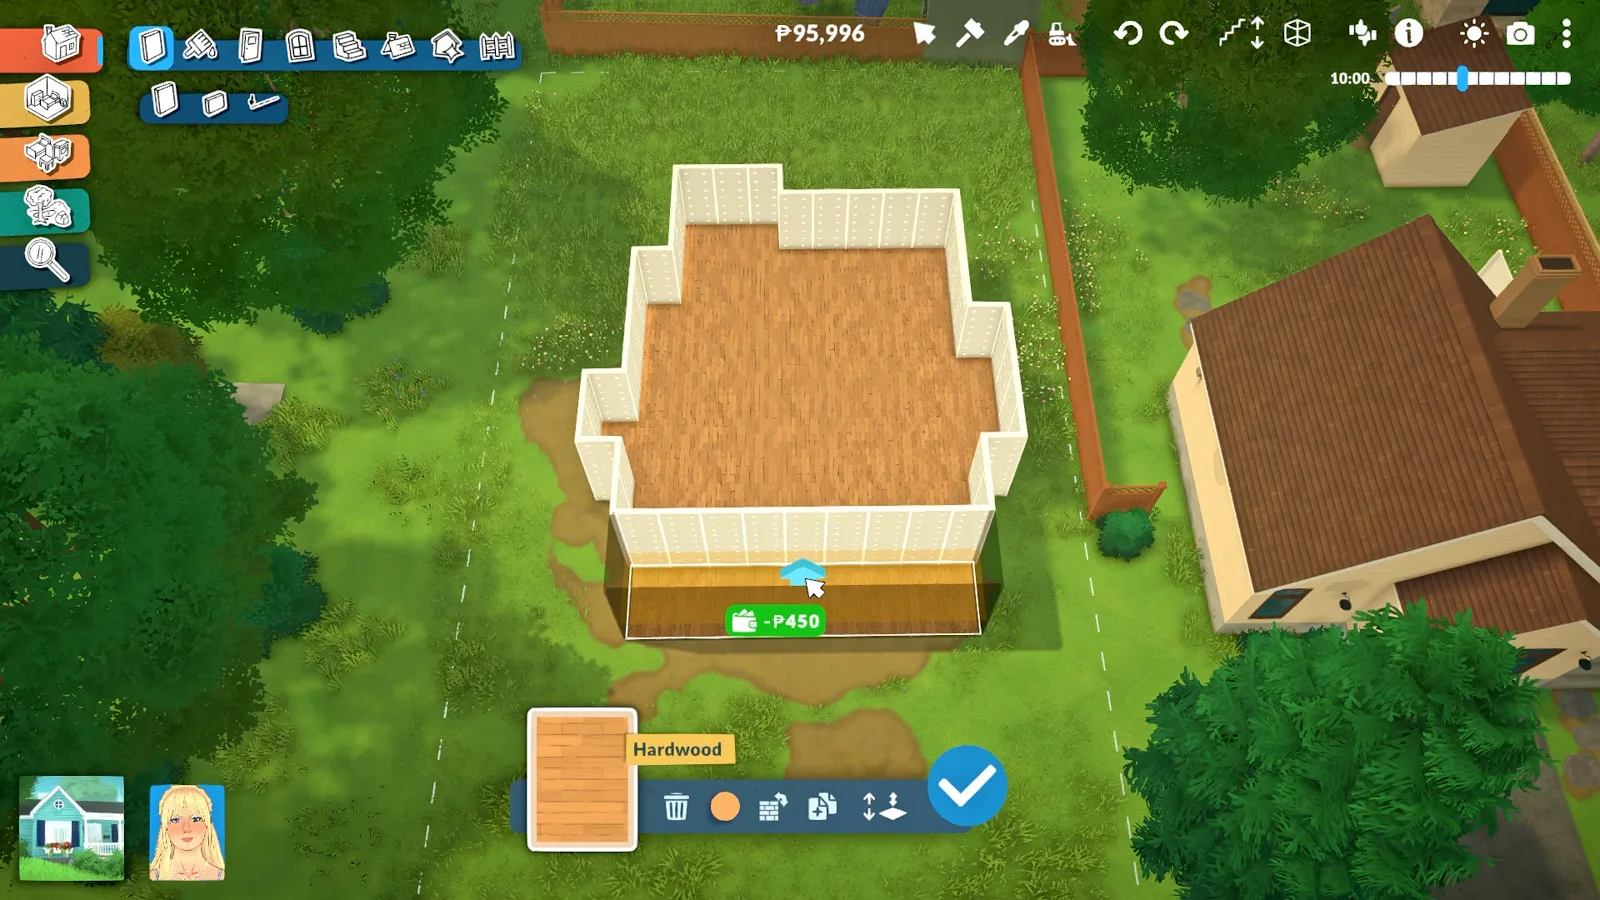
One unbroken plate: no landing, no stair well to work around.Watch at 0:36 - 3
Carve the rooms out of the plate
Interior partitions come from Separator Wall Placement Mode, which drops a wall onto an existing floor without extending the outside shell. That is how a single-storey plan gets its rooms: one big plate, then dividers, then doorways cut back out of them.
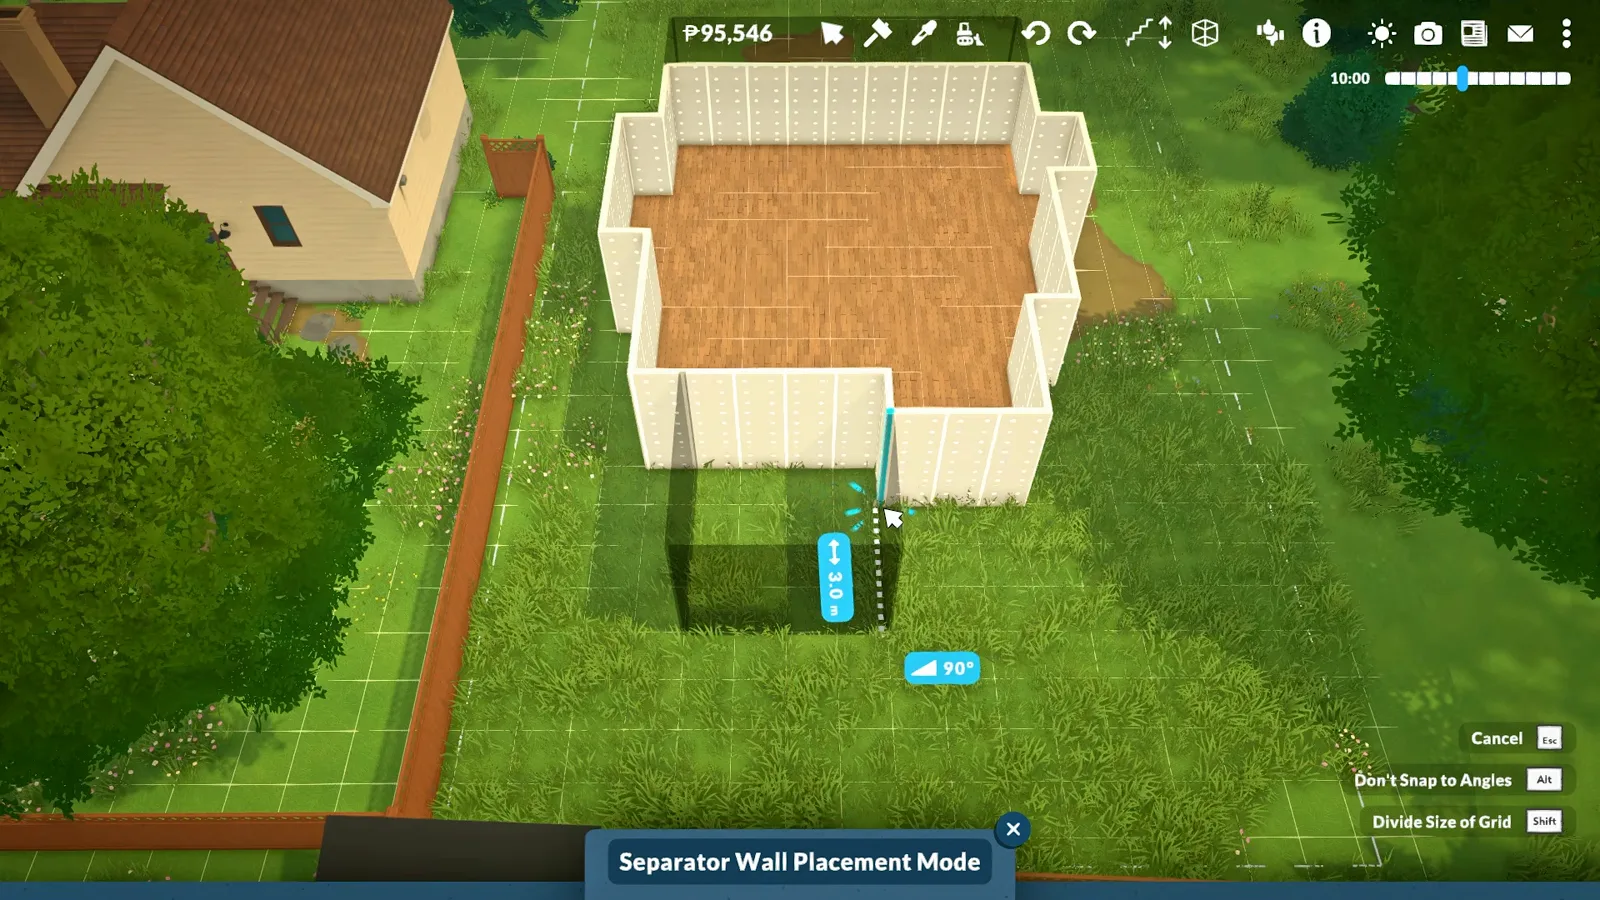
Separator walls carve rooms without growing the footprint.Watch at 0:40 - 4
Read the span off the metre overlay
The same move at a bigger scale: ItsAnitaa's Fairhaven plan runs partitions across a much wider floor plate, and the blue overlay reports the wall length in metres while you drag. It is the only measurement the game gives you for free, and on a one-storey house it is how you catch a room that has quietly become too long.
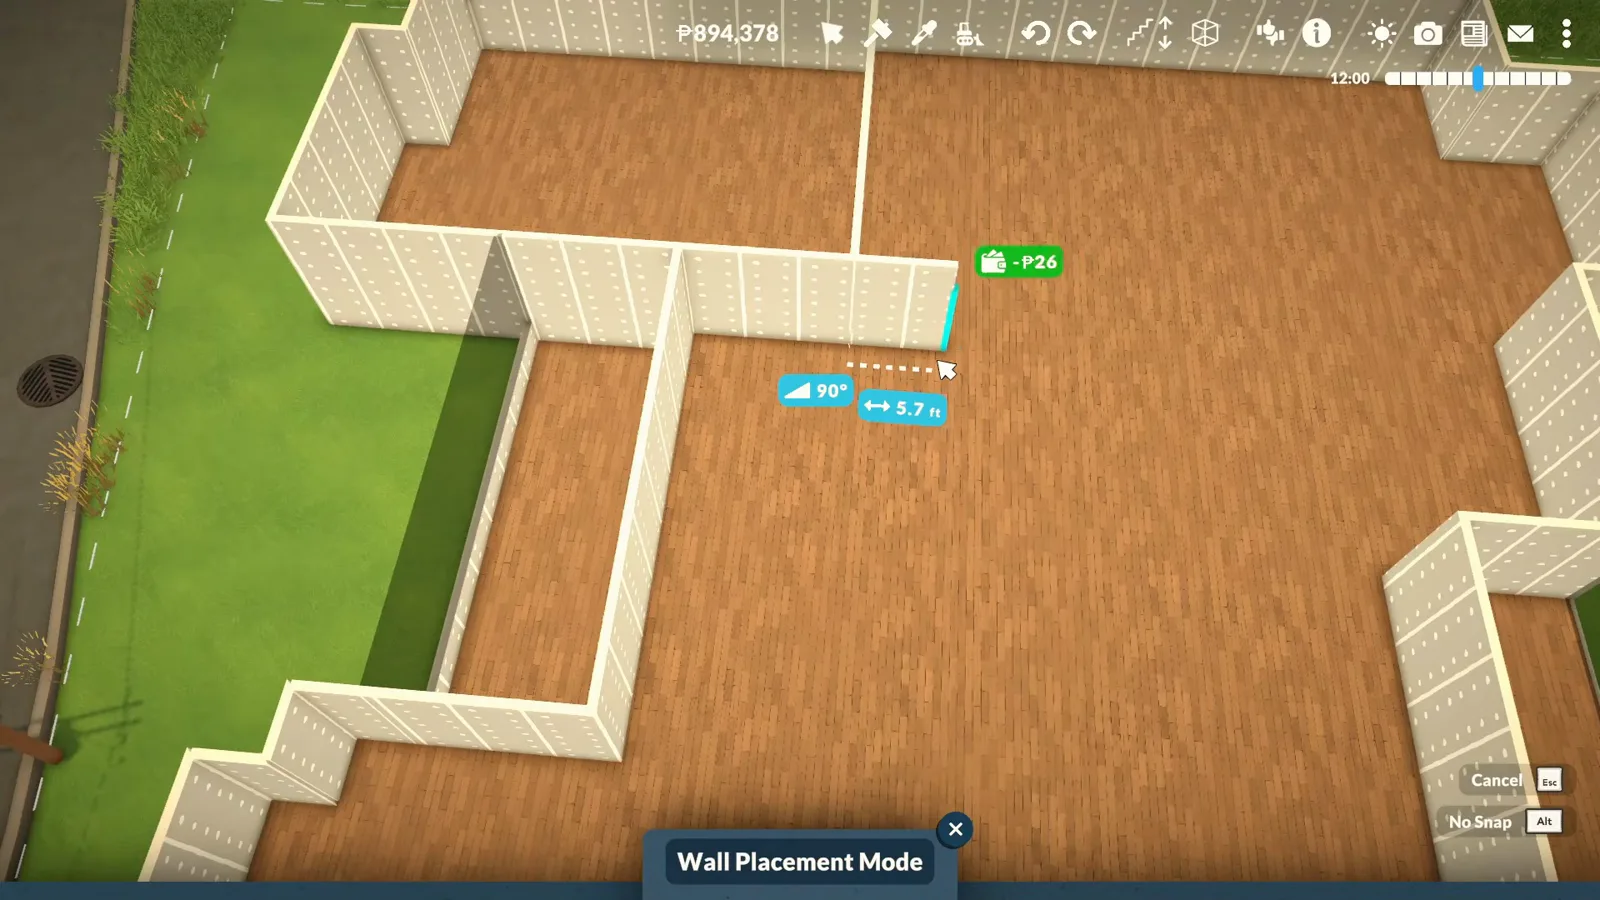
The metre readout is how you judge a one-floor span.Watch at 2:10
The roof
Keep a wide hip roof from reading as a box
One storey means one long, blank roof plane. Both builds fix it the same way: a stack through the slope, a second colour on the gable, and dormers dropped onto the front run.
- 5
Roof the whole plan with one hip
With the shell closed, the roof catalogue opens on hip and gable surfaces rather than a per-room tool. One large hip covers the main mass; pieces snap to the top of the wall and inherit its height, so the roof shape is decided by the wall outline you already committed to.
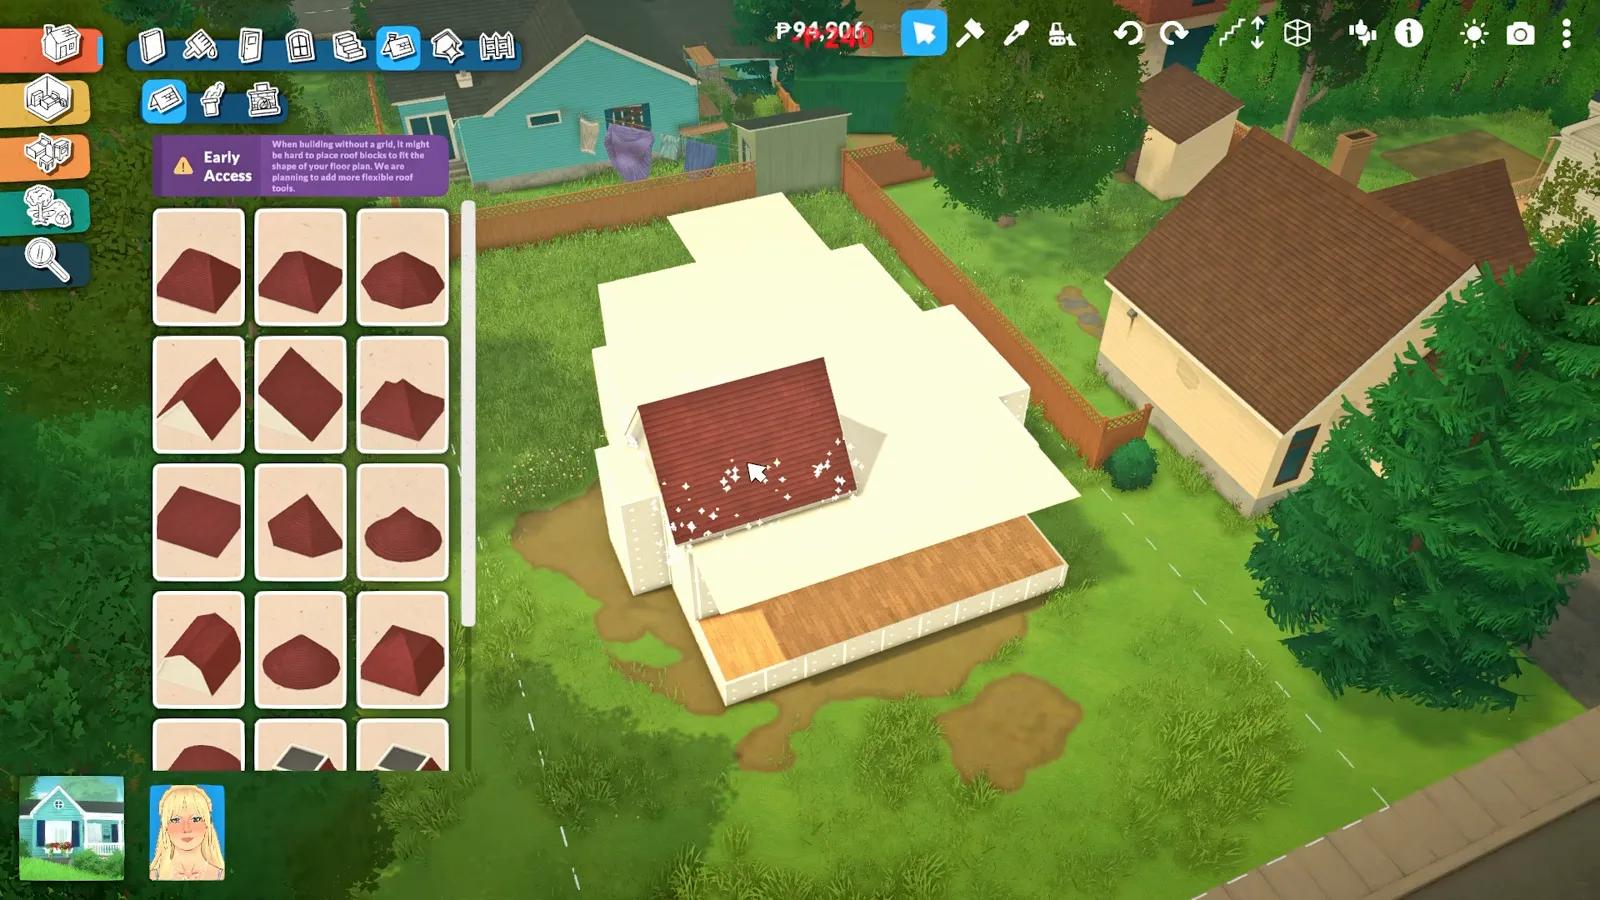
Roof pieces are placed as surfaces, not as a house preset.Watch at 0:44 - 6
Punch a stack through the roof plane
A bungalow's chimney is what stops a low hip roof reading as a tent. Here the stack rises through the slope on the street side and the roof closes around it, so place it before you paint anything — the roof rebuilds itself around the obstruction.
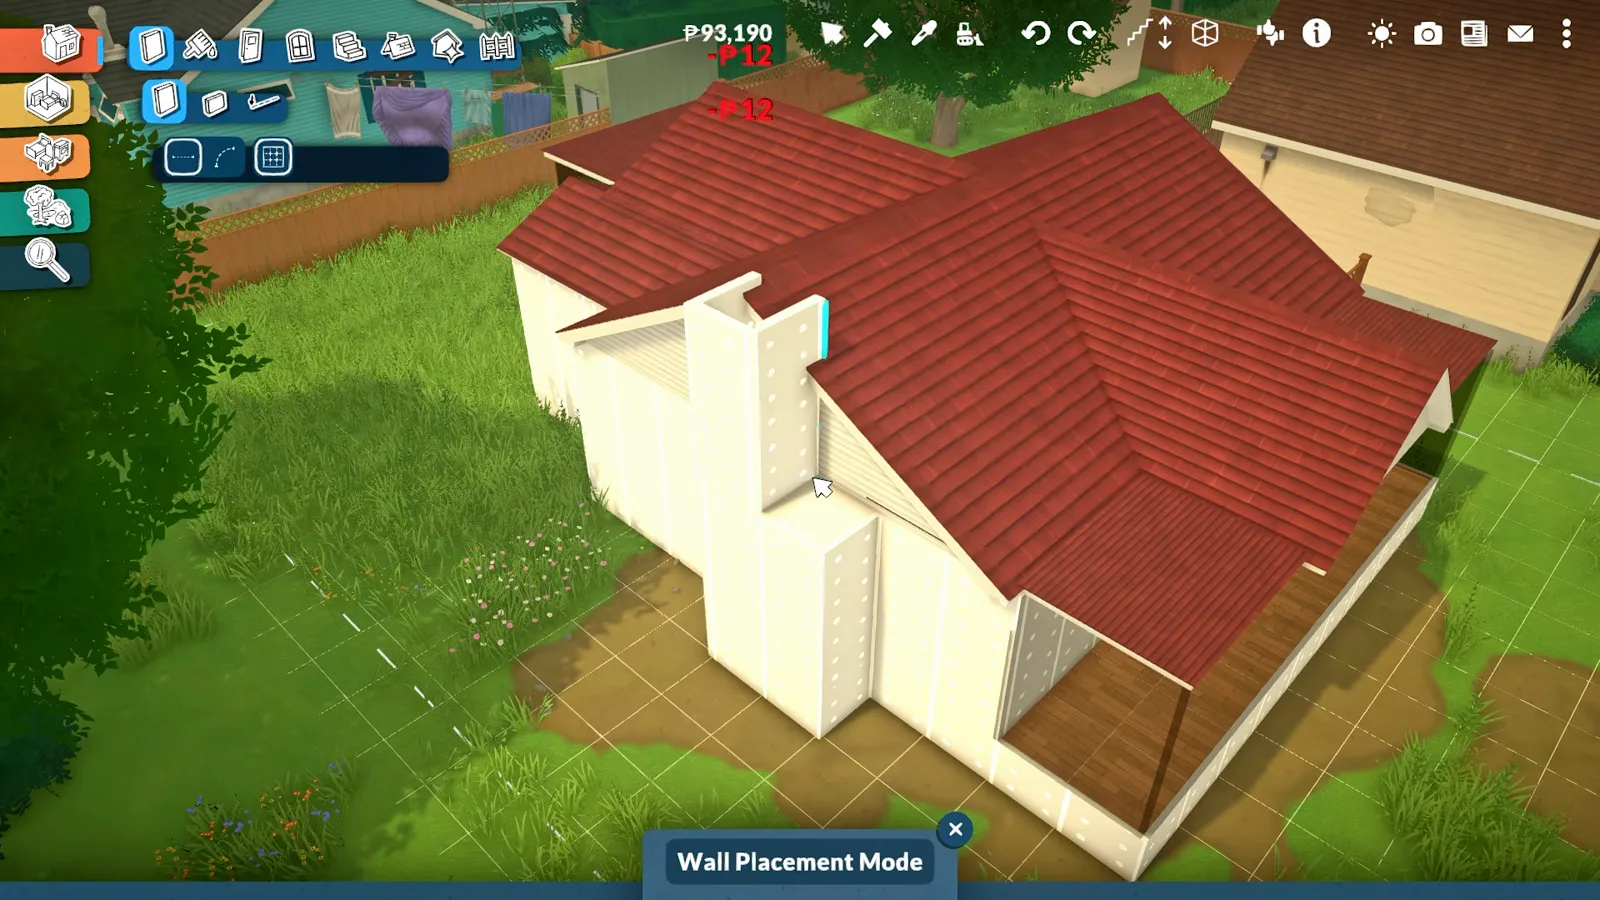
Chimney first, roof colour second — the stack breaks the plane.Watch at 1:10 - 7
Paint the roof on its own palette
Roof Painting Mode carries its own swatch grid, so tiles can go a different colour from the trim. Both builds here keep a warm roof over a pale body, which is the classic pairing and hides the fact that the whole roof is a single piece.
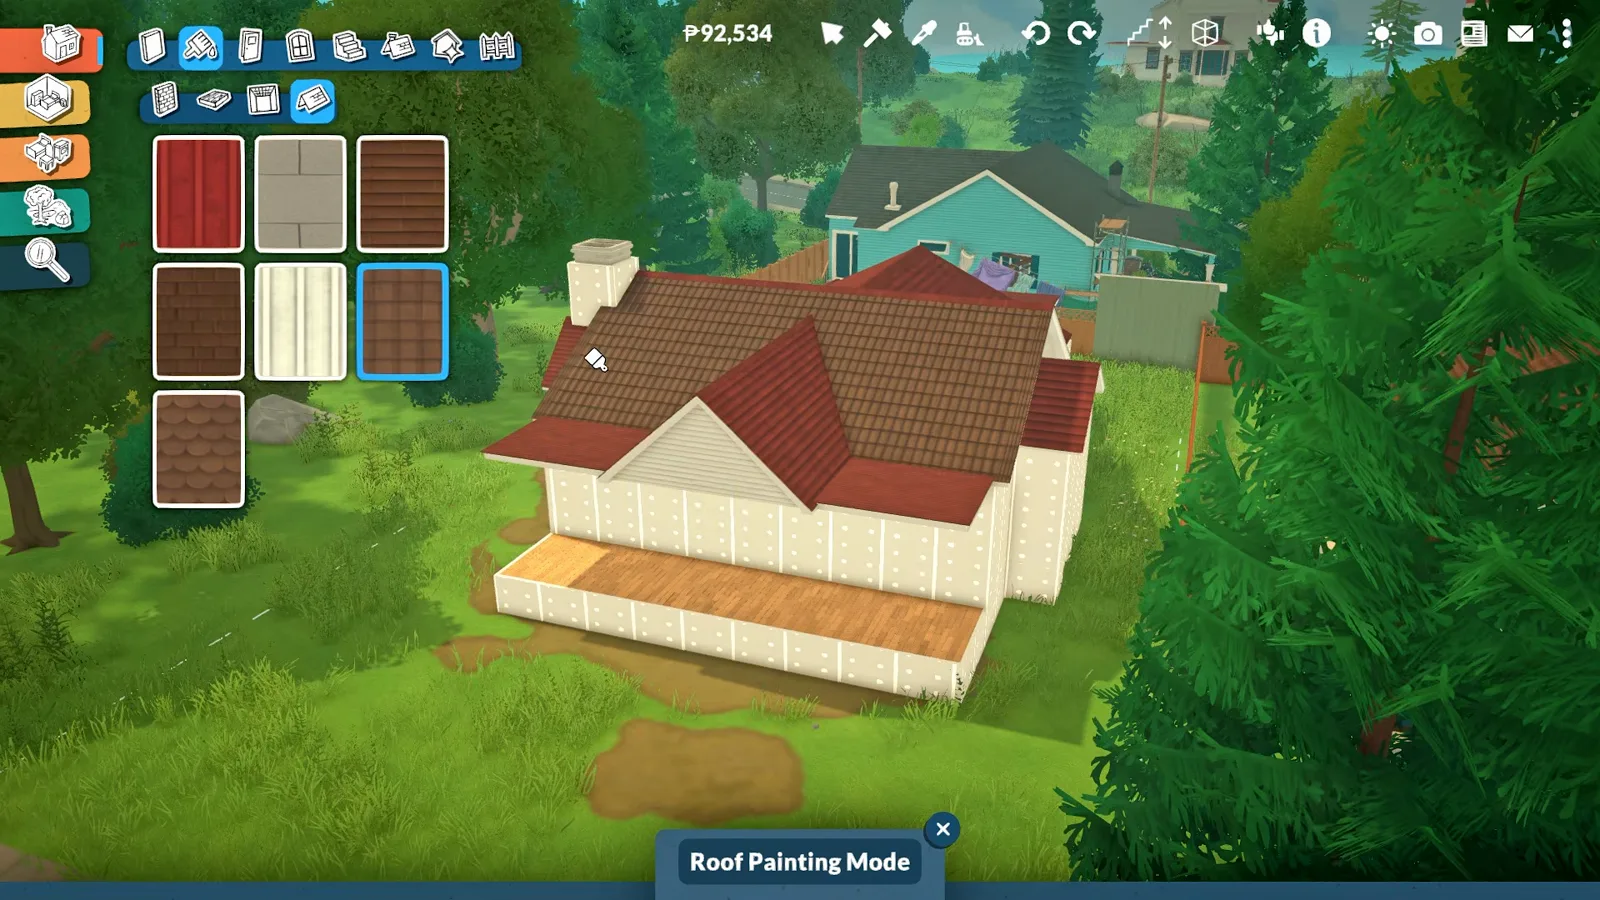
The roof has its own palette, independent of the siding.Watch at 1:20 - 8
Break a long roof with shed dormers
Over a wide single storey the hip roof gets very long and very blank. ItsAnitaa sets two shed dormers into the front slope — roof pieces laid on top of the main plane — which gives the silhouette something other than one big triangle and puts light into the rooms underneath.
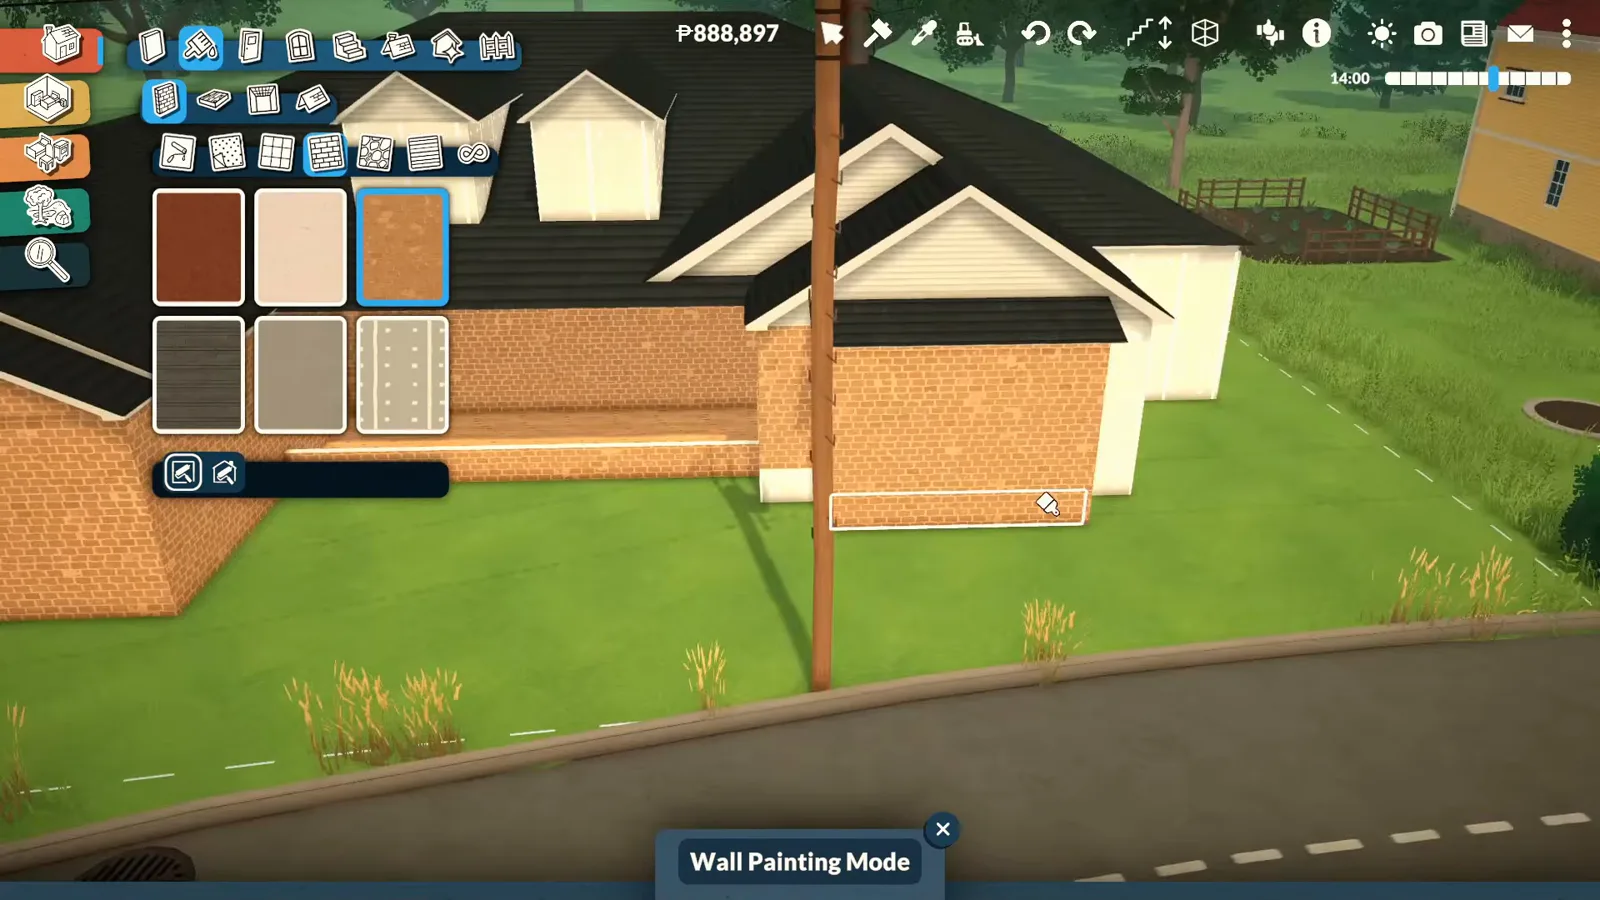
Dormers sit on top of the roof plane; there is no dormer tool.Watch at 4:10
Skin and openings
Siding, windows and the front door
With no second floor to compose, the facade carries the whole character of the house. This is where the two-tone paint scheme, the window rhythm and the raised entry come from.
- 9
Give the gable a second colour
Wall Painting Mode opens the full siding palette. The move visible here is painting the front gable and the porch fascia warmer than the body of the house, which makes a shallow porch read as an entrance instead of a ledge. With no upper floor to compose, two tones on one shell do most of the work.
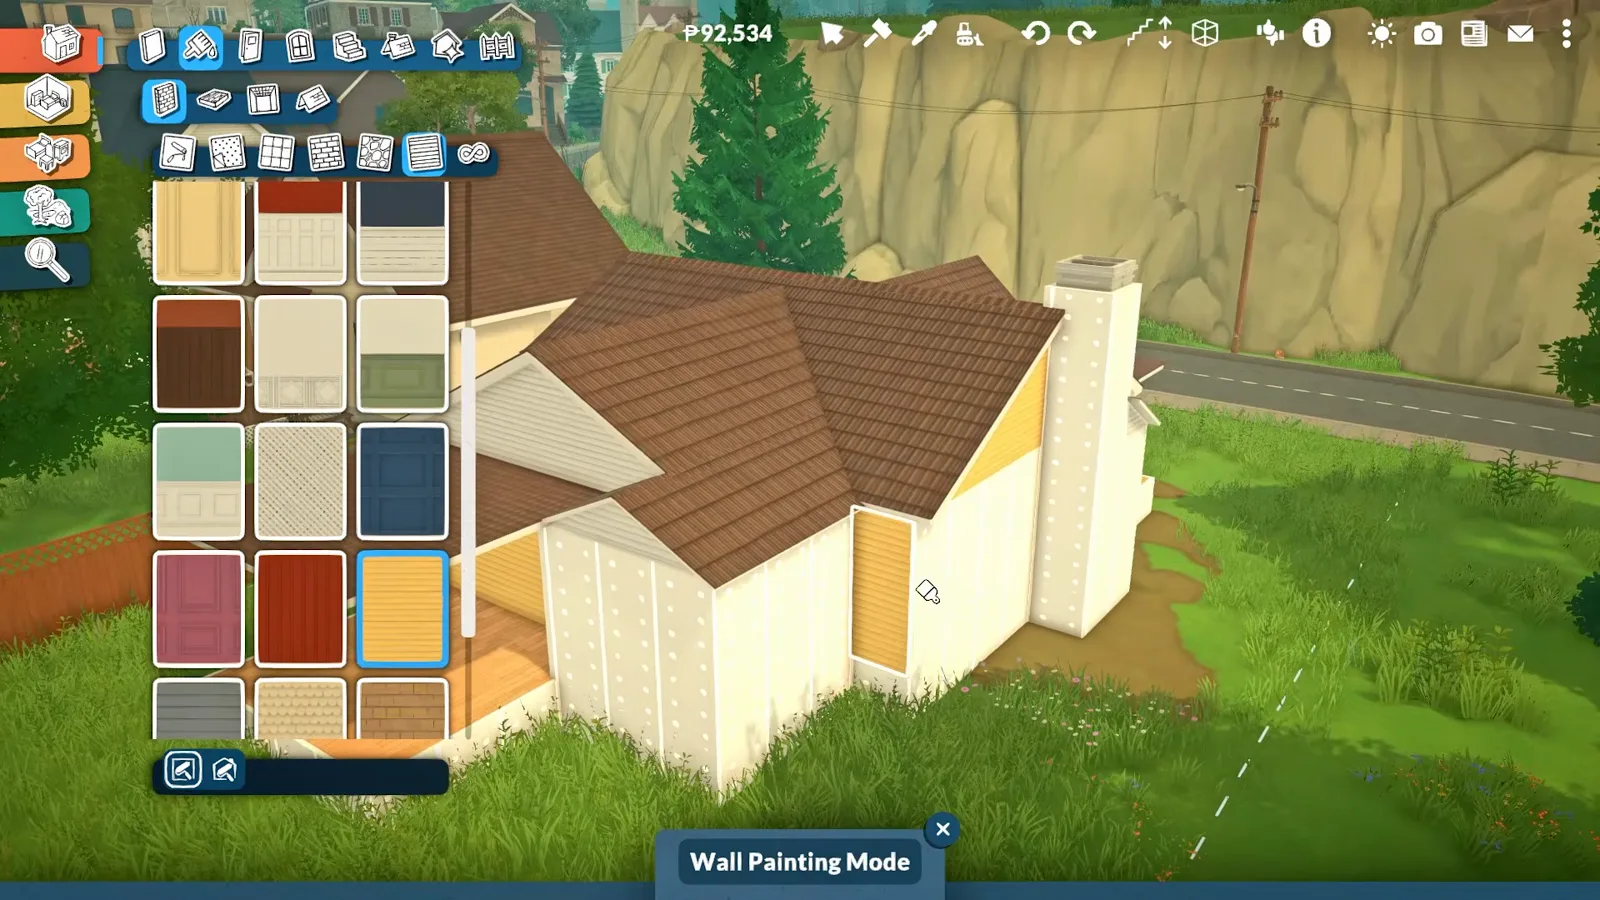
Two siding colours on one shell is what makes the entrance read.Watch at 1:36 - 10
Place windows from the room, not the street
The window catalogue is opened against the finished brick wall and each unit highlights the wall section it will snap into. On a bungalow the front rooms get the tall windows and the service side gets the small ones, so line them up from the interior plan you drew in step 3 rather than from the facade.
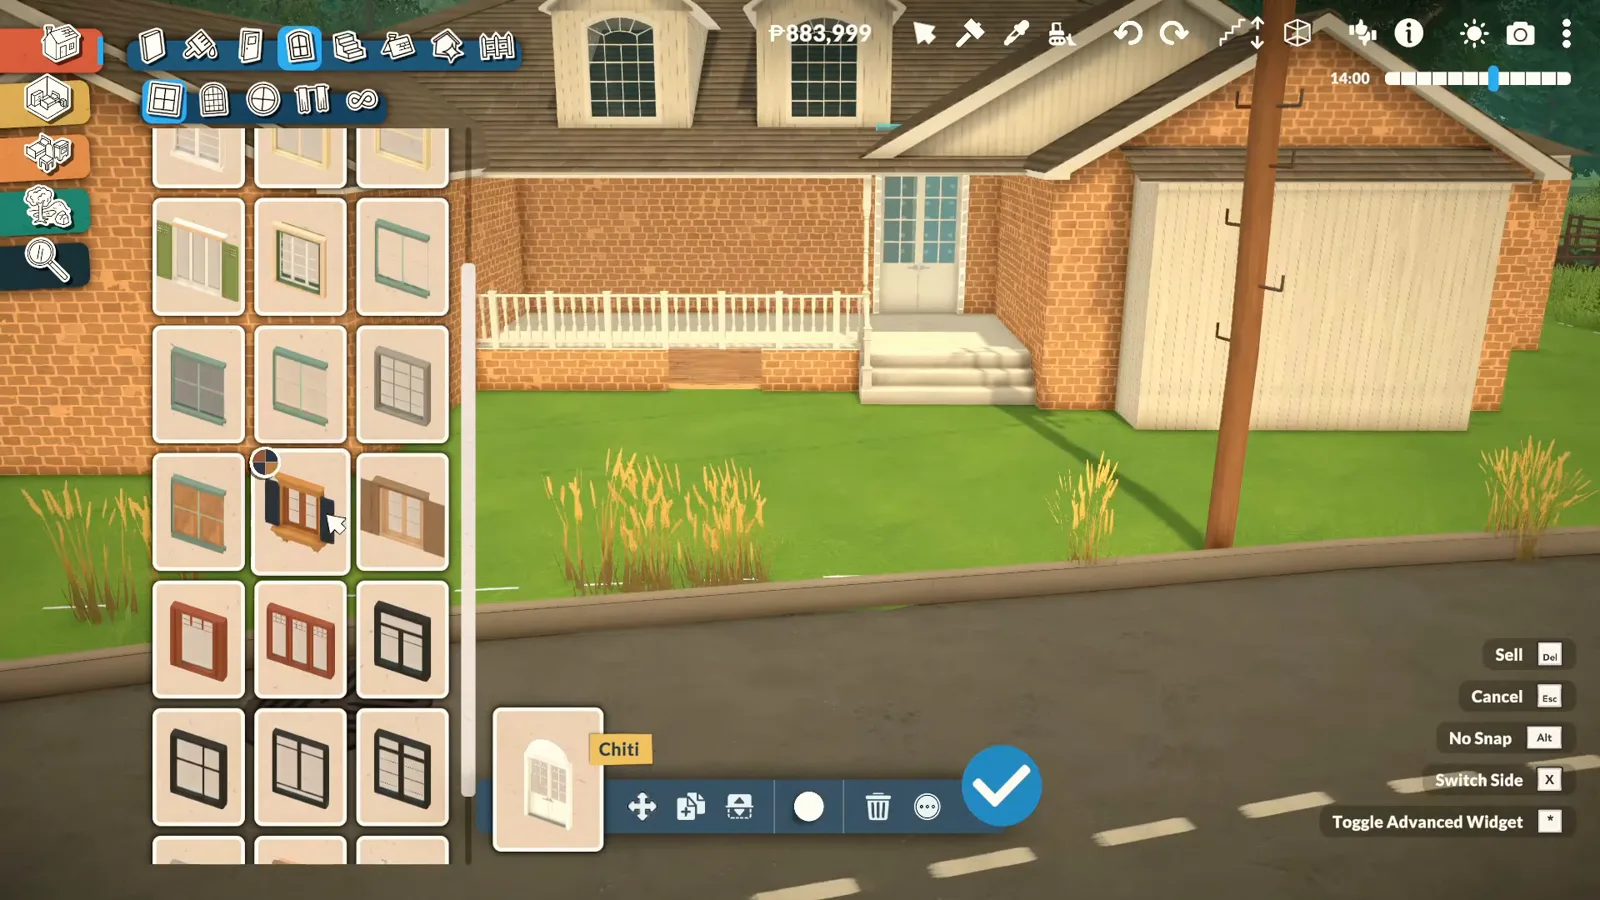
Windows snap to the wall segment they are dropped onto.Watch at 5:20 - 11
Set the door on a raised deck
The door catalogue is open with a fanlight unit highlighted in cyan above a short run of steps. Raising the entry a few steps off the lot costs no floor area and is most of what makes a bungalow porch look deliberate rather than accidental.
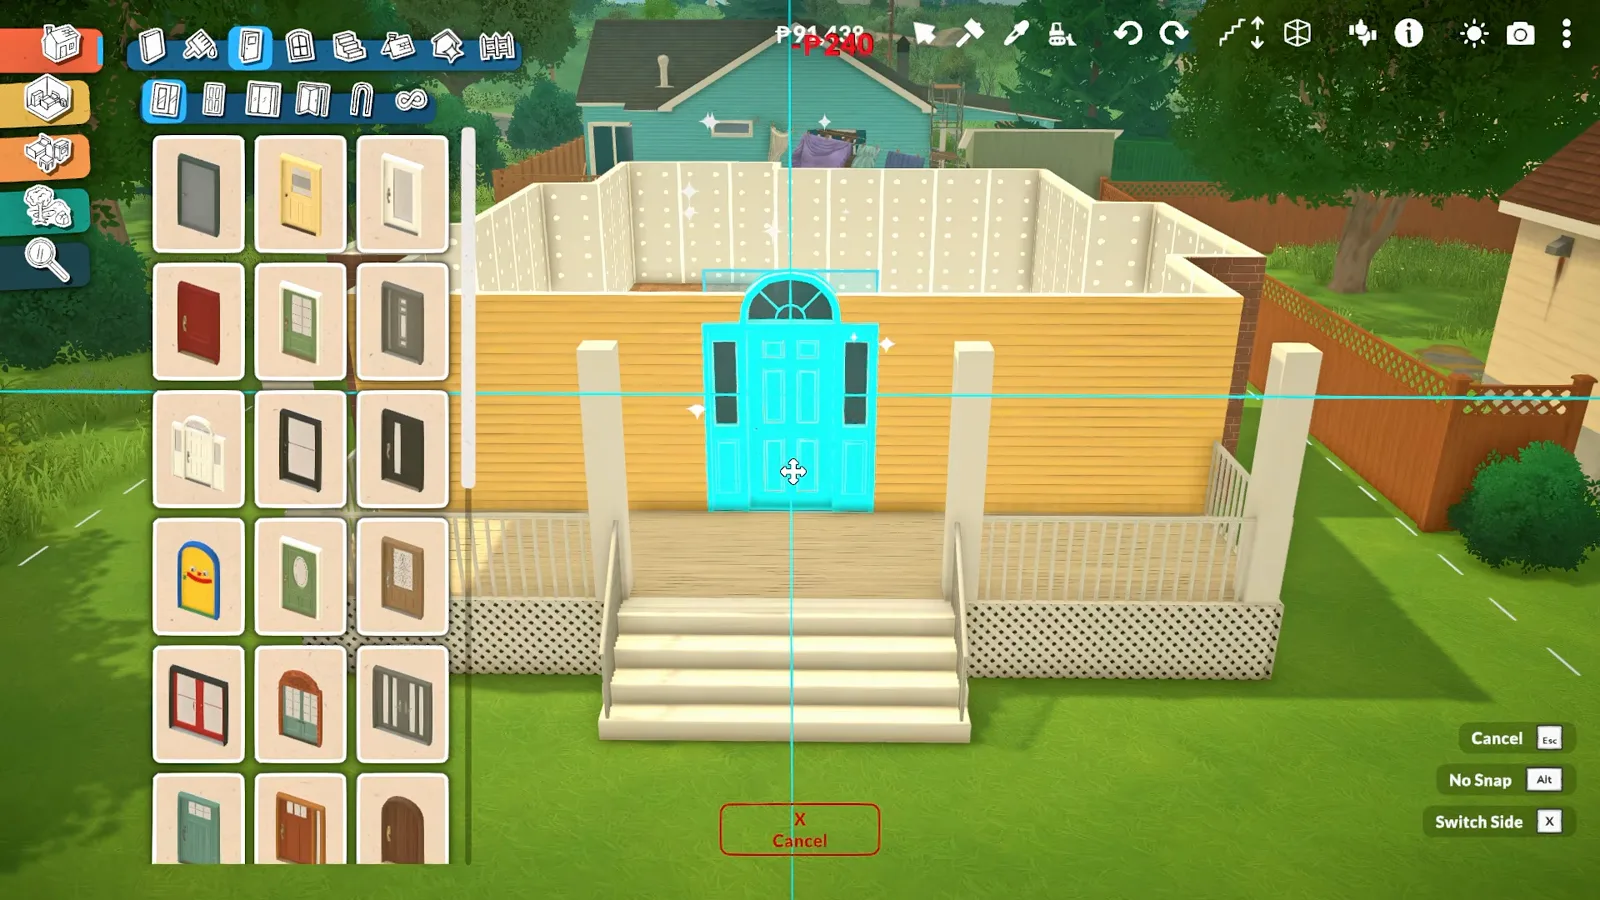
The cyan highlight is the door about to be placed, not a bug.Watch at 2:30 - 12
Close the porch with posts and lattice
The porch is a deck under the main roof with square posts at the corners and lattice skirting below the deck edge — Fence Placement Mode supplies the rails. Keeping it open on three sides is how a single-storey house gets a bright front room without adding a storey.
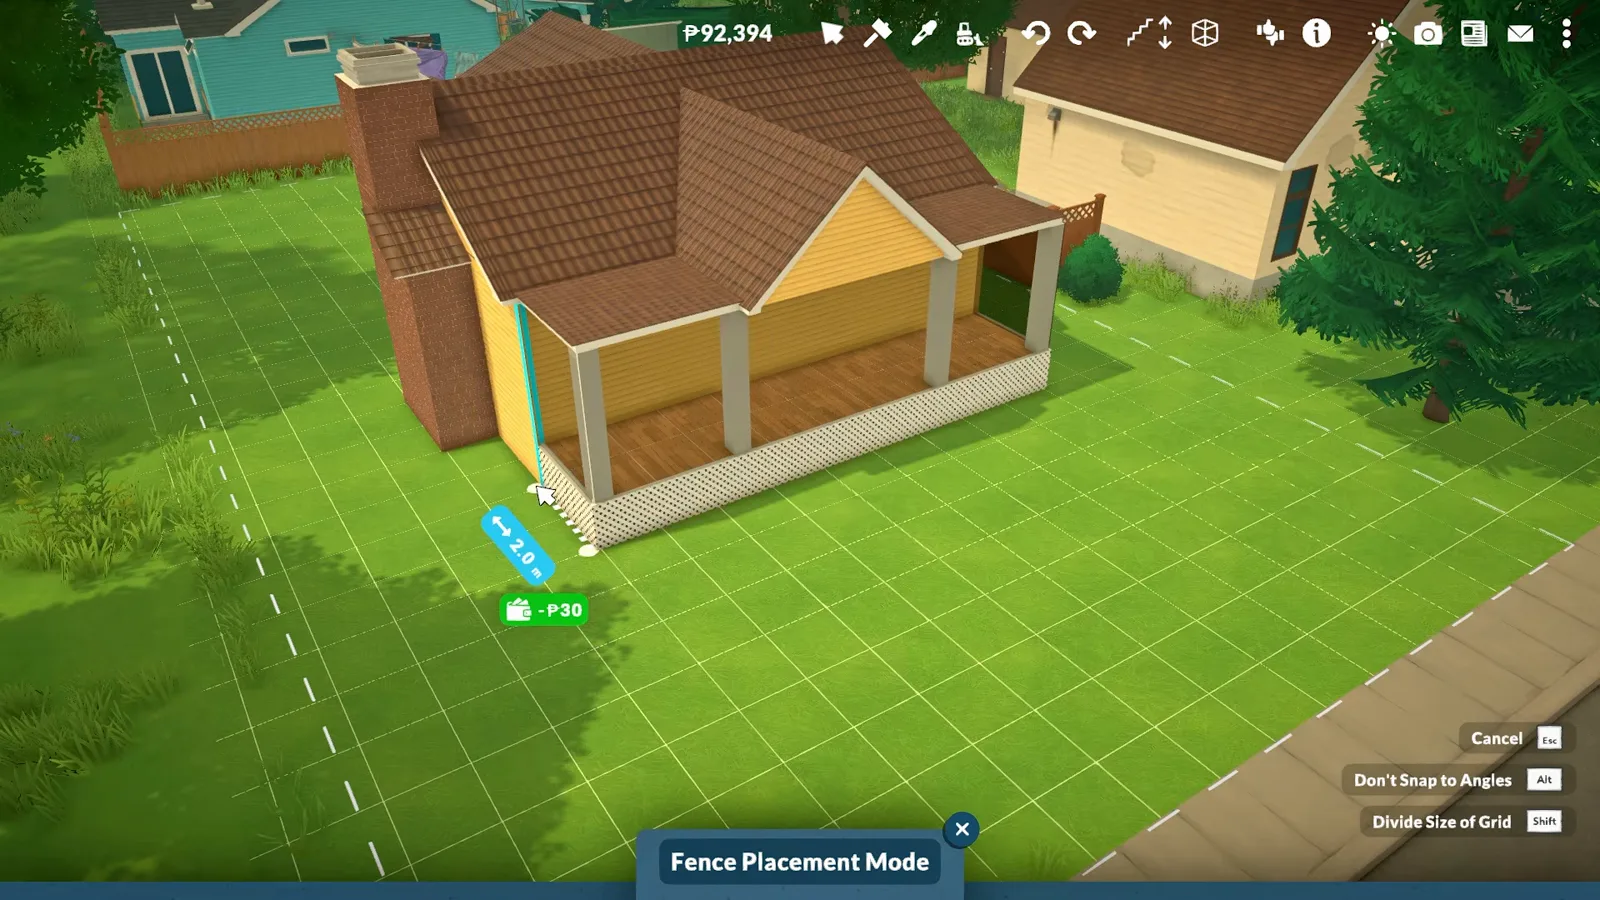
Posts plus lattice: a porch without spending floor on walls.Watch at 2:12
Grounds and living
Finish the plan outside the walls
A bungalow runs out of floor area before it runs out of household. The overhead read, the garden path, the living room and a pergola patio are how both builders buy the rest.
- 13
Read the finished plan from above
Straight overhead the shell shows what a bungalow spends its floor area on: one long entry spine with rooms either side and no circulation stacked on top of itself. The garden path already loops the house, so every external door lands on paving instead of bare lawn.
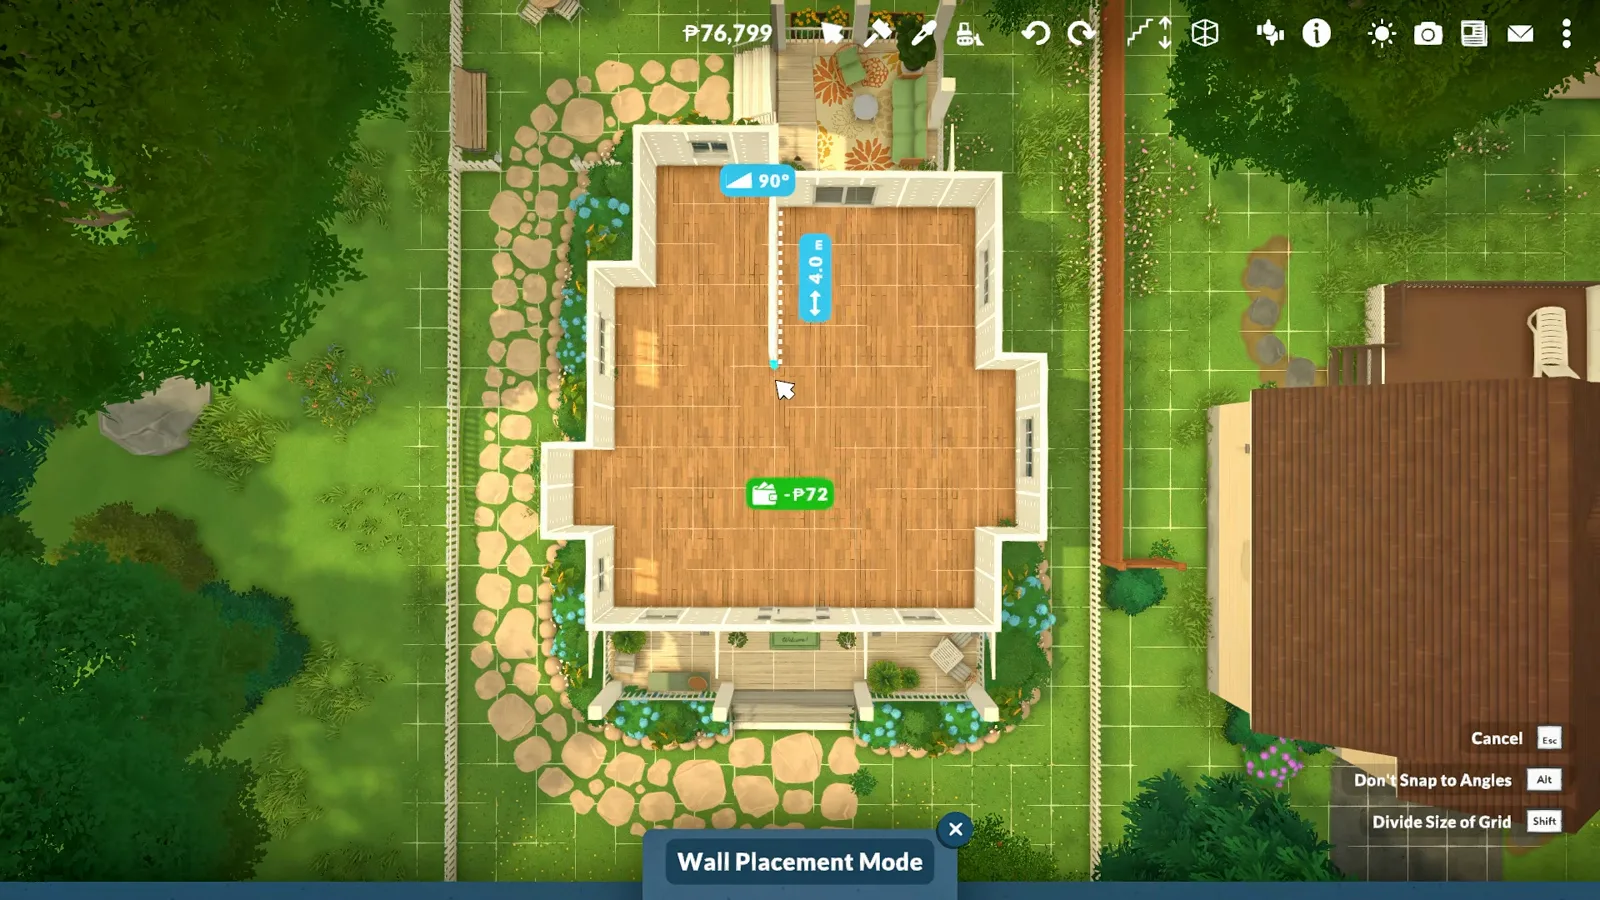
Top-down is the only way to see a one-floor plan as a plan.Watch at 8:40 - 14
Curb the beds before you plant them
The rock catalogue is open with a sunflower and blue-flower bed already edging the front path. Terrain paint lays the bare ground, rock pieces curb it, and the planting fills the strip between — in that order, or you end up moving flowers.
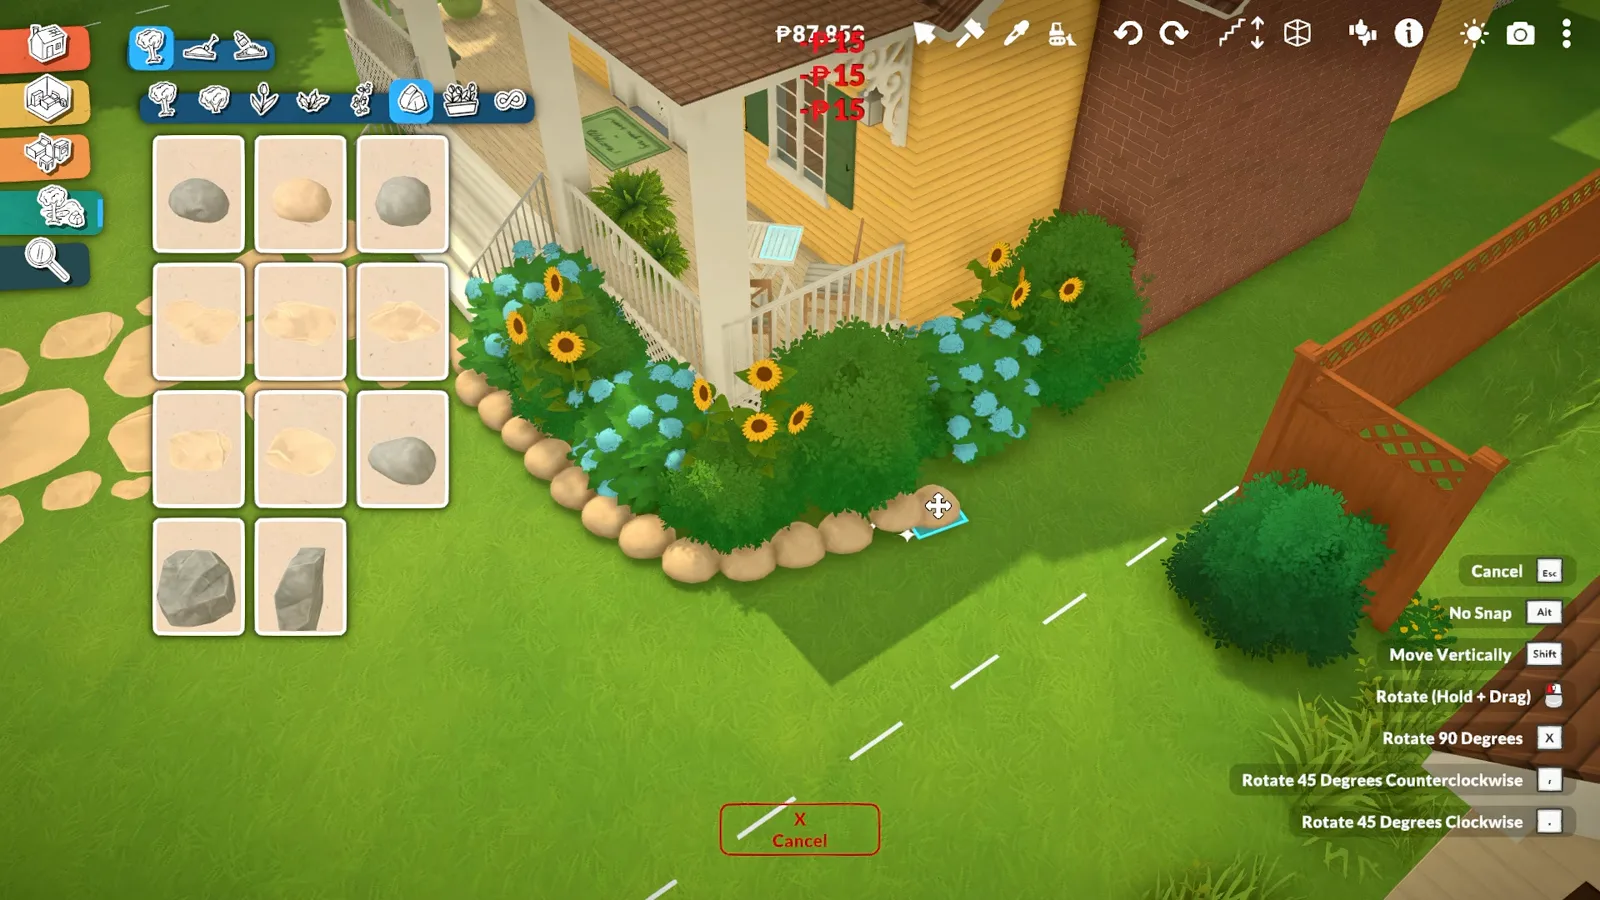
Rock pieces curb the bed; the flowers go in afterwards.Watch at 4:00 - 15
Furnish the long rooms first
With no upstairs, one living room carries the whole household's downtime, so the sofa and rug land before anything else. Cushions and small clutter are then lifted onto surfaces with Shift (hold) while you move the mouse — the same item-height adjustment works on every surface in the house.
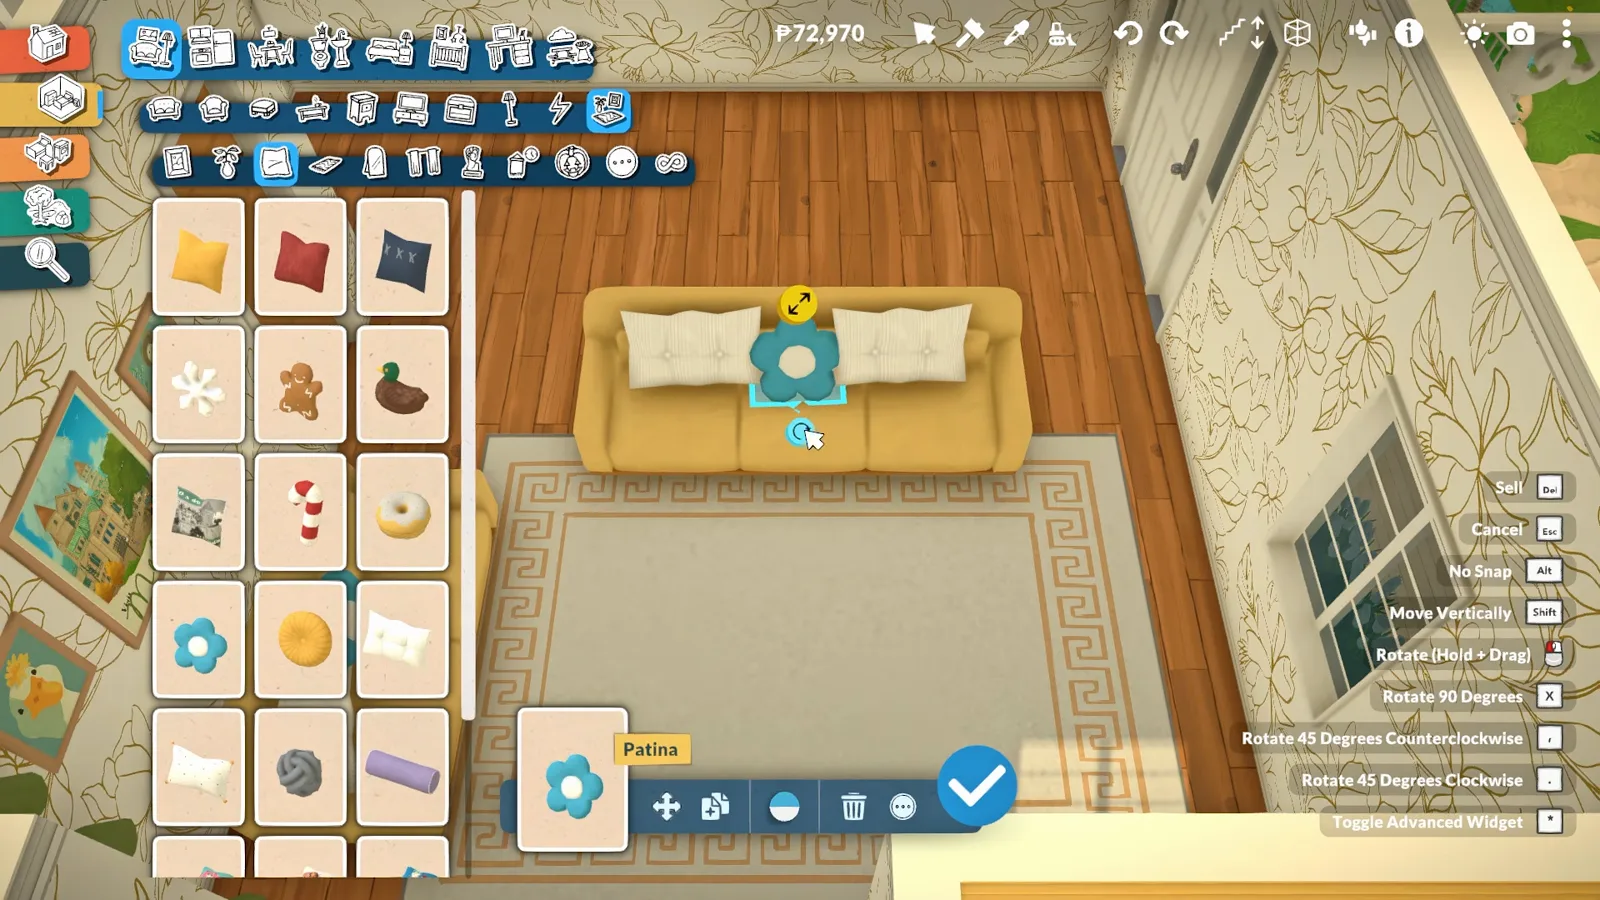
Cushions are separate items — drop them on the sofa, not beside it.Watch at 9:40 - 16
Push the last room outdoors
The one-floor budget runs out at the back wall, so ItsAnitaa takes the last rooms outdoors: a round gravel patio with a metal table and six chairs, a white pergola standing over the bed beside it, and a bench on the lawn against the picket fence. The rock catalogue is open at the left — the boulders in that planting come from it.
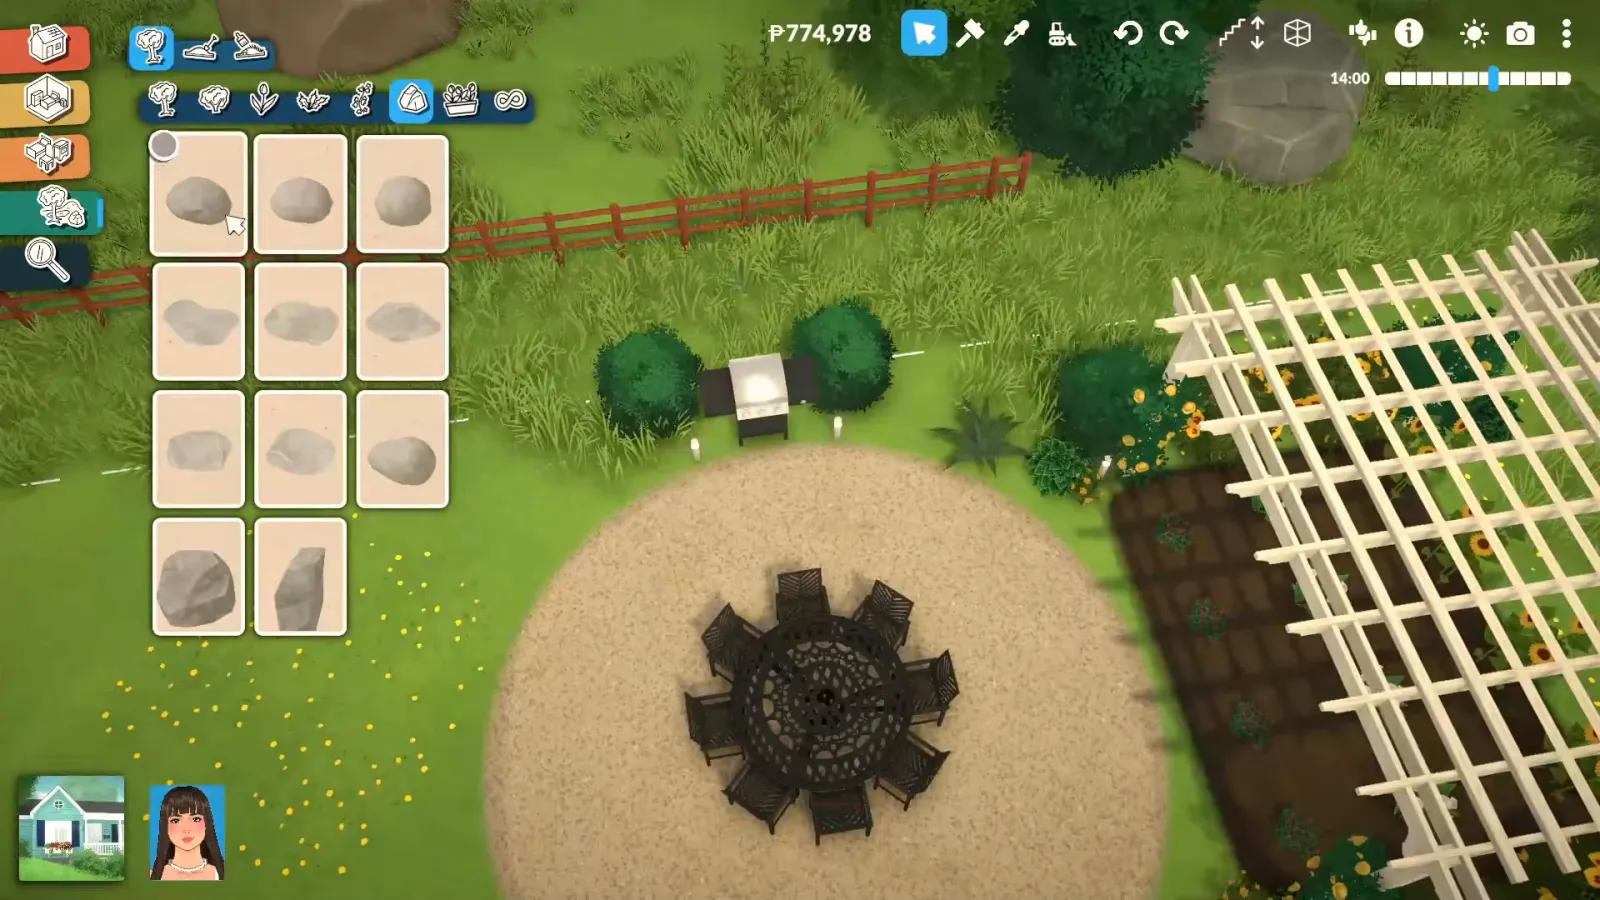
Patio, pergola and a bench on the lawn — the last three rooms, none of them under a second floor.Watch at 37:35
Bungalow questions, answered from the footage
- Is there a bungalow preset or template in Paralives?
- No. As of 0.1.8b there is no house-type stamp and no one-click bungalow in build mode — you lay the floor plate, walls and roof yourself, exactly as the sixteen steps above do. Finished one-storey builds can be downloaded from the Workshop through the in-game library, but those arrive as whole houses rather than a style you can apply to your own lot.
- How big a lot do I need for a one-storey house?
- Bigger than the same floor area needs on two storeys — that is the entire trade-off, and it is why bungalows get pushed to the outer lots. We cannot give you a verified figure: neither builder states a lot size and Paralives never prints the lot area on screen. The only measurement the game does show is wall length in metres while you drag, which is what step 4 uses.
- Can I add a second floor to a bungalow later?
- Not without rebuilding the roof. Wall and floor heights are free to raise, but every hip piece, chimney and dormer in steps 5 to 8 sits on the one-storey wall line, so adding a storey means stripping the roof first. Neither build in this guide shows a mid-build floor addition, so we have no footage to confirm how much of the interior survives the change.
- Where do the kitchen, bathroom and laundry go?
- On the same floor as everything else, and grouped. DARIKOSIMS runs a compact kitchen along one wall with a bathroom off the living area; ItsAnitaa keeps a separate utility room with a washer and dryer behind the kitchen. With no stairs, wet rooms can share a wall and run their services in one line, which is the practical reason bungalow plans read as a row of rooms rather than a cluster.
- Does a bungalow need stairs at all?
- Only at the front door. Both houses here sit close to grade and the only step run is the short porch stair in step 11 — the rest of the plan is flat, which is what makes the type popular for households that want to avoid climbing. If you want a higher deck you are into the foundation workaround rather than a stair tool, which our foundations and stairs guides cover step by step.
- What is the cheapest thing to get wrong on a bungalow?
- The roof. A single wide hip over one storey reads as a low box unless you break it, and all three fixes are free or nearly so: a stack through the plane (step 6), a second siding colour on the gable (step 9) and dormers dropped onto the long slope (step 8). Both builders use all three.
Go deeper on the tools
Foundations
There is no foundation button — raise a porch deck or a sunken lounge with wall heights instead.
Stairs
Eight staircase styles and how to resize them, for the one flight your bungalow actually needs.
Roofs
Corner roofs, flat roofs, skylights and dormers explained tool by tool, not style by style.
Keep building
Starter home
Empty lot to playable house on a budget — the essentials list a bungalow still has to satisfy.
Farmhouse
Another low, wide silhouette with a porch — but the roof and the outbuildings work very differently.
Tiny house
What one storey looks like when the lot refuses to give you more floor area.
Windows & doors
Snapping openings to walls, fixing curved-wall windows and resizing sliders.
How to make a porch
The raised-foundation and half-level methods behind the entry deck in step 11.