
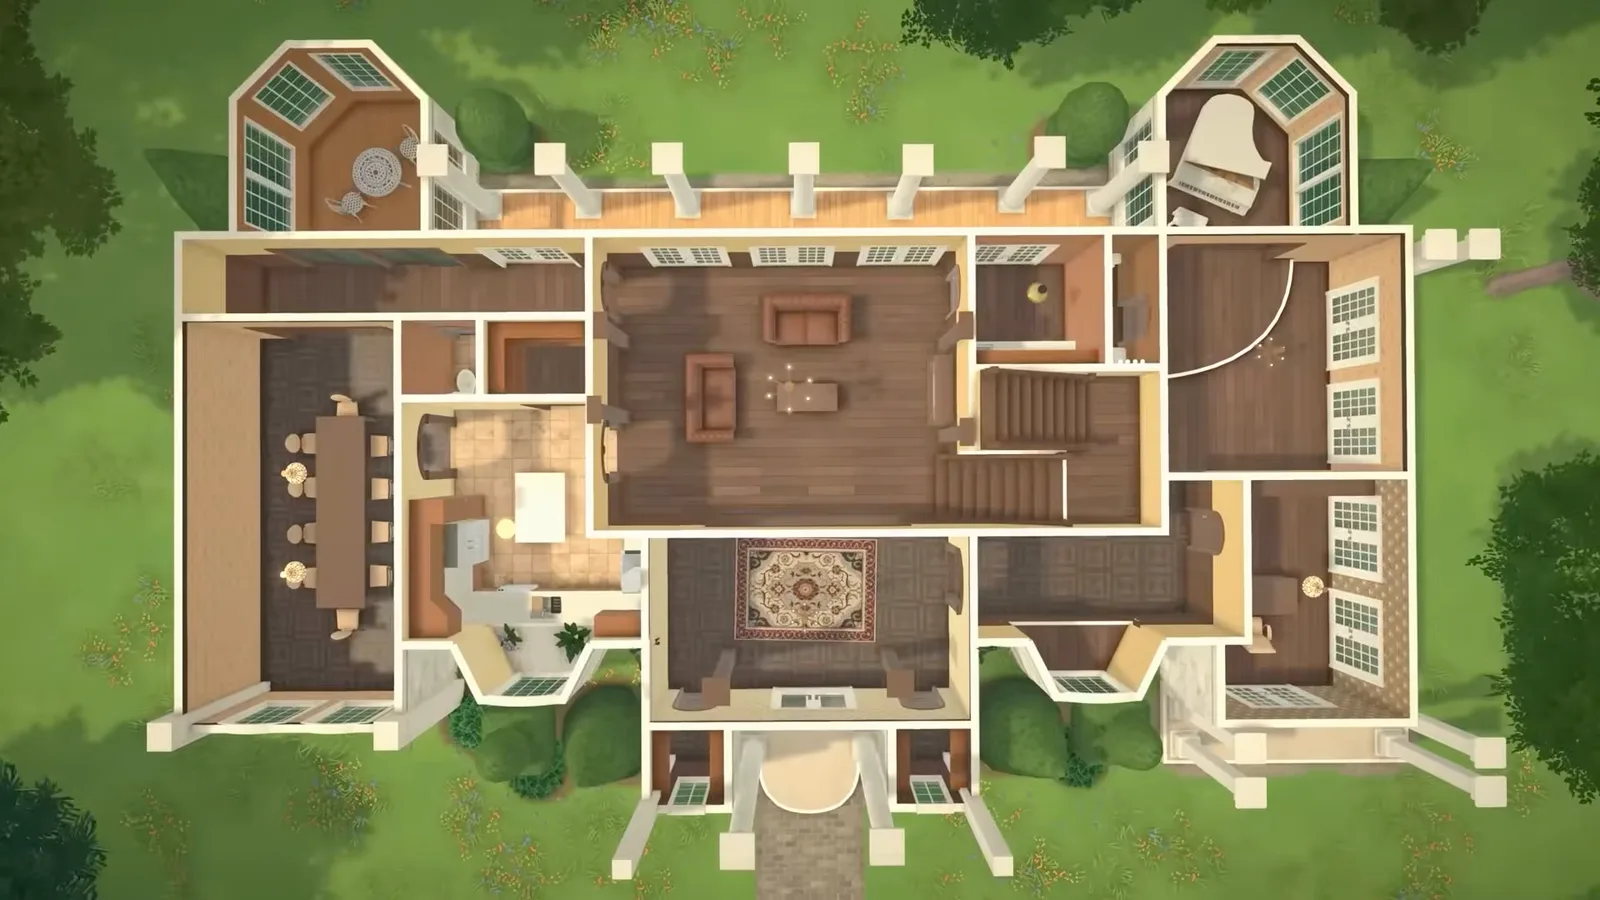
The short version
Turn autosave off, draw the room shape before you decorate anything, and remember that a raised foundation is faked with the separator tool rather than built with a foundation tool. Those three things account for most first-build disasters.
- Settings → General: switch Enable Autosave off while you build
- Rooms cannot be moved after placement — get the footprint right first
- Foundation = separator outline + raised floor + snapped stairs
- Home / End cycle wall visibility, Page Up / Page Down change floor
Before the first wall
Set the game up first
Four minutes of setup saves an hour of rebuilding. Early Access build mode is generous with tools and careless with your save file.
- 1
Turn autosave off before you build
Open Settings → General and switch Enable Autosave off for as long as you are building. Dragging walls around can still glitch a room in Early Access, and an autosave will write that glitch straight into your file. With autosave off, a broken room is fixed by quitting to the main menu without saving and loading again. Save manually every few rooms instead.
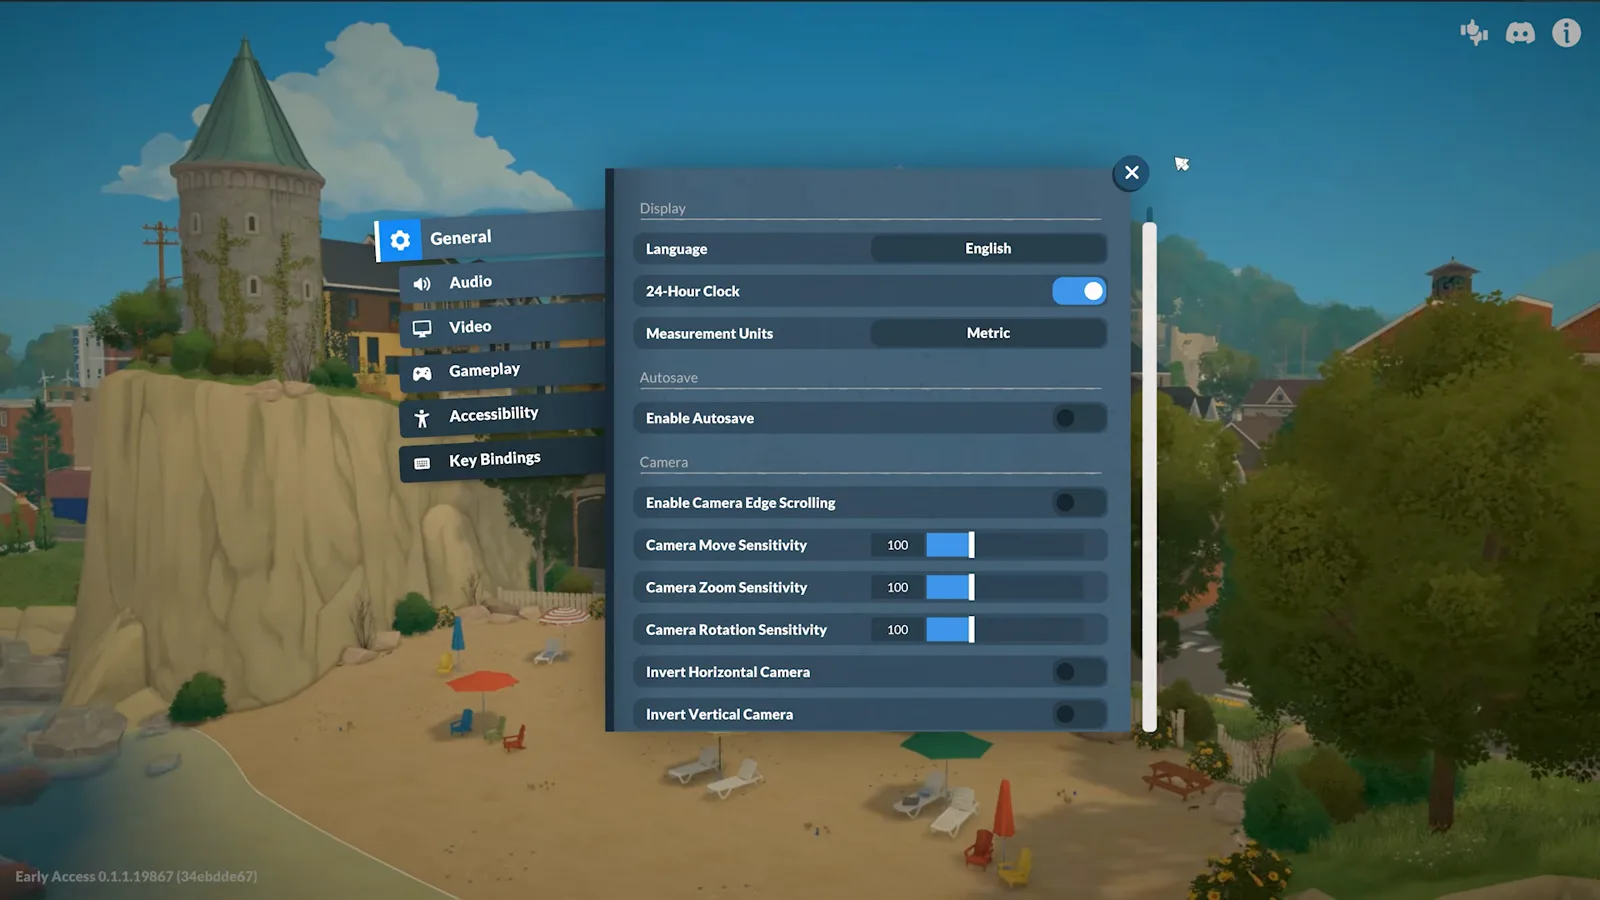
Settings → General → Enable Autosave, off while you build.Watch at 1:02 - 2
Set the three build mode options
Settings → Gameplay has a Build Mode block with three switches worth knowing. Use Grid for Wall Placement should stay on while you learn. Pause Time While in Build Mode stops your Paras starving through a long session. Start New Wall Automatically After Placement keeps the wall tool armed so you can draw a whole room without re-selecting it each time.
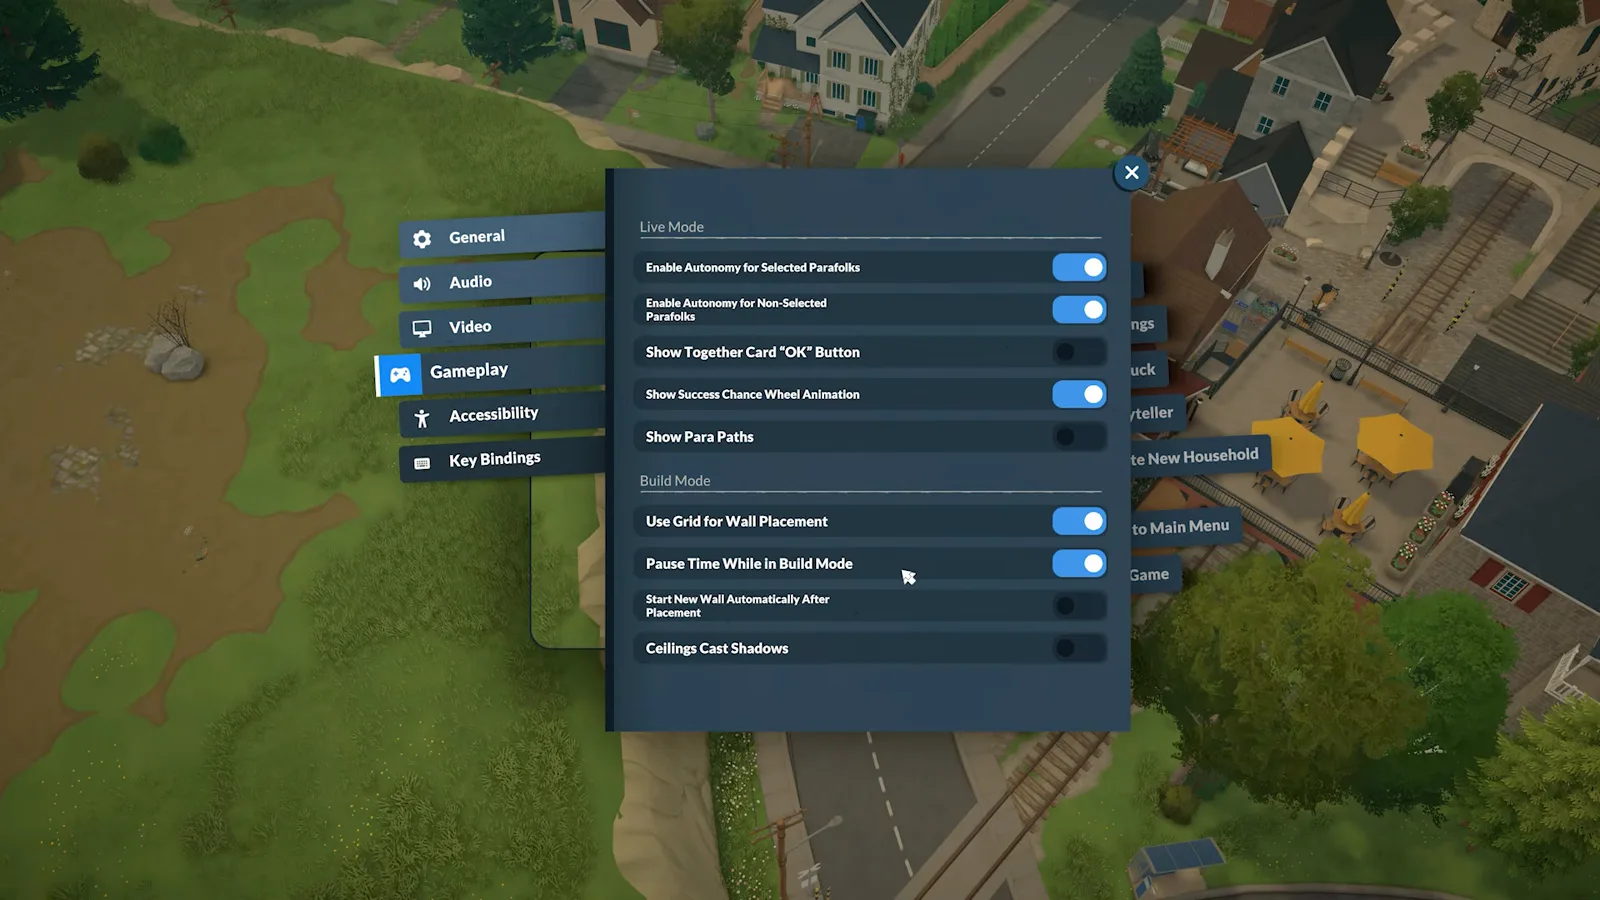
Settings → Gameplay → Build Mode: the three options that change how walls feel.Watch at 1:18 - 3
Buy an empty lot to work on
Zoom out to the map and click any lot without a house, then buy it. If you only want to practise, start a new game from the main menu and pick the simple empty terrain instead: no Paras, no household money, just a flat grey box to build in.
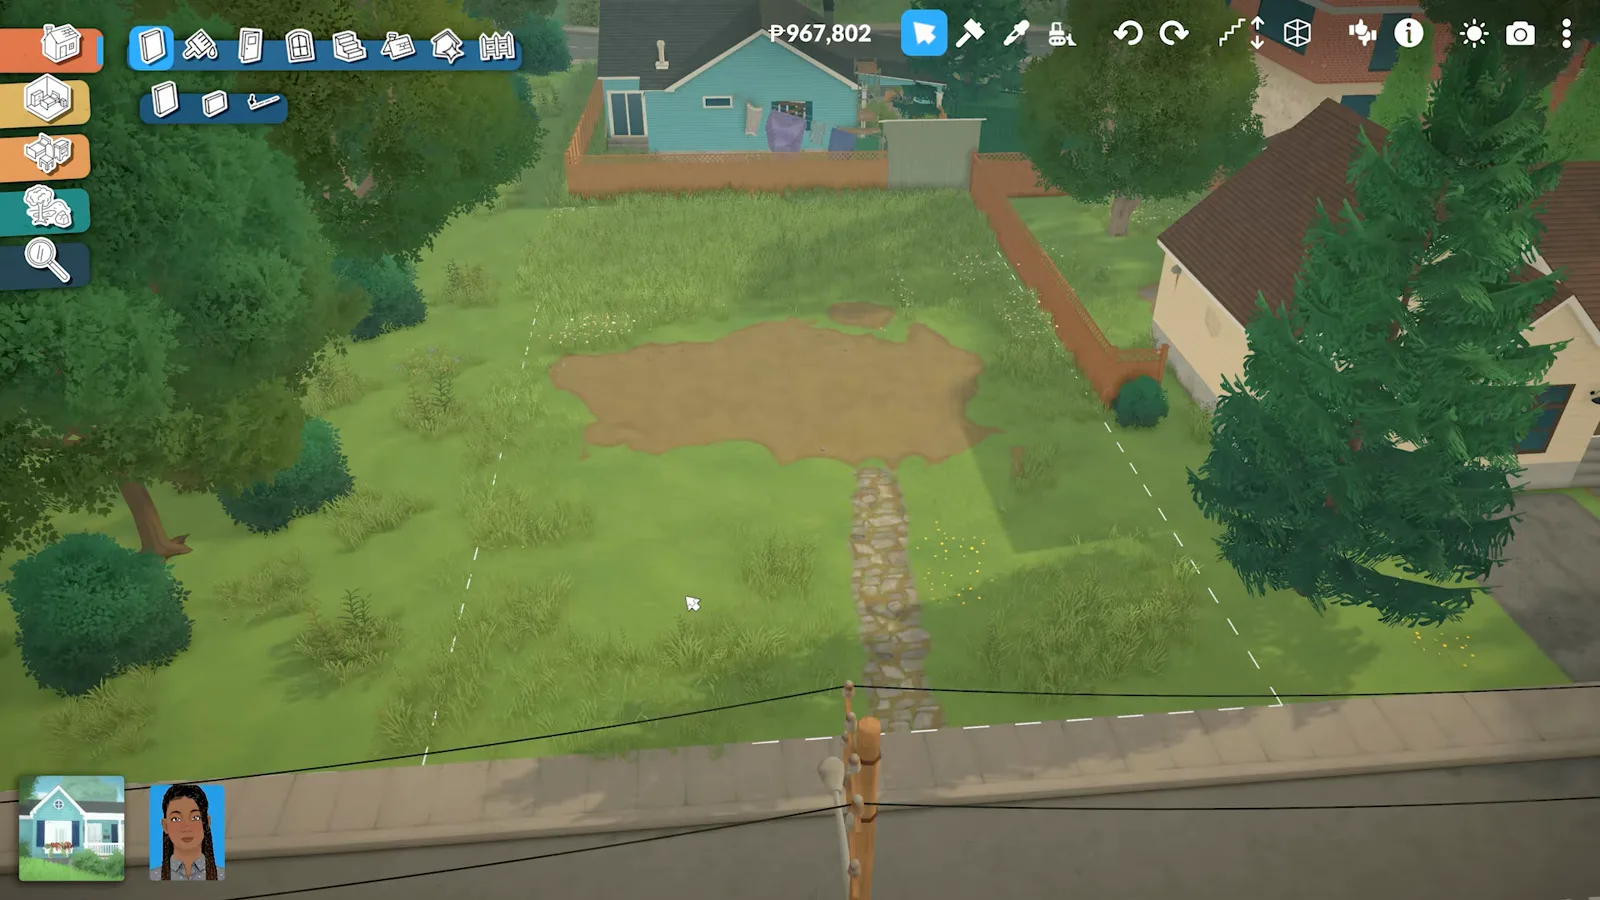
Any lot with no house on it can be bought and built on.Watch at 1:36 - 4
Learn the toolbar before you draw anything
The house icon in the bottom-left corner swaps live mode for build mode — no loading screen either way. Along the top: cursor, sledgehammer (K) to sell one item at a time, pipette (I) to copy a colour or an object, bulldozer to clear the lot, undo (Ctrl+Z), redo (Ctrl+Y), floor up and down (Page Up / Page Down) and wall visibility (Home / End). Hover any tool and the game plays a short clip of what it does.
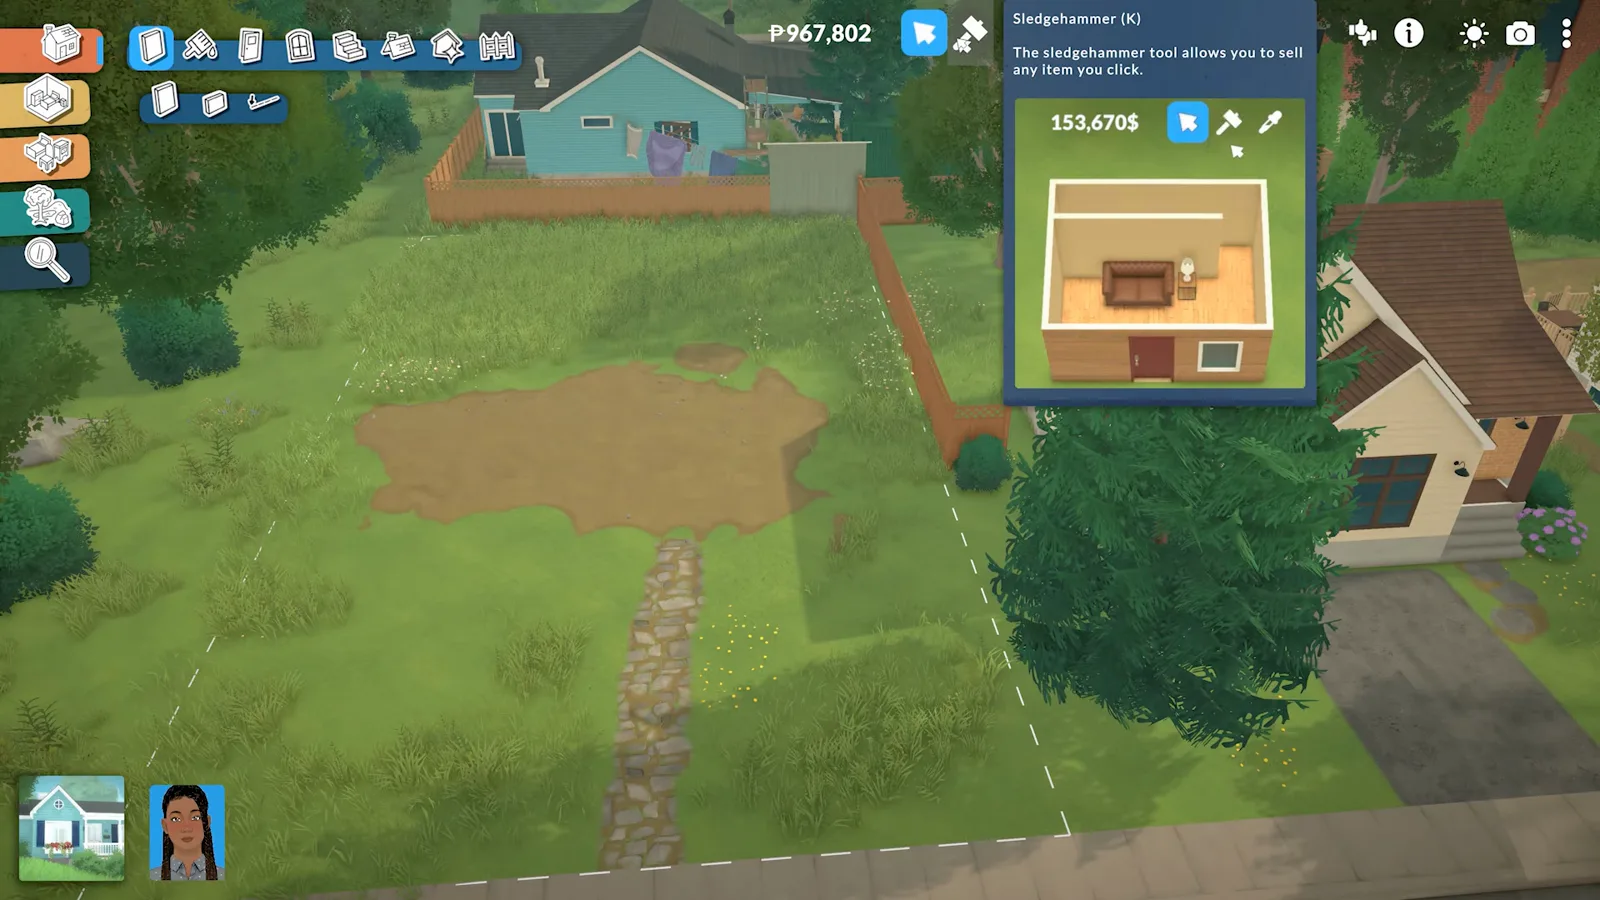
Hovering a tool plays a preview clip — cheaper than trial and error.Watch at 1:45
The shell
Walls, foundation and stairs
The shell is where Paralives differs most from other life sims. Rooms are permanent once drawn, and the foundation you expect to find does not exist yet.
- 5
Draw the rooms, then level the floors
Walls follow the grid by default. Hold Shift for half-grid steps, hold Alt or press G to place off-grid entirely. Draw the full footprint before you decorate: rooms cannot be repositioned, although you can drag a single wall to make one bigger. When one section ends up lower than the next, click the floor and pull its blue arrow up until both levels match.
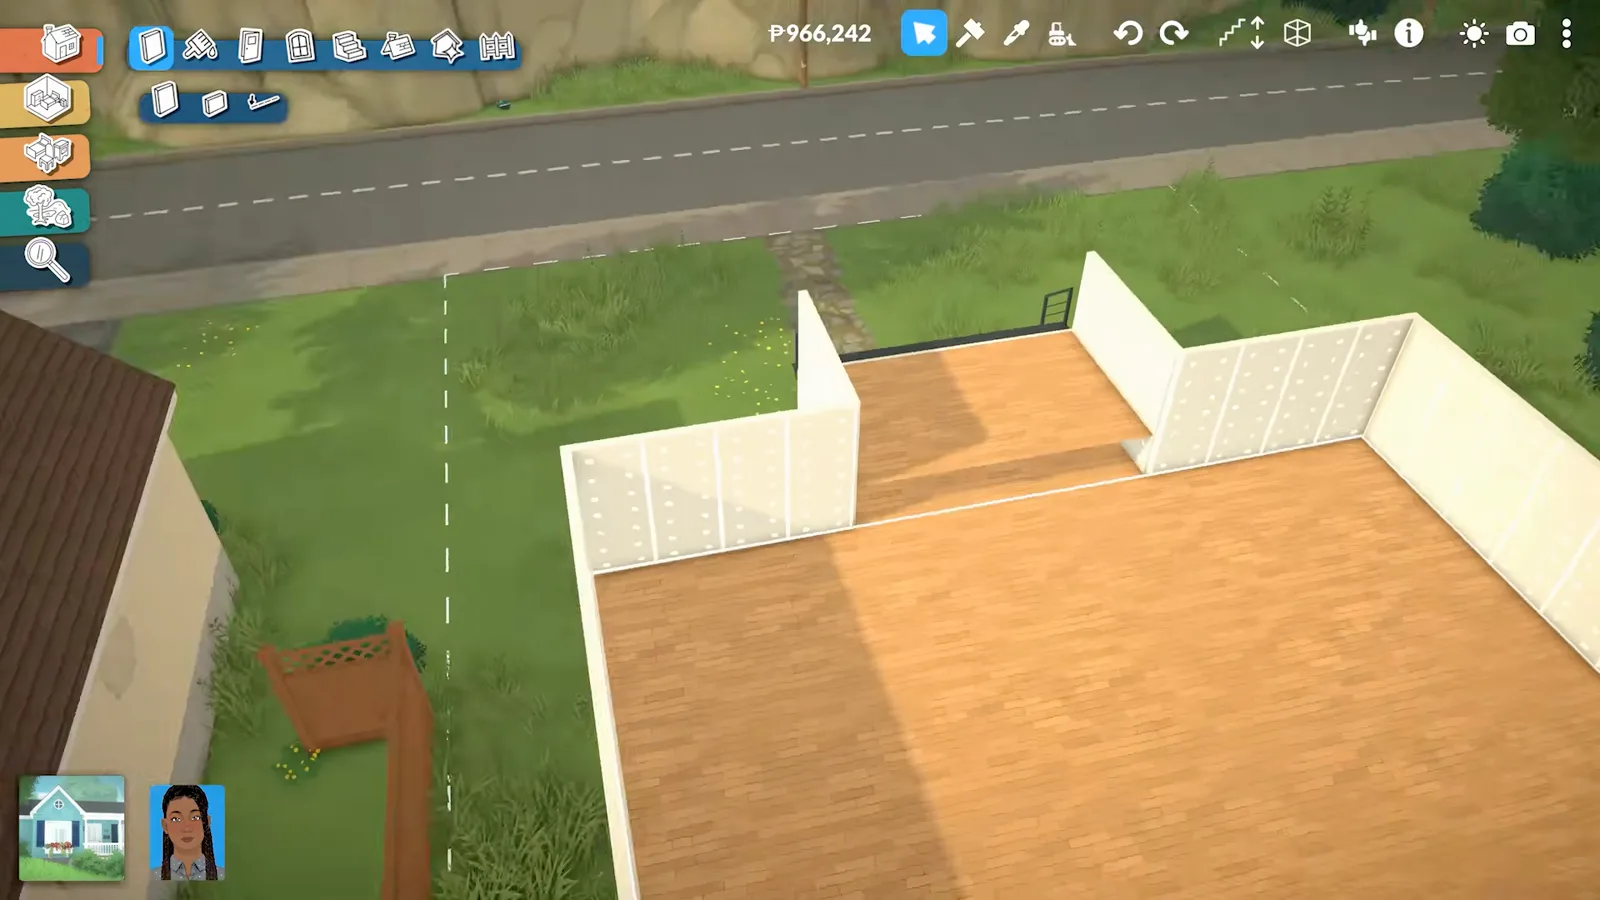
Different levels are normal after joining sections — raise the low one with the blue arrow.Watch at 5:40 - 6
Fake the foundation with the separator tool
Paralives has no foundation tool. Draw the room outline first, then pick the separator — it sits to the right of the wall tool — and trace over that outline. A separator marks an edge without adding a wall, which is what gives stairs something solid to snap against. Then raise the floor a few ticks with the blue arrow in the middle of the room.
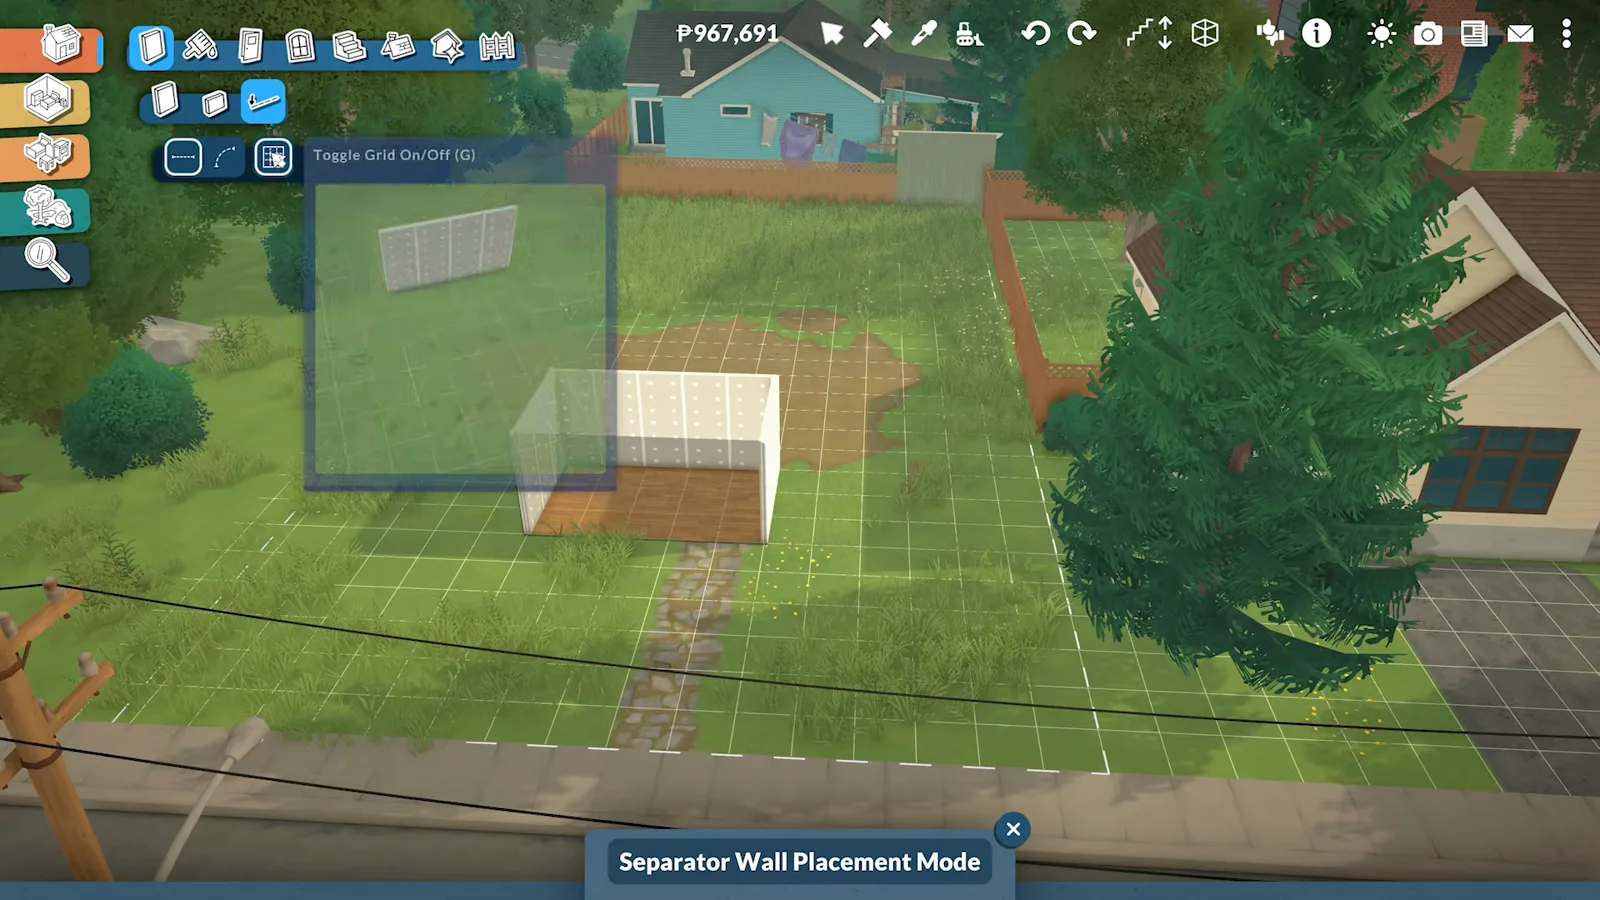
Separator mode: an edge with no wall, so the stairs have something to grab.Watch at 4:25 - 7
Drop the stairs against the raised edge
Open the stairs catalogue and drag a set towards the raised platform until it snaps into place. It does not have to look right yet — snapping is the only part that matters. If the staircase refuses to attach, the platform edge probably has a wall on it instead of a separator.
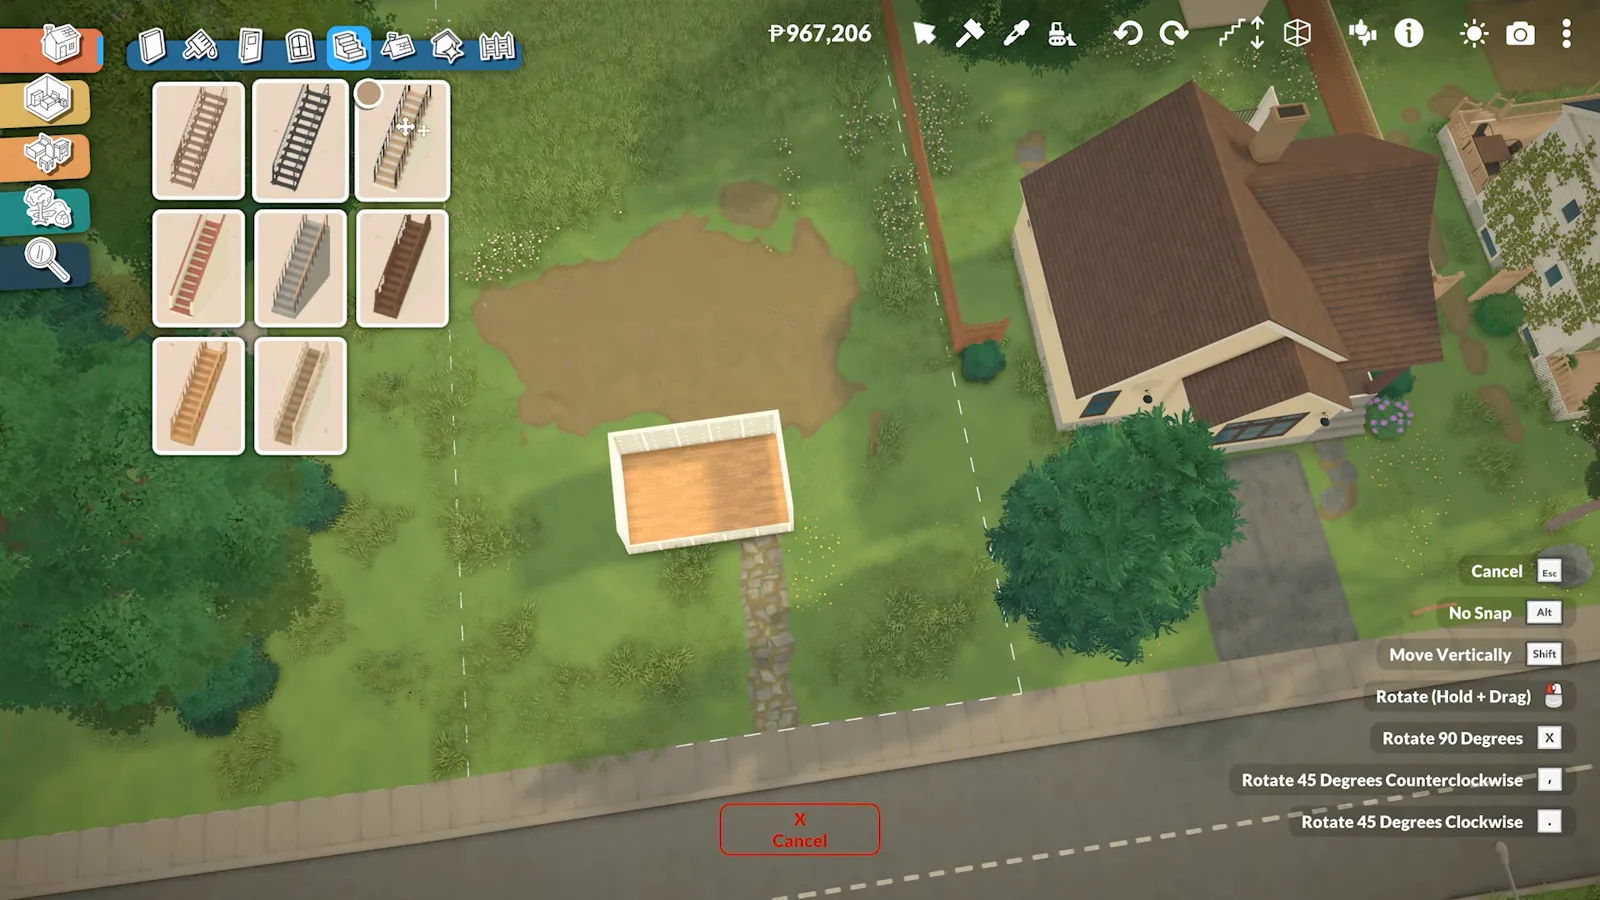
Get it close, let it snap, adjust afterwards.Watch at 4:45 - 8
Widen the stairs and learn the object menu
With the staircase selected, drag its side handles to widen it until it lines up with the opening, and recolour it from the same panel. The list on the right is the object menu you will use on everything from now on: Sell (Del), No Snap (Alt), Move Vertically (Shift), Rotate 90 Degrees (X), the two 45-degree rotations, and Toggle Advanced Widget for free stretching and tilting.
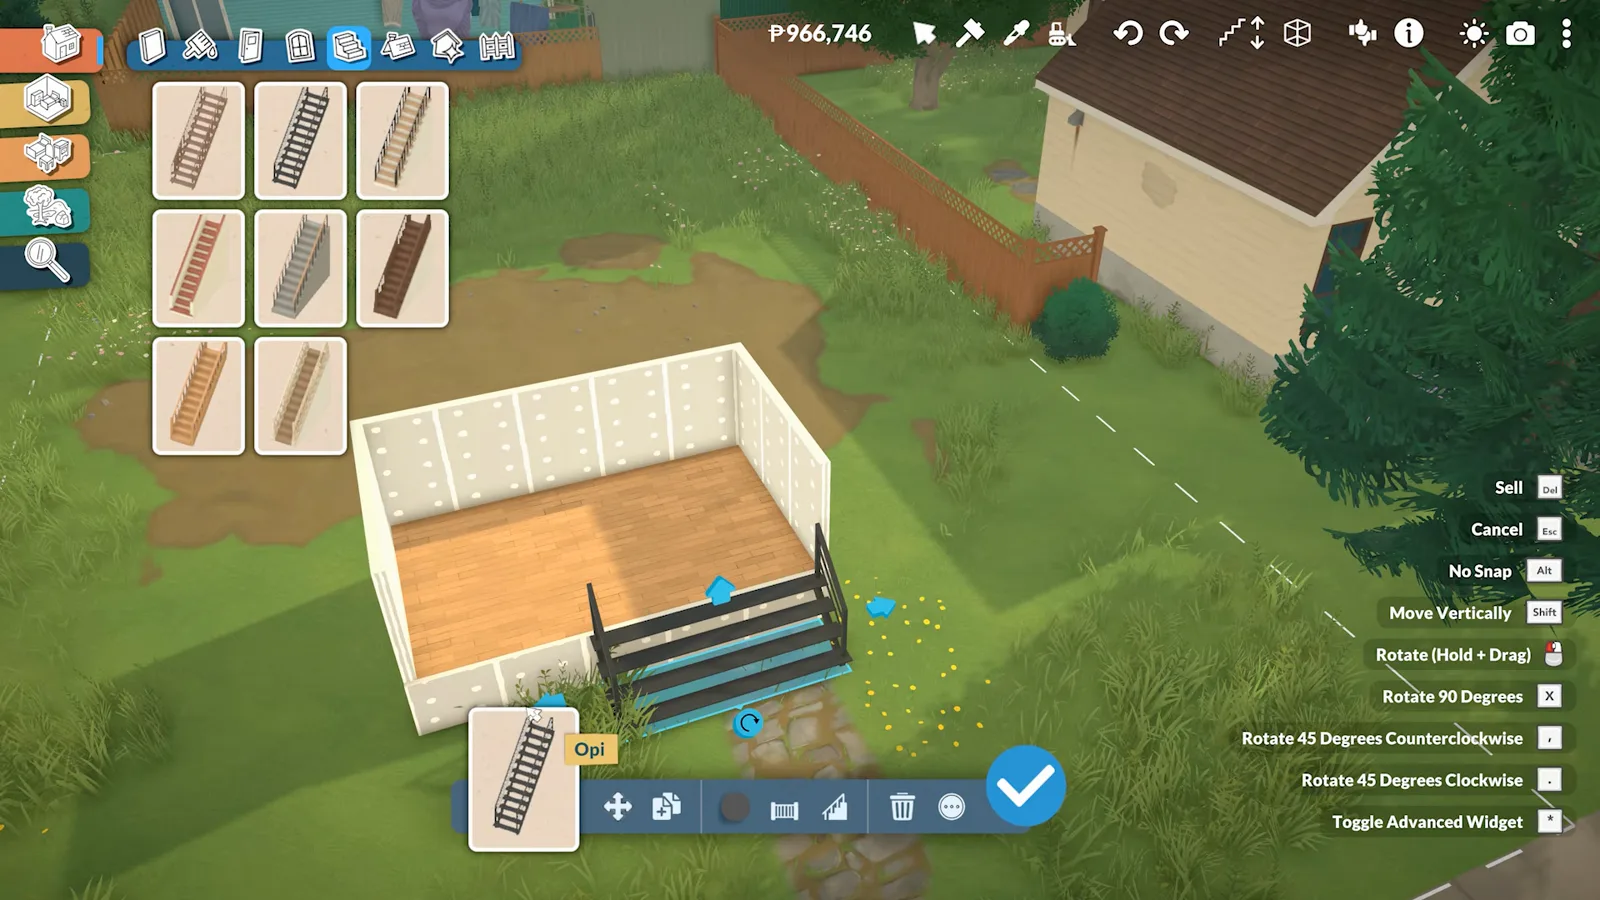
Every object exposes the same shortcut list — worth memorising early.Watch at 5:02
Openings and roof
Doors, details and the roof
Doors and windows resize freely, architectural details are hidden one tab further along, and the roof is the one tool still fighting you in Early Access.
- 9
Place doors and windows
Doors, arches, windows, curtains and blinds share one tab. Windows resize freely and the game adds panes as they grow, so build the size you want once and duplicate it rather than resizing each copy. Two buttons look similar but are not: flip item mirrors it, while switch side of item on wall moves the handle and lock to the other face — that is the one that keeps interior doors looking interior.
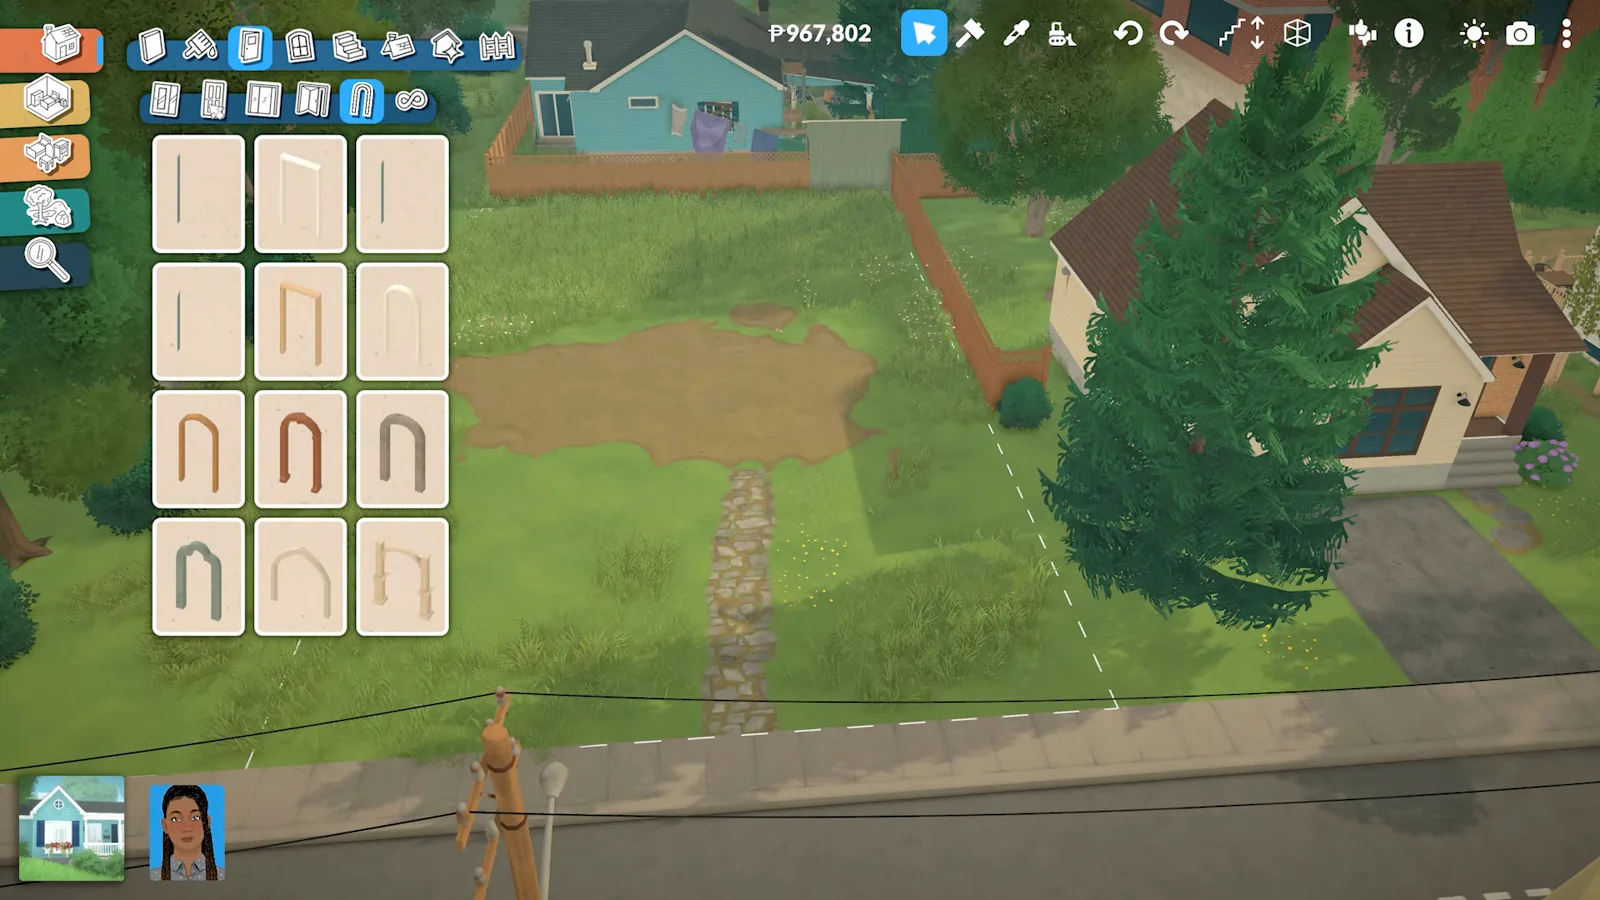
Doors, arches, windows and curtains all live in the same tab.Watch at 2:35 - 10
Add trim, columns and texture
Architectural details is the tab most first builds skip. Moulding runs along a wall the way a fence does, columns can be resized in both thickness and height, and the miscellaneous section holds shutters, roof trim, pipework, graffiti and wall cracks. Almost all of it recolours, and most of it resizes.
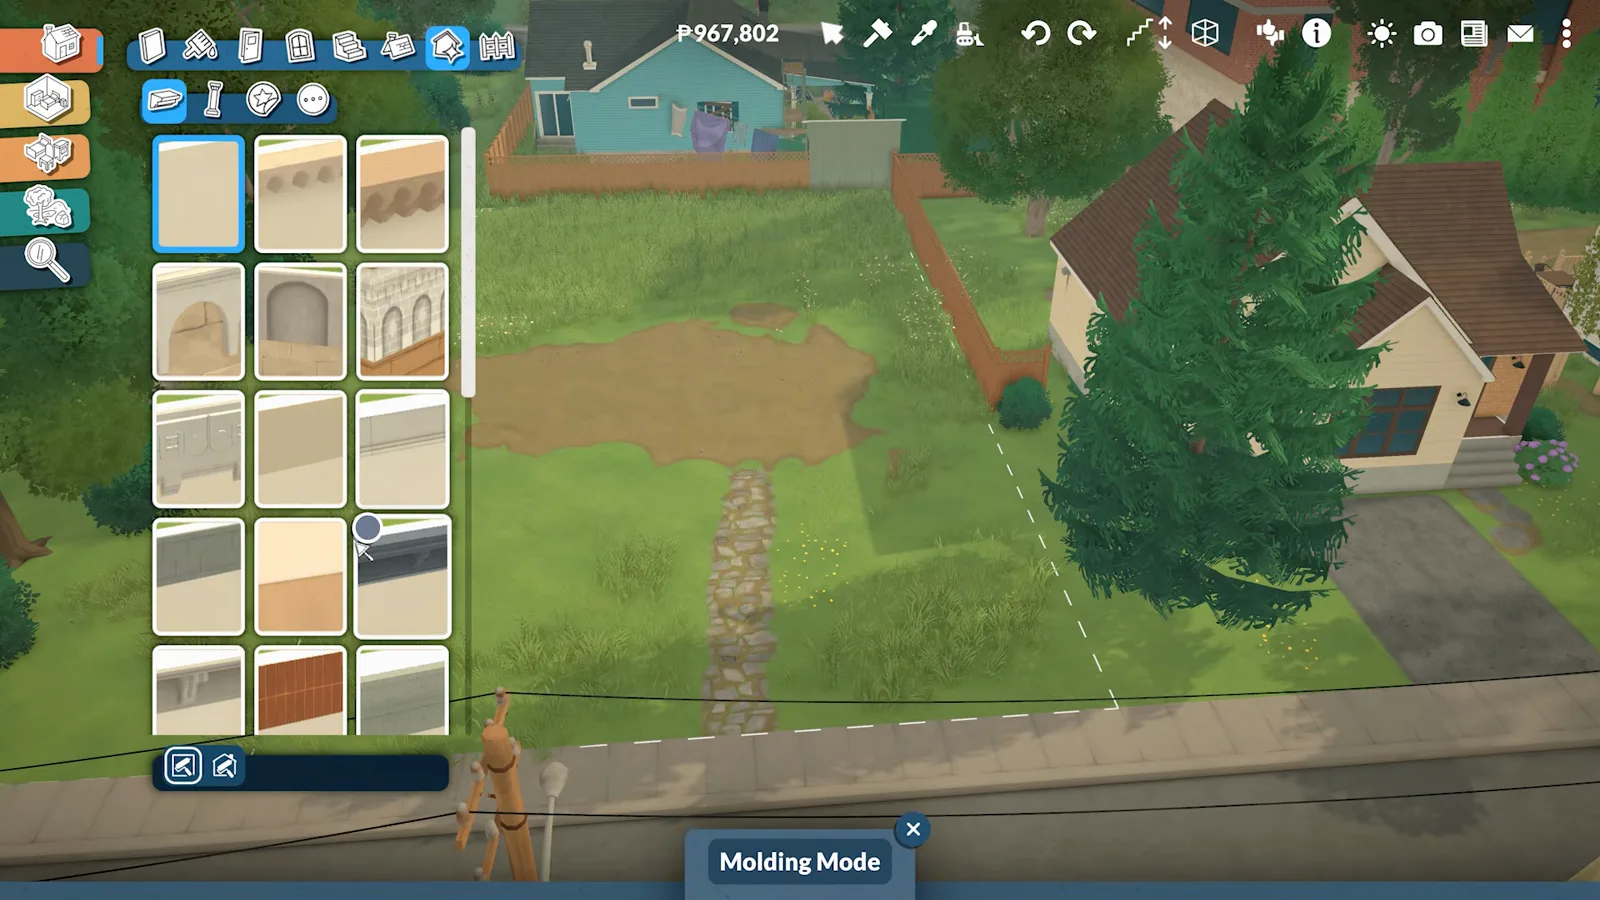
Moulding is drawn along walls like a fence, then recoloured.Watch at 3:05 - 11
Add the upper floor
Page Up moves you to the next level and creates it if it does not exist; press it once more and you get a roof level. Draw the upper walls starting from an existing wall so they inherit the right height instead of measuring from the terrain, and remember Paras need an interior staircase to reach anything you build up there.
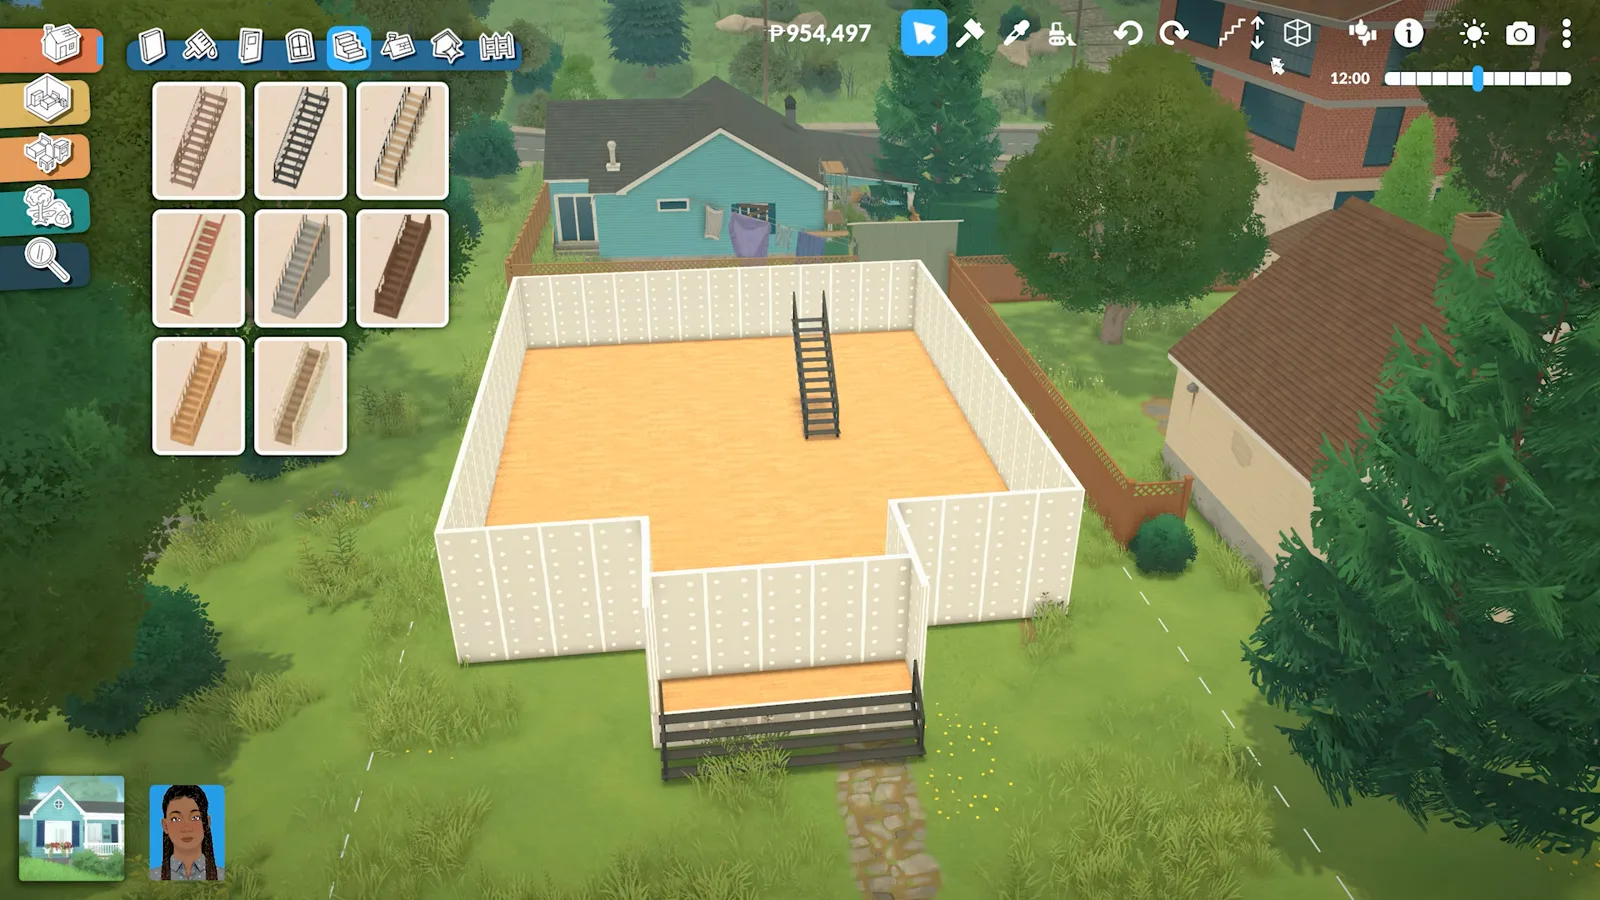
Page Up adds the level; the stairs make it usable.Watch at 7:20 - 12
Roof it — in pieces if you have to
Roofs, chimneys and fireplaces share a tab. Drag a roof across the shell, then pull its edges out for an overhang, since the default sits tight against the walls. Roof snapping is the weakest part of Early Access build mode: complicated shapes go together more reliably as several small pieces, and a roof that refuses to align usually behaves after reloading the save.
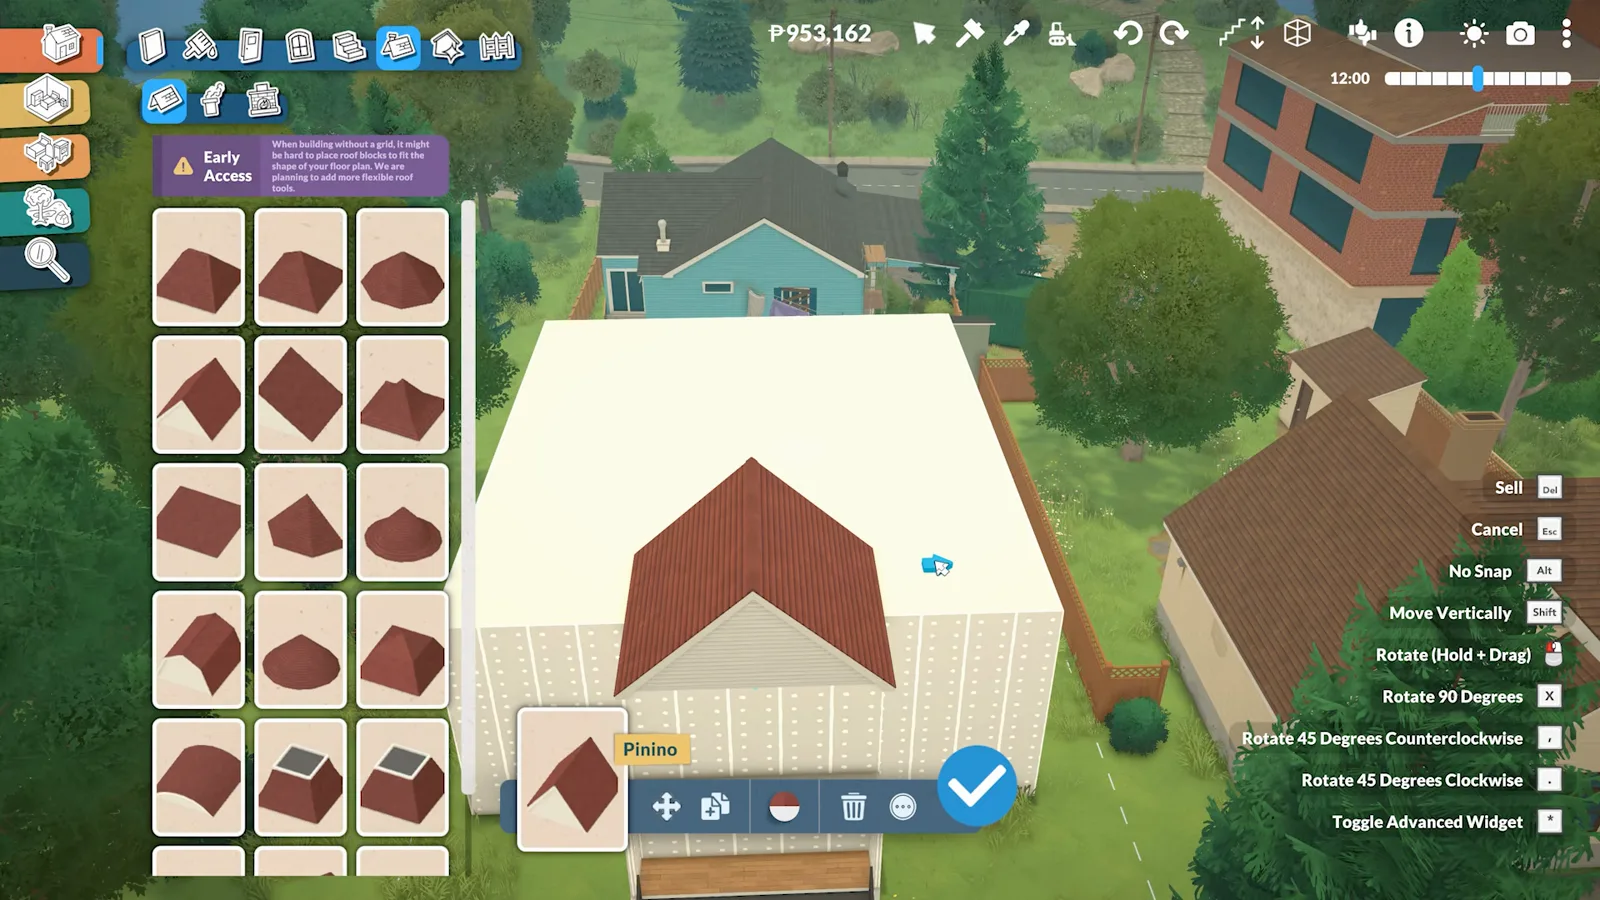
Overhang is manual — drag the roof edges past the wall line.Watch at 7:42
Finishing
Furnish, landscape and save
A build reads as finished once the ground around it does. Terrain painting takes two minutes and changes more than another room of furniture would.
- 13
Furnish by room or by category
Objects are indexed twice: by room — living, kitchen, dining, bath, bed, kids, office, outdoors — and by type, which is seating, surfaces, beds, storage, appliances, plumbing, lighting, hobbies, decor and clutter. Search beats both once you know what you want. Everything you place is deducted from the household's money, so a practice build on empty terrain costs nothing.
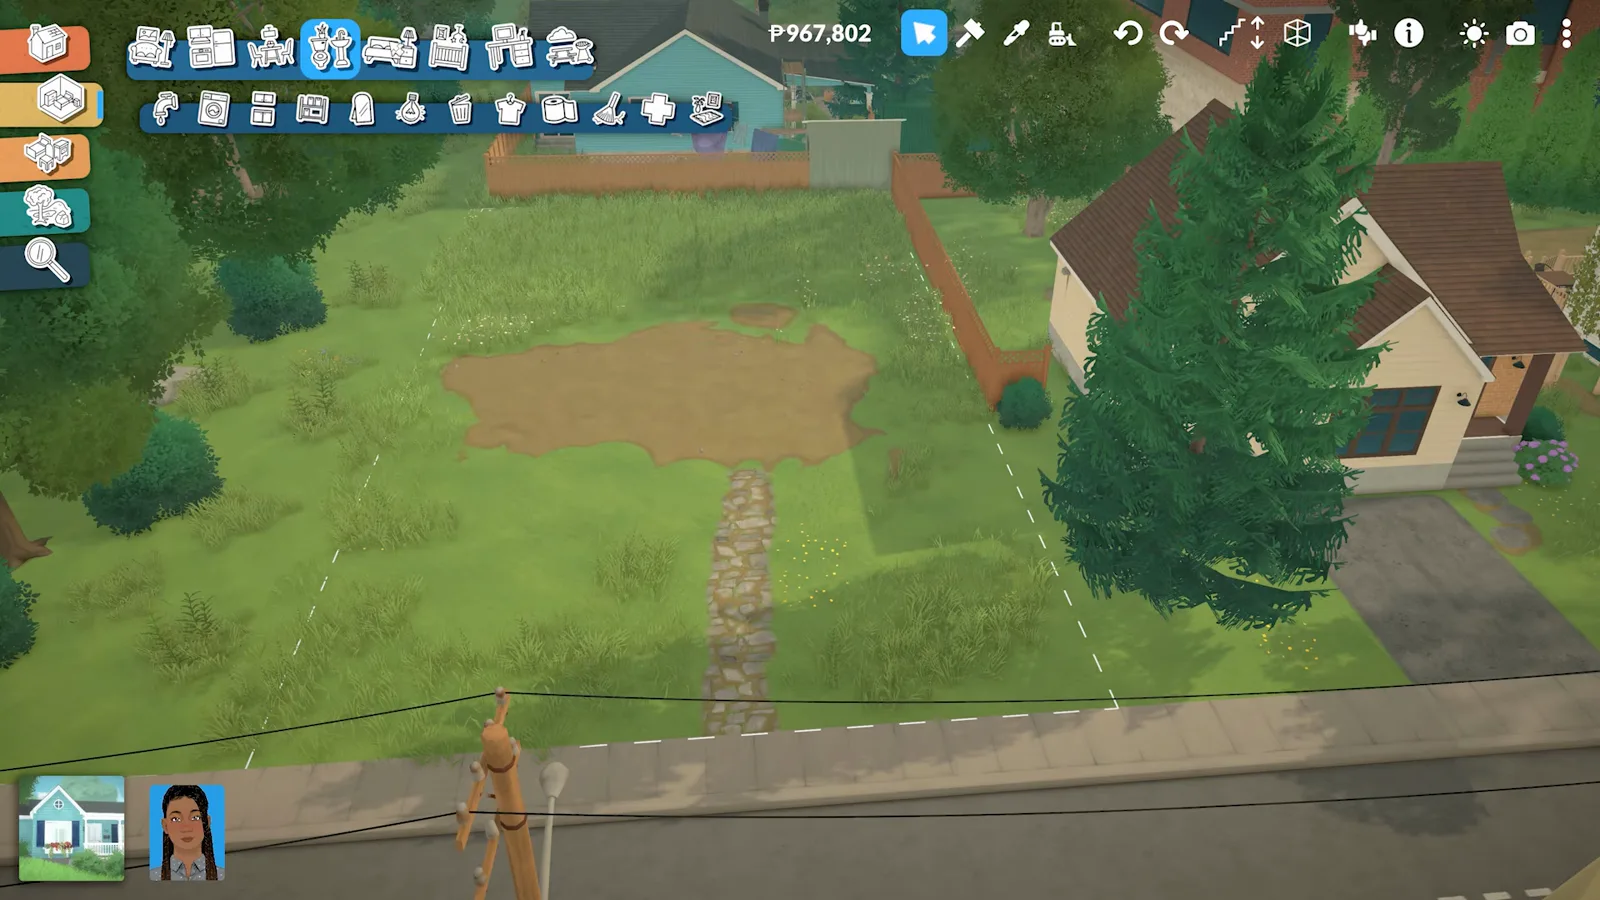
Same objects, two indexes — plus a search box that beats both.Watch at 3:35 - 14
Paint the ground around the house
Terrain paint mode brushes grass, weeds, dirt, gravel and paving directly onto the lot, and the slider at the top sets the brush size. Clearing the default weeds and laying a path is the fastest way to make a build stop looking like a box dropped on a field.
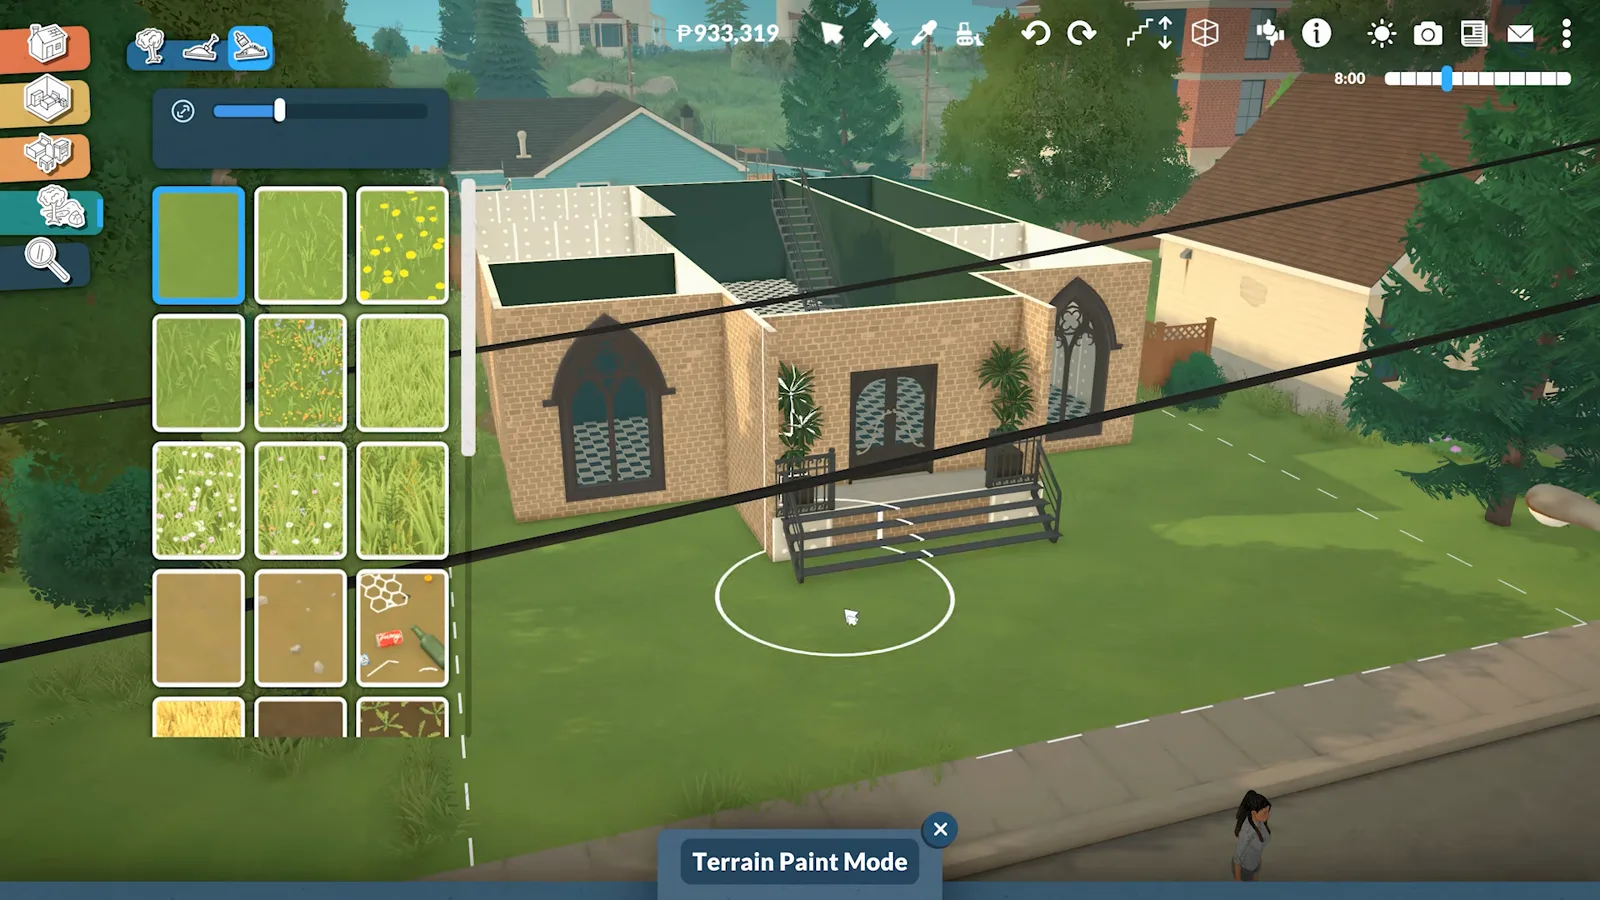
Brush size lives at the top of the panel.Watch at 8:55 - 15
Raise, lower and flatten the ground
The height tools — elevate, lower, smooth and flatten — reshape the lot itself, with the same brush size and strength controls. Flatten is not just cosmetic: uneven terrain is a common cause of walls refusing to connect, so level the footprint before you start rather than after.
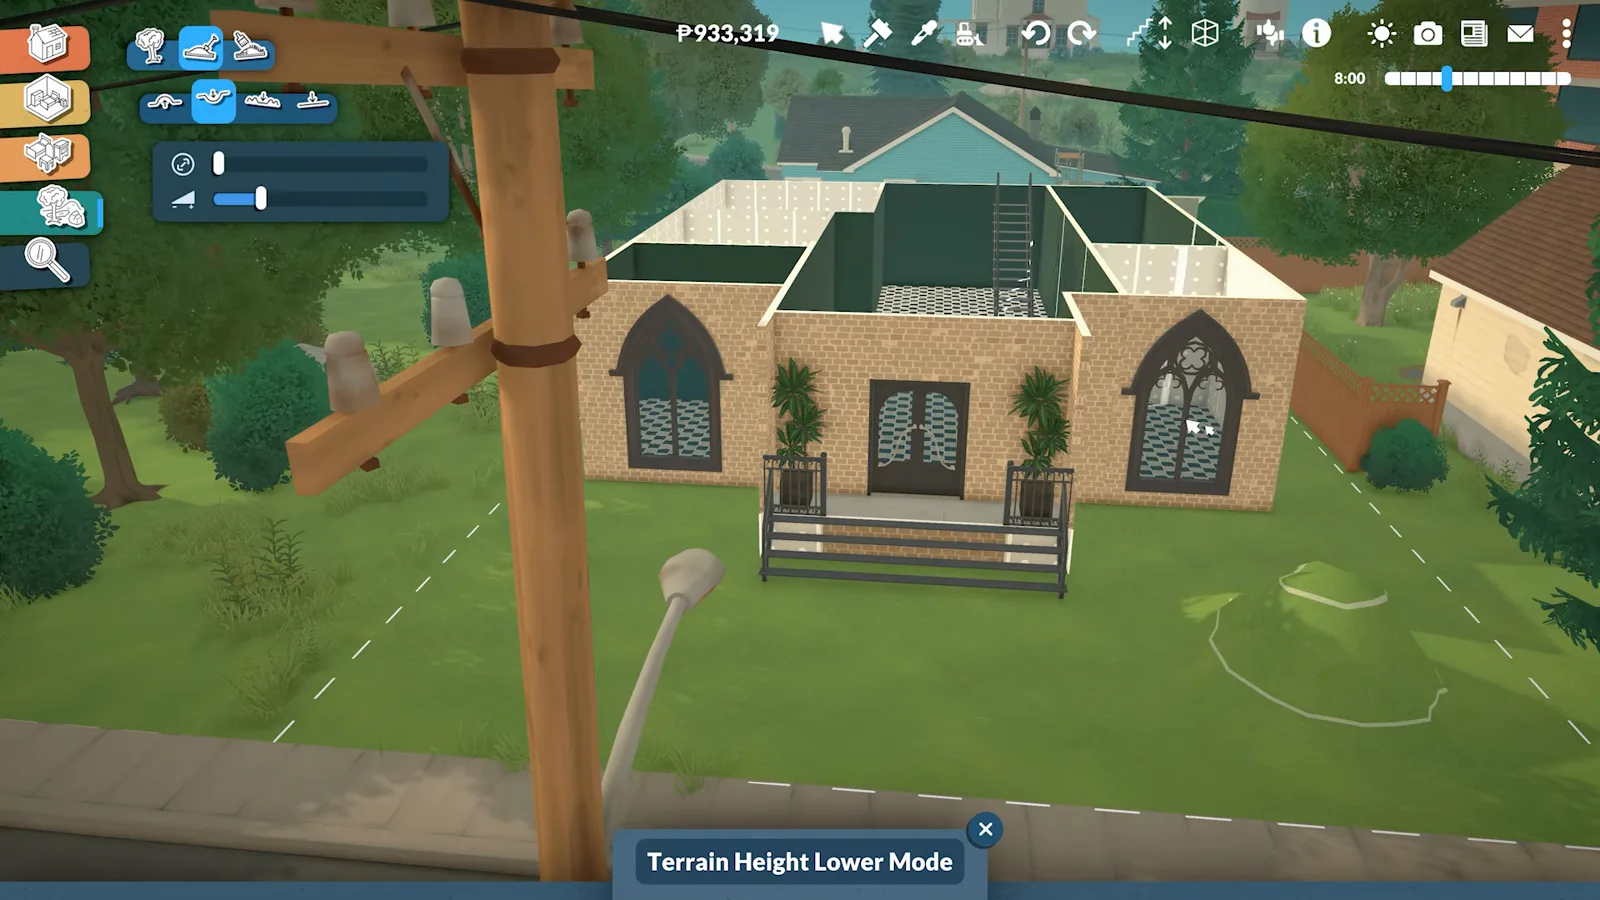
Flatten the footprint first if walls will not connect.Watch at 9:22 - 16
Plant in clusters, not one at a time
Trees, shrubs, flowers, weeds, vines and rocks use the same brush behaviour: hold and drag and they cluster naturally instead of lining up in a row. Individual plants can still be selected, resized and recoloured afterwards.
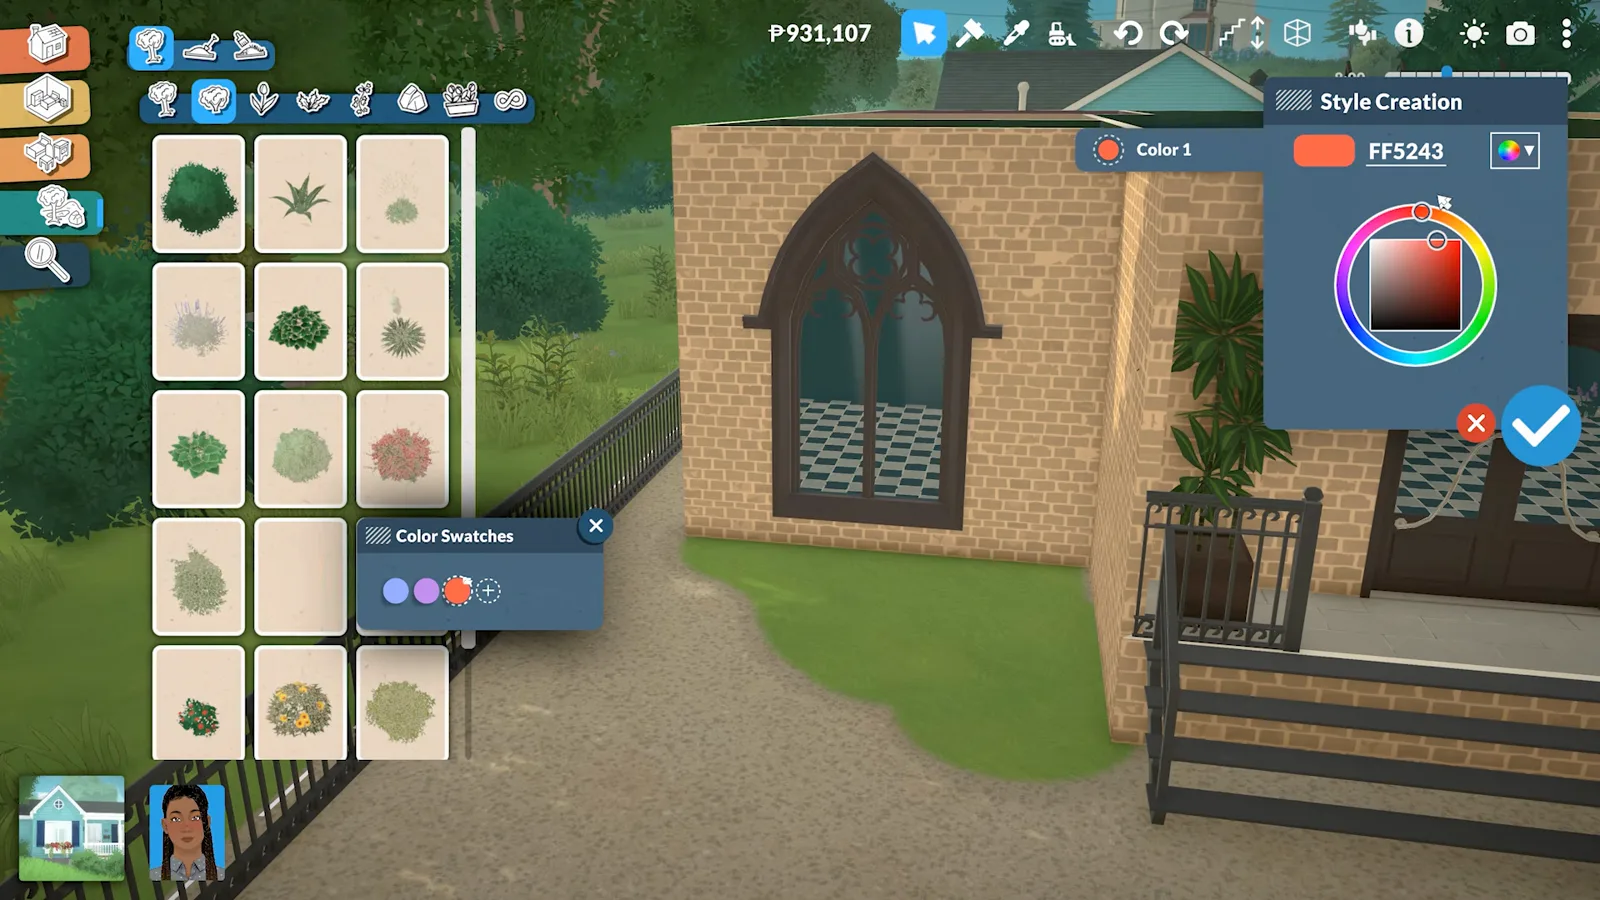
Hold and drag — the game scatters them for you.Watch at 10:01 - 17
Save the lot so you can reuse it
Zoom out, select the finished house and choose save lot to the library. The Lot Library keeps three shelves: lots you made, lots shipped by the team and anything installed from the Steam Workshop. The same panel is where you upload a build to the Workshop, set a custom thumbnail, rename it or delete it.
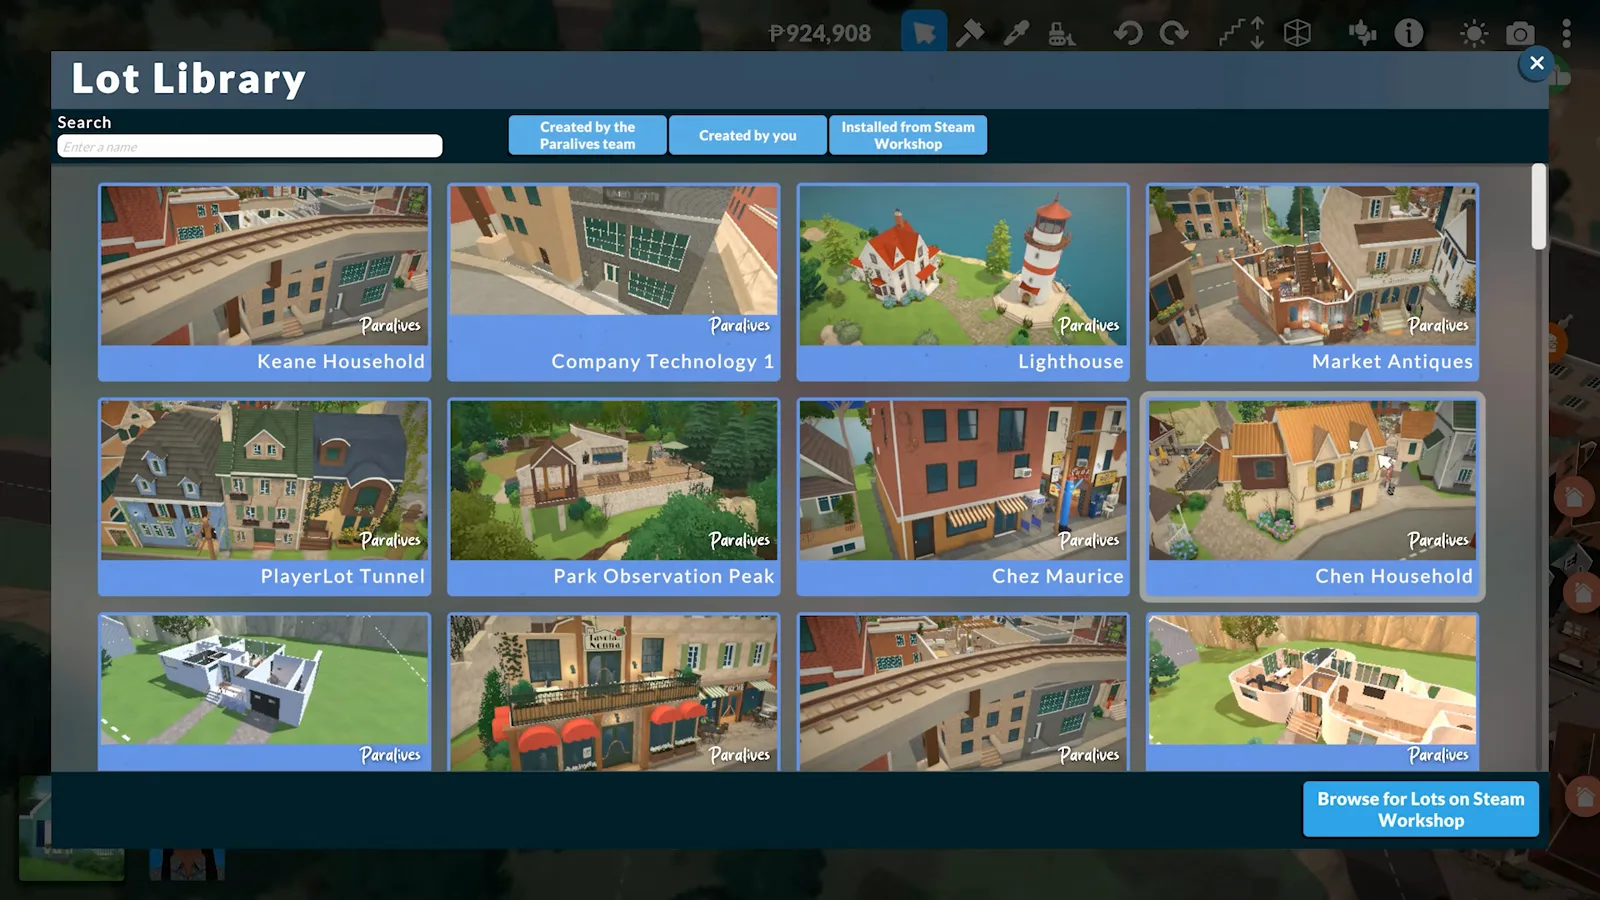
Saved lots can be placed on any empty lot later.Watch at 10:46
Build mode questions
- How do you enter build mode in Paralives?
- Click the house icon in the bottom-left corner while in live mode. There is no loading screen, and clicking your Para's portrait switches straight back. You can also move the cursor between lots you own and edit them one after another.
- Is there a build mode tutorial inside the game?
- Partly. The info button in the build toolbar holds short tutorial clips, and hovering most tools plays a preview of what they do. Neither covers the separator workaround for foundations, which is why guides like this one exist.
- Why can't I move a room in Paralives?
- Moving walls, rooms or a whole house on the lot is not supported in Early Access 0.1.9b. You can drag an individual wall to resize a room, but the footprint itself is fixed once drawn, so plan it before decorating.
- How do you build a foundation in Paralives?
- There is no foundation tool yet. Draw the room, trace the outline with the separator tool, raise the floor with the blue arrow in the middle of the room, then snap a staircase to the raised edge.
- Can you share a house you built?
- Yes. Zoom out, select the lot, save it to your library, then upload it to the Steam Workshop from the Lot Library panel. Other players place it from their own library.
Keep building
15 build mode tips
Alignment tricks, resize limits and the colour-code shortcut, each with its own screenshot.
Build from a floor plan
Put a real blueprint image on the ground and trace the walls straight over it.
Foundations guide
The separator workaround in more depth, plus split levels and porch heights.
Roofs guide
What snaps, what clips, and how to piece an awkward roof together.
All build guides
Curved walls, stairs, garages, porches and the rest of the build cluster.