
At a glance
A Paralives kitchen island is built, not bought: the walkthrough below turns a lowered separator-wall rectangle into a painted, storage-backed, stool-lined island in fourteen steps.
- No island catalogue item exists — the base is a separator-wall rectangle with its height dropped to counter level.
- The room's floor is the countertop: Floor Painting Mode sets wood or stone, Wall Painting Mode finishes the sides.
- A real cupboard and a dishwasher slot into the open side, so the island still stores things.
- Bar stools are currently decorative — the catalogue's own Early Access banner says Parafolks cannot use them.
- For seats that work today, the kitchen-hacks tour drags a counter-height table between cabinet runs instead.
- Hold Alt (hold) whenever a stool, sink or appliance refuses to sit where the island needs it.
Part 1 — Base and footprint
Start from a lowered room shell
Paralives has no island item to drag in, so this build starts from the wall tools. Drawing a rectangle and lowering it produces a counter-height shell that every later step dresses up.
- 1
Draw the island's footprint with the separator wall tool
Open the wall tools and pick the separator wall. The build starts like any room: a one-metre segment, a right angle, another segment. Nothing about the tool is island-specific — you are simply drawing the rectangle the island will occupy.
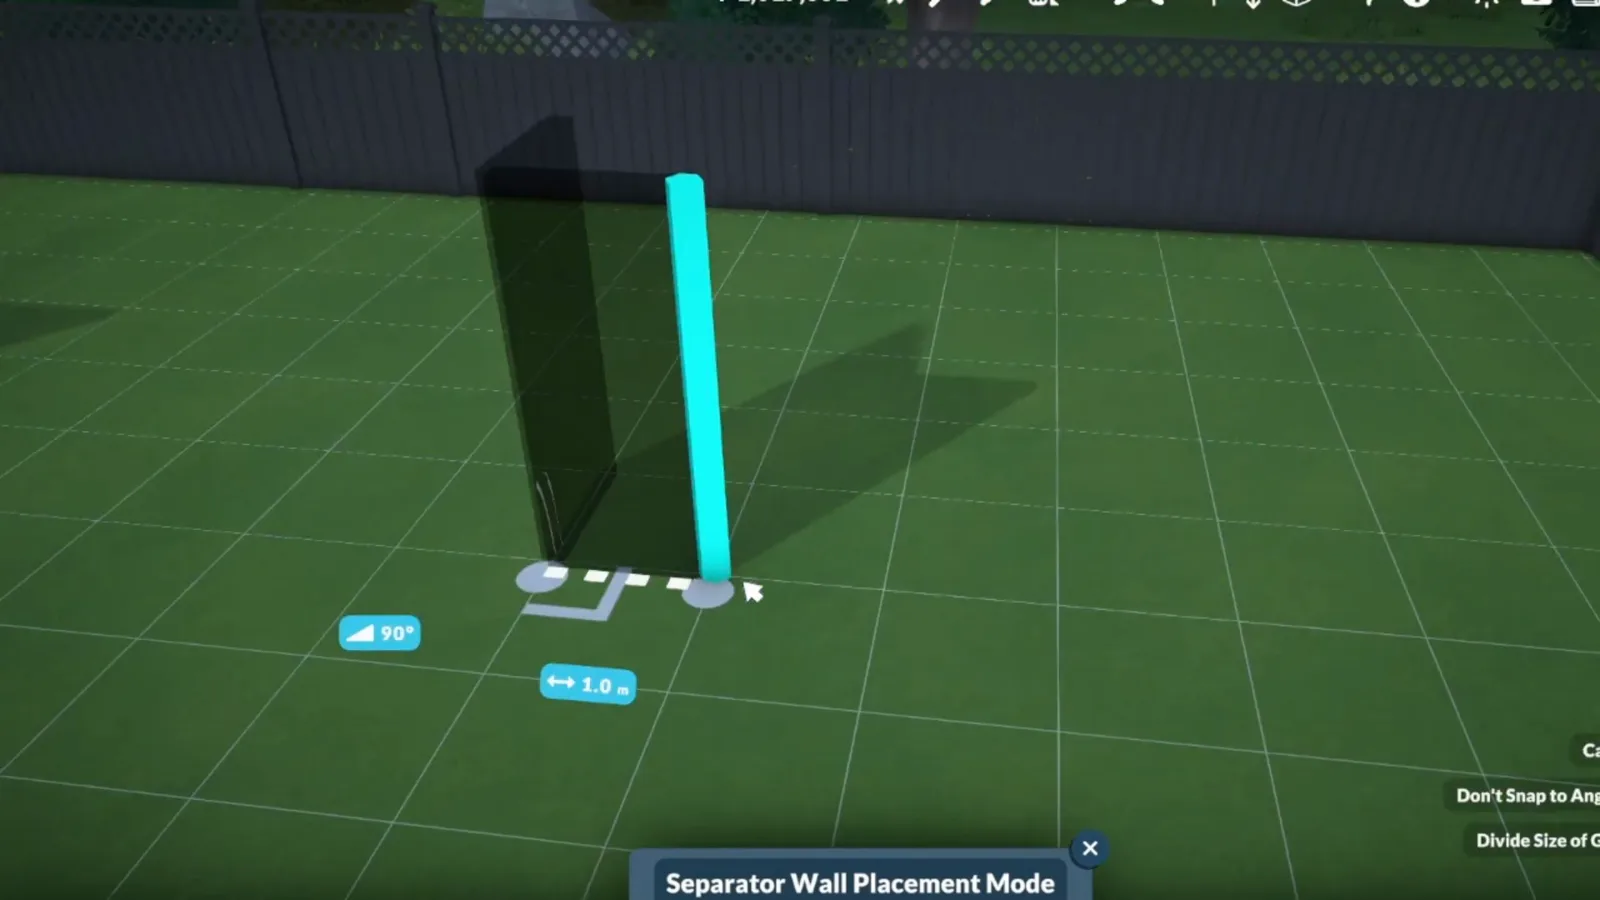
Separator Wall Placement Mode — the island starts as an ordinary room outlineWatch at 0:04 - 2
Drop the walls to a fraction of full height
With the rectangle drawn, the height control comes down to 5 — a fraction of a normal wall. The mode label now reads Half-Wall Placement Mode, and the shape stops suggesting a room and starts suggesting a cabinet: a waist-high box the size of an island.
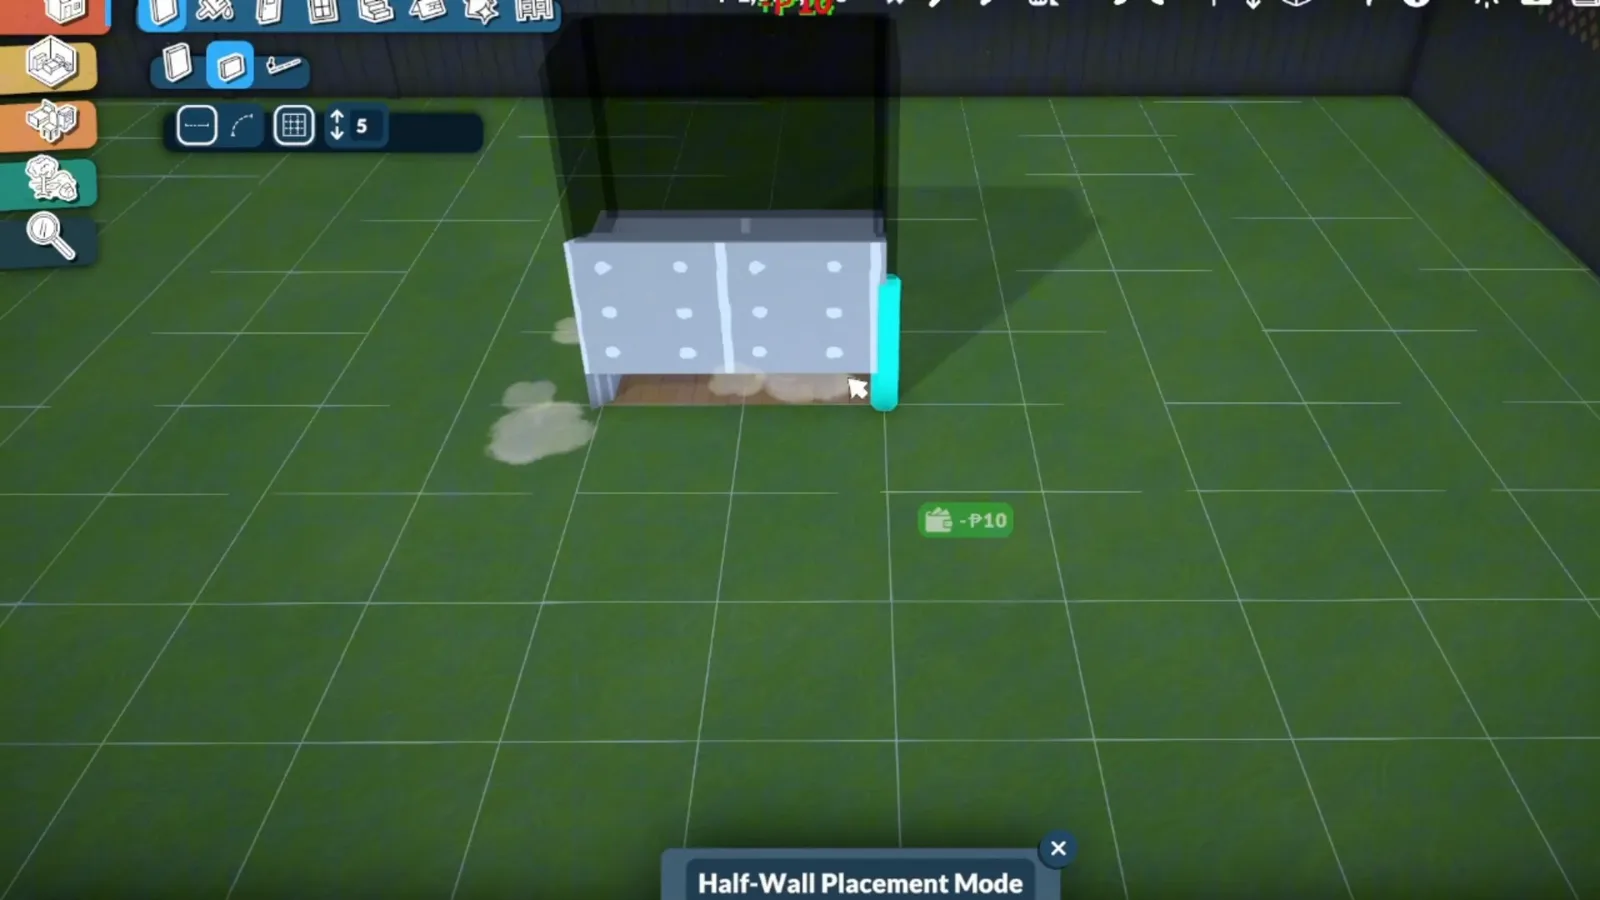
The wall-height readout sits at 5 — counter height, not ceiling heightWatch at 0:20 - 3
Close the loop and let the floor become the work surface
Join the last corner and the game fills the footprint with a floor. Because the walls now stand at counter height, that floor is the island's countertop — the shell already reads as a wooden-topped island before a single cupboard is placed.
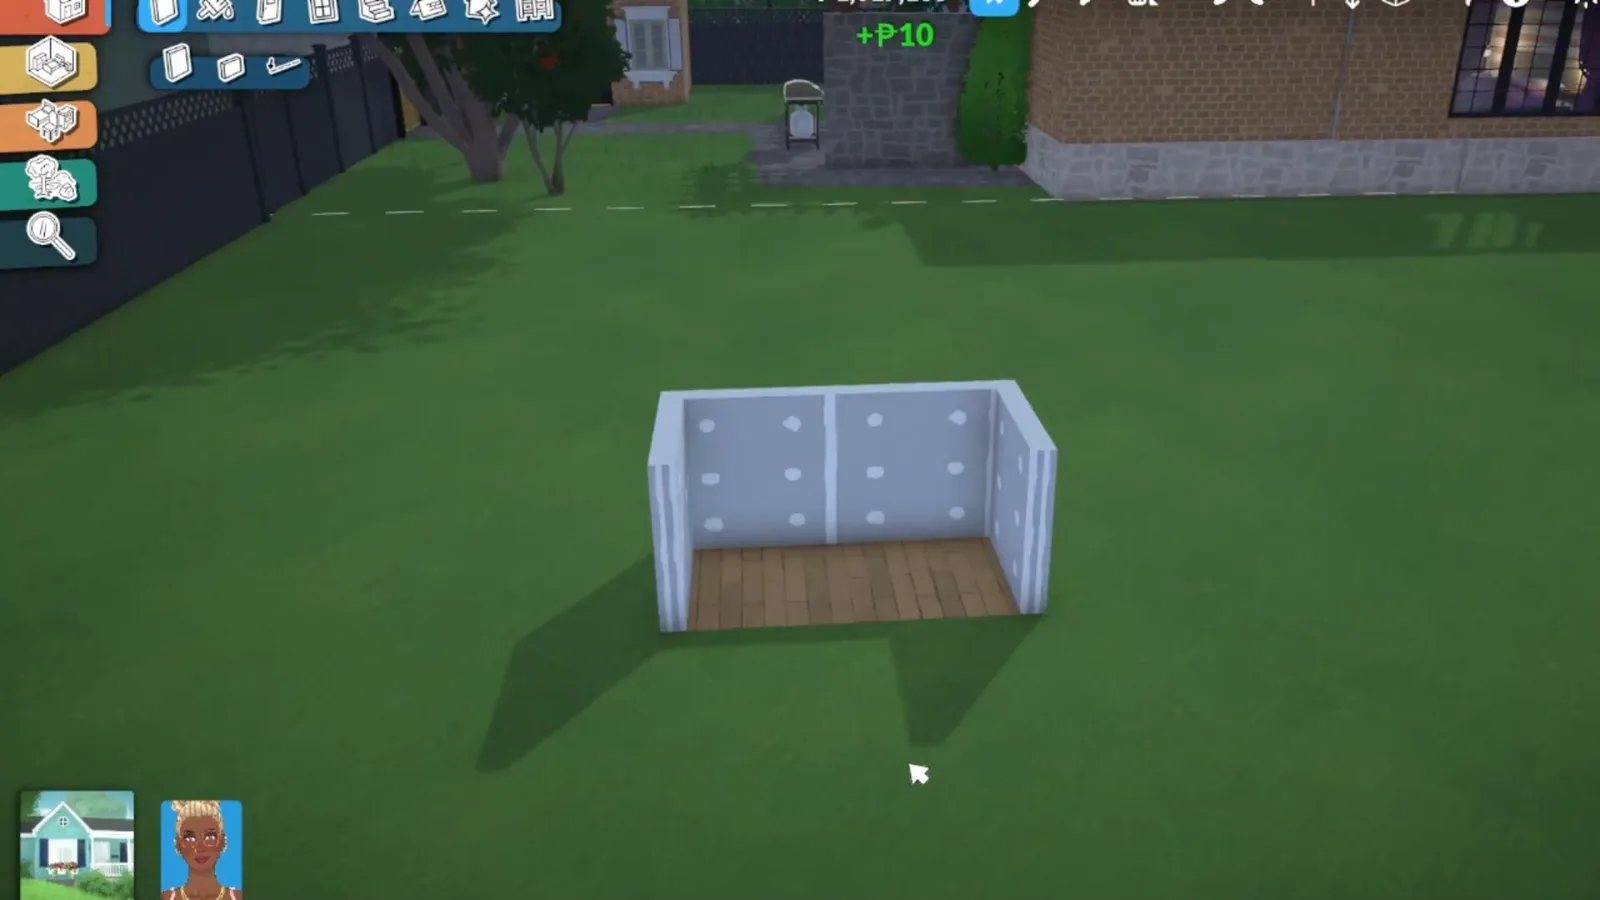
The half-wall rectangle with its floor — the island silhouette is doneWatch at 0:28
Part 2 — Countertop and finish
Paint it into furniture
The shell's surfaces take paint like any room's. Floor paint sets the countertop and wall paint sets the cabinetry — which is why the same shell can become a marble-topped island or a rustic one without rebuilding.
- 4
Paint the work surface in Floor Painting Mode
Floor Painting Mode treats that surface like any other floor: pick a finish and click. The demo tries a wood-look linoleum first, which turns the top into a warm butcher-block-style work surface.
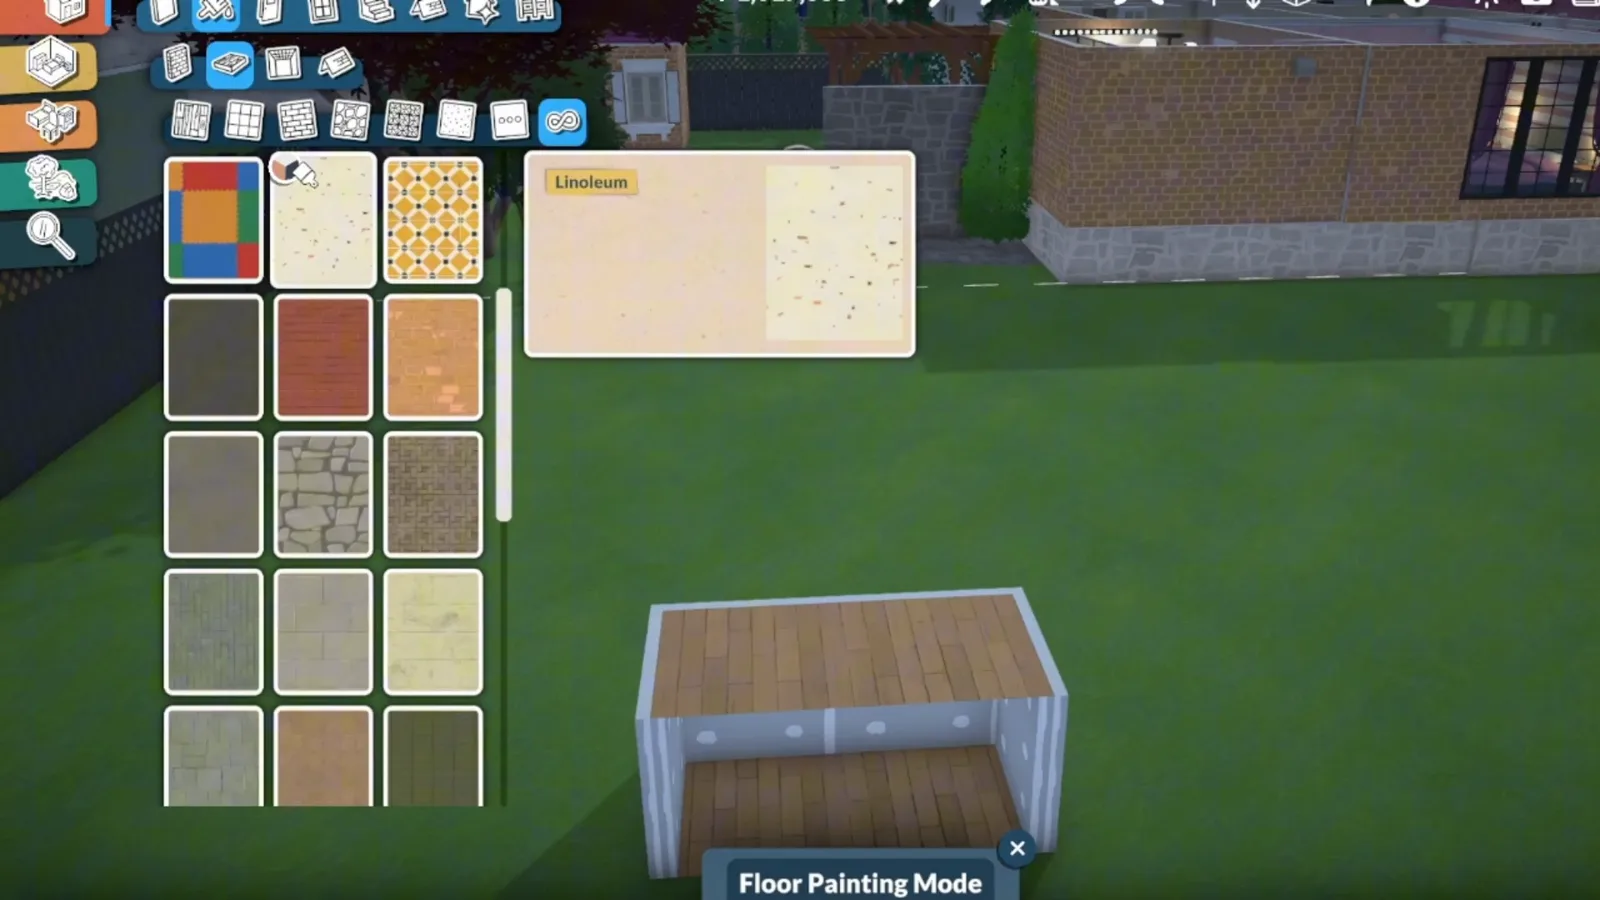
Floor Painting Mode — the island top paints like any floorWatch at 0:40 - 5
Or commit to a stone-look countertop
Floor patterns include speckled stone, and the demo settles on one for a granite-style top. Between the floor and wall palettes, the whole counter-and-cabinet look of the island comes from paint — no counter object involved.
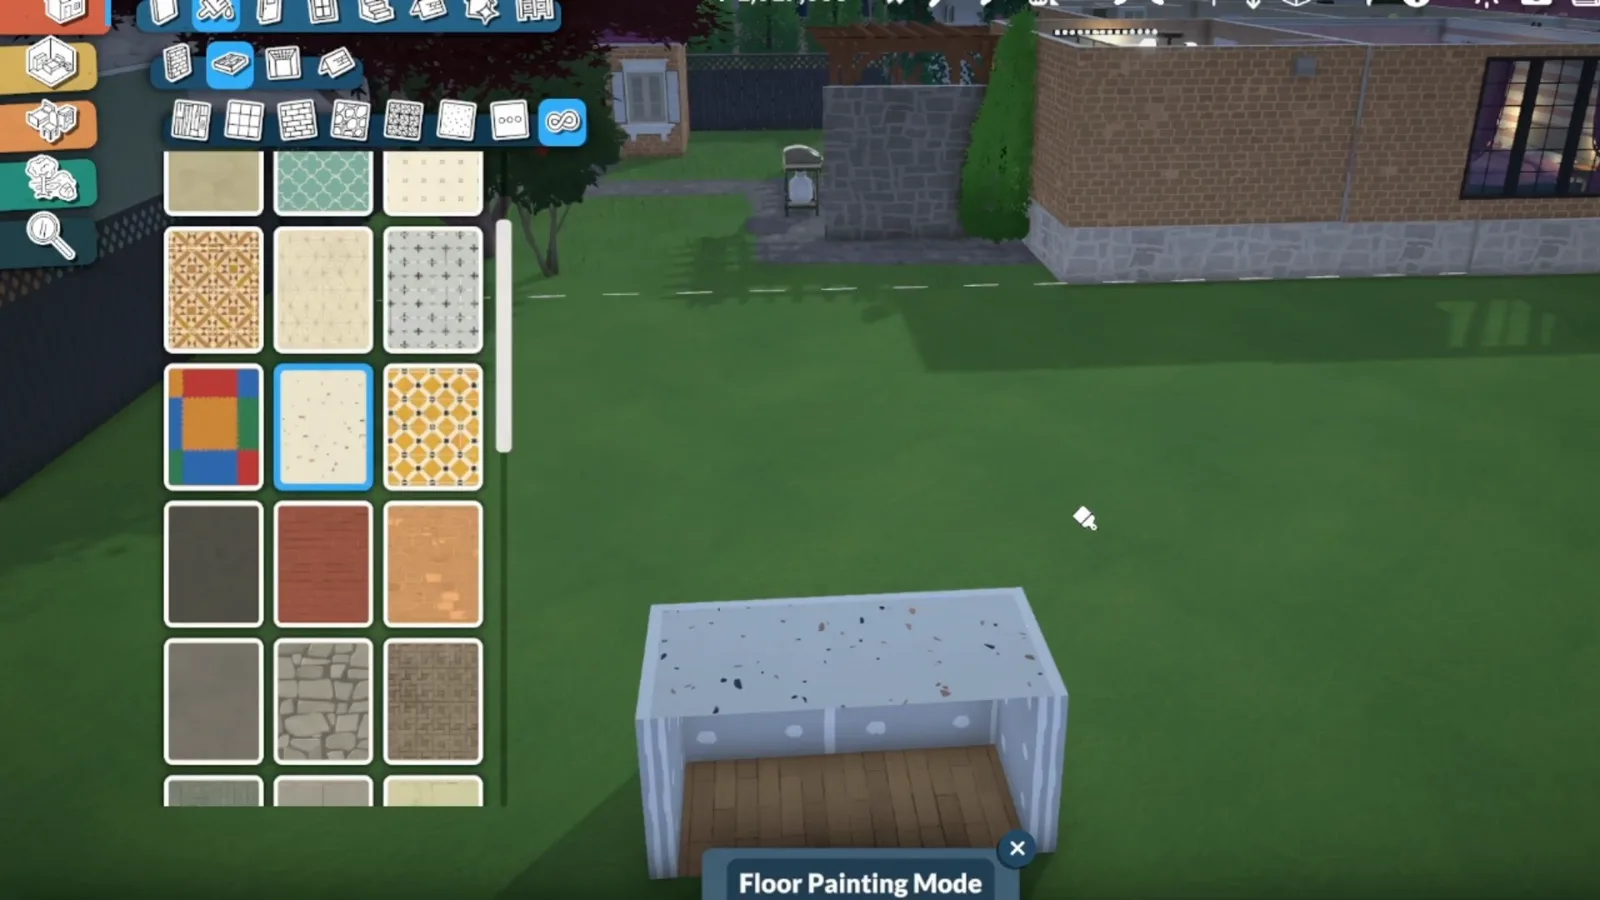
A speckled stone pattern gives the top a granite lookWatch at 0:48 - 6
Finish the outer faces with Wall Painting Mode
Wall Painting Mode does the sides. The video dresses the base in a cream marble tile, and the dots that marked the raw half-wall segments disappear into a finished cabinet box. This is the step that sells the island as furniture rather than construction.
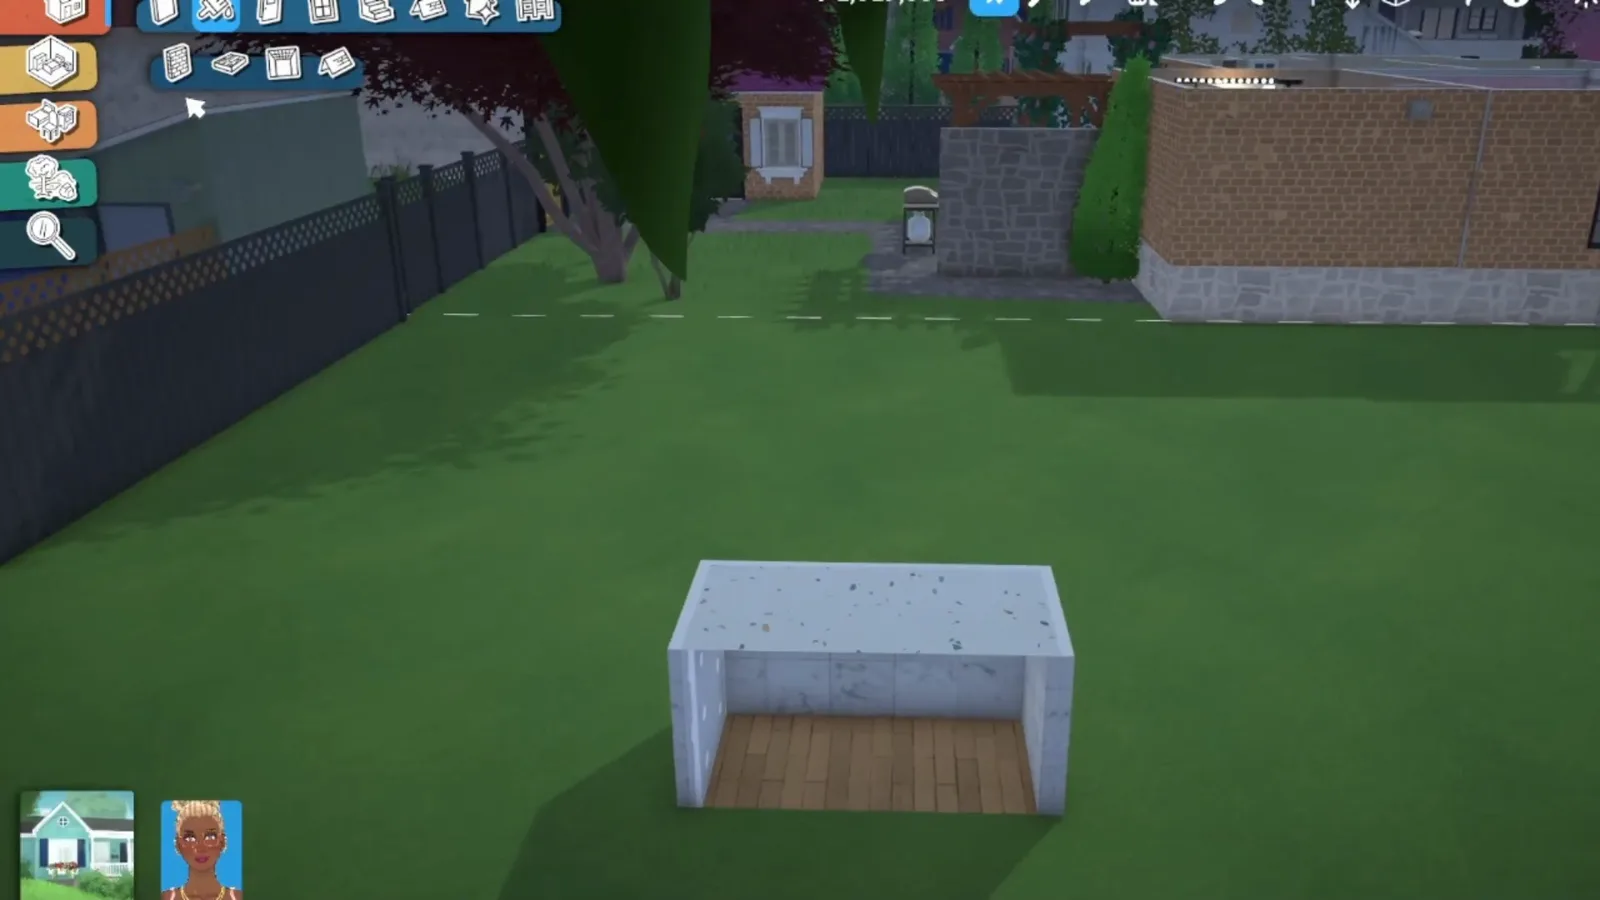
Marble-tile sides — the raw half-wall shell now reads as a cabinet baseWatch at 1:03
Part 3 — Working storage
Make the storage real
A pretty block that stores nothing is just a table. The kitchen catalogue's real cupboards and appliances slot into the open side, so drawers and a dishwasher still work behind the painted faces.
- 7
Place a real cupboard inside the shell
The shell itself is decorative, so the build borrows function from the kitchen catalogue: a cupboard is placed inside the open side, its front flush with the base. Geekism's kitchen tutorial covers these cupboards in depth — the three-dots menu on each swaps between a double cupboard, a single cupboard, a drawer over a cupboard, two large drawers or four small ones.
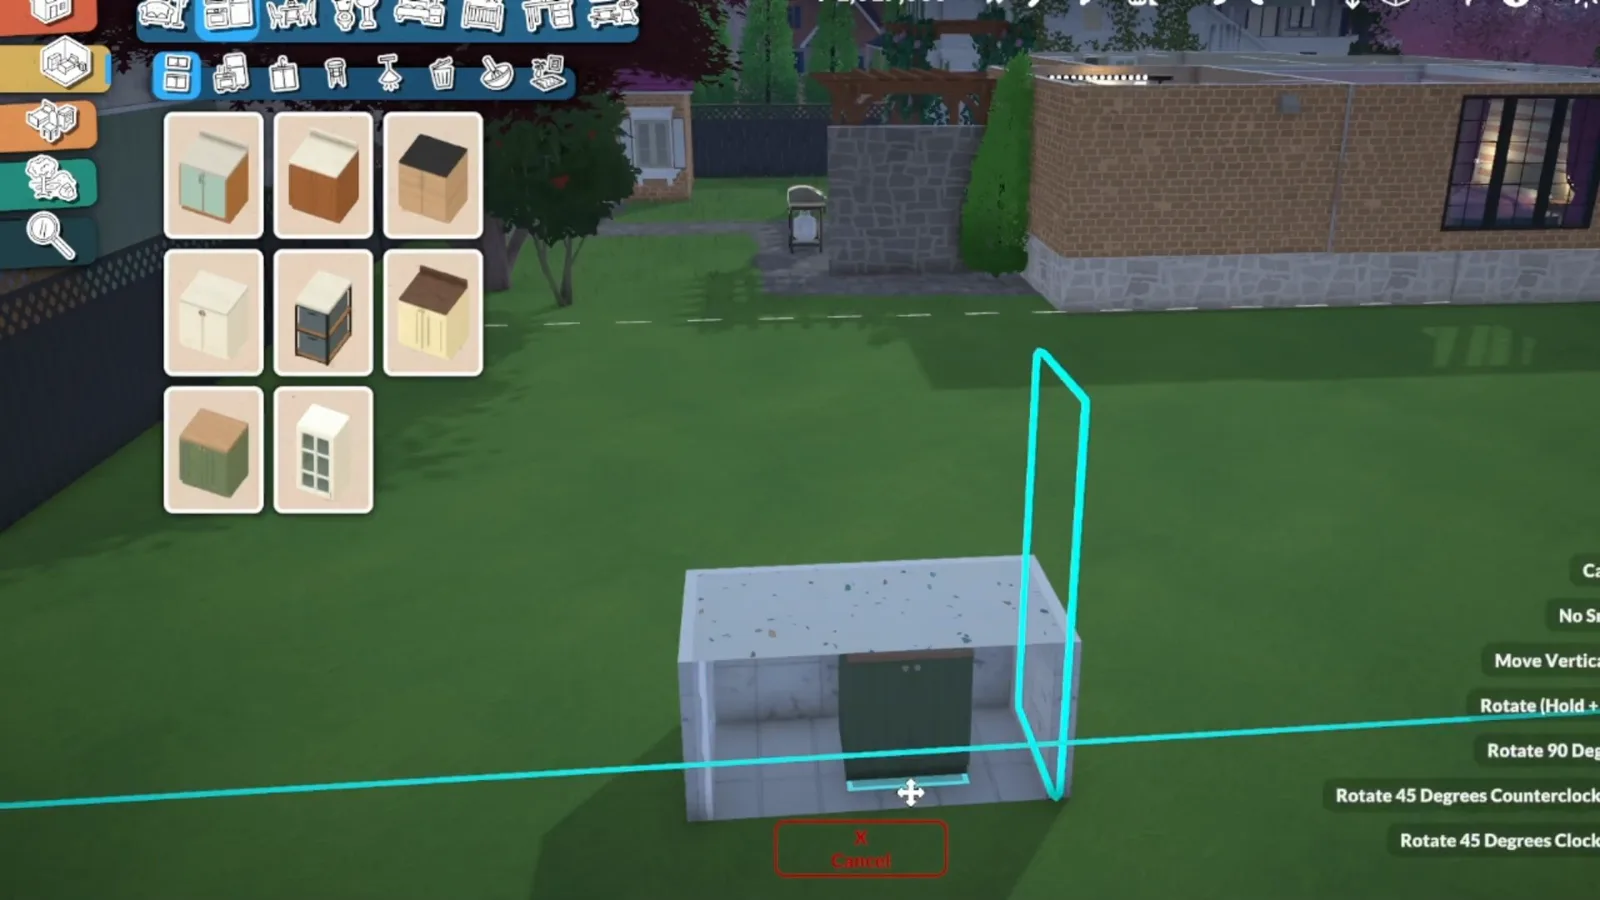
A kitchen cupboard dropped into the island's open sideWatch at 1:12 - 8
Slot a dishwasher beside it
A dishwasher follows, tucked into the same opening. Geekism points out the catalogue even has an under-counter piece shaped for appliances like this, so the island hides storage and dishwashing behind one painted face.
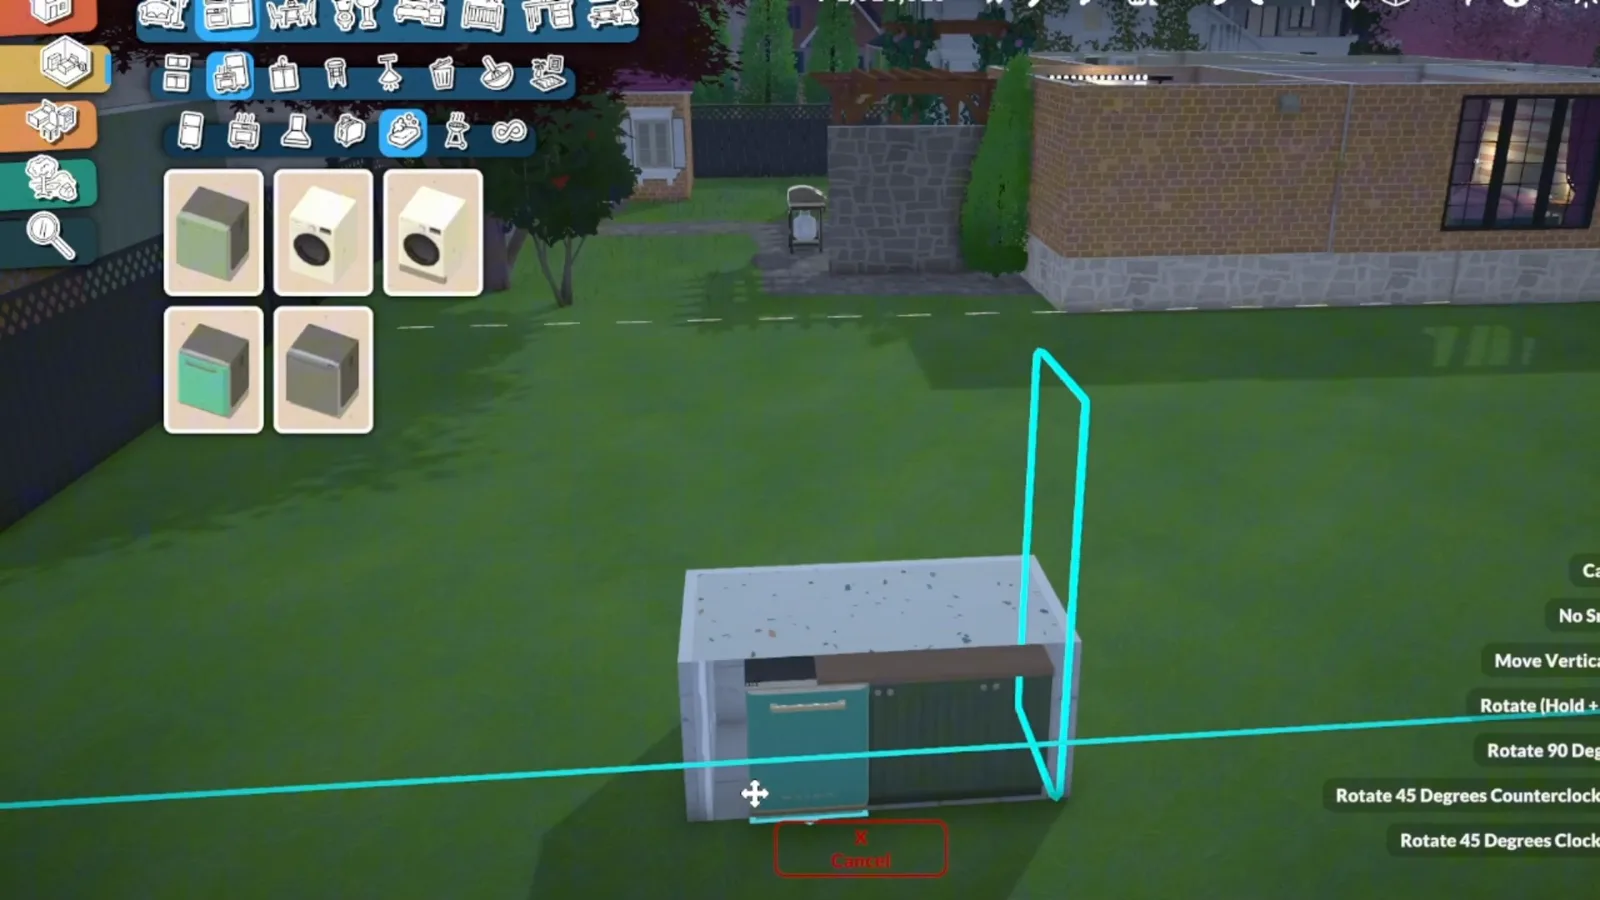
The dishwasher slots under the counter line like in a real kitchenWatch at 1:20 - 9
Line the front with matching units
Two more cupboard units fill out the front — three doors' worth of storage in the demo — each recoloured from the same palette so the island reads as one piece of furniture. The blue checkmark confirms the last placement.
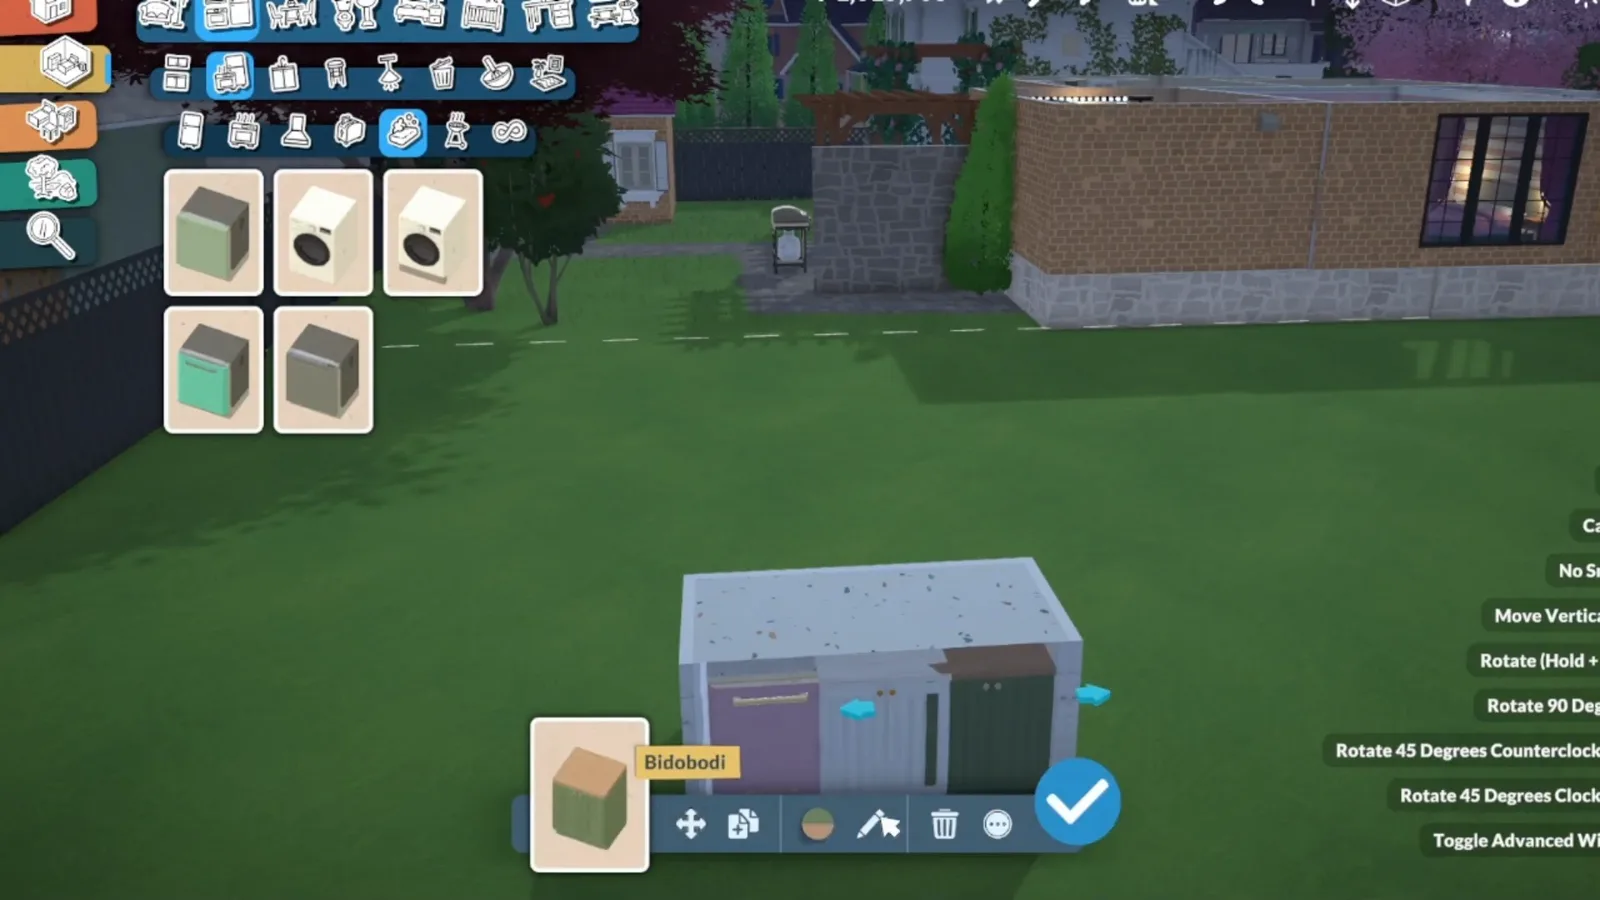
Three storage units, one palette — the island's working sideWatch at 1:28
Part 4 — Seating and dressing
Stools, colour and clutter
Stools sell the island look even though the game's own banner admits they are decorative for now. Style Creation ties them to the island's palette, and a table-based alternative exists for players who need working seats today.
- 10
Add bar stools — knowing their limits
The stool catalogue carries its own warning: Early Access items are purely decorative at the moment, and Parafolks cannot use them. The demo adds them anyway, because a dressed island with seating reads right even before the game catches up.
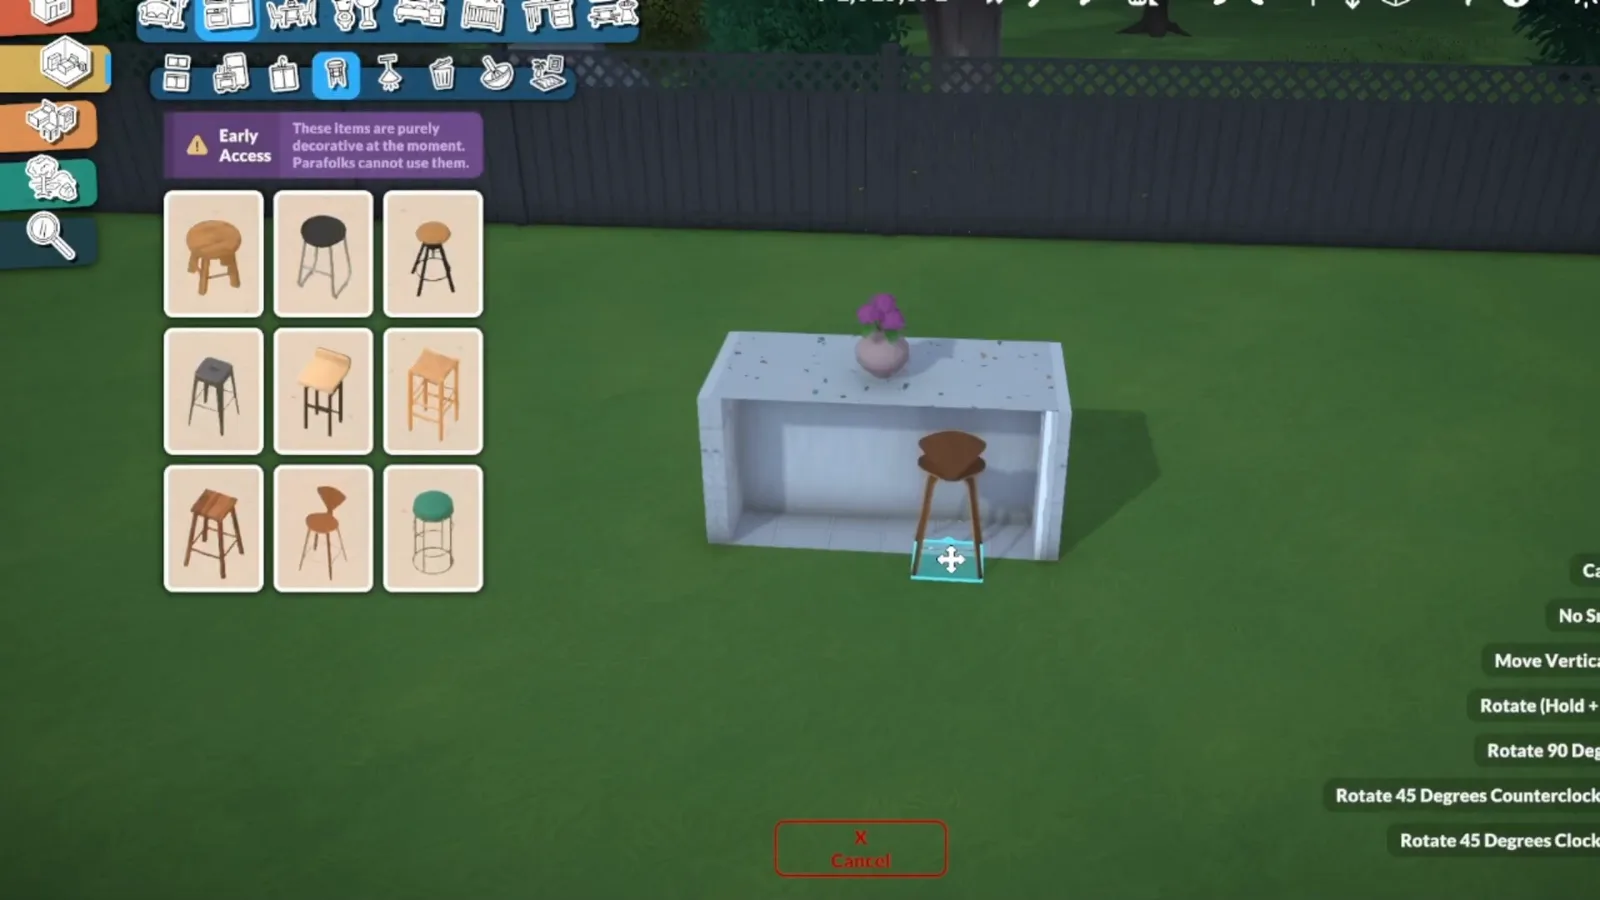
The game's own banner: decorative only, Parafolks cannot use themWatch at 2:08 - 11
Recolour the stools in Style Creation
Style Creation splits each stool into seat, edges and frame, and the demo warms all three to a brown wood tone. Matching the stools to the countertop keeps the island looking like one designed piece.
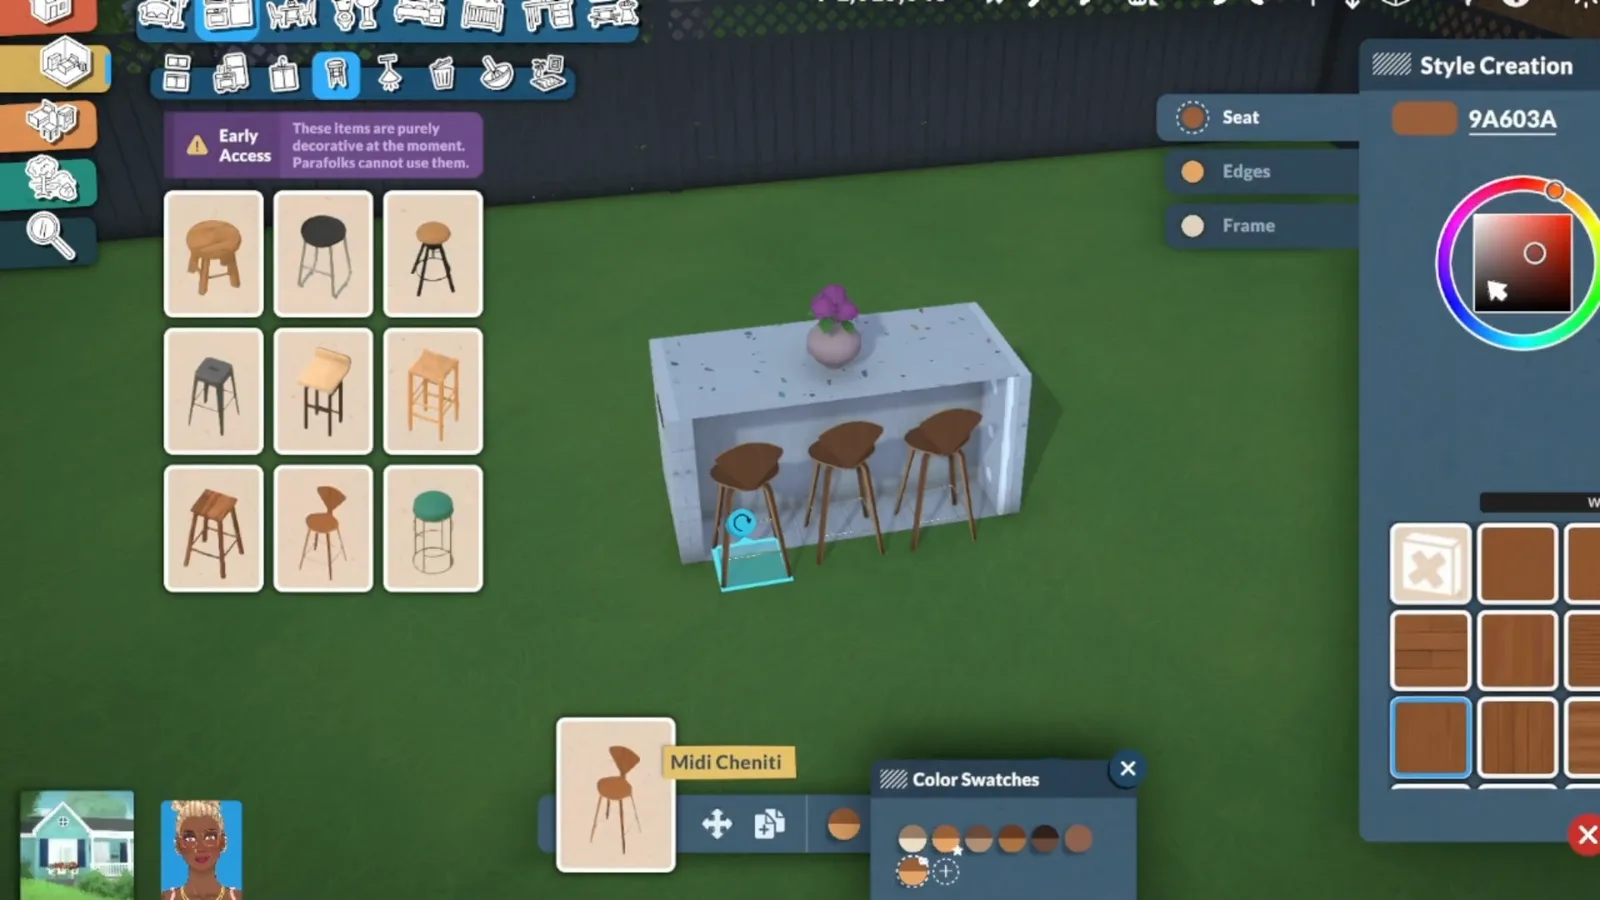
Seat, edges, frame — each stool part takes its own colourWatch at 2:16 - 12
Line the stools up under the overhang
Three stools slot into the open side, their backs just below the countertop. The overhang the half-wall shell leaves is deep enough for the look — though until seating becomes functional, this row is staging, not chairs.
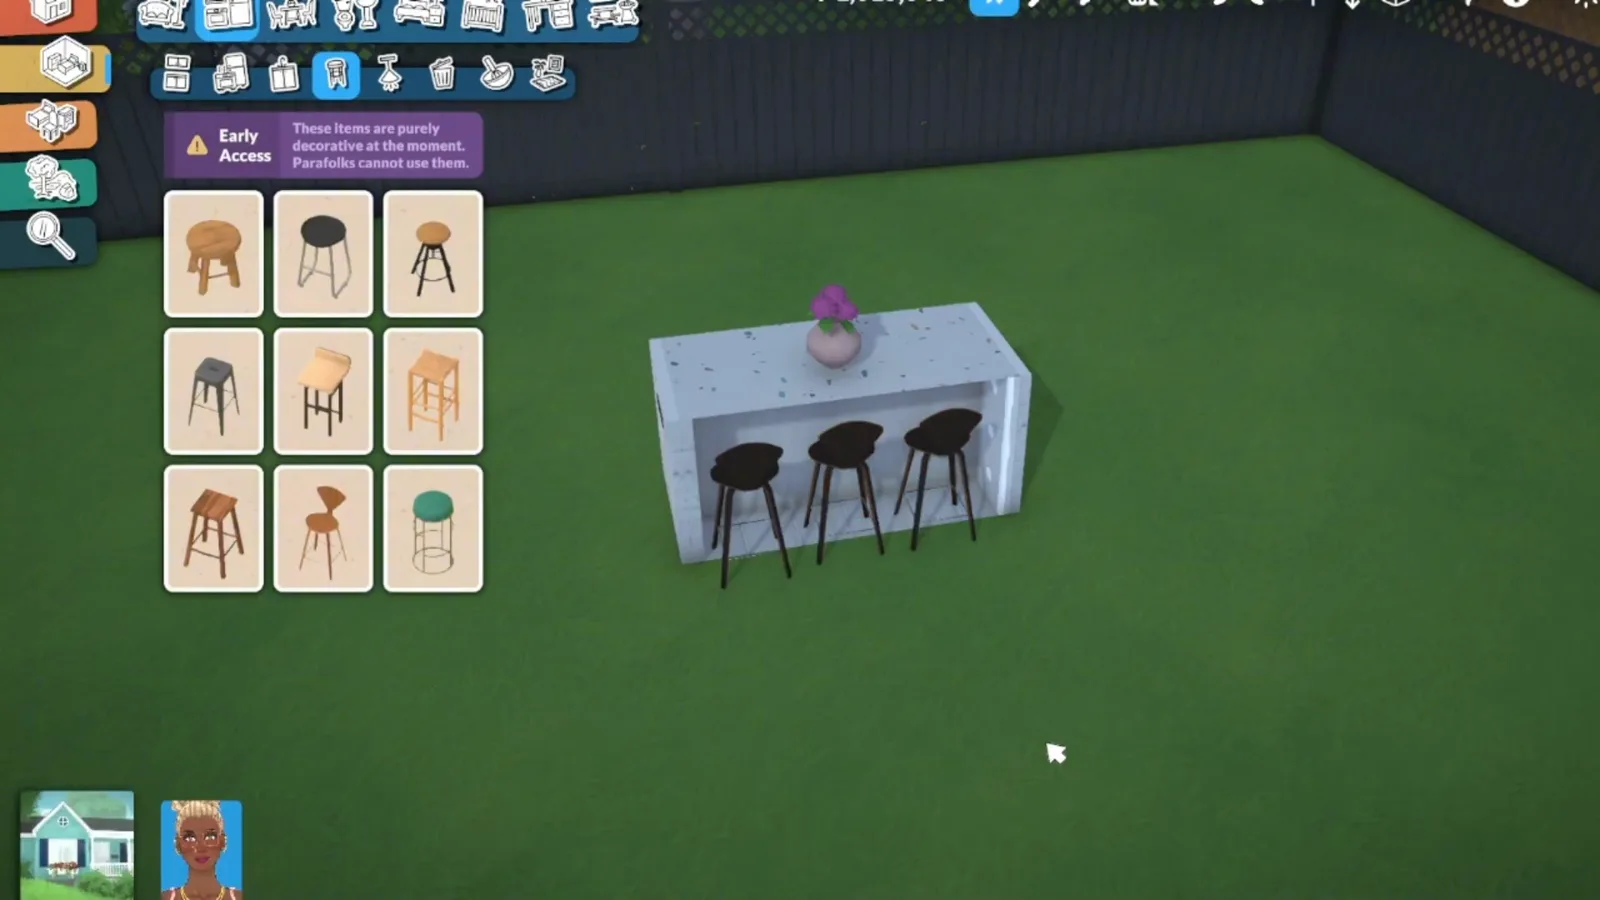
Three stools staged under the island's overhangWatch at 2:24 - 13
Dress the countertop with purposeful clutter
A cutting board lands on the stone top, then the kitchen clutter catalogue opens. Geekism's advice for counters applies to islands: keep clutter purposeful and grouped — prep near one end, serving pieces near the other — so the surface tells a story instead of noise.
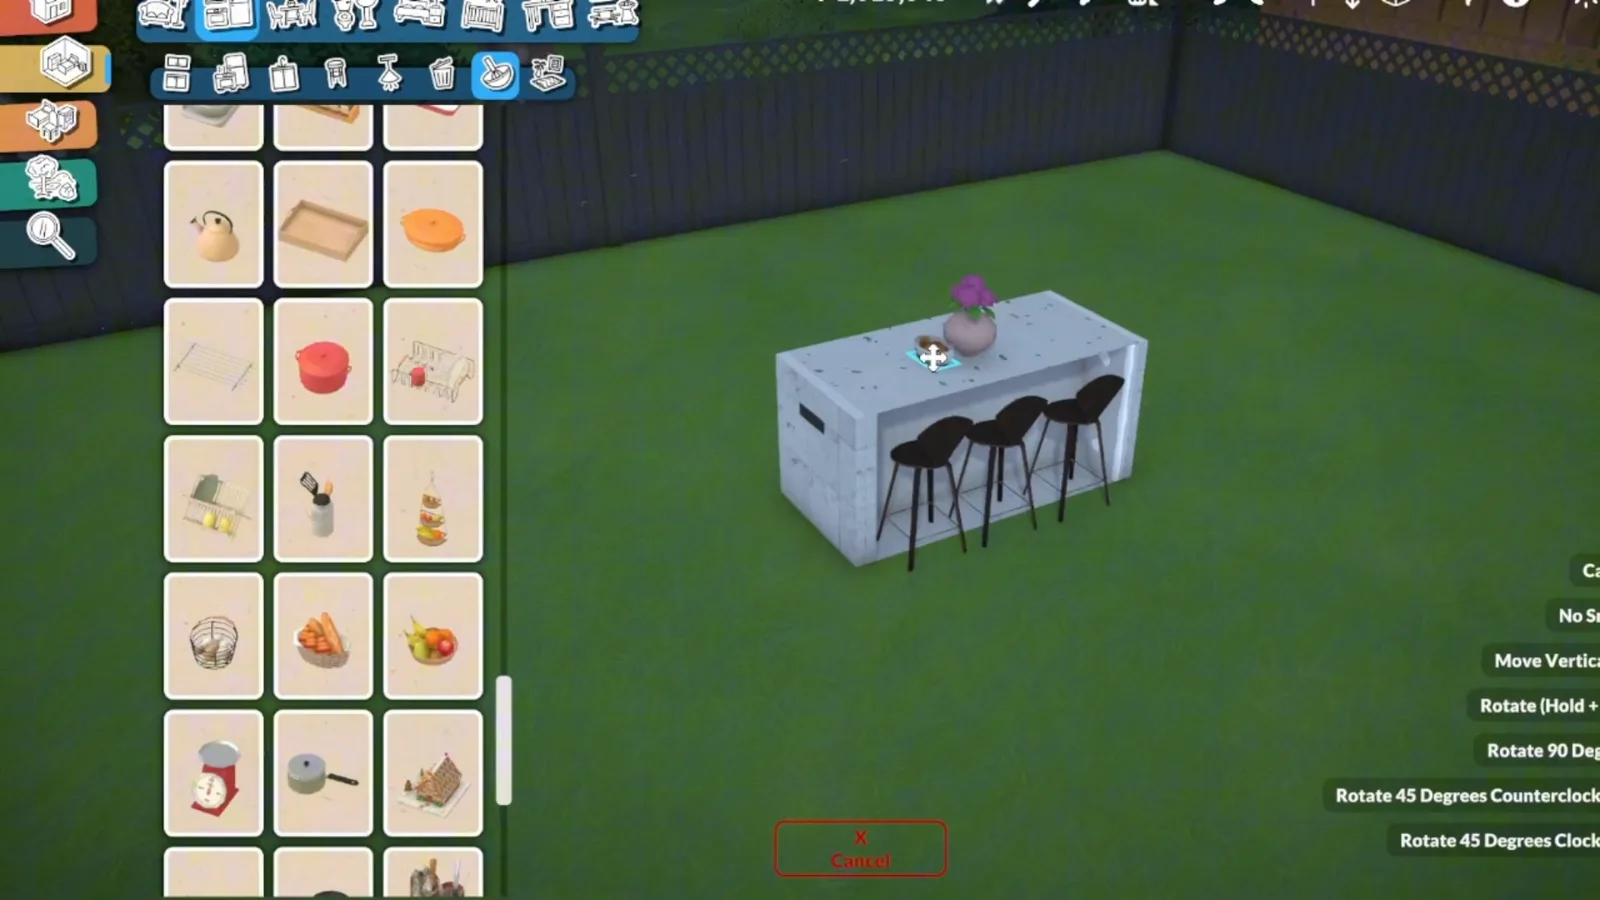
Prep clutter first — the cutting board claims the work zoneWatch at 2:40 - 14
The finished island
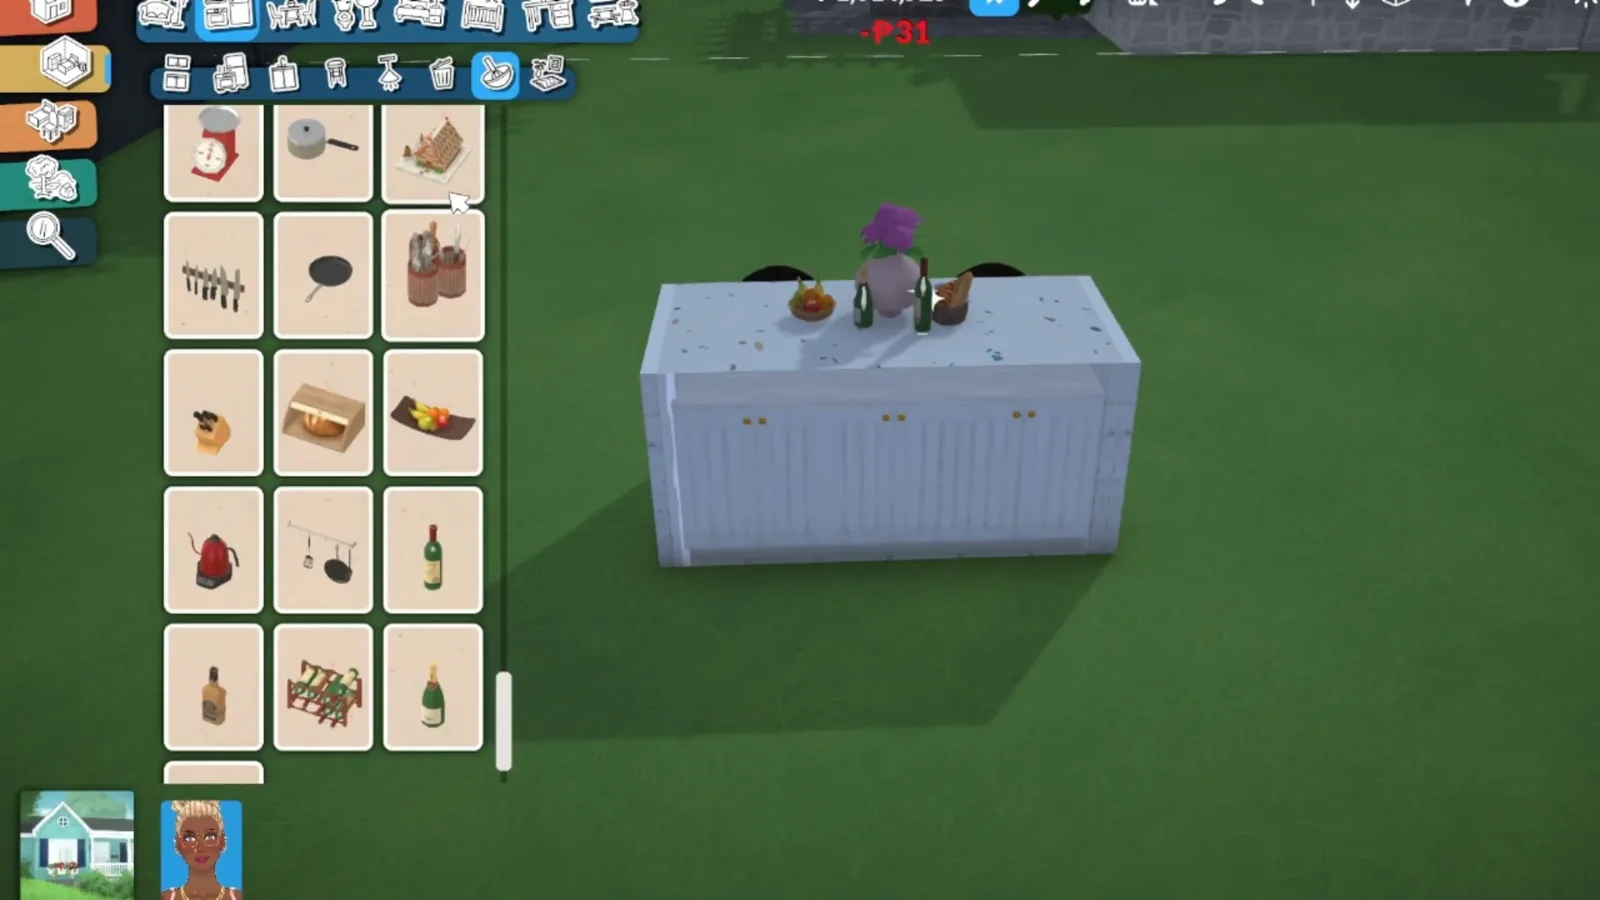
The last shots show why the detour is worth it: a fluted cupboard front with gold knobs behind a speckled stone top, dressed with a fruit bowl, wine bottles and flowers. For seating that actually works today, Mikko's kitchen-hacks tour offers the swap — drag any table into a gap between cabinet runs; tables and chairs are fully functional, so Paras can eat at a table island while stools stay decorative.
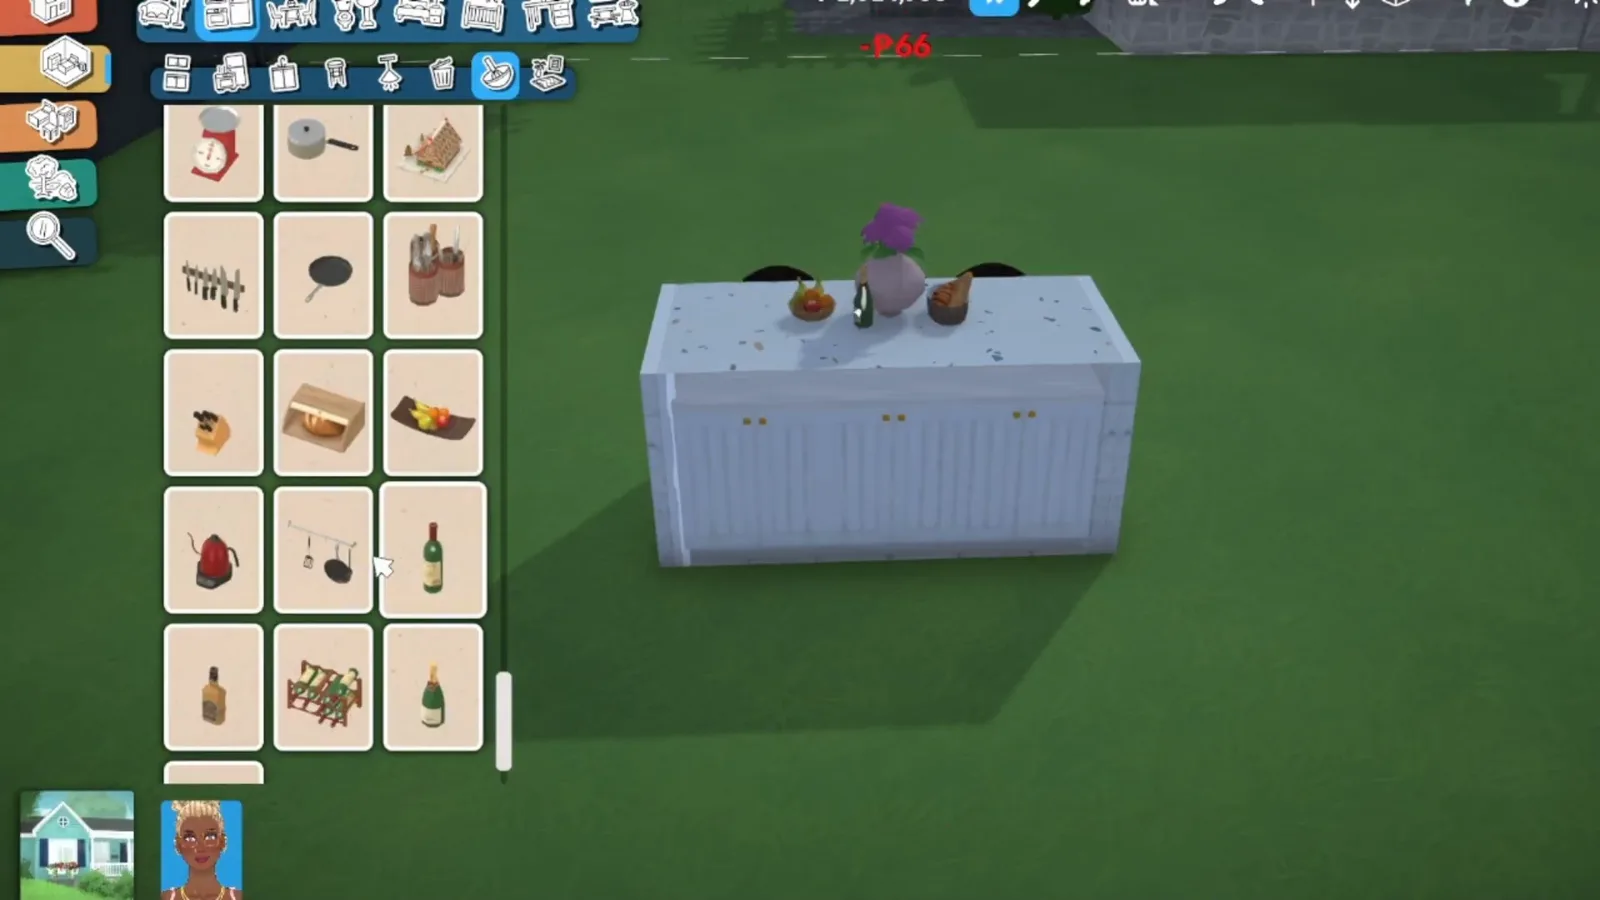
Fluted doors, gold knobs, a dressed stone top — doneWatch at 2:48
Kitchen island FAQ
- Does Paralives have kitchen islands?
- Not as a single catalogue object. The kitchen sets include island-friendly pieces — Mikko's kitchen-hacks tour points out a waterfall-style counter and cabinets with no back edge that read cleanly from both sides — and this guide's walkthrough builds one from a separator-wall rectangle lowered to counter height, then paints it into a finished block.
- How do you make a kitchen island in Paralives?
- Two routes. The shell route in this guide: draw a separator-wall rectangle, drop it to counter height, paint the floor as the countertop and the sides as cabinetry, then slot real cupboards or a dishwasher into the open side. The counter route: drag kitchen cupboard runs out, mix the five formats from each piece's three-dots menu (double cupboard, single cupboard, drawer over cupboard, two large drawers, four small drawers) and put two cabinets back to back for a double-sided island, as Geekism's and Mikko's tutorials demonstrate.
- Can Parafolks sit at a kitchen island in Paralives?
- Not at bar stools yet — the build catalogue marks them Early Access and purely decorative, so Parafolks cannot use them. Mikko's workaround is to drag any table into a gap between cabinet runs: tables and chairs are fully functional, so Paras can eat at a counter-height table island today. Geekism also notes some top cupboards have a breakfast-bar option if you only want the look.
- How do you place counters and appliances freely in Paralives?
- Everything snaps to its highlight boxes by default. Hold Alt (hold) to place items off-grid — Geekism uses it to nudge sinks and small appliances back from the counter edge, and Mikko places small appliances anywhere on a counter with it.
- How do you hide the back or sides of a Paralives island?
- Pick cabinets without a back edge — they look finished from both directions. Two ordinary cabinets placed back to back make a double-faced island, and Mikko hides a mismatched end by standing a column against it, sized to the island and painted the same colour.
Keep building
Kitchen ideas & design
The wider kitchen cluster: cupboard formats, counter sinks, tucked appliances and the induction hob fix.
Decorating guide
Clutter, colour and the finishing passes that make a build feel lived-in — the same dressing logic this island ends with.
Rooms & open plans
Where an island belongs: zoning open kitchen-living space, and how room shapes and separators work.
Half walls
The shell technique this island is built on, taken further — railings, split levels and sunken lounges.
Curved walls
Freeform wall drawing for rounded rooms and soft edges — the same tools, bent.
All build guides
Every guide in the Paralives build cluster, from foundations to roofs.