
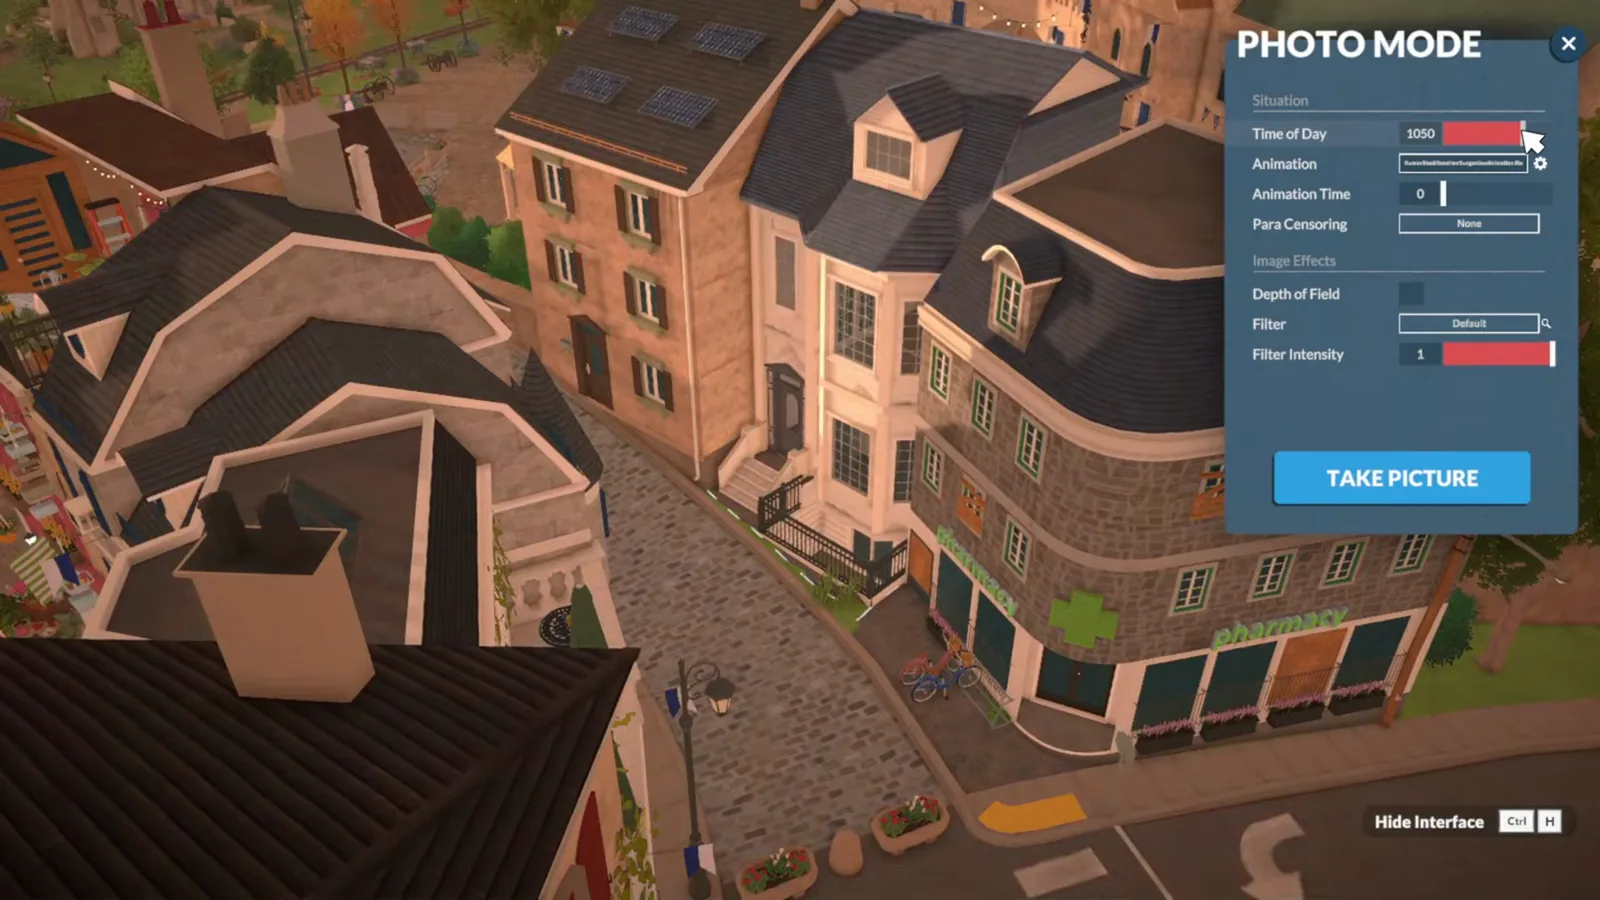
The short version
There is no townhouse lot type in Paralives: residences are the only residential lot in the game, and every residence is a single home. What you can do is build one narrow, three storeys high and hard against its neighbours — which is exactly what a terraced house is. These steps follow two builders who did just that, from an empty wedge of paving to a Photo Mode reveal down a shared street.
- Turn the grid off before the first wall — snapping is what stops a townhouse sitting flush.
- Hold the no-snap modifier to push walls, columns and trim right up to the plot line.
- Fix the stairwell first: on a narrow footprint the stairs decide every other room.
- Roof pieces clip freely into each other, and a chimney dropped on a roof just sits there.
- Wallpaper and floor finishes cost nothing — spend the budget on structure and furniture.
- One builder finished at P38,838 and called it playable for a three-or-four-Para household.
The controls this guide leans on
Every technique below is base build mode. These are the bindings that make a narrow lot work — the full list lives on the controls page.
GToggle the gridAlt (hold) / Option (hold)Disable snappingShift (hold)Move an object vertically* (numpad)Toggle the advanced transform widgetPage UpGo up a floorPage DownGo down a floorCtrl + Shift + C / Cmd + Shift + COpen the cheat console (alternate)SETMONEY <amount>Set the household funds when you just want to buildThe plot
Wall a narrow lot flush with the neighbours
A townhouse lives or dies on its street wall. Both builds here start on a tight paved plot hemmed in by taller neighbours, and both start the same way: drawing walls free of the grid so the facade lands on the same plane as the house either side.
- 1
Draw the first wall free of the grid
Both builders open the same way: Wall Placement Mode on a plot barely wider than the house itself. The highlighted segment runs along the pavement edge between two existing walls, and that line is the one the whole facade has to match. ItsAnitaa is blunt about it — if you are building between other houses, do not leave the grid on, or nothing will sit flush with the neighbours.
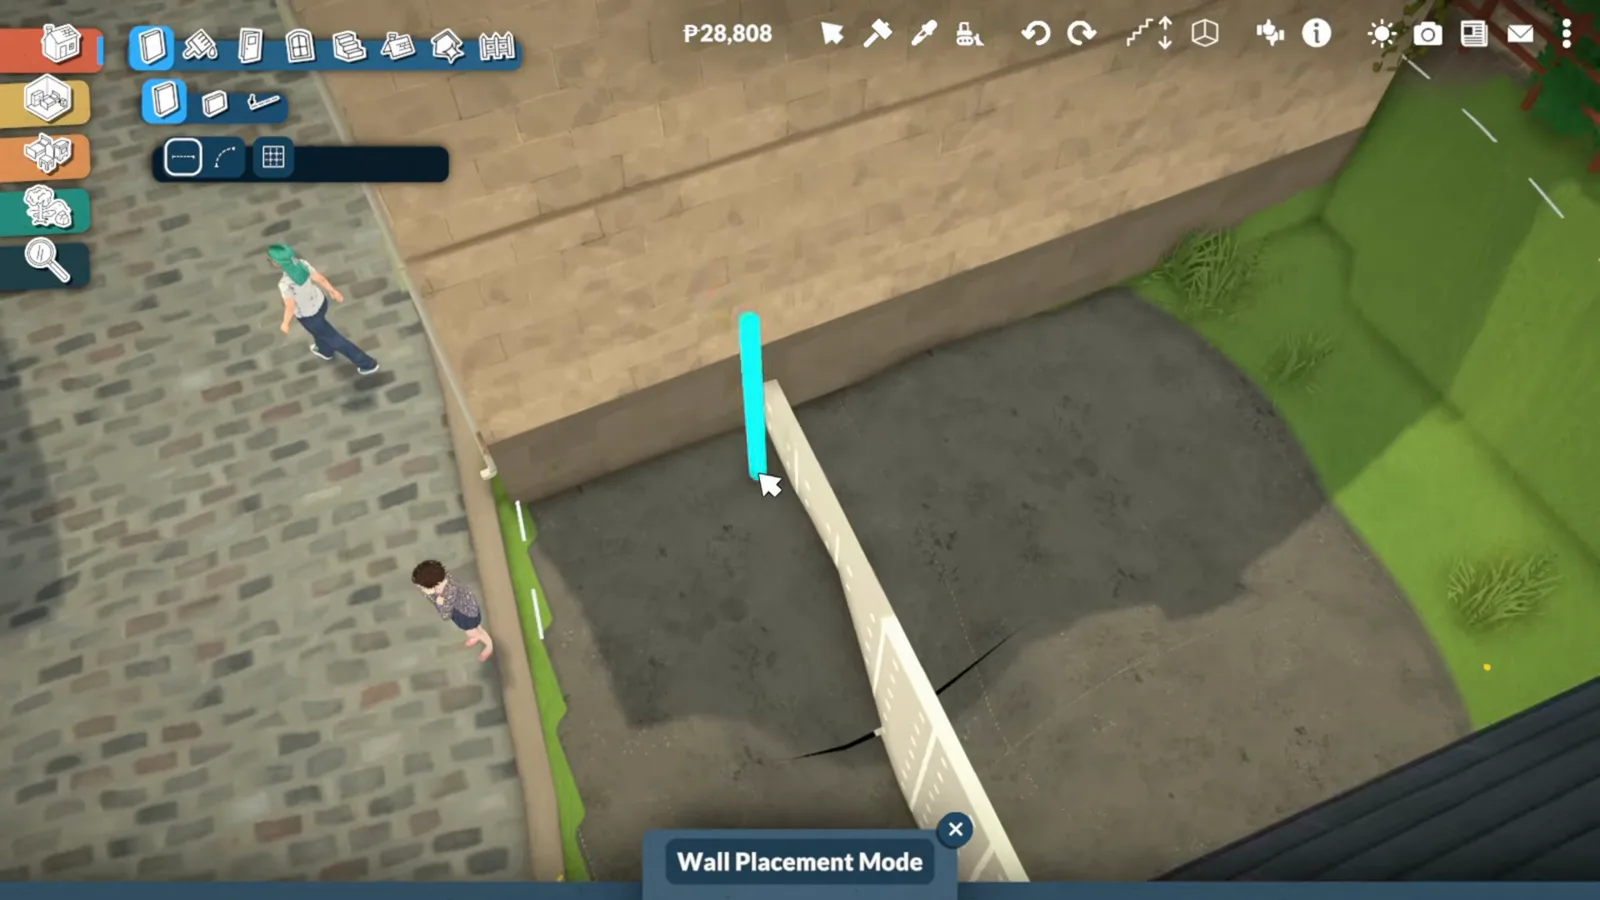
A plot barely wider than the house: the first wall sets the street line.Watch at 0:03 - 2
Repeat the footprint on every floor
A terraced house is the same rectangle three times over, so the upper walls copy the ground floor almost exactly. Only one elevation ever changes — the flank is already somebody else's building. The highlighted segment on this top floor is a bedroom being divided from the stair landing.
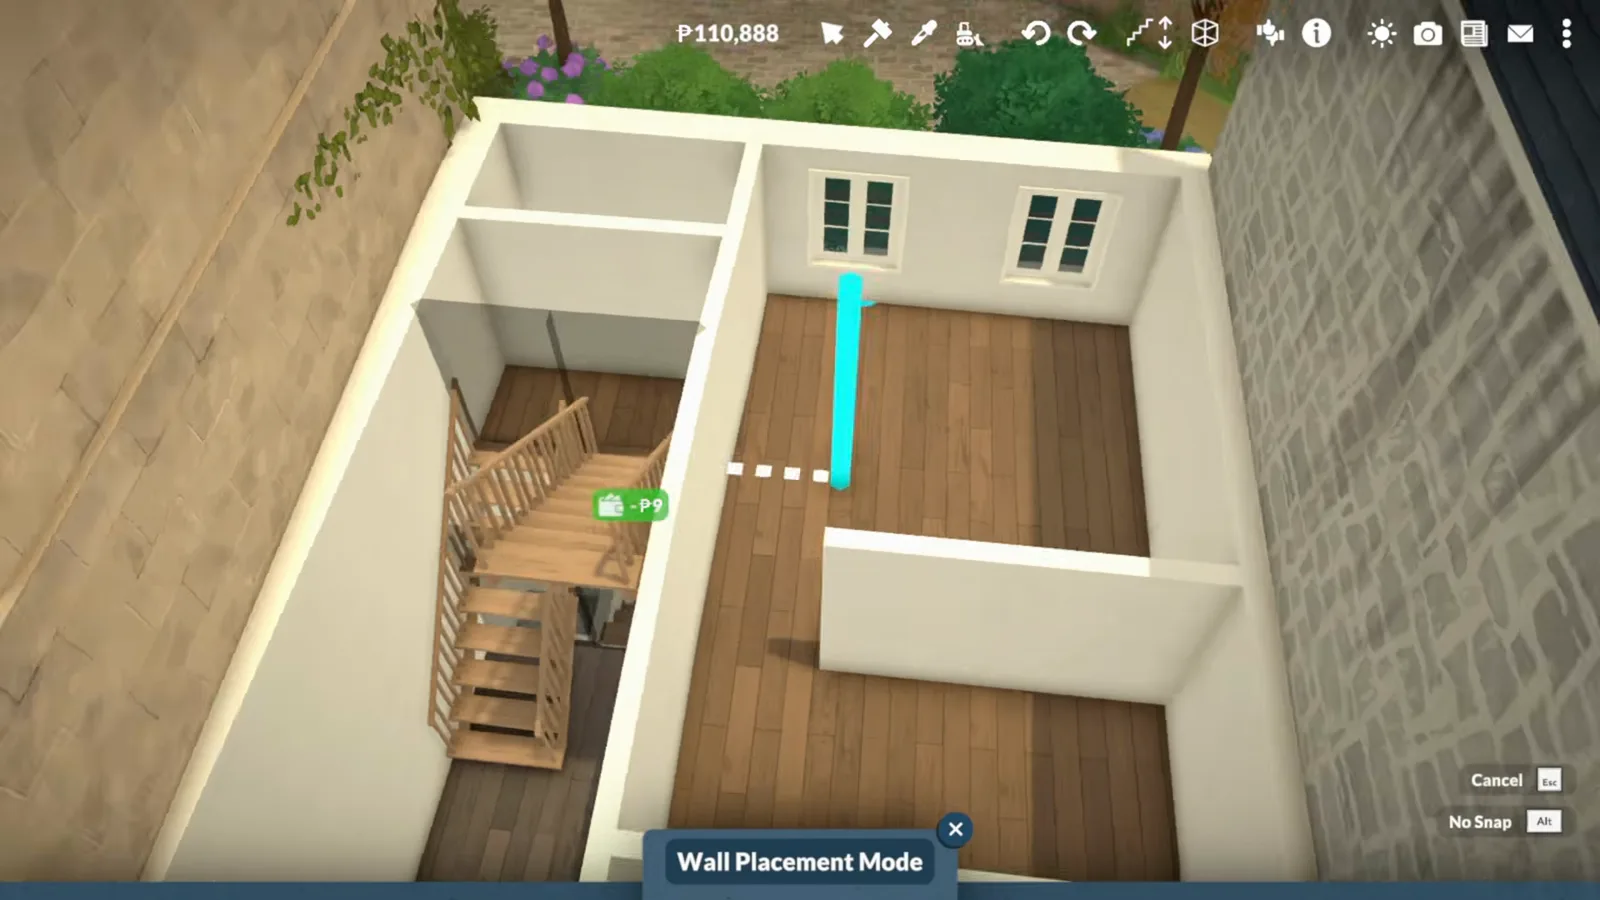
Same rectangle, three times: upper floors inherit the ground-floor footprint.Watch at 7:21 - 3
Use half walls for cornices and parapets
Half-Wall Placement Mode is the tool behind the thick white border that runs under a townhouse roofline. ItsAnitaa built exactly that by placing half walls along the top of the facade and painting them white — a cornice assembled entirely from shipped tools. The same low wall makes parapets, room dividers and stair guards on an open landing.
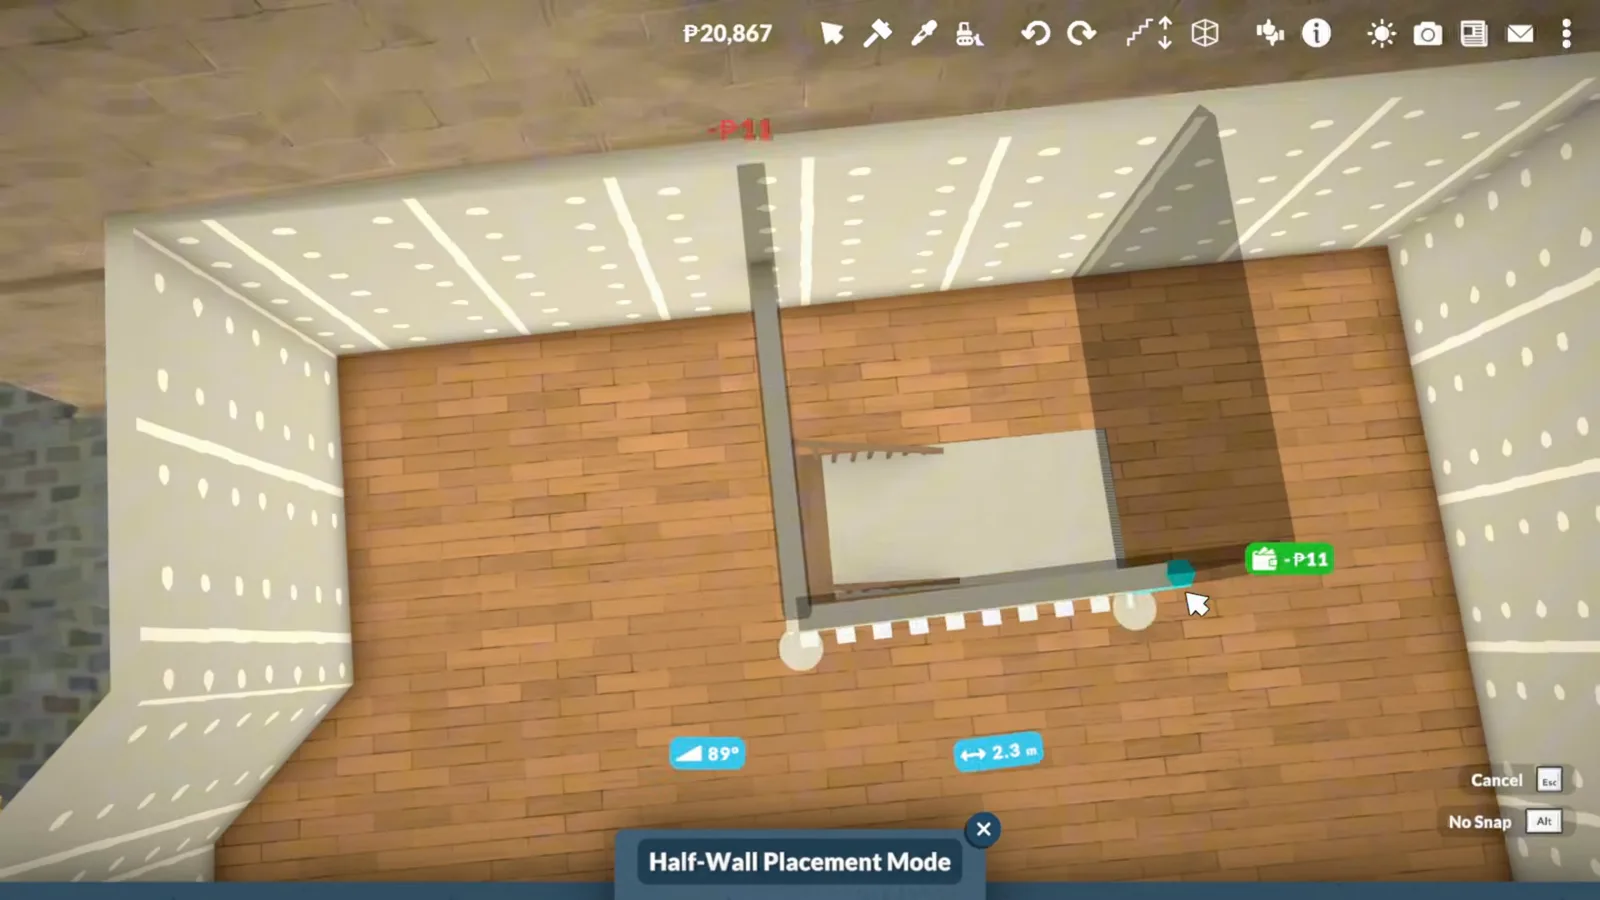
The cornice trick: a half wall painted white, run along the top of the wall.Watch at 4:12 - 4
Paint the floors last, and for free
Floor Painting Mode opens a grid of timber, tile and stone swatches. ItsAnitaa points out that none of it costs anything — wallpaper and flooring are free in Paralives whichever swatch you pick, so the budget question is only ever about structure and furniture. On a narrow plan that freedom is worth having: one wood finish can run the full depth of all three floors.
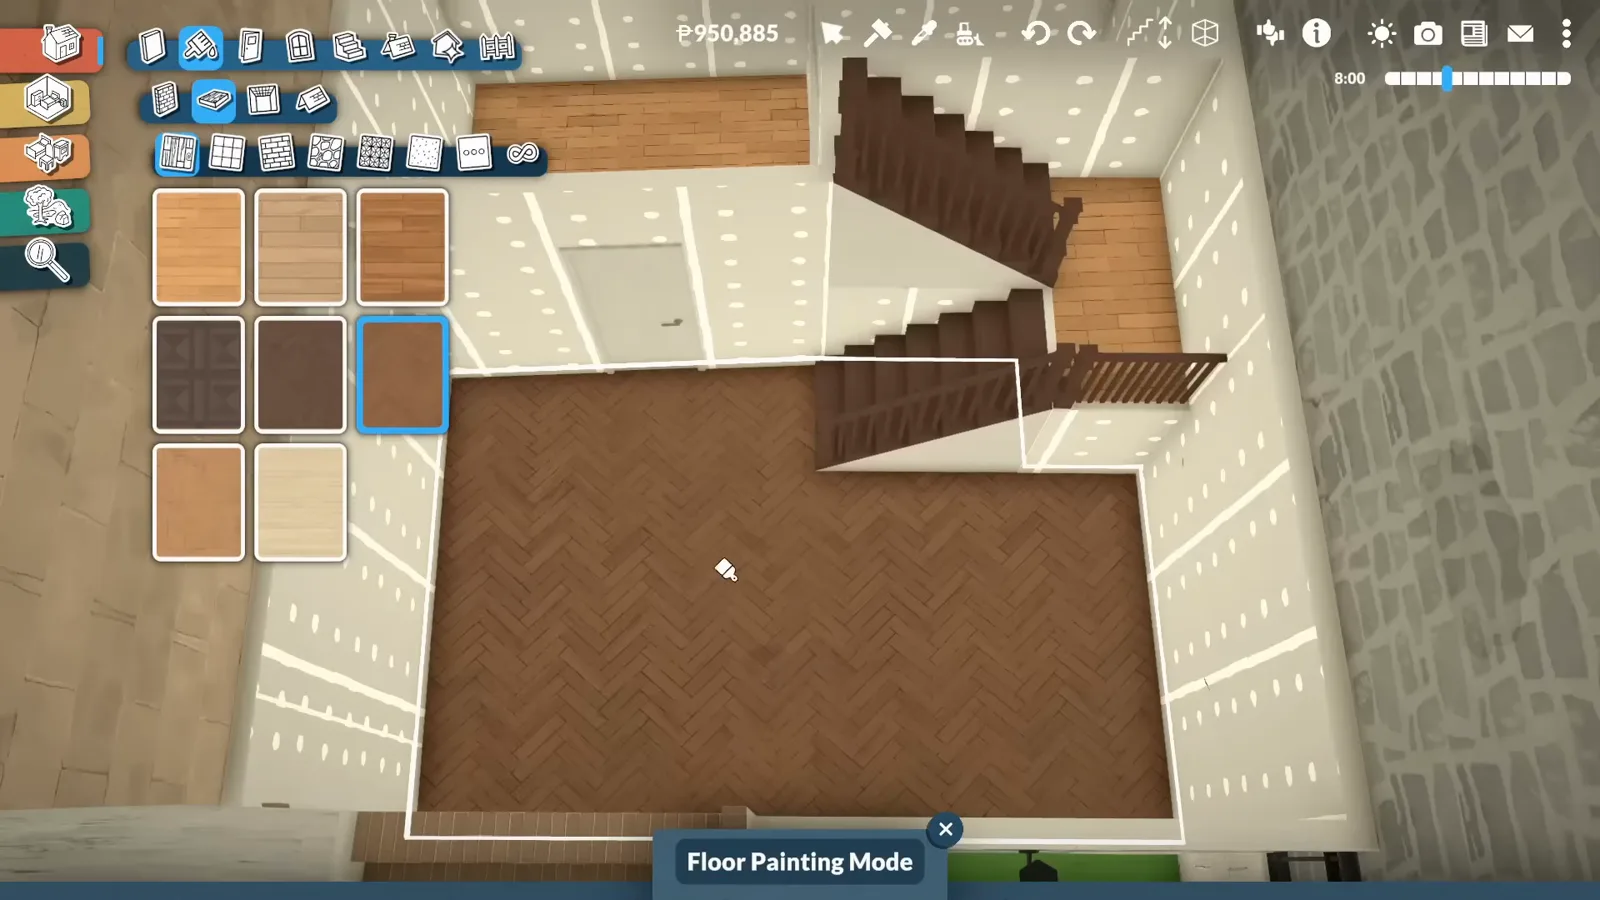
Flooring is free, so the whole plan can be one continuous wood finish.Watch at 12:28
Getting upstairs
Stack three storeys on one footprint
There is no land to spread across, so the plan goes vertical. The staircase is the decision that shapes everything else — its run, its turn, and the hole it needs in each floor above it.
- 5
Come in off the street by a flight of steps
The defining move of a British terraced house is the raised entrance: a short external flight up from the pavement to a front door that deliberately does not sit at street level. The staircase catalogue has the pieces, and ItsAnitaa wanted exactly that — a staircase going up to the front door — because it is what the London rows she copied actually do.
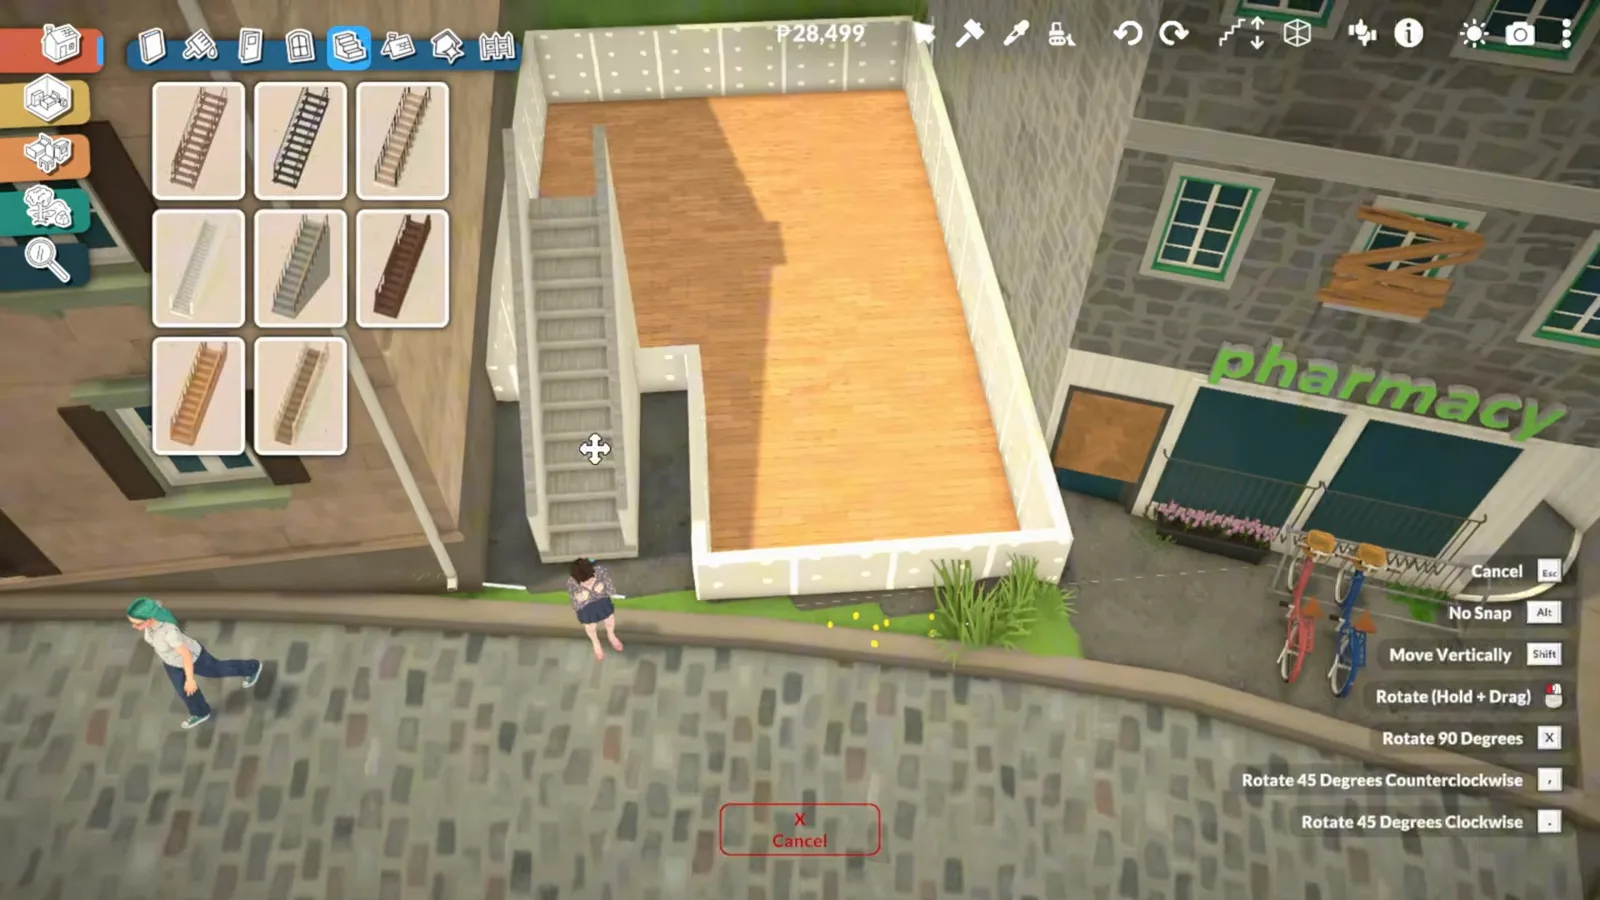
The raised entrance: steps from the pavement up to the front door.Watch at 0:48 - 6
Fine-tune the stair run with the placement menu
Right-clicking a placed object opens the full list of placement options — the same menu the keyboard shortcuts drive. On a narrow lot the useful entries are the rotate options and the advanced transform widget: a stair that is a few centimetres too long for its well can be turned and nudged rather than rebuilt. The placed piece's own tooltip here reads Wiki.
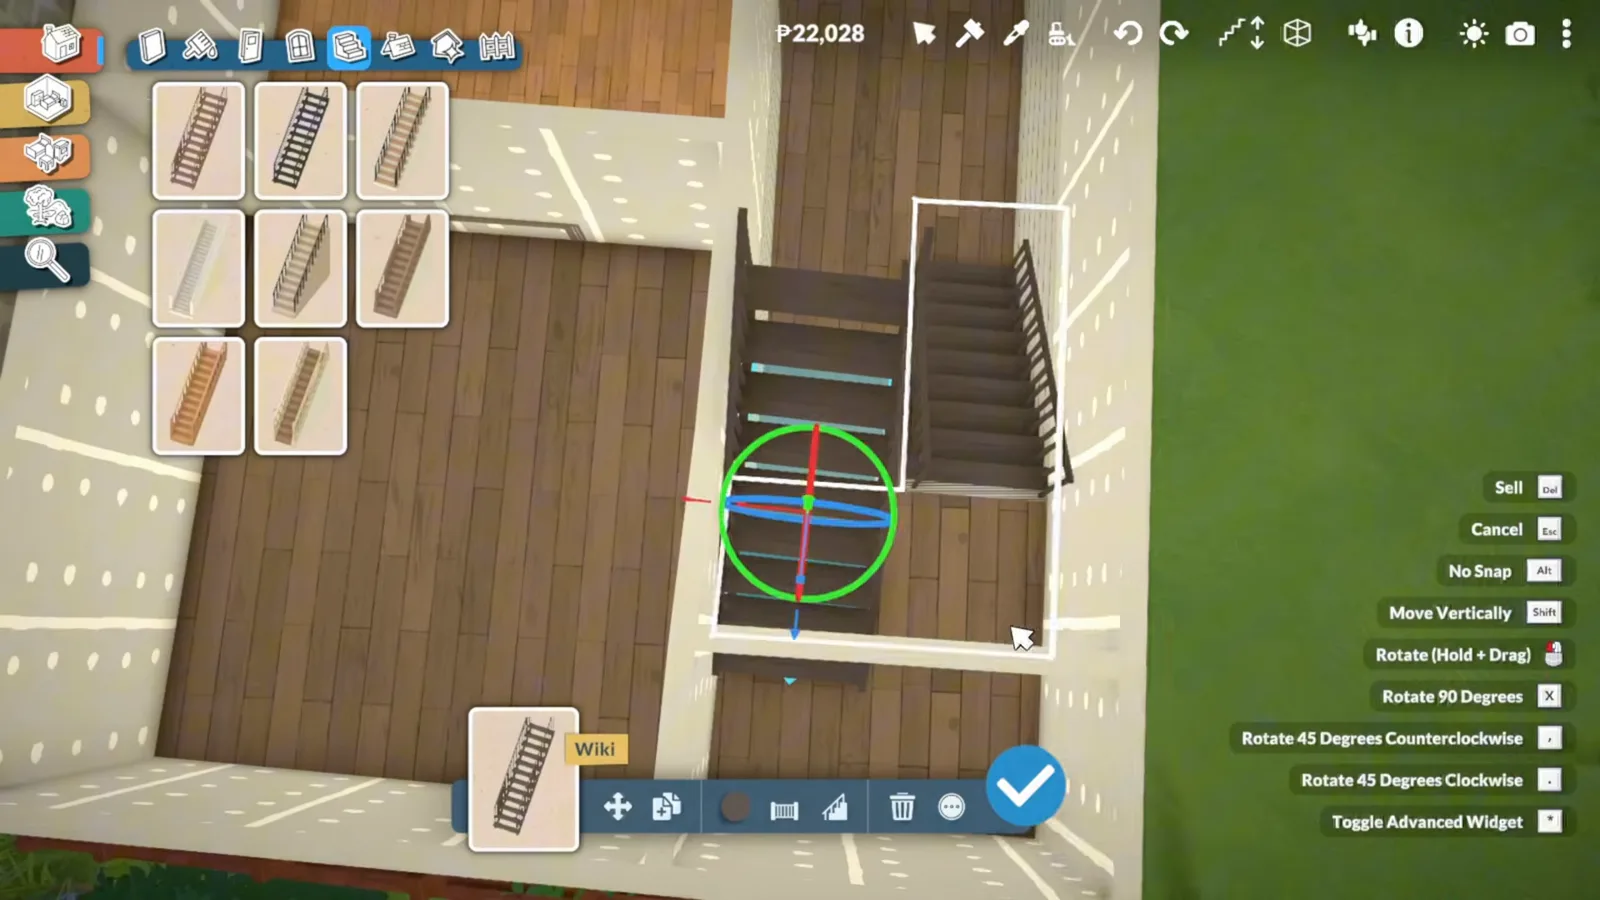
Every placement option in one menu — rotate and nudge instead of rebuilding.Watch at 3:36 - 7
Turn the stair to buy back floor area
Two straight flights meeting at a half-landing are the compact answer to three storeys on a small footprint: the run doubles back on itself instead of needing a full-depth stair hall. ItsAnitaa wanted a U-shaped stair running the entire height of her house and could not get it to work, but the U-turn at the lower level survived into the finished build.
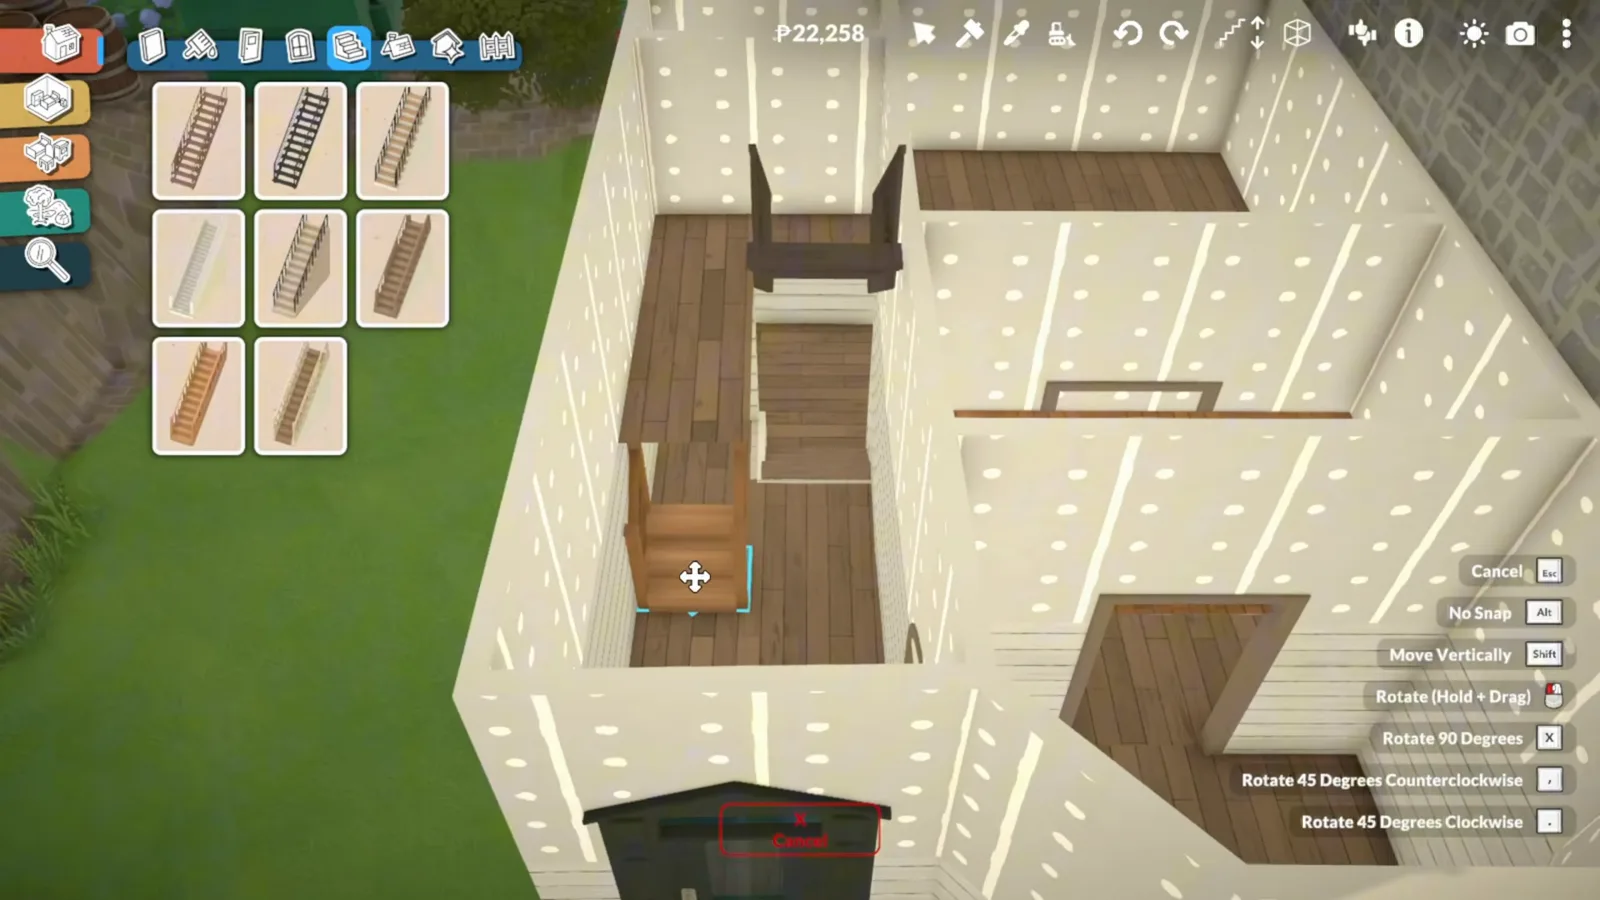
A U-turn at the landing buys back the floor a straight run would eat.Watch at 3:48 - 8
Give the top floor a railing, not more roof
Under a mansard the top floor is the awkward one — low eaves, dormer headroom, and a strip of roof you could stand on if it were safe. Running railings along the opening turns it into a roof terrace, and the Interior Doors catalogue supplies the glazed doors that make it a room rather than a hatch. It is the only outdoor space a townhouse can add without more land.
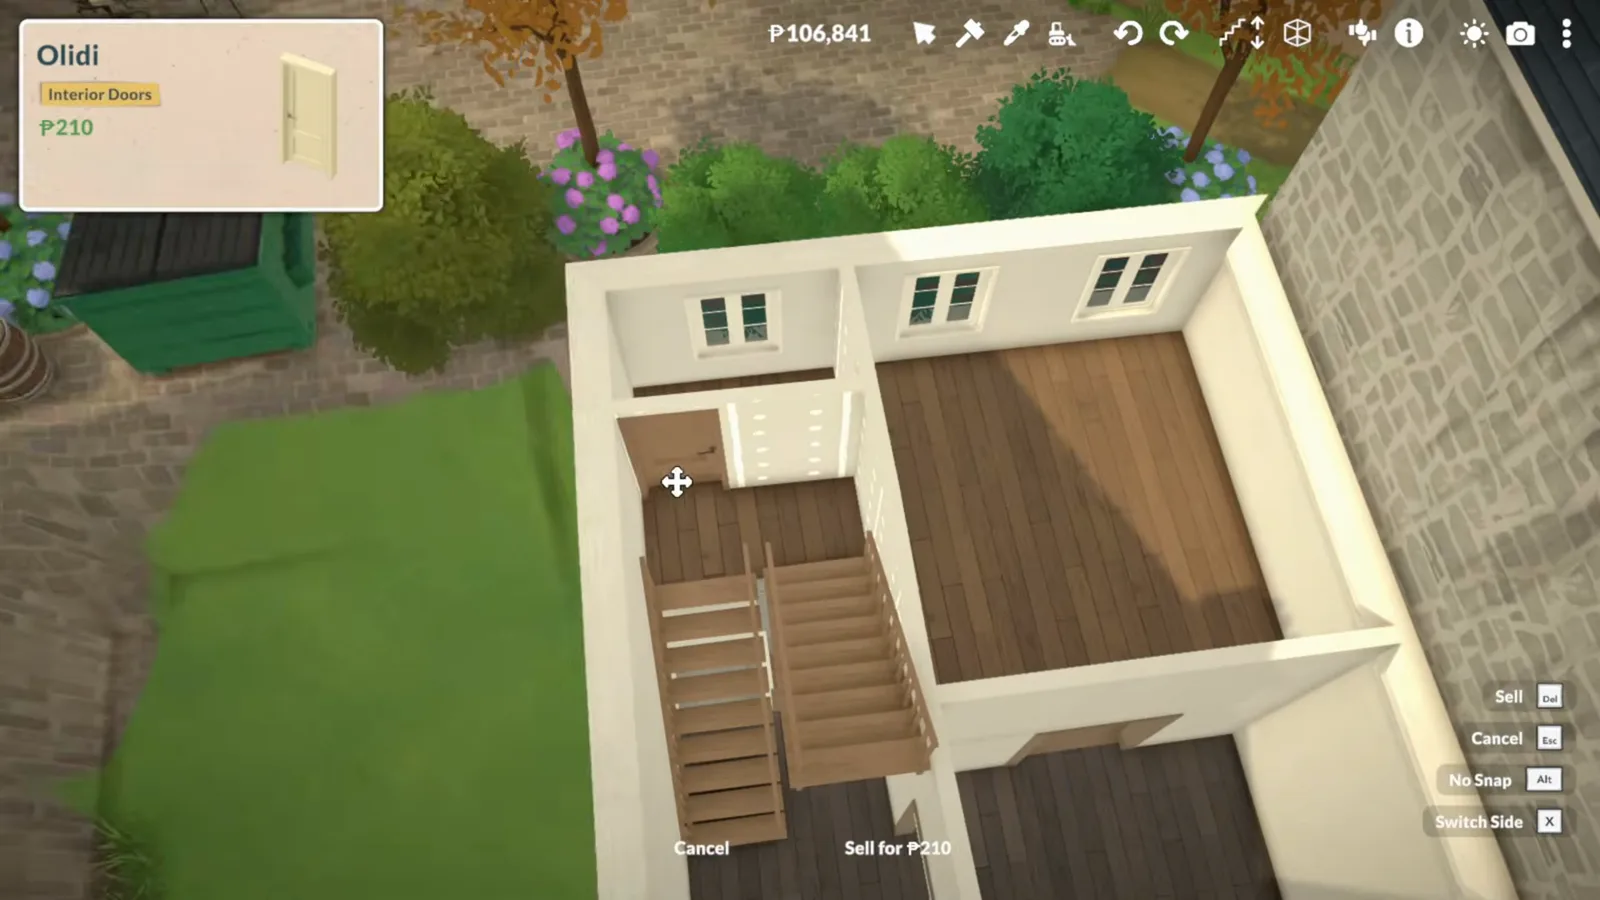
The top floor earns its keep as a railed roof terrace.Watch at 10:48
The street wall
Dormers, chimneys and a front door you climb to
The terraced look is a roofline and an entrance: a mansard pitched steeply enough to cut dormers into, a stack or two, columns framing the door, and a short flight of steps up from the pavement.
- 9
Frame the entrance with columns
Molding Mode is where trim, columns and edging live. Both builds use it to frame the doorway and to draw a vertical line down the facade, which is what makes a tall thin house read as designed rather than squeezed. ItsAnitaa outlined her whole build in columns, again placing them free of the grid so each one sat exactly on the wall face.
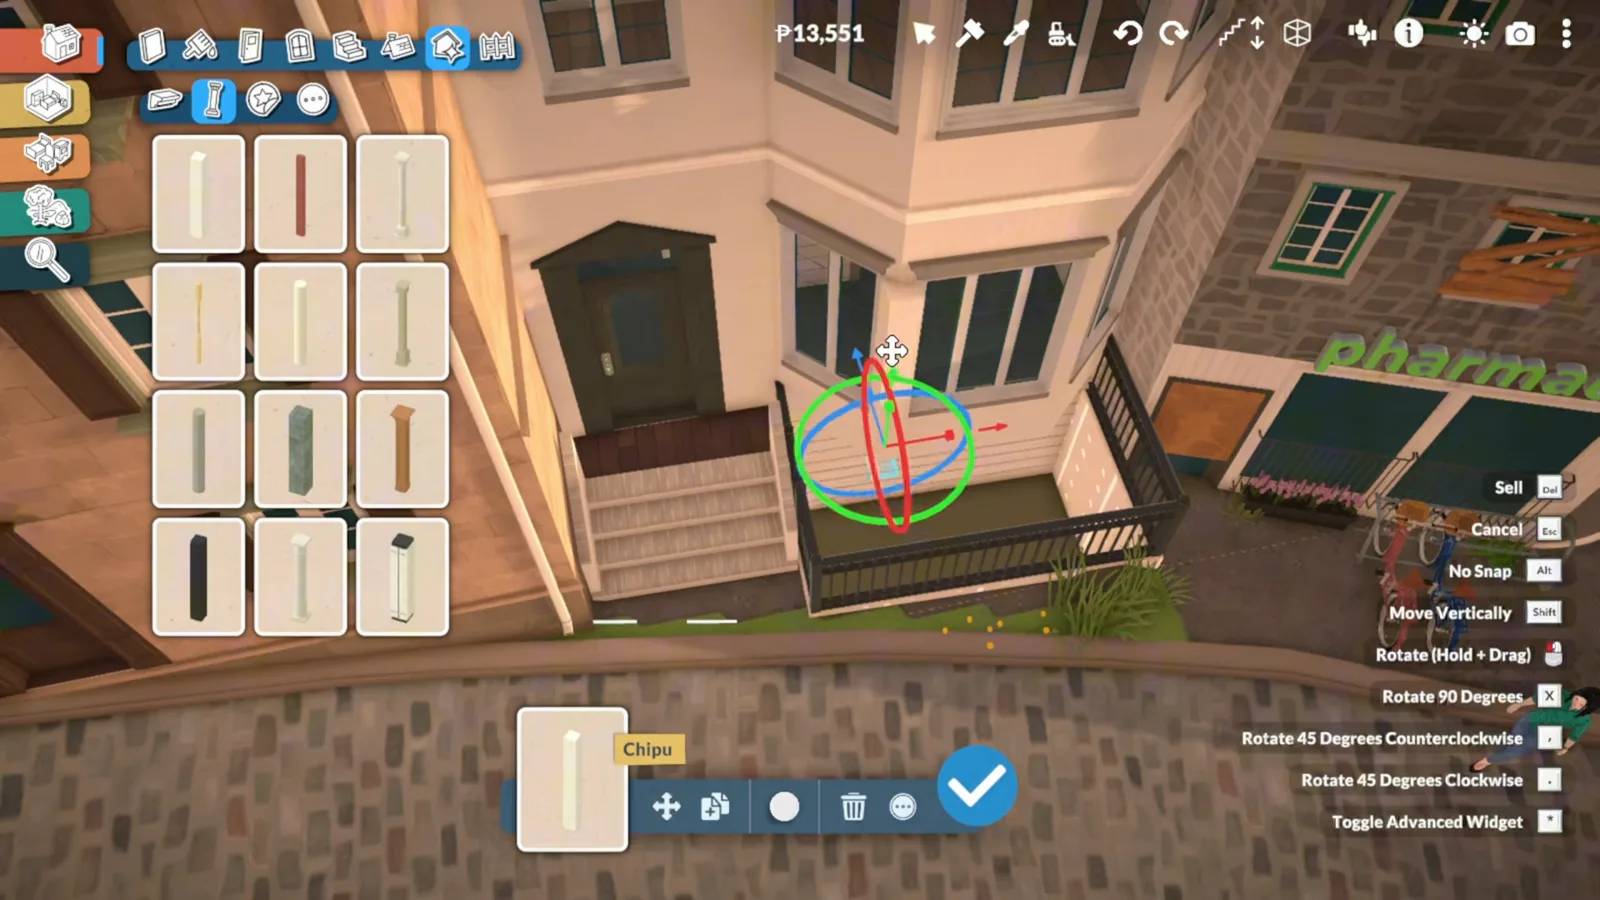
Molding Mode: columns and trim to frame a tall, thin facade.Watch at 6:00 - 10
Pitch a mansard steep enough for dormers
The terraced roofline is a steep mansard with dormers cut into it, and that slope is what makes the top floor usable rather than a crawl space. From this angle you can see why: the roof falls away on both sides toward the pavement, so the dormers do all the daylighting that no side window can, because there are no side windows.
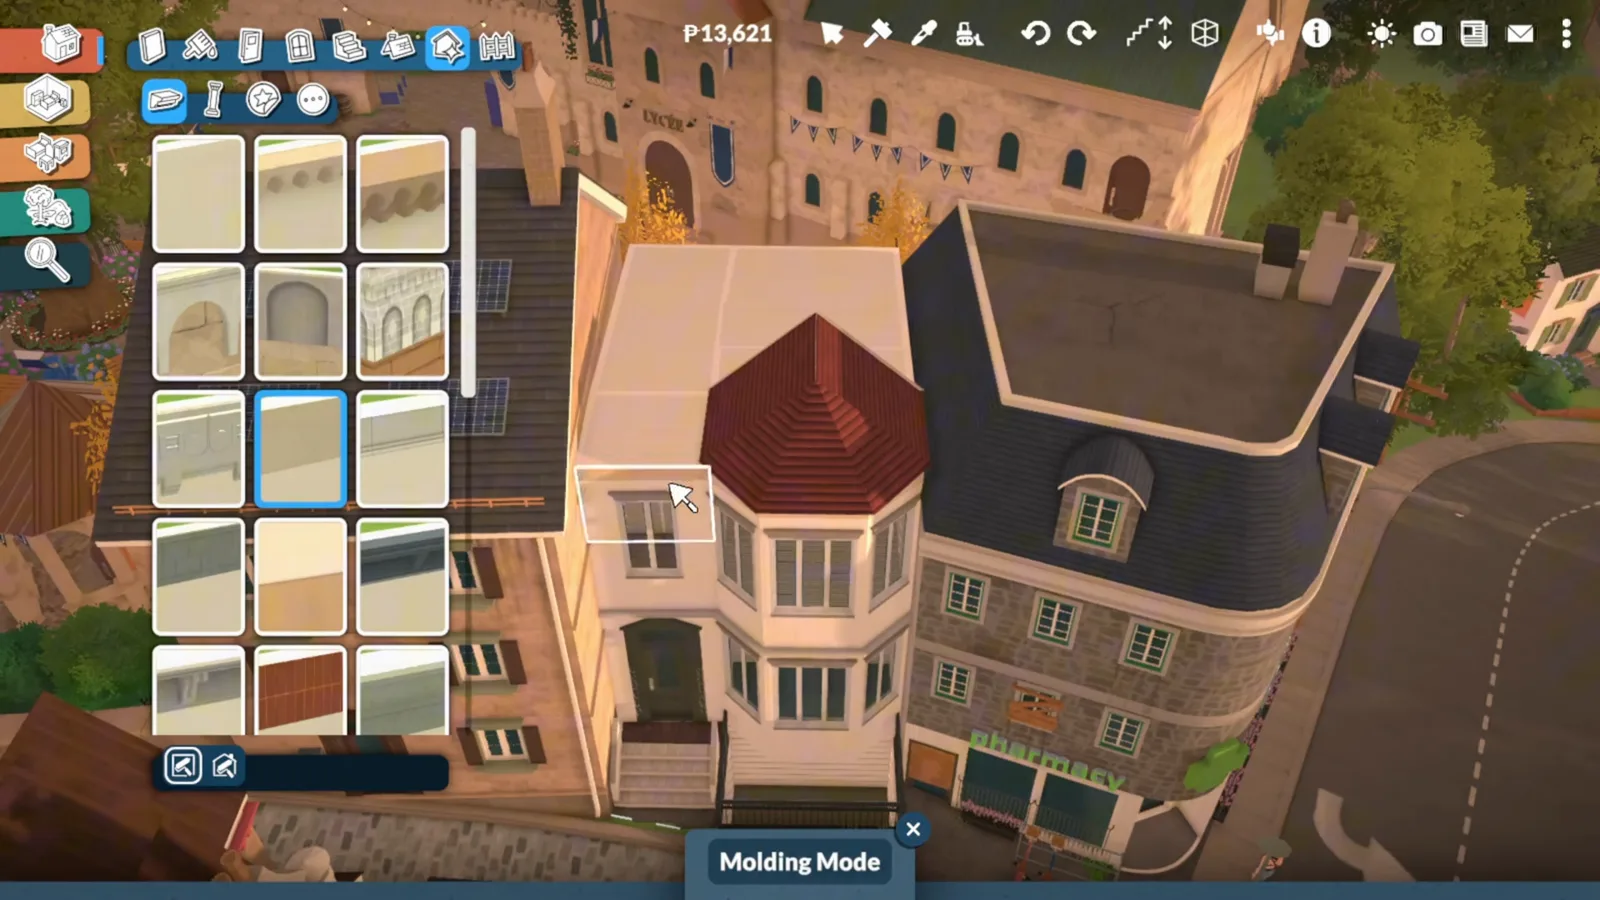
Mansard plus dormers: the roofline that defines a terraced street.Watch at 5:36 - 11
Clip roof pieces together
Roof pieces go down freely and clip into each other, which is how a dormer gets built into a slope that is already placed. ItsAnitaa singles this out as the part of the roof tools that genuinely works well. The one thing she wants added is for a roof passing through a wall to stop showing on the inside of the room below it.
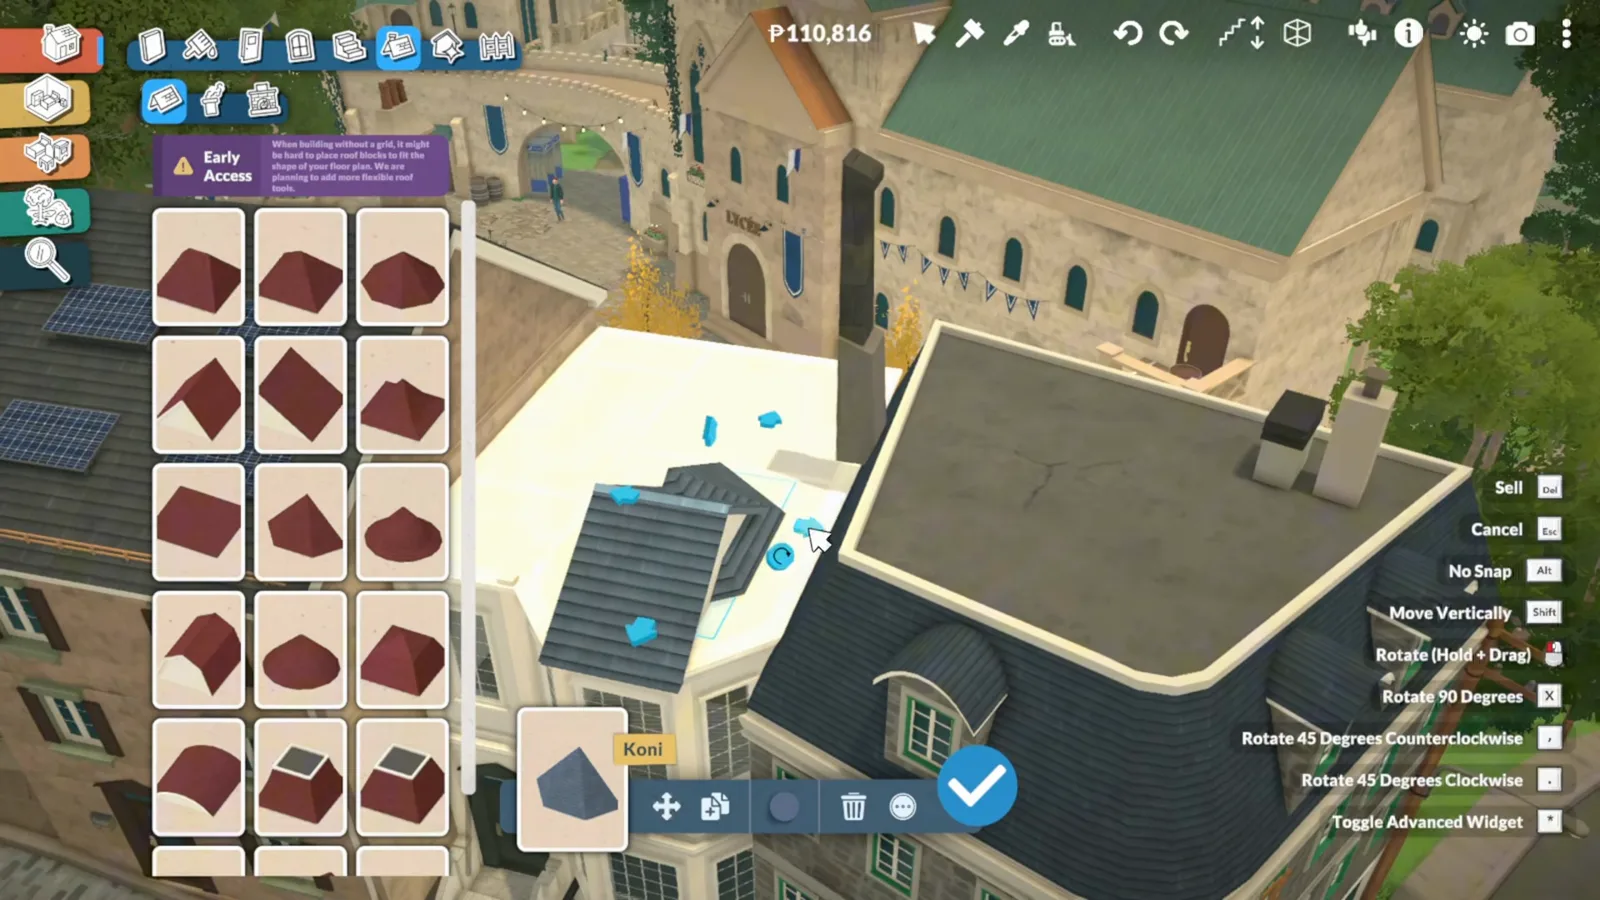
Roofs clip together, so a dormer can be cut in after the slope exists.Watch at 8:12 - 12
Drop a chimney straight onto the roof
A chimney needs no support and no flue chase: place one on a roof slope and it sits there. ItsAnitaa calls this out as one of the features she likes — you can just put the chimney on top of a roof and it will sit nicely. On a terraced roofline a stack or two is most of the character, and it costs nothing to try a few positions.
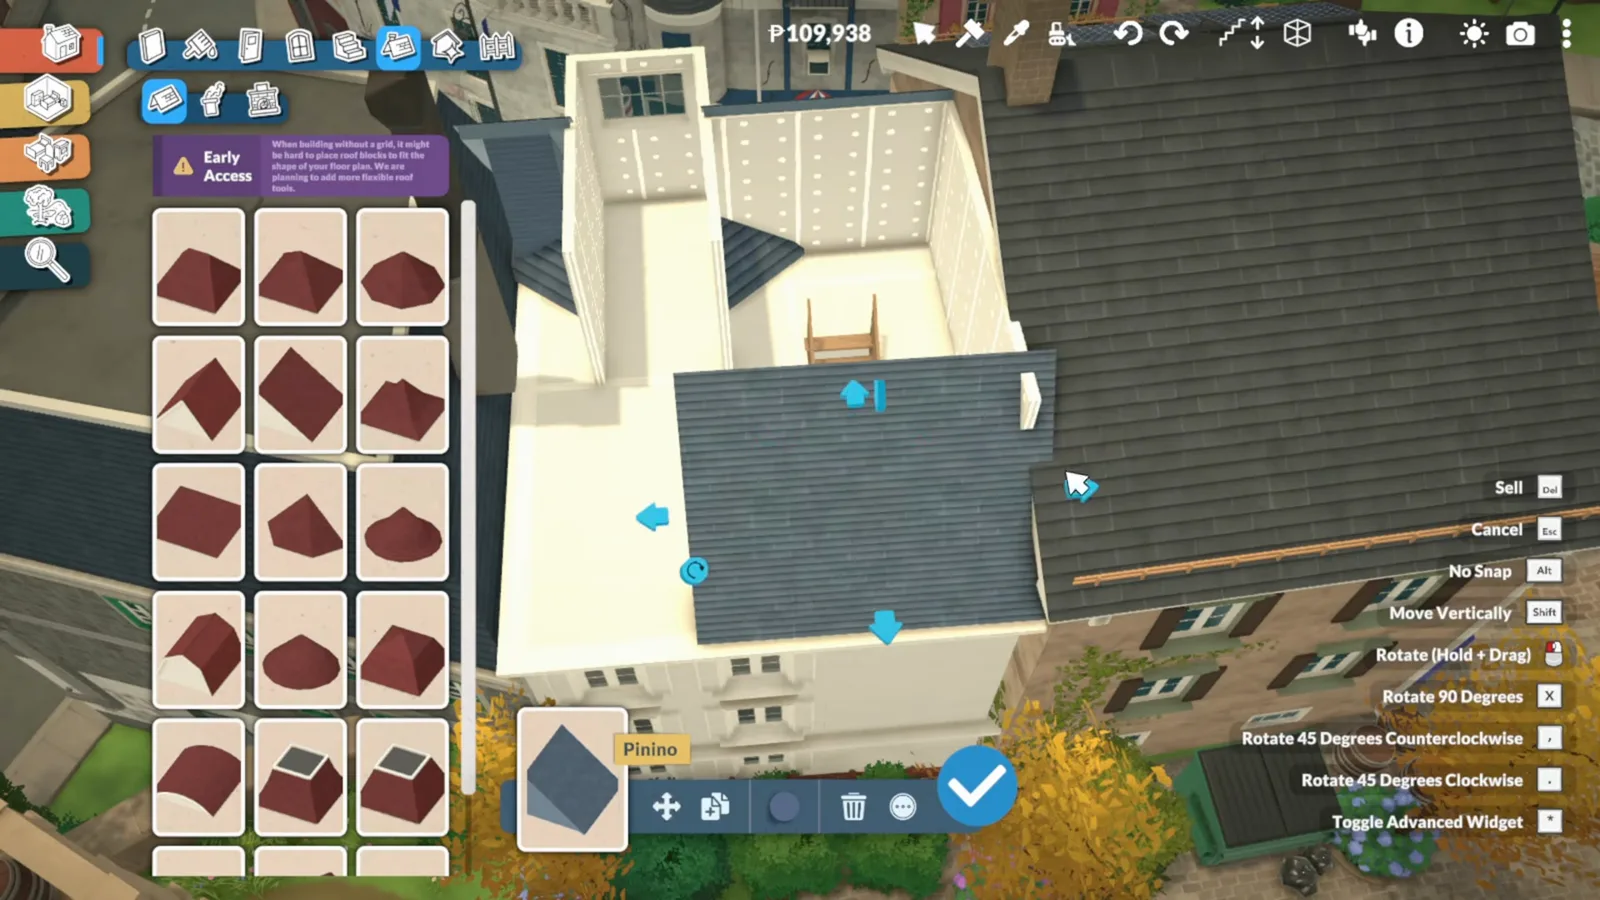
A chimney dropped on the slope: no flue chase, no supports.Watch at 9:42 - 13
Close the front with area railings and planters
The last few centimetres of a townhouse are all street: railings across the light well in front of the steps, a gate, and whatever planting will fit. Space is the whole problem — ItsAnitaa had to shrink her planter area just to squeeze in a wheelie bin, and tucked it away from the door rather than leave it facing the street. Bay windows are the other half of the answer: they project over the pavement instead of taking floor area from inside.
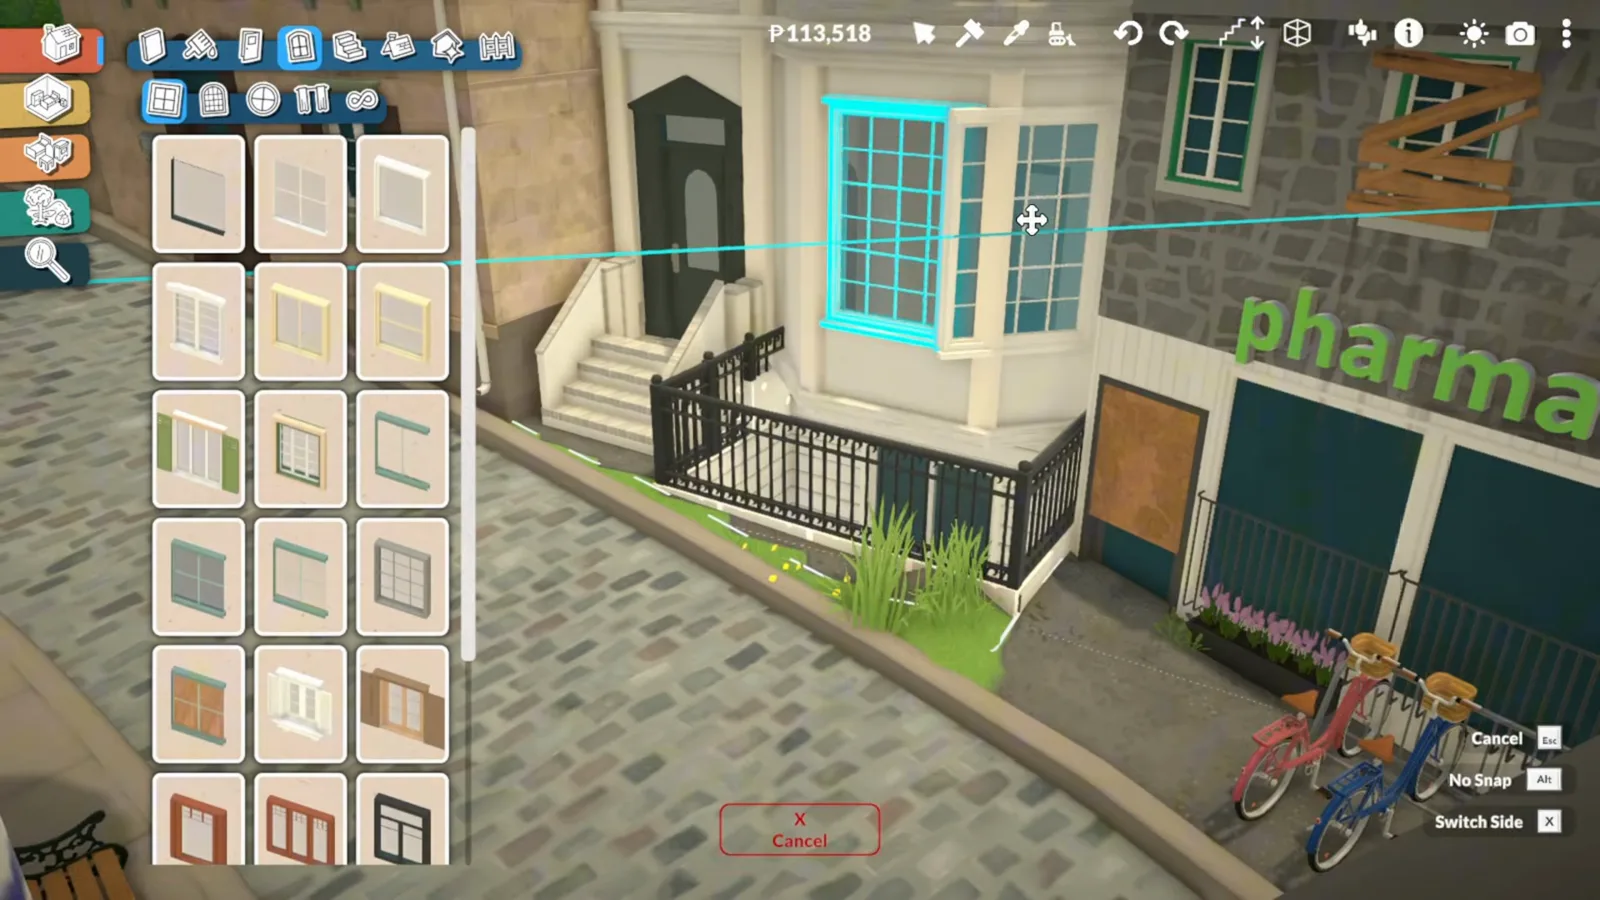
Railings, steps and a bay window: the last metre is all street.Watch at 7:48
Three floors of rooms
Fit a whole life into a narrow plan
ItsAnitaa's finished layout is the test of whether the shape works as a home: a bedroom with an en-suite and a study below, all the living rooms on the main floor, and two bedrooms plus a bathroom above.
- 14
Put all the living rooms on one floor
The main floor here carries the kitchen, the dining table and the living room in a single narrow run, and ItsAnitaa explains exactly why: she did not want to be going up and down stairs just to watch television. She had expected to push the living room down to the lower floor and found it fitted. The dark worktop runs along two walls and the stair rises straight through the middle of the plan.
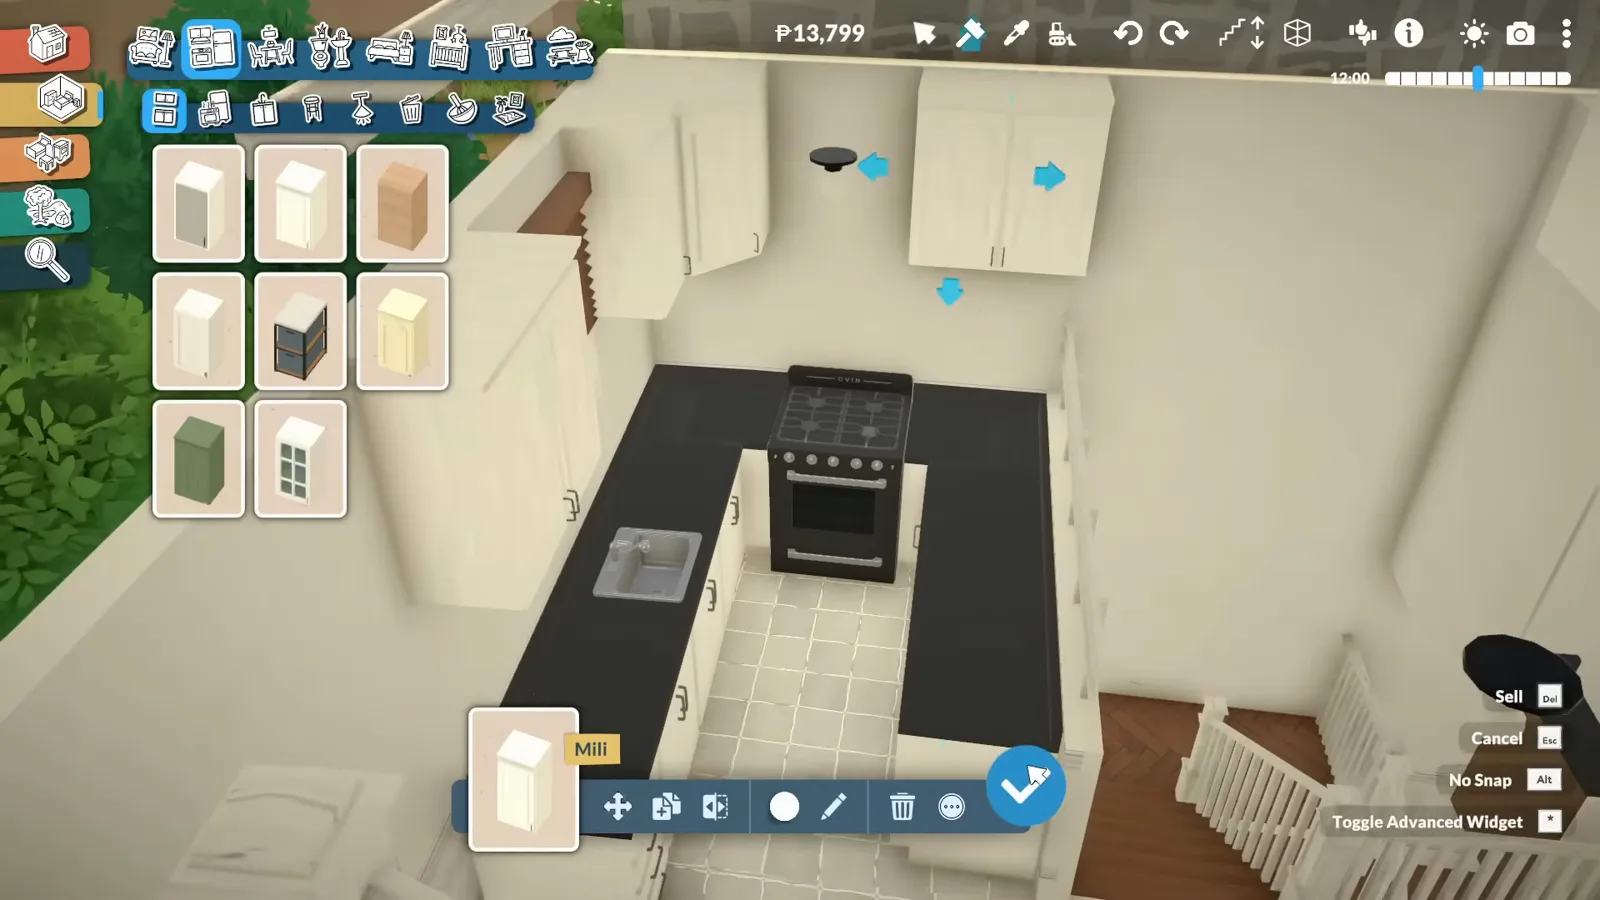
Kitchen, dining and living on one floor — no stair-climbing for the sofa.Watch at 15:17 - 15
Squeeze a full bathroom into a leftover corner
A basin, a WC and a window fit into the space left between the stair and the party wall — the room that was never going to be anything else. ItsAnitaa's lower-floor bedroom has its own en-suite, and this one serves the two bedrooms above, which is roughly how most terraced houses end up arranged once the useful rooms have taken the good floor area.
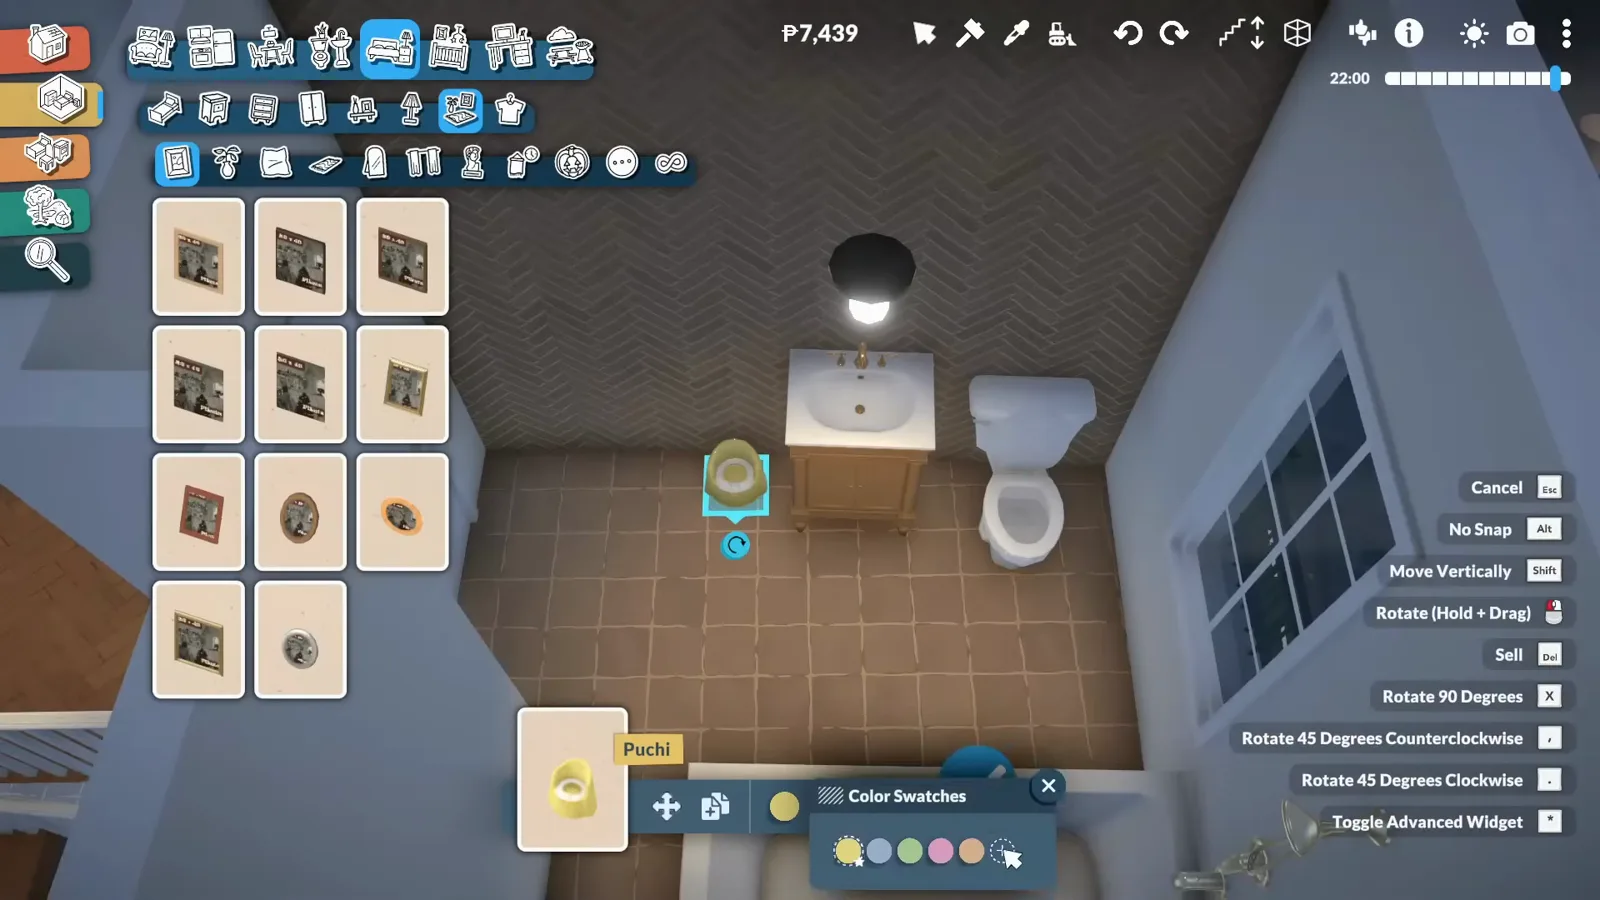
One basin, one WC, one window: the leftover corner becomes a bathroom.Watch at 18:40 - 16
Plan for the room that has to be smallest
The top floor gets the smallest bedrooms, and this one is doing two jobs at once: a double bed and a crib pushed against the panelling. ItsAnitaa's finished house is three bedrooms with a crib in the parents' room and two bathrooms, with the main bedroom and a toddler's room sharing the upper floor and a bathroom between them.
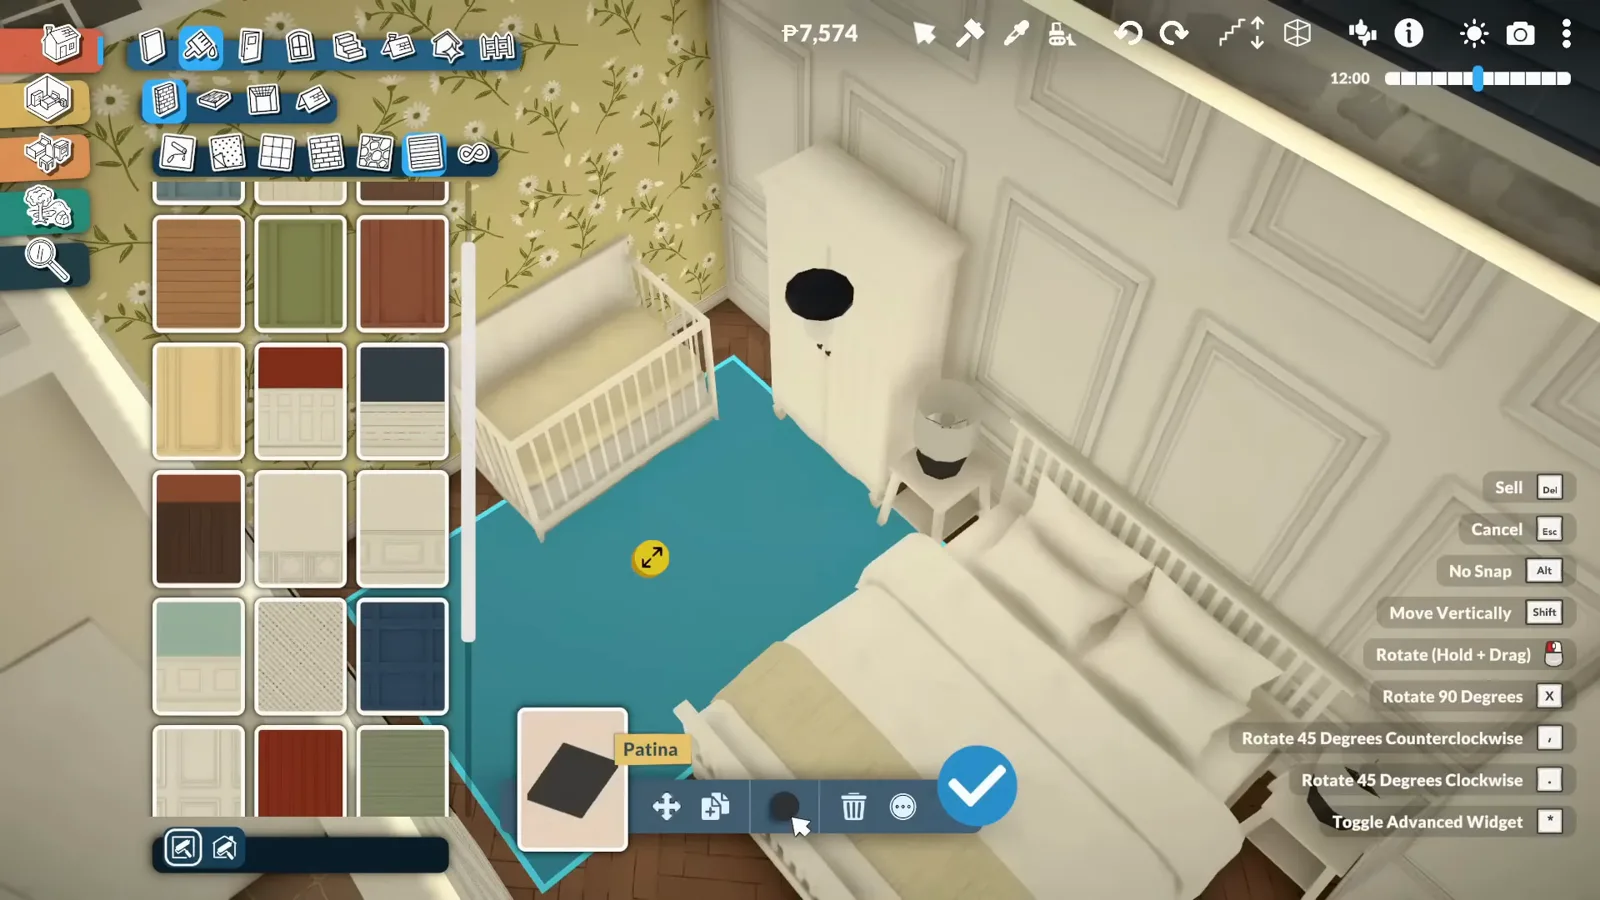
Three bedrooms plus a crib in the main one; the top floor does the rest.Watch at 18:02
What nobody has pinned down
Two builders can show you how a townhouse gets made; neither can tell you where the game's limits are. These are the questions this page deliberately leaves open rather than estimates an answer for.
- A published maximum number of storeys. Both houses here run three floors plus a set-back top level, and neither video hits a ceiling on height — but no source documents a hard cap.
- Whether the stairwell flooring problem ItsAnitaa hit on her second floor still behaves the same way in build 0.1.8b. Her build was filmed before the current patch.
- The starting-funds figure. The builder quotes P30,000 for a single Para on the default difficulty, which matches one wiki reading — our money guide flags the same number as disputed.
- Whether a dedicated terraced or apartment lot type is scheduled. Lot and world editing sit on the roadmap with no dates attached.
Paralives townhouse FAQ
- Is there a townhouse or terraced lot type in Paralives?
- Not as a lot type: residences in Early Access are single-family homes, and lot and world editing tools are still on the roadmap. A townhouse is therefore a build style you apply to a normal residence lot — narrow, vertical and flush with its neighbours. The same boundary applies to apartments, and our apartment build guide covers that version of the problem.
- How do you build on a narrow lot in Paralives?
- Turn the grid off first, then place walls free of it so the facade lands on the same plane as the houses either side. Both builders in this guide say the grid is what ruins a terraced row: leave it on and nothing sits flush. Hold the no-snap modifier to push walls, columns and trim right up against the plot boundary, and use half walls to build the cornice line along the top of the facade.
- How many floors can you stack in Paralives?
- No hard maximum has been published. Both townhouses here use three living floors plus a top level set back behind the mansard, stepping between them with the floor-up and floor-down controls, and neither build ran into a height limit. Treat three or four storeys as comfortably available and anything taller as untested.
- Do you need a mod to build a townhouse?
- No. Everything in these sixteen steps is base build mode — walls, half walls, stairs, roof pieces, moldings, columns and railings all ship with the game. Mods only come in if you want somebody else's finished house: both builds shown here were published to the Steam Workshop, so you can drop the whole terrace into your save instead of drawing it. Our workshop guide covers installing them.
- Why can't I delete the floor under my stairs?
- One builder hit exactly this and could not work around it. She wanted a U-shaped stair running the full height of the house, which needs the flooring removed beneath it on the upper level so Paras do not bump their heads — but the game would not let her delete that floor on the second storey. Her workaround was to keep the U-turn only on the lower floor and run a straight flight elsewhere. It is an Early Access limitation rather than anything you are doing wrong.
Keep building
Apartment build
The other answer to having no terraced lot type: an open-plan family apartment on a normal residence, with the lot-type boundary spelled out in full.
Half walls
The tool behind every cornice, parapet and room divider in this guide, covered end to end with its own worked examples.
House ideas
Every house type we have built a guide for, from tiny houses to mansions, with the lot each one wants.
Related guides
Stairs
U-shaped and L-shaped staircases, the ones the narrow plan depends on, built step by step.
Roofs
Mansards, dormers and roof trims in depth — the facade work summarised here starts there.
Foundations
Setting a footprint on a tight or sloped plot before the first wall goes up.
Tiny house
The same problem with no vertical escape: fitting a whole household onto the smallest lot in the game.
Cheats and commands
The money command used to test a build this size, plus the console that takes it.