
The short version
Paralives has no sunken-room button, but the floor plan has a loophole: draw the pit as a low-walled room, drag that wall height down so it becomes the foundation of the whole house, then treat the level above as your real first floor. Trace the pit with the Separator tool, sledgehammer the old floor and ceiling away in two clicks, and the pit is a room. Lexdotexe's tutorial is the source for every step below.
- The wall height you drag down does double duty: house foundation and pit depth
- Page up after lowering — the old second floor becomes your real first floor
- Separator tool traces the pit; the sledgehammer needs TWO clicks: floor, then ceiling
- Circles must be built inside-out — inner circle before outer walls, or they clip
- Rectangles stay resizable after the fact; circle pits mostly don't
- Stairs need a flat run — or lower the ceiling until Paras can walk out
The shell
Draw the house, then sink its walls
The trick inverts your instincts: the sunken level is built first and the real house goes on top of it. Four moves set the depth of the pit and the height of the foundation in one drag.
- 1
Sketch a small outline of the house
Lex starts with a rough single-storey outline — just enough walls to know where the living room will sit. You are not building yet; you are deciding where the pit goes, because the pit's walls become the house's foundation in the next step.
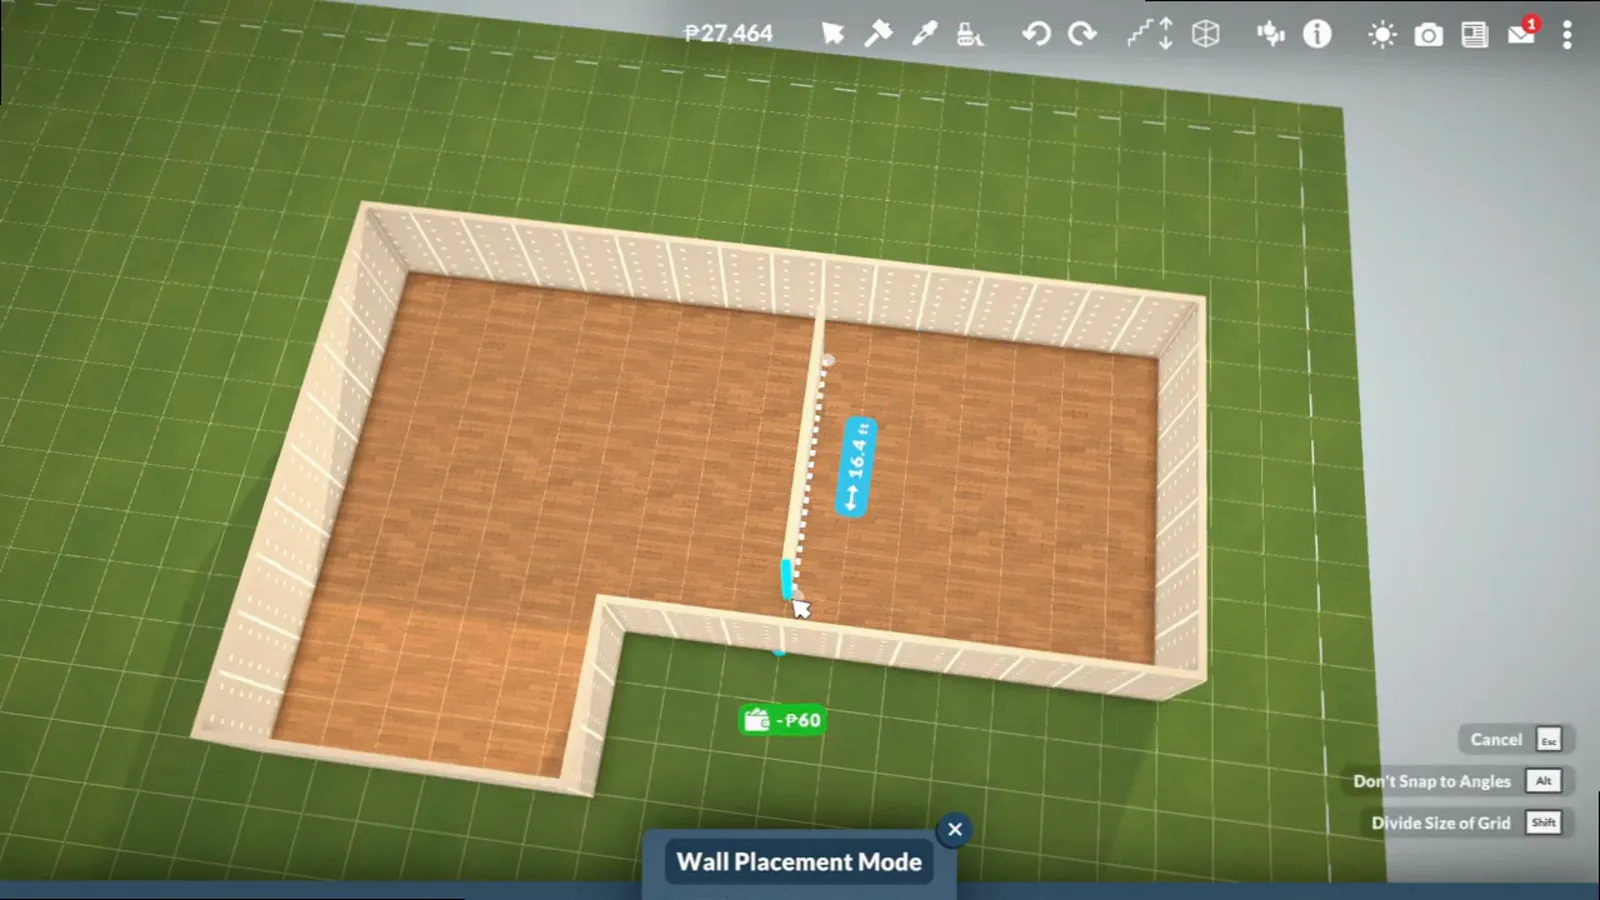
Rough plan first — the pit decides the foundation.Watch at 0:35 - 2
Wall off the sunken area
With the room tool, outline where the living room should sink. This inner room is the pit's whole footprint — get its position right now, because after the trick everything above is built around it.
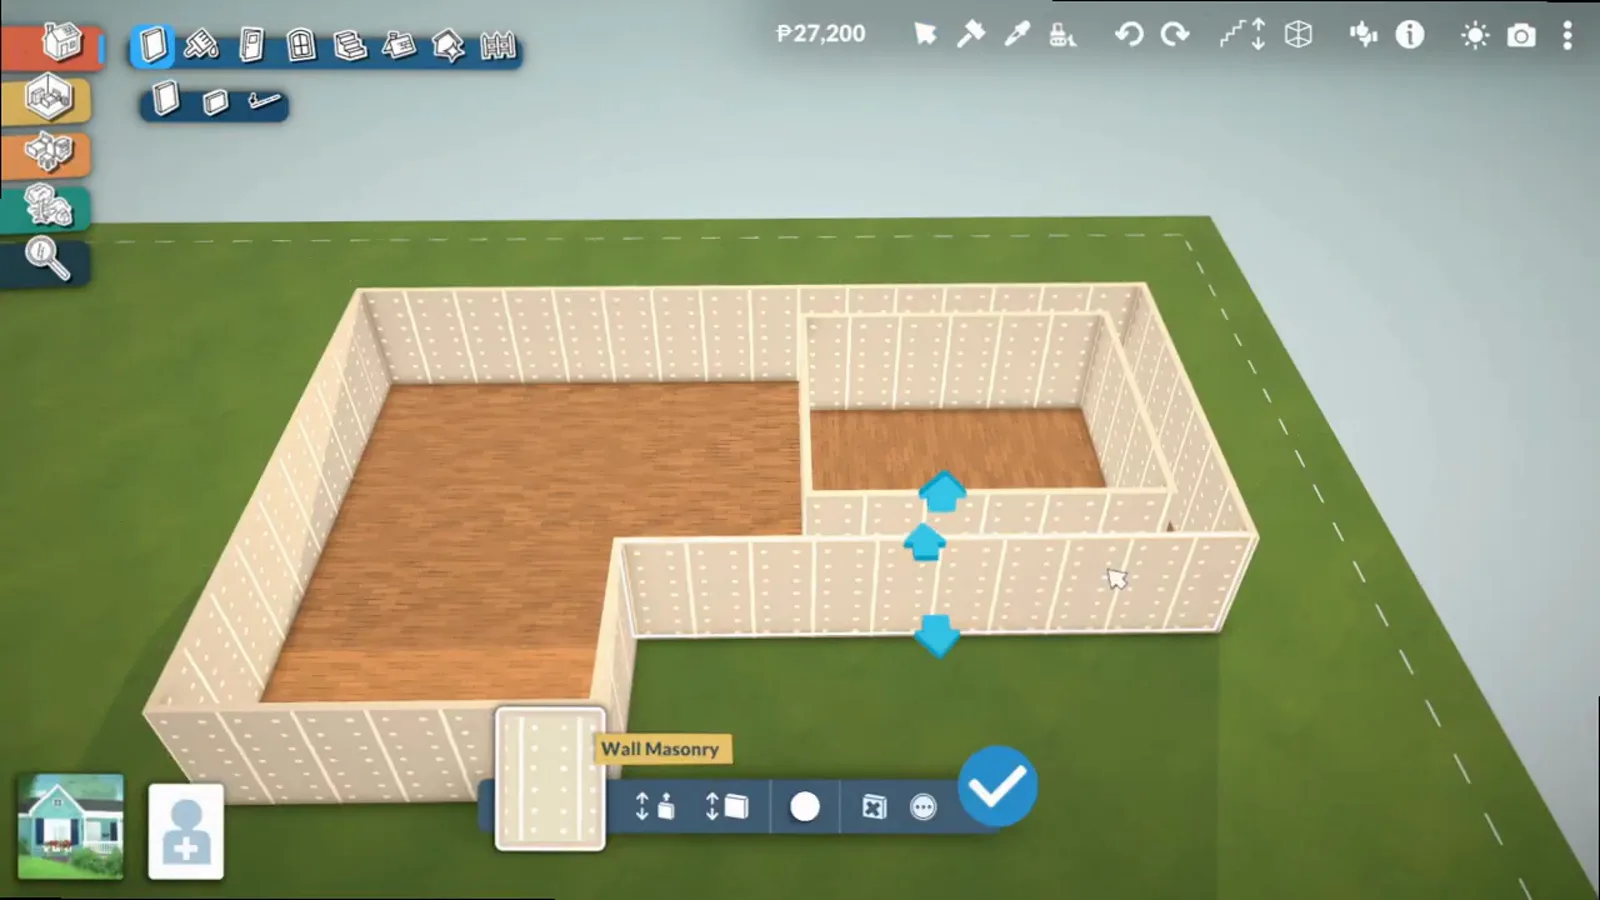
The pit's footprint, walled like any room.Watch at 0:50 - 3
Drag the wall height down
Select the walls and drag the wall-height handle down instead of up. In one move, Lex explains, that sunken wall becomes two things at once: the foundation of the house's exterior, and the depth of the conversation pit. Depth is set here and only here.
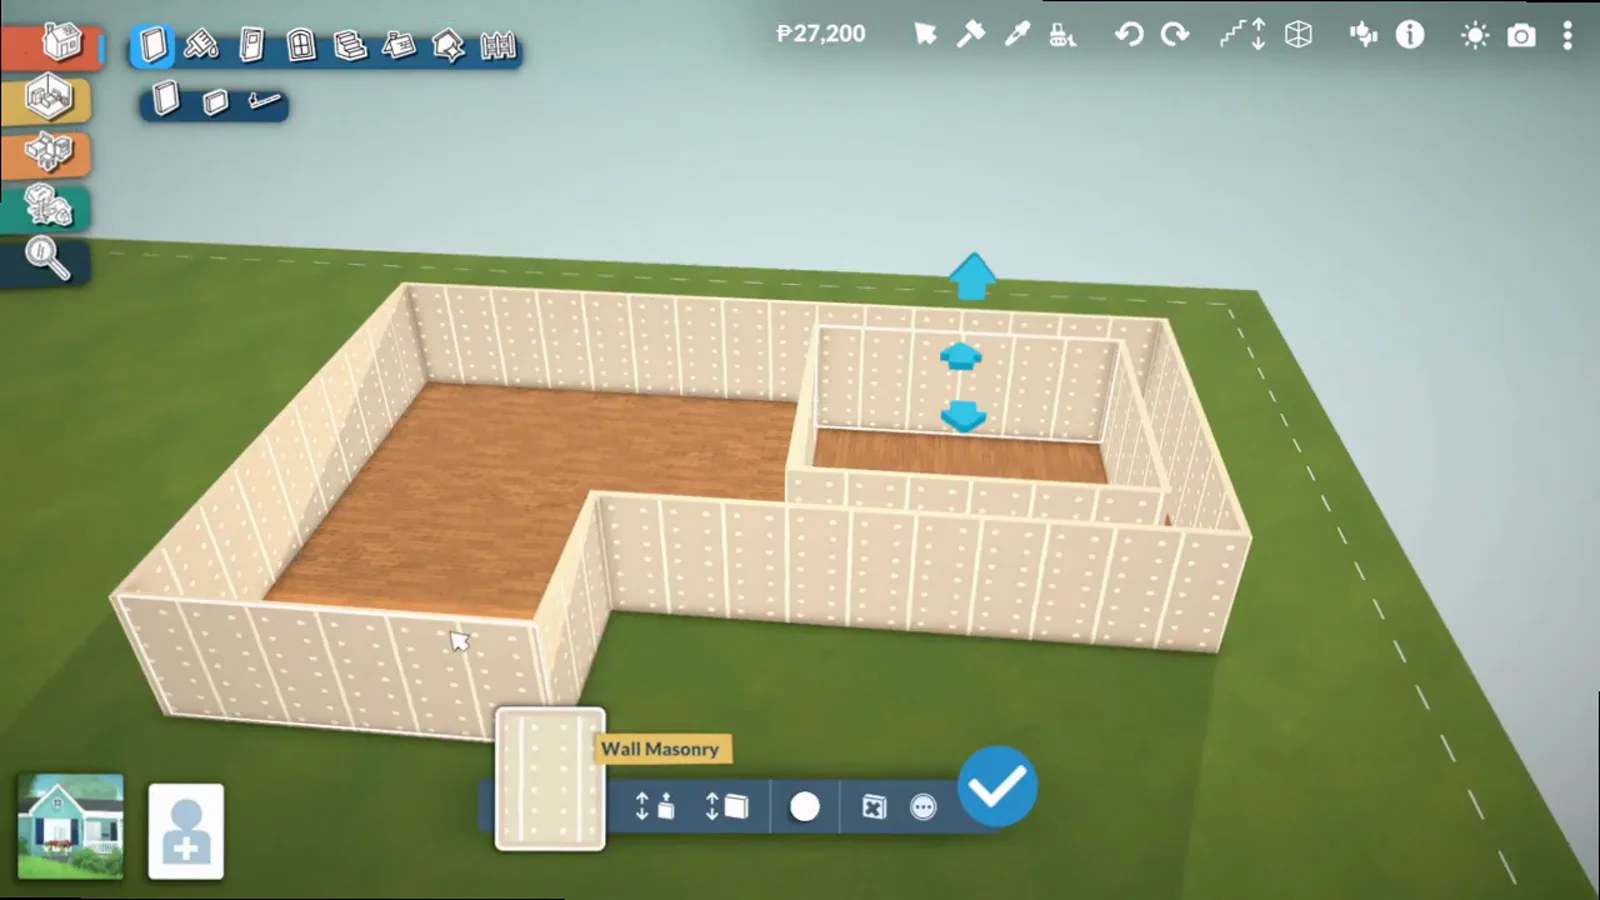
One drag: foundation outside, pit depth inside.Watch at 0:57 - 4
Read the shell: you just built the basement
The whole ground level is now a tall slab — foundation outside, pit walls inside. This is the level visitors will never stand on. Everything that feels like "the house" happens one floor above it.
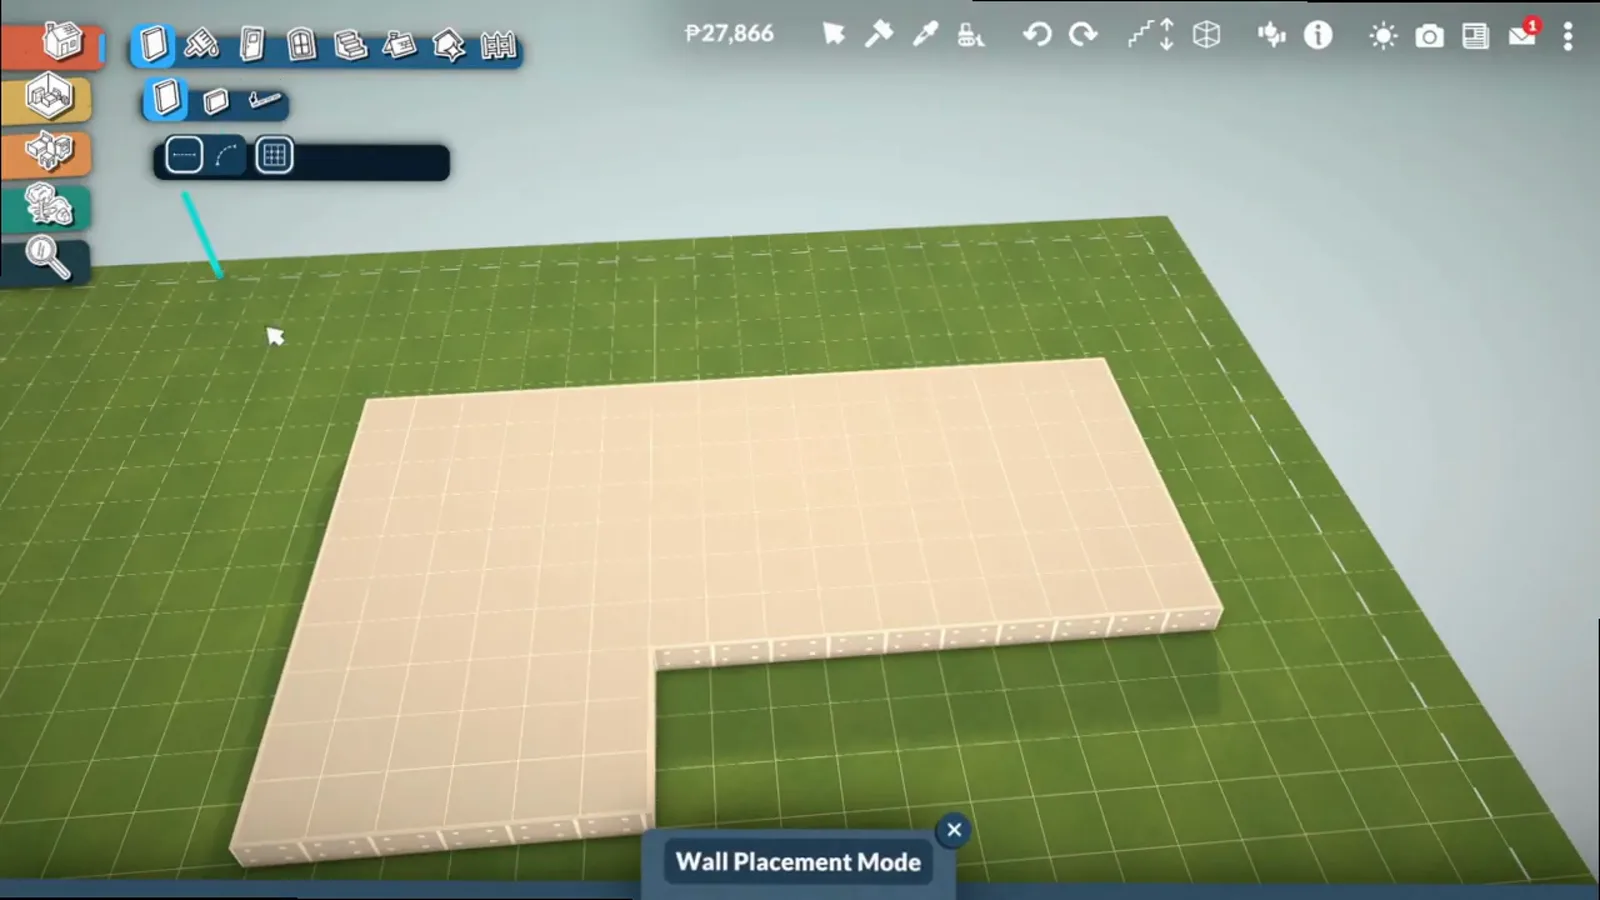
Ground level is now the pit's floor.Watch at 1:20
The real first floor
Page up, trace, and open the hole
With the shell sunk, the floor plan moves up a level. The pit is carved out of the new floor with one dotted line and two sledgehammer clicks — floor first, ceiling second.
- 5
Page up — the second floor is floor one now
Press Page Up and redraw the house outline on the level above, leaving the pit's footprint open. This mental switch is the heart of the trick: what the game calls the second floor, your Paras will call the ground floor.
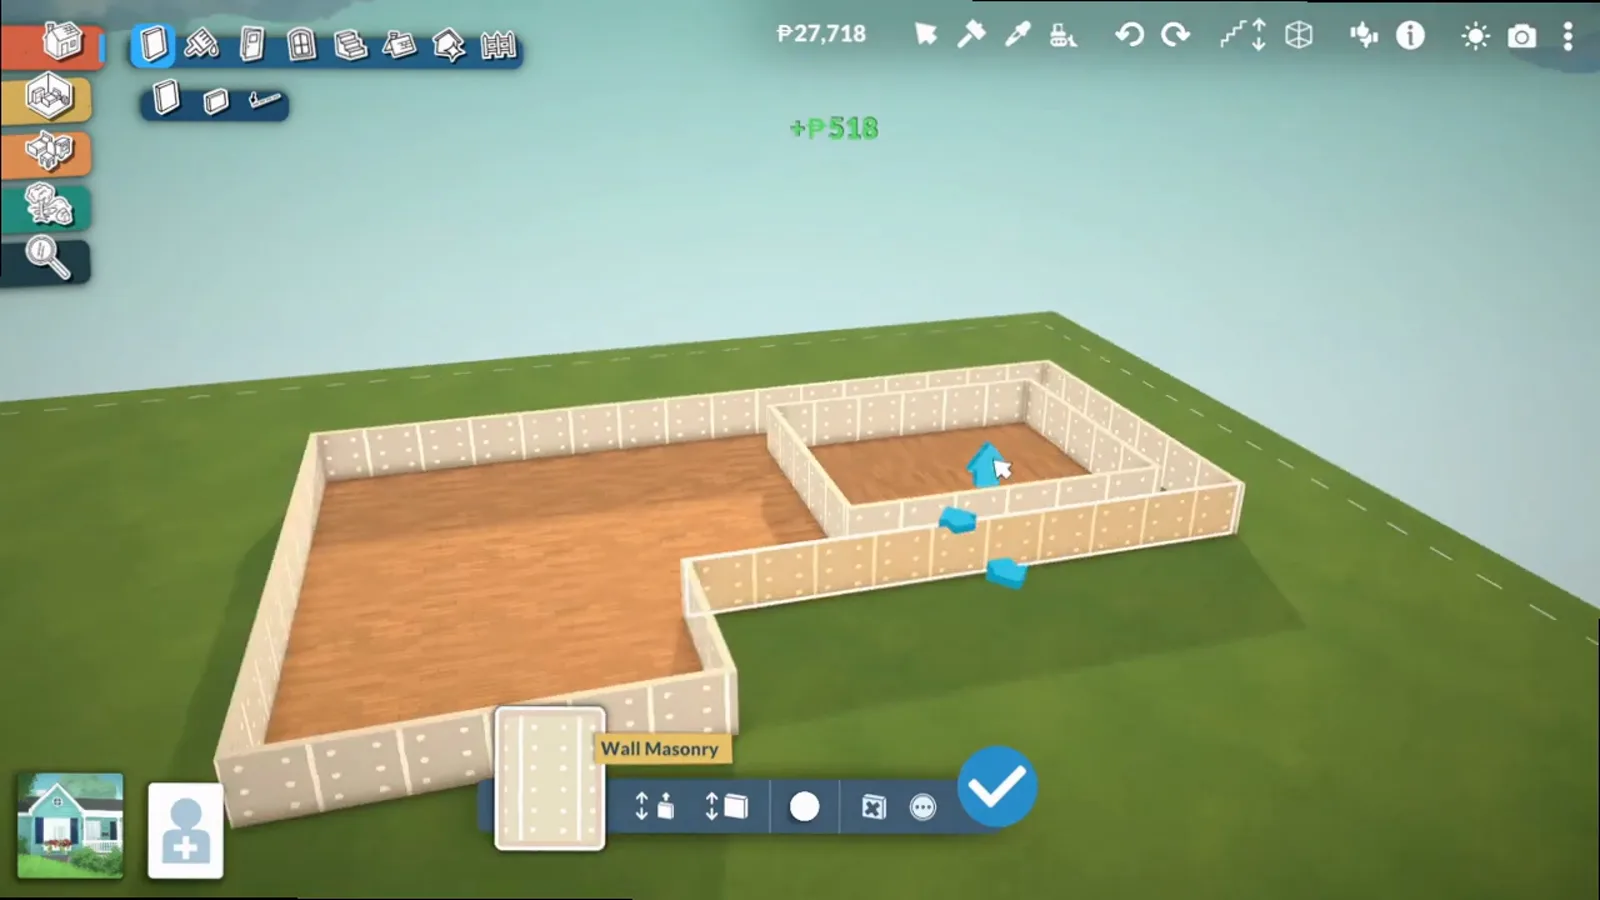
New level, new outline — pit left open.Watch at 1:05 - 6
Trace the pit with the Separator tool
Next to the half-wall tool sits the separator — the dotted-line icon. Trace the pit's footprint exactly the same size as the level below. Lex counts the clicks as he goes: same size is not approximate; the two rooms must align.
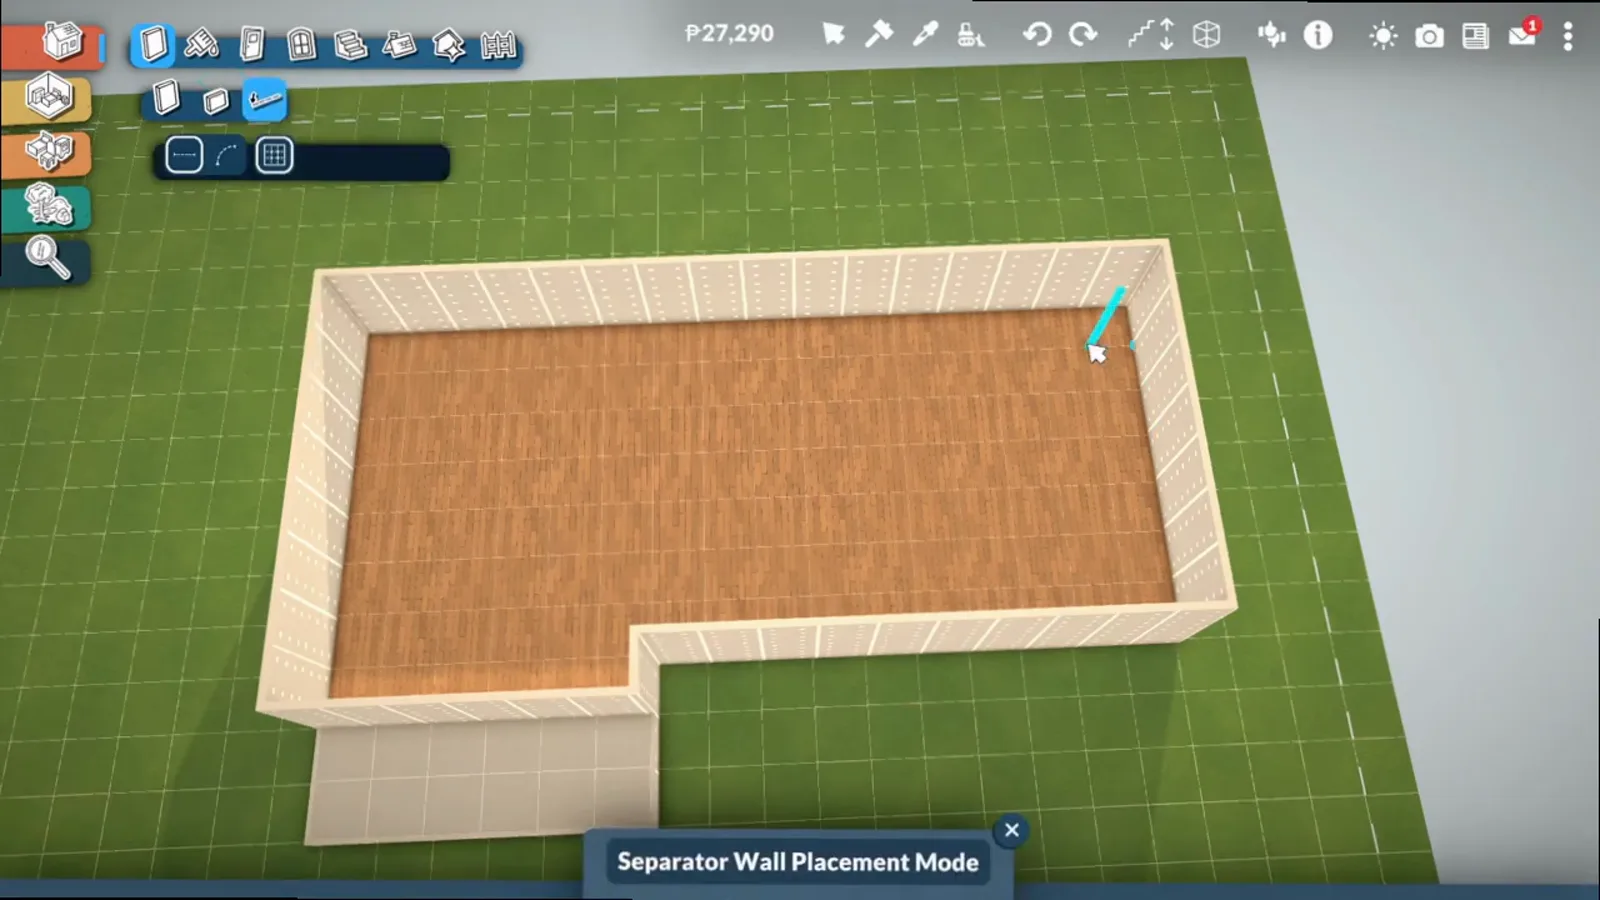
Dotted line, same footprint, floor below.Watch at 1:40 - 7
Sledgehammer twice — floor, then ceiling
Now the satisfying part. Select the sledgehammer and click the traced area twice: the first click removes the floor, the second removes the ceiling under it. Miss the second click and you have a hole into a dark box — the pair of clicks is what opens the view down into the pit.
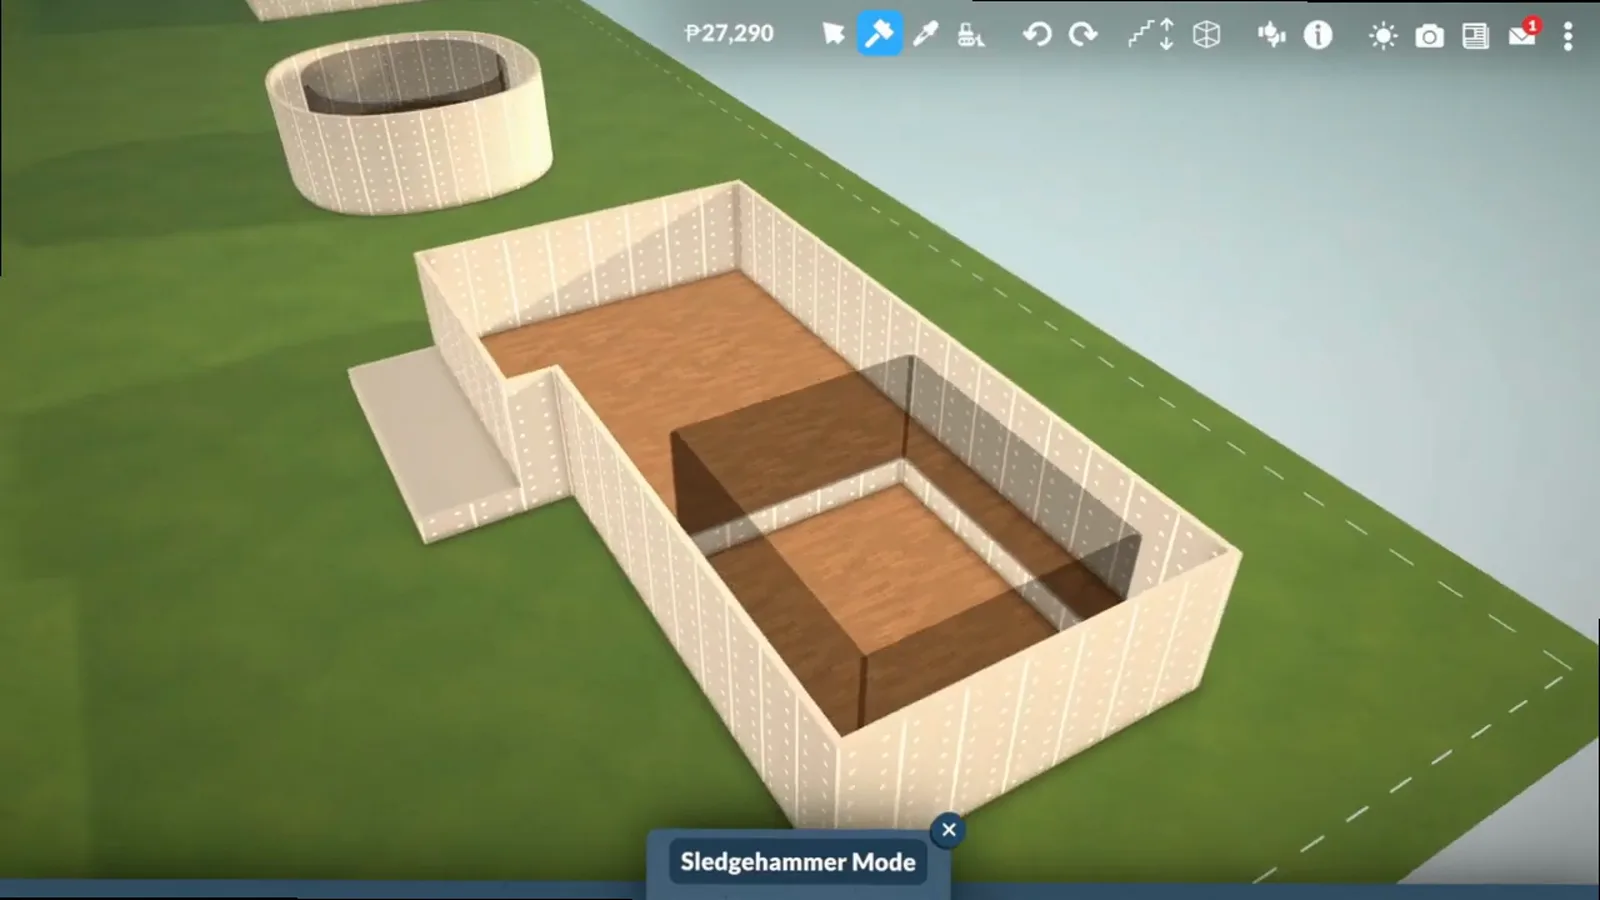
Two clicks: floor gone, ceiling gone.Watch at 2:00
Shapes & sizes
Rectangles forgive, circles don't
The same trick makes both a square conversation pit and a round one, but they behave differently afterwards. Rectangles can be dragged bigger at any time; circles lock in early and punish second thoughts.
- 8
The sunken area appears
With both surfaces deleted, the pit opens up — a recessed room with real walls, real floor and the house standing around it. This is the moment to walk the camera around: sight lines from the front door decide where the steps will go.
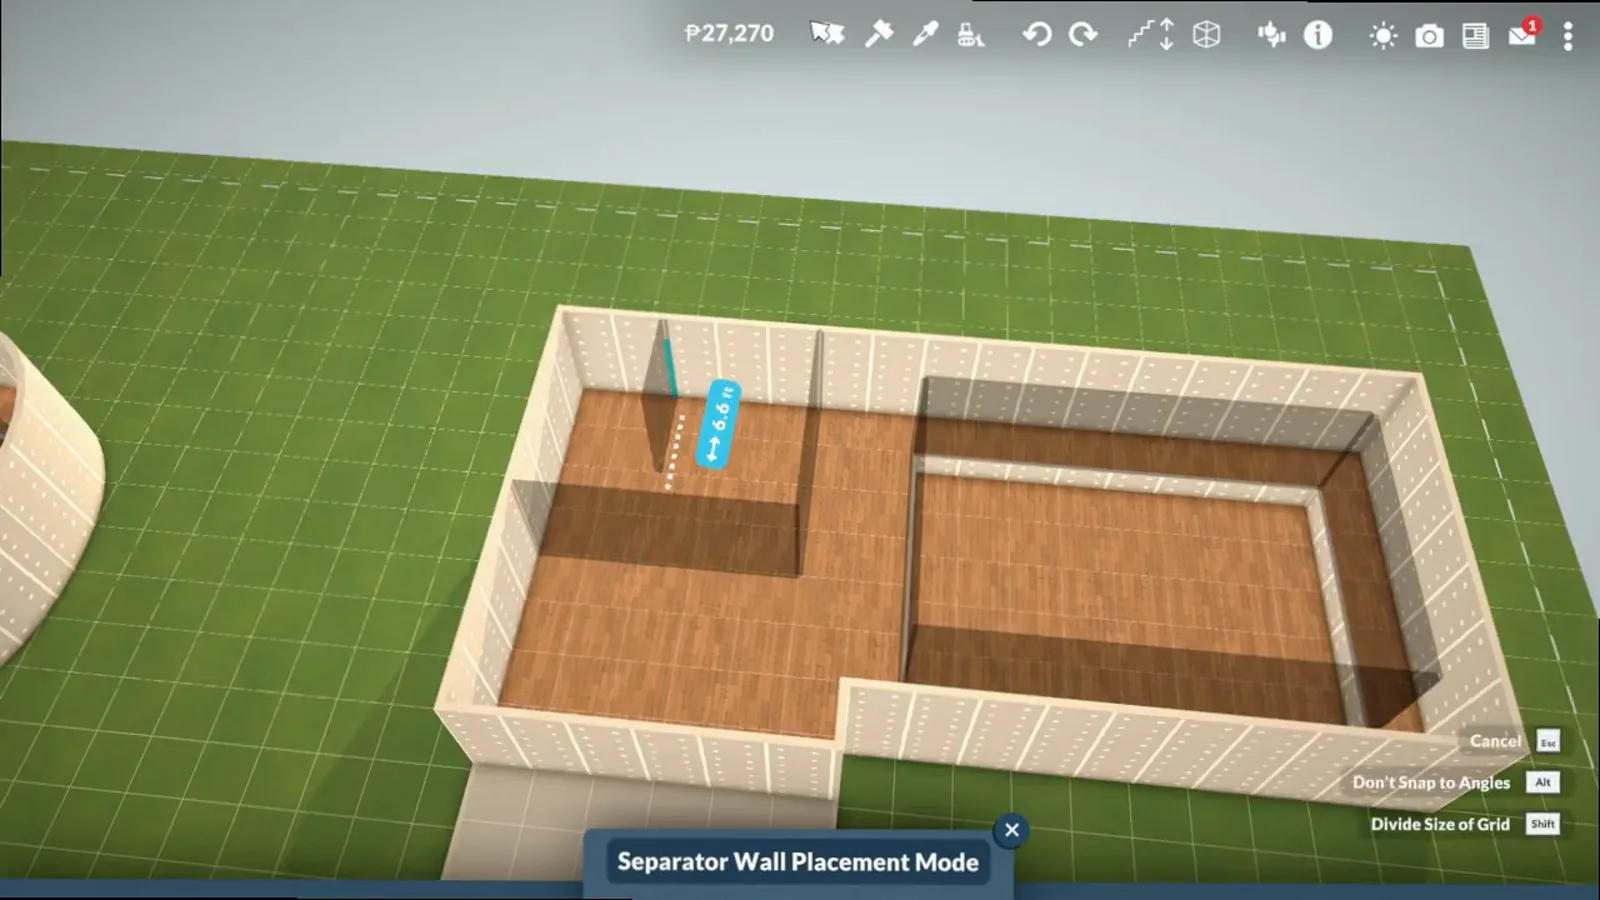
A room below the room — no mods, no tools.Watch at 3:25 - 9
Rectangles can still be dragged bigger
Change your mind? On rectangular pits, select the pit floor and drag it outward — Lex demonstrates resizing after the fact without rebuilding. Depth too can be re-dragged. This forgiveness is exclusive to straight-walled pits.
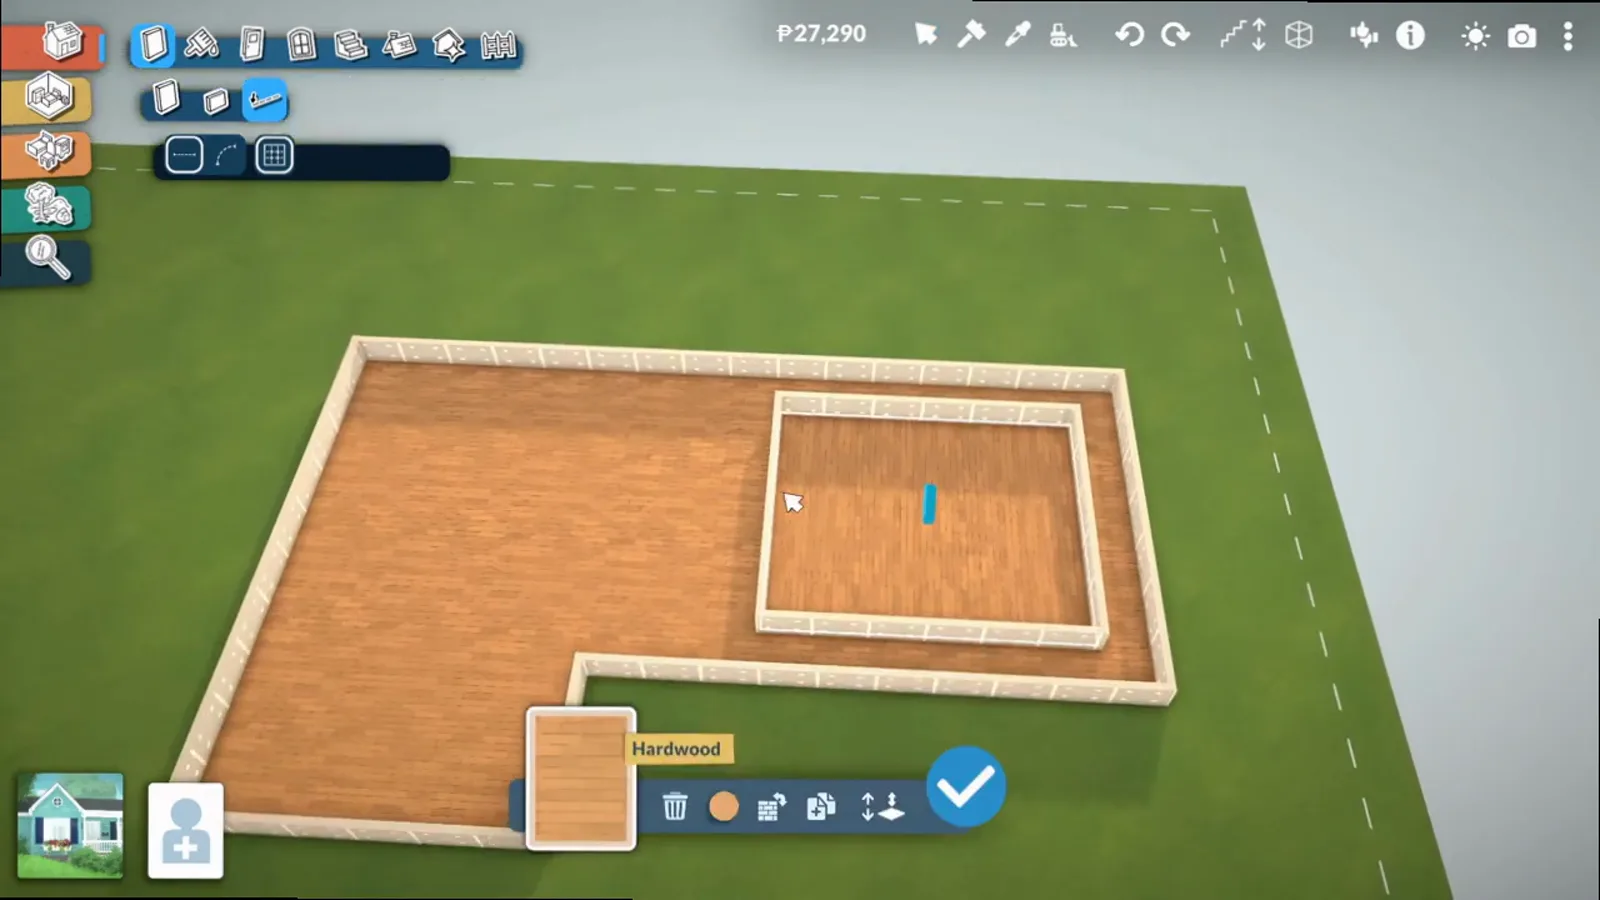
Rectangles forgive; the round one won't.Watch at 2:40 - 10
Circles: inner circle before outer walls
Round pits break the order of operations. Build the small inner circle first, finish it completely, and only then add the larger circle around it. Reverse the order and, as Lex puts it, the walls clip together and "you're not going to have a good time".
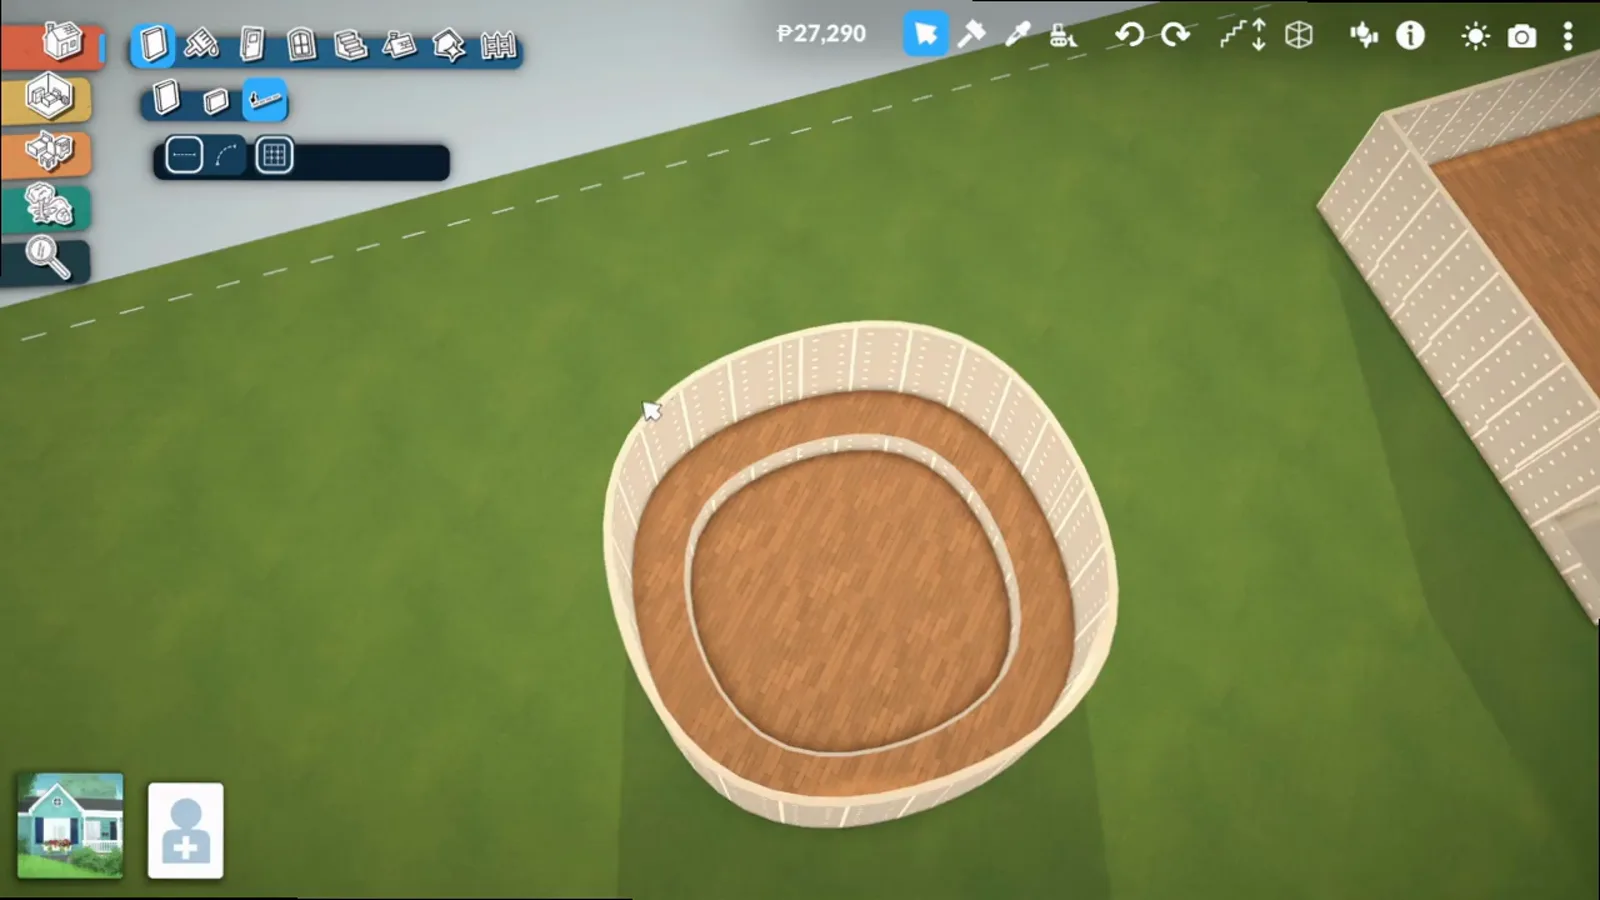
Inside-out, or the circles clip.Watch at 2:20 - 11
The round conversation pit
Done right, the round pit is the most photogenic variant — a ring of seating looking across at itself, no corners to hide a lamp in. Its price: rectangles resize later, circles mostly don't, so commit to the diameter before you furnish.
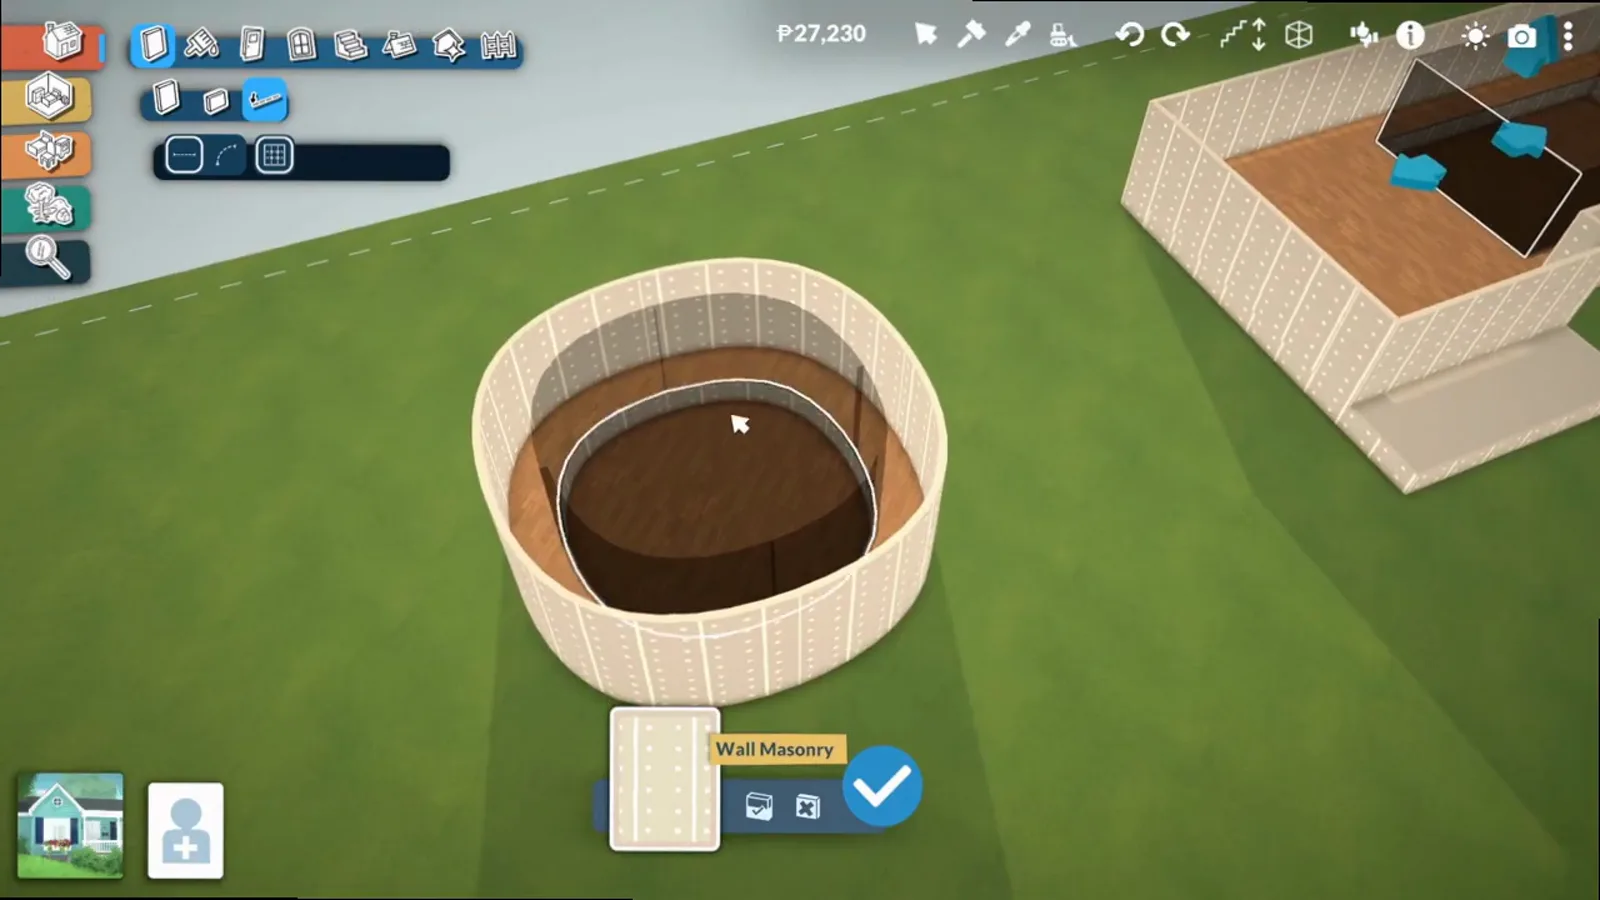
Lock the diameter early; circles hold grudges.Watch at 3:00
The room
Floors, furniture, and the finished pit
Depth only reads once the room is dressed: hardwood at the bottom, rugs and sectionals on the lower level, and one level change the eye can follow.
- 12
Floor the pit in something darker
Give the lower level its own floor finish — Lex picks a hardwood a shade deeper than the upper floor. The contrast line at the pit's edge is what makes the level change legible from across the room.
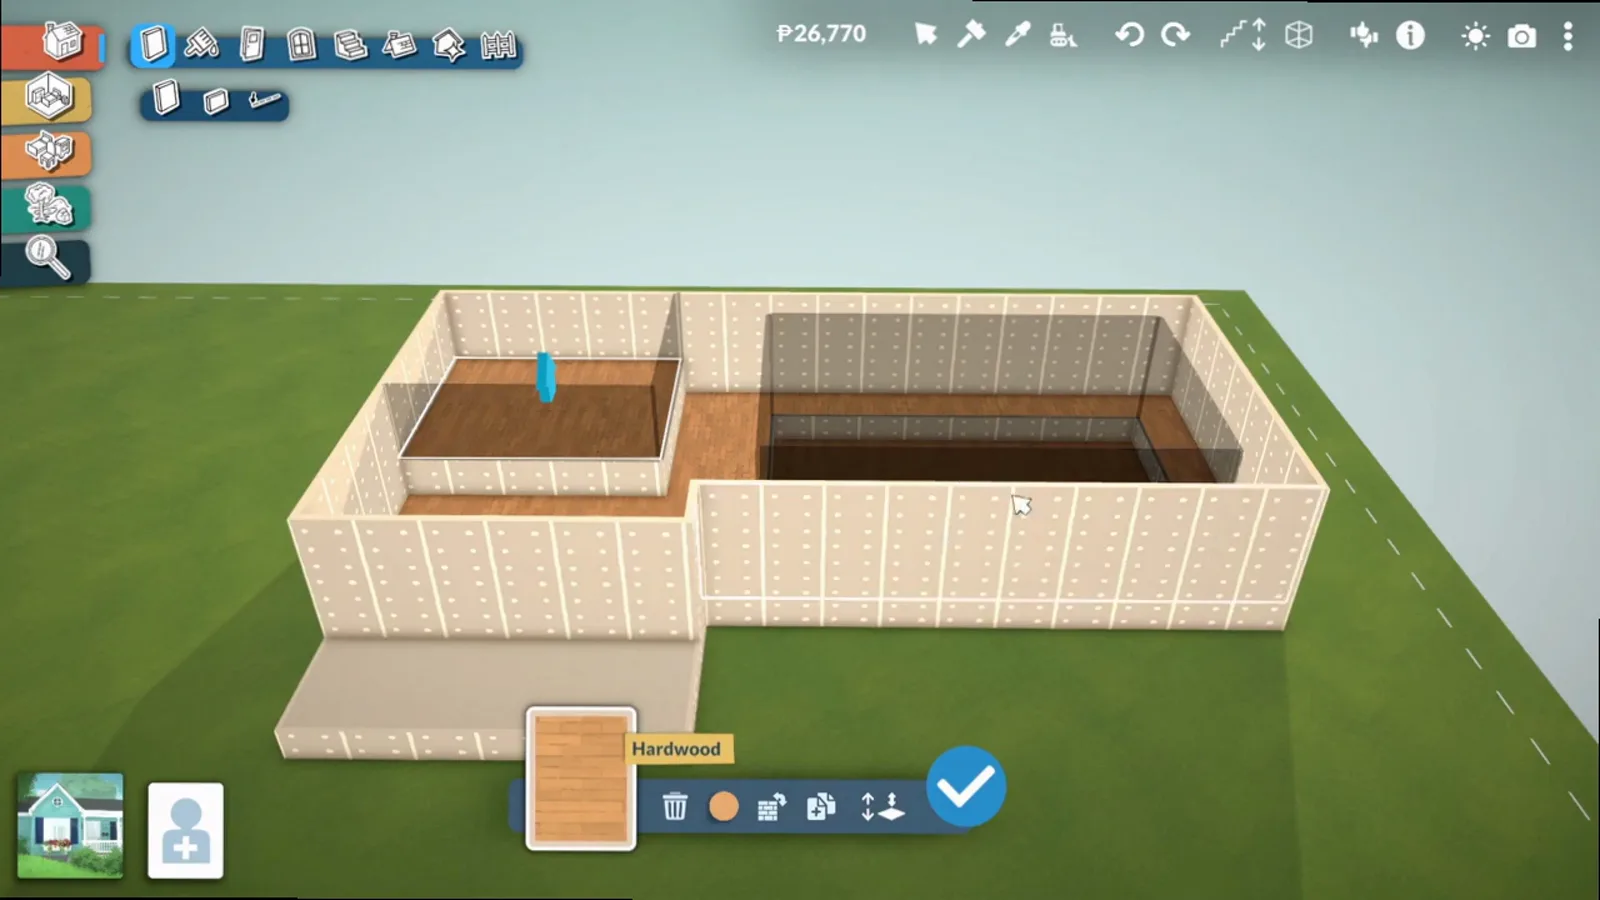
Darker below: the depth reads as design.Watch at 3:45 - 13
Furnish down into the pit
Sectionals and rugs live on the lower level, arms hooked over the pit edge; plants and floor lamps mark the rim so nobody steps in blindly. Lex throws his demo build together with exactly this recipe — furniture arranged around the level change, not despite it.
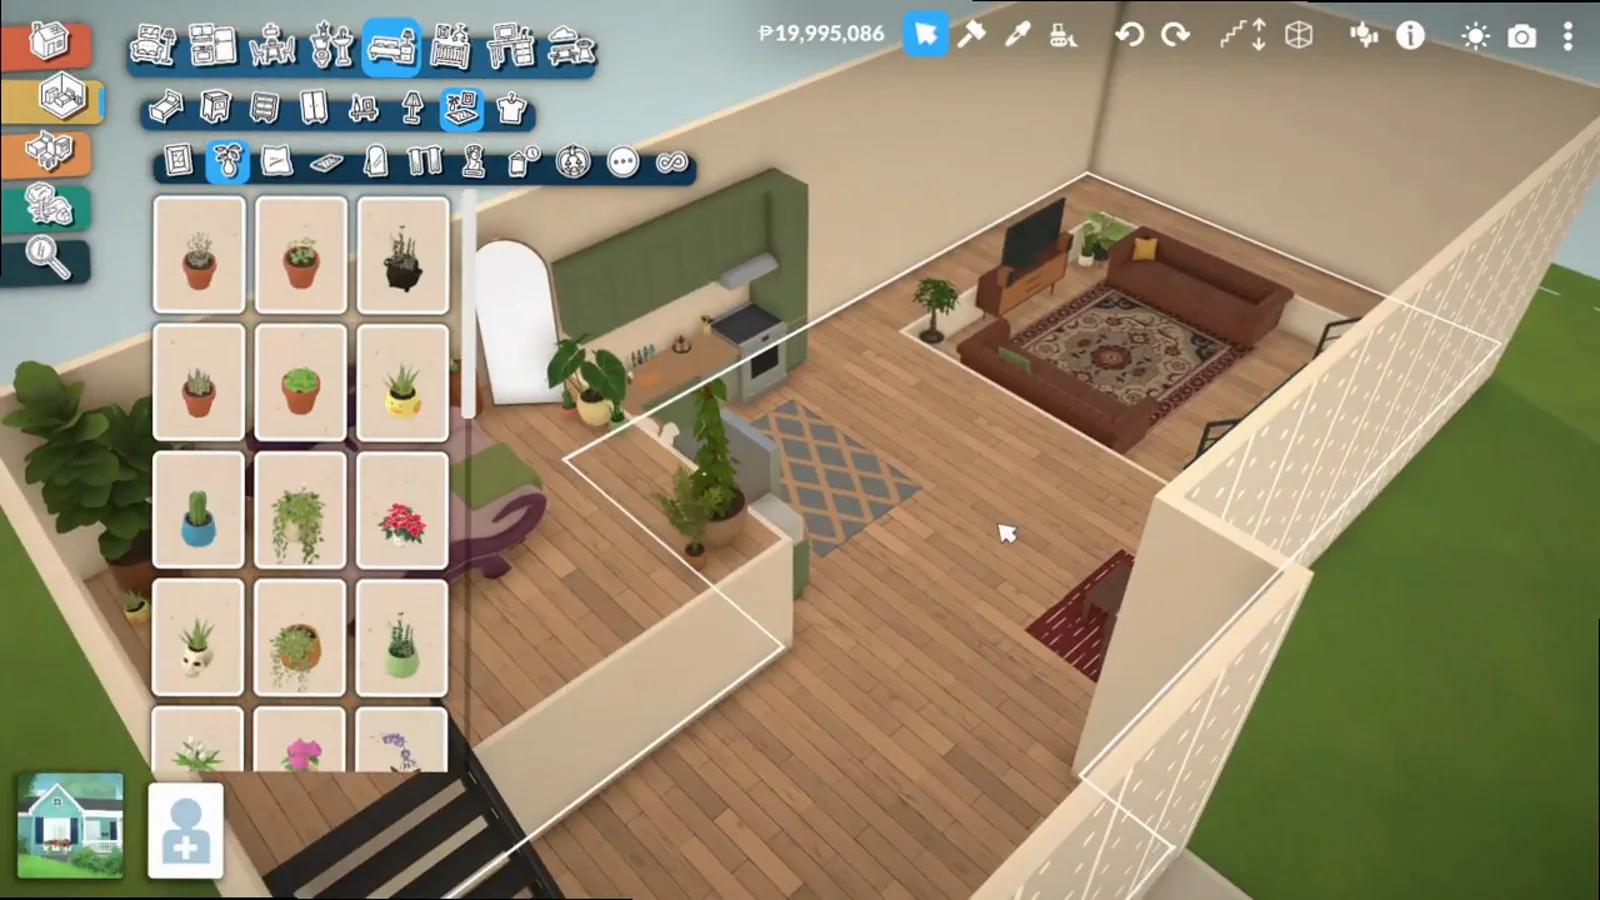
Furniture honours the step, plants warn about it.Watch at 4:00 - 14
The finished sunken living room
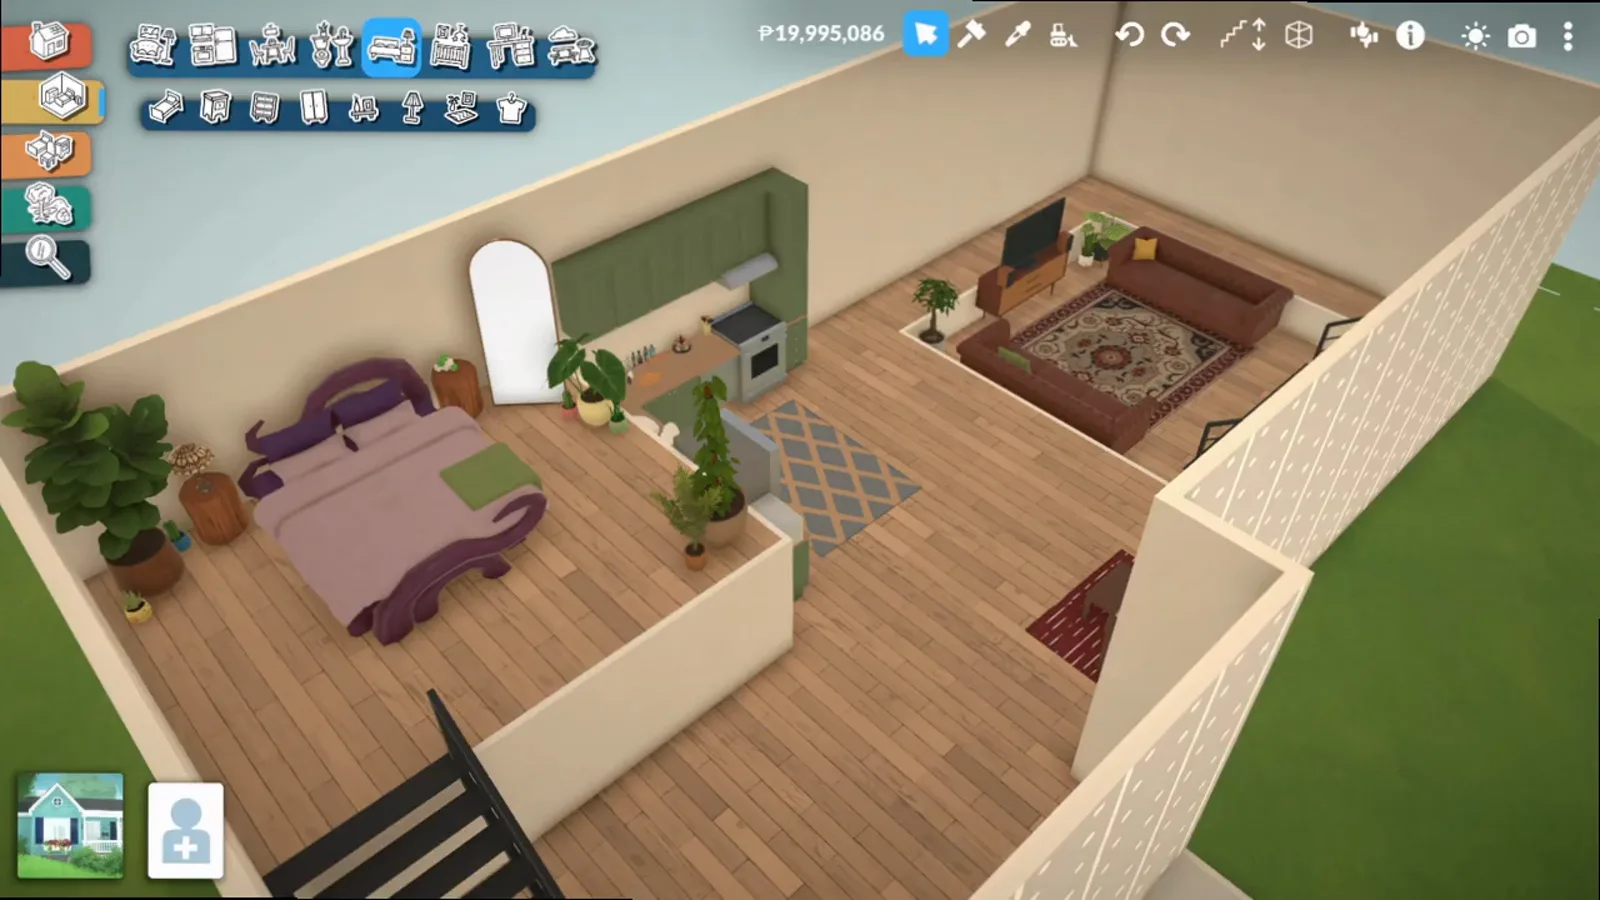
The finished build tells the whole story in one frame: entry and kitchen at the top, a short stair down, and the lounge nested below with its own rug and TV wall. A sunken living room is just an honest floor plan that admits where the party happens.
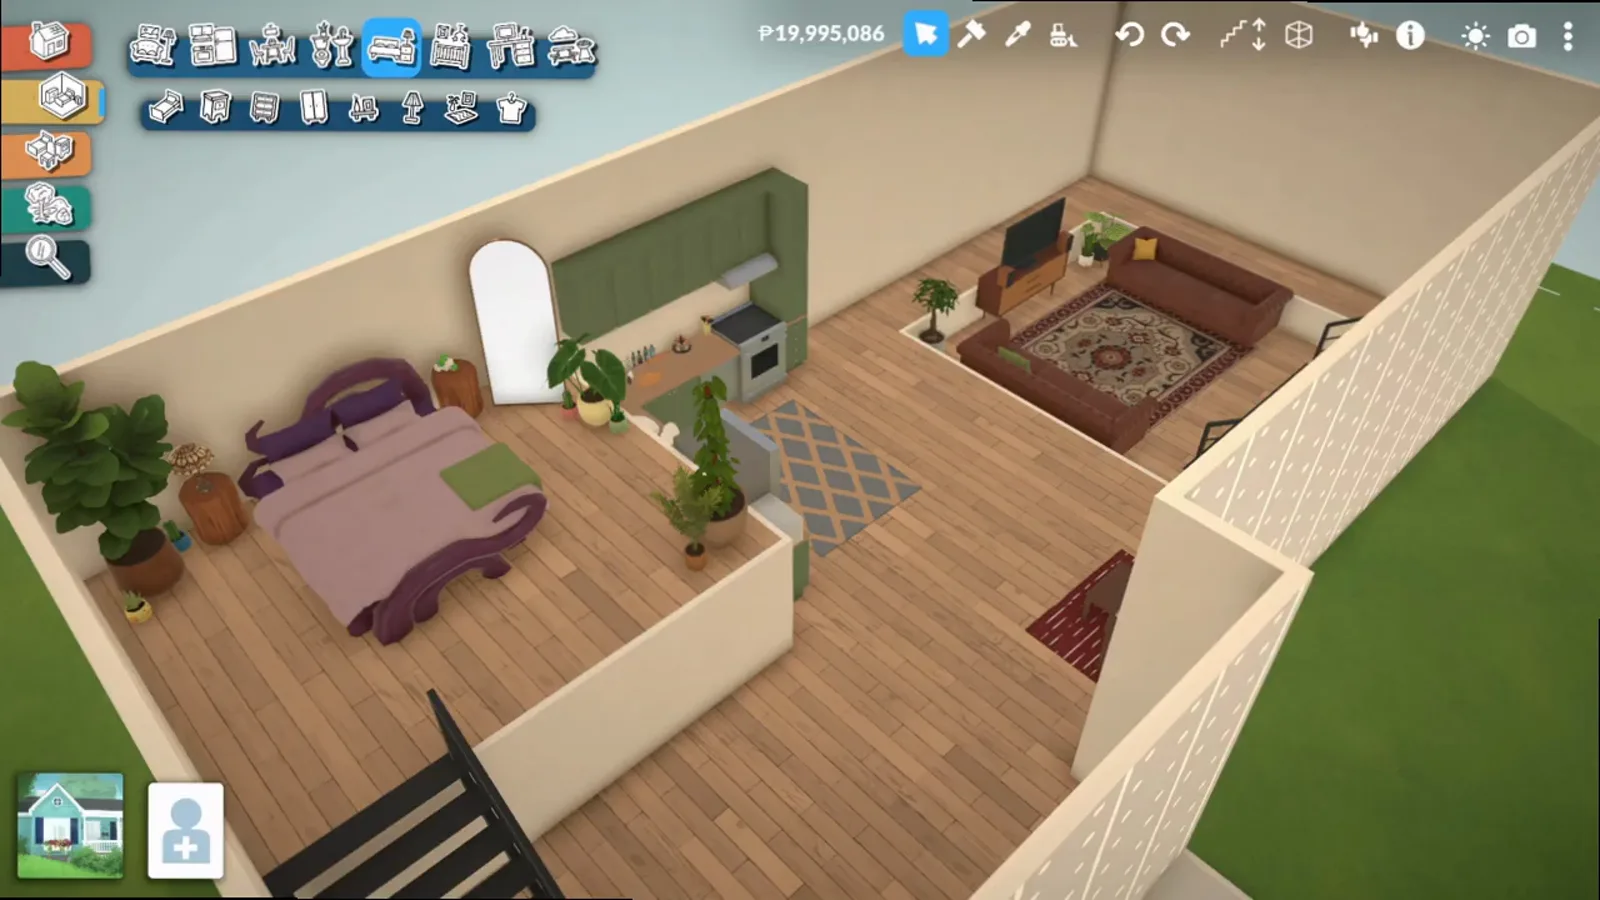
Entry above, lounge below — plan complete.Watch at 4:23
Beyond the rectangle
The circle pit is the showpiece variant, and its rule — inner shape finished before outer walls — generalizes to any curved sunken shape. Expect to rebuild, not resize: circles lock their diameter early, so sketch the seating ring before you commit.
Sunken areas also stack with the raised-platform tricks from our platforms guide: Lex's closing demonstration raises a floor section right next to his pit, sunken and raised levels sharing one wall. Split-level plans are just this trick applied twice with opposite signs.
Sunken living room FAQ
- How do you make a sunken living room in Paralives?
- There is no dedicated tool. The demonstrated trick: draw the pit as a room, drag its wall height down so it becomes the foundation, page up to the next level, trace the pit with the Separator tool, then delete the traced floor and ceiling with two sledgehammer clicks. The full sequence with pictures is steps 1–8 above.
- Why does the sledgehammer need two clicks?
- The first click deletes the floor of the traced area; the second deletes the ceiling attached underneath it. As Lexdotexe demonstrates, one click leaves the old ceiling shading the pit — the second click is what opens the sight line down into the sunken room.
- Can you resize a sunken area after building it?
- Rectangular pits, yes — select and drag the pit floor outward, or re-drag the depth, exactly as the tutorial shows. Round pits are the exception: their walls clip if you try to grow them after the fact, so the diameter has to be right before the outer ring goes up.
- Do you need stairs to get into a sunken room?
- Usually yes, and they need a flat area to land on — the tutorial calls this out explicitly for circle pits. The alternative the video demonstrates: lower the ceiling of the pit enough that Paras can walk up the slope itself. Both routes keep the pit reachable without mods.
- Does Paralives have a sunken room or conversation pit tool?
- No — as of 0.1.8b the wiki documents no sunken-room mechanics at all; the technique on this page is creator-demonstrated construction, not a game feature. That also means an official tool could change the workflow in any future patch, and this page would be rebuilt around it.
- What is a conversation pit?
- A living room whose seating area sits a step or two below the floor around it, with cushions along the sunken edge — a 1970s living-room staple that never left. In Paralives terms: the pit from this guide, a wraparound bench or sectional on the lower level, and a coffee table in the middle.
Keep building
Platforms
The raised half of level tricks — platforms, vertical drag and bed lifts that pair with a sunken floor.
Loft build
Split-level living at house scale — mezzanines and half-floors, the opposite sign of the same trick.
Split-level house
A whole house built on staggered levels — the sunken room idea at blueprint scale.
Basement build
When the pit wants to become a full storey — basements, bulkheads and below-grade rooms.
Floors
Floor placement, deletion and finishes — the surface you are about to sledgehammer twice.
Living room ideas
Sectionals, rugs and TV walls to furnish the pit once the concrete work is done.
Mid-century modern guide
The style that made sunken living rooms famous — a full mid-century ranch with a conversation pit built in.