
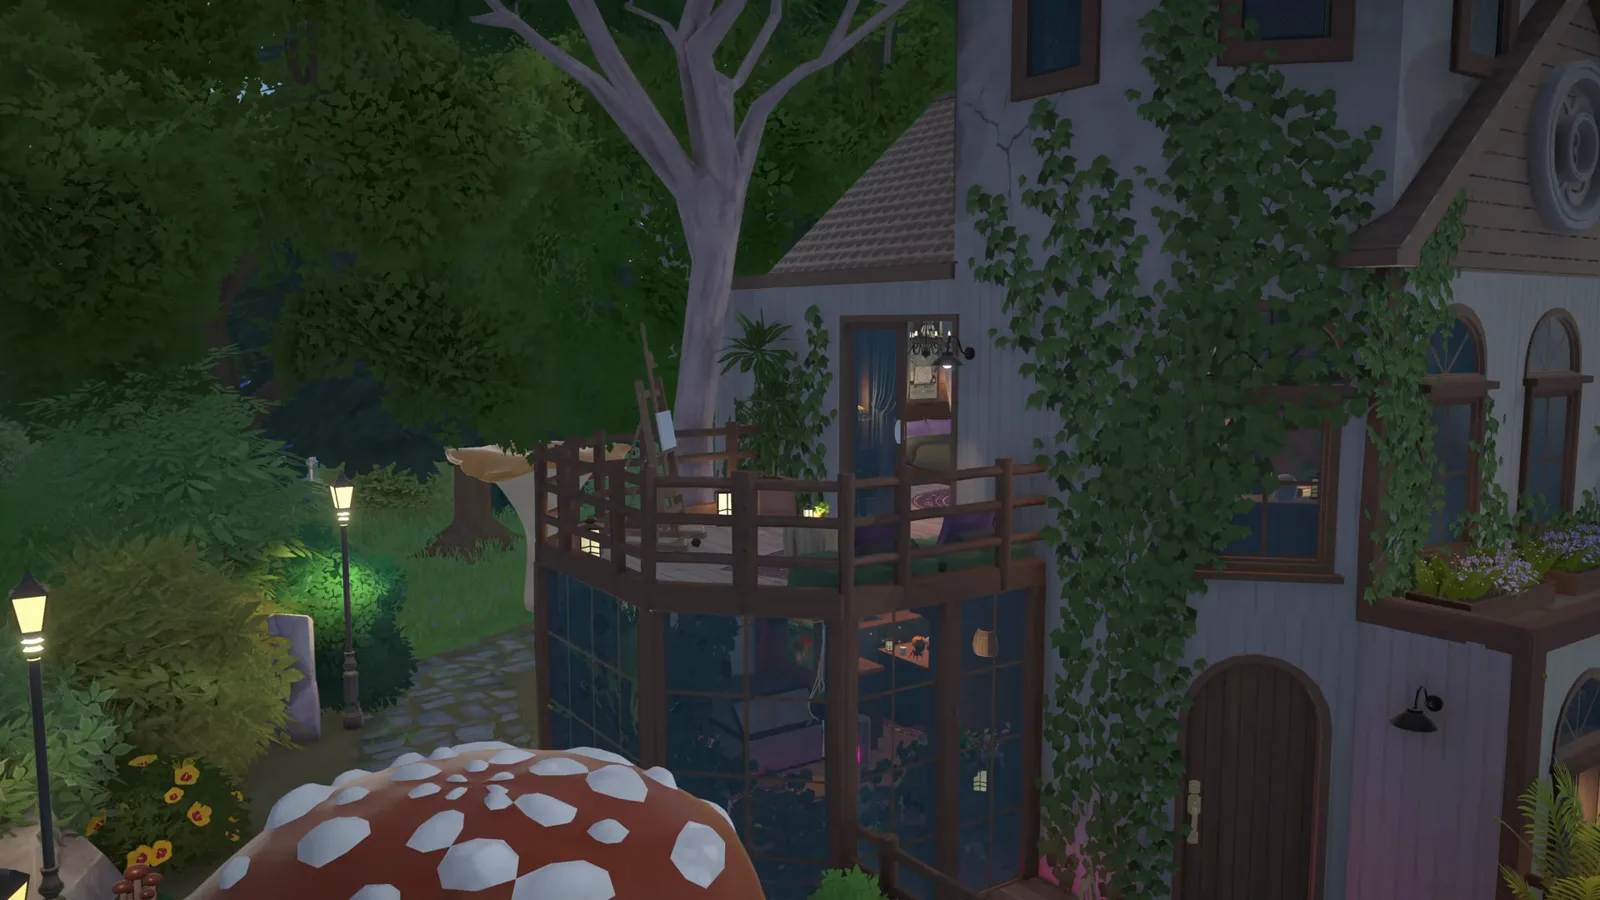
The short version
Nothing about this house is rectangular on purpose. The shell wanders off the grid, a round tower takes a steep cone roof like a witch hat, timbers and ivy age it into the forest, and the inside is dressed shelf by shelf: crystals, skulls, potion bottles, hanging herbs. The basement even opens as a potions shop, with a secret workroom hidden behind a bookshelf.
- Walls are placed freehand — the lopsided footprint and bay bump-outs are the point, not a mistake.
- A tall cone on the round tower makes the witch-hat roofline; steep roof pieces recolor from the swatch grid.
- Timbers and Beams pieces over plank walls turn bright new rooms into an old forest cabin.
- Climbing ivy from the plants catalogue pulls the exterior back into the trees, thicker at the base.
- The greenhouse attaches to the house itself, so the walk from fresh herbs to the cauldron is three steps.
- The walkout basement runs as a potions shop — and a bookshelf swings open onto a secret workroom.
Shell
A shell that never meets a straight line
The witch house starts where grid houses stop: walls wander at angles, the footprint grows lopsided bumps, and a round tower carries the roofline. Nothing here needs a cheat — freeform walls are a core build tool — but it does mean every room is a one-off.
- 1
Throw the shell off the grid
Skip the grid and draw the walls freehand: the footprint of a witch house should look like it grew instead of got built. This shell sprouts an angled bay bump-out for the sitting nook and leaves a notch where the round tower lands. Freeform walls never snap, so expect to nudge every corner until the silhouette reads crooked in the right way.
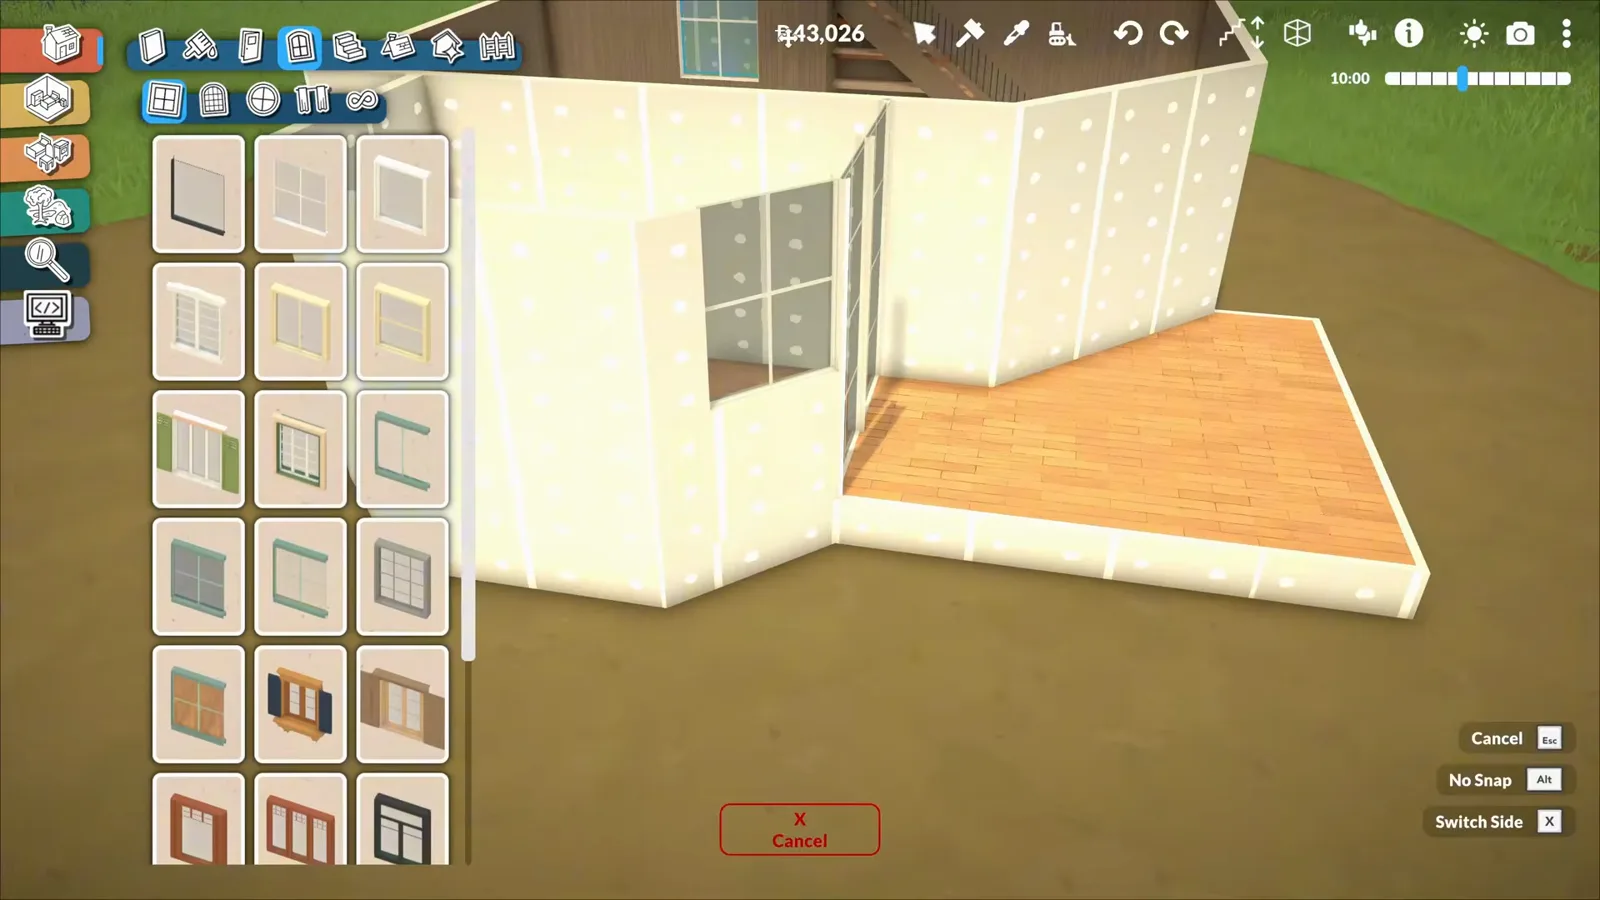
The lopsided footprint is deliberate — walls wander so the house looks grown, not placed.Watch at 3:20 - 2
Cap the tower with a witch-hat cone
The roofline sells the whole theme. Over the round tower, pick the steepest cone roof piece and stretch it tall — the taller the cone, the more it reads as a witch hat. The Color Swatches panel recolors every roof plane, so the cone and the cottage roof can share one weathered shade instead of clashing blacks.
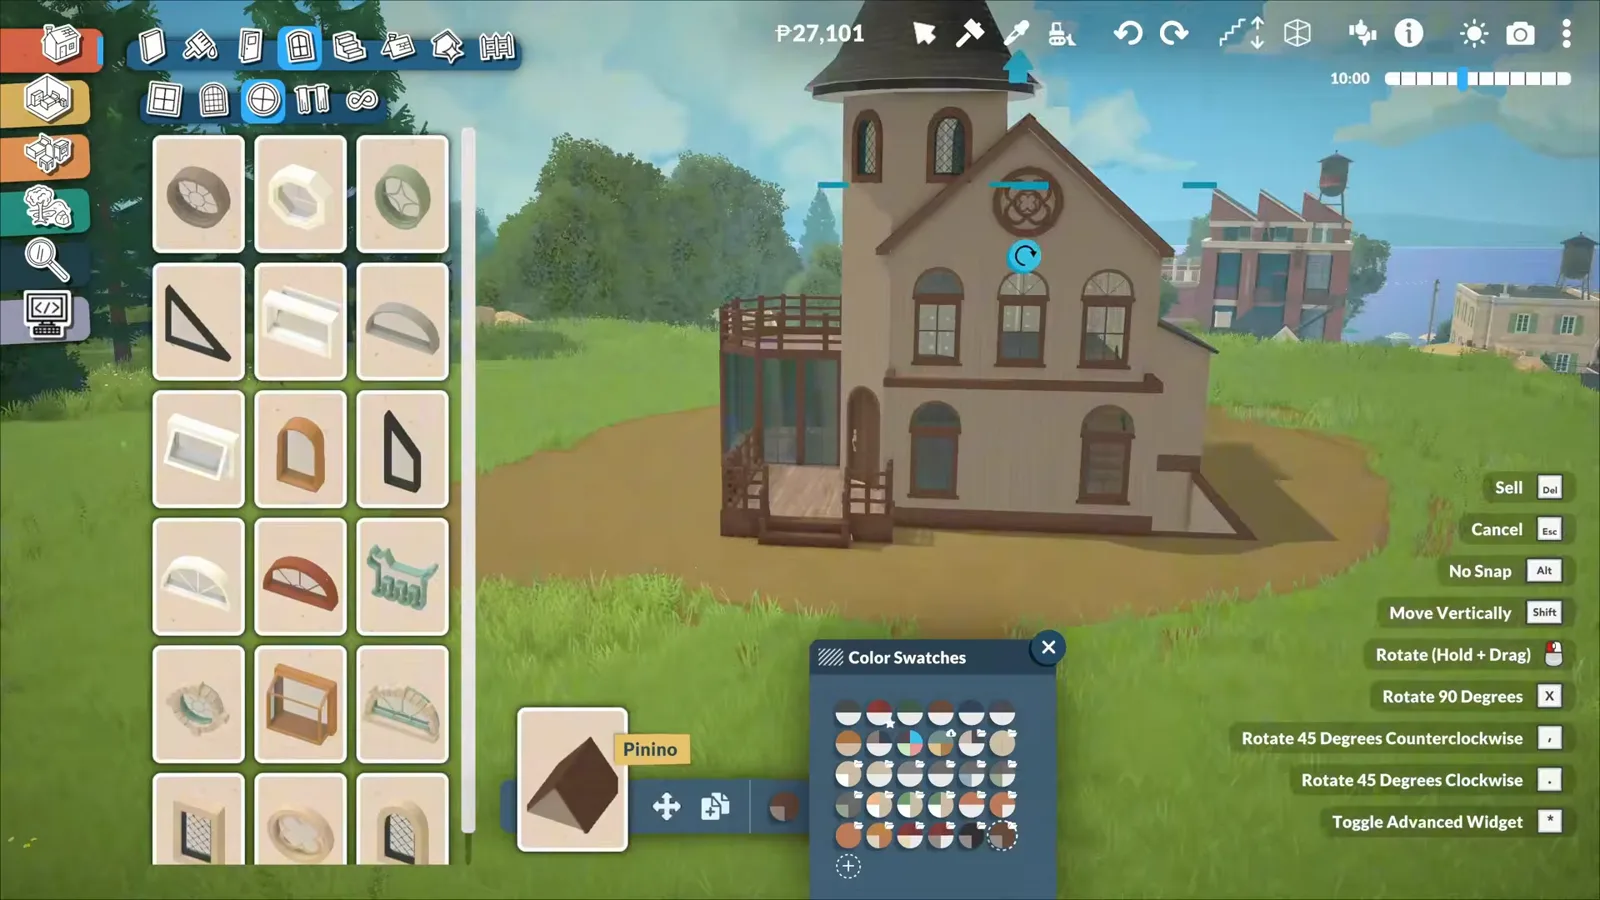
A steep cone on the tower does more for the theme than any furniture could.Watch at 5:20 - 3
Age the inside with timbers and plank walls
A fresh shell looks too new for a forest witch, so the interior gets the old-cabin treatment: plank walls and ceilings, then Timbers and Beams pieces laid across them — the free-placed timber beam costs P35 and goes wherever a real beam would sag. Lintels over doorways and beams across ceilings turn bright new rooms into something that has stood for a century.
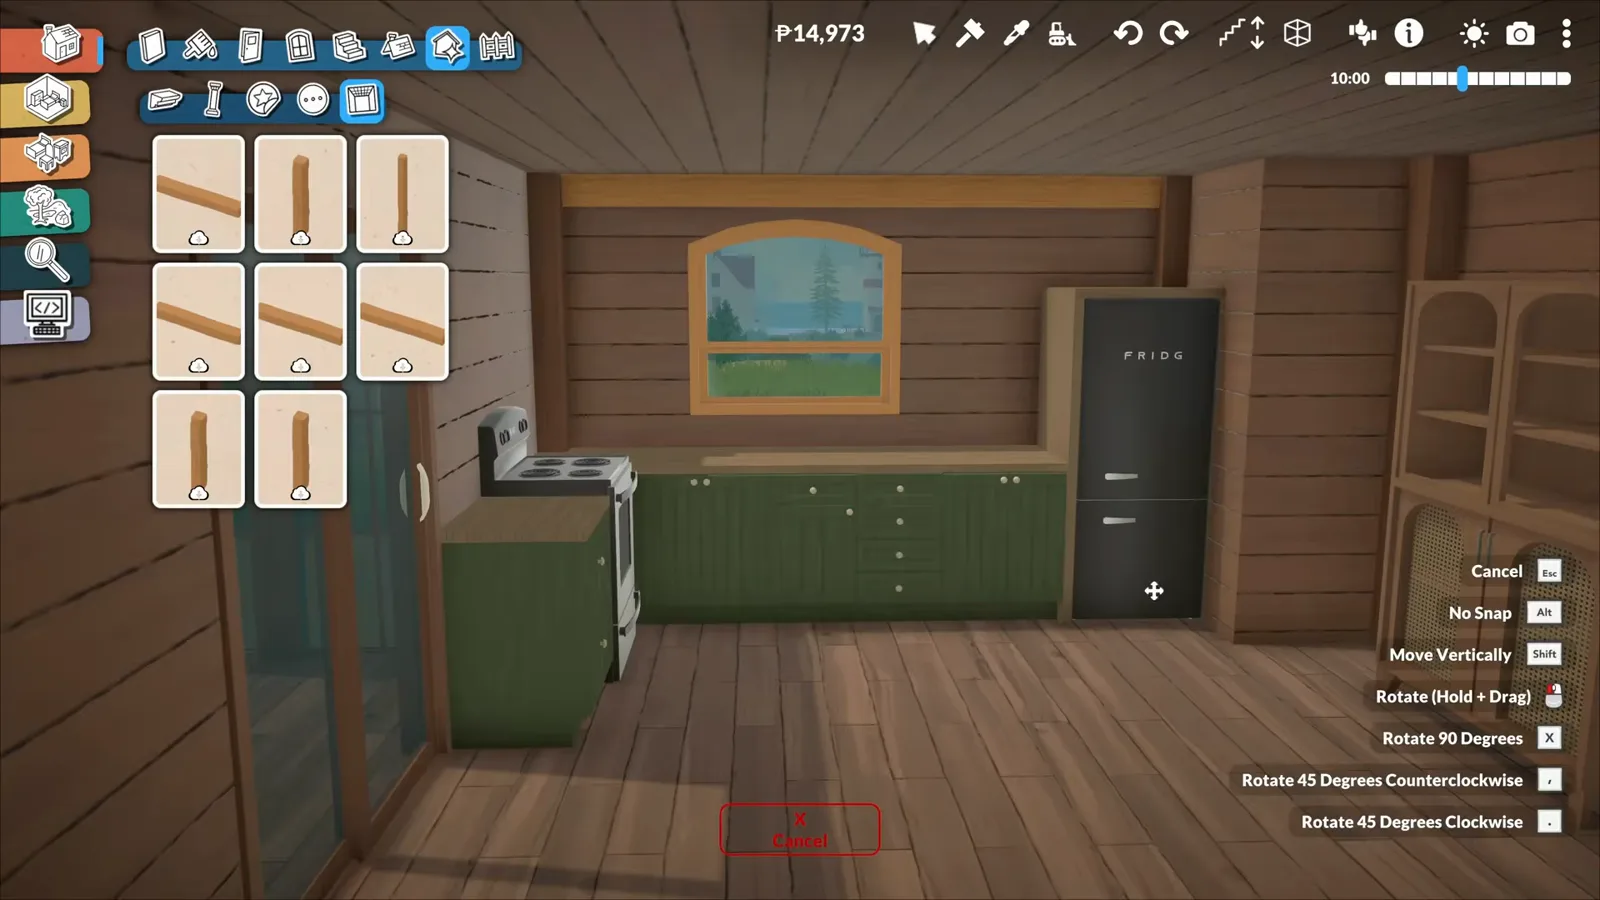
Timbers and Beams pieces over plank walls are what make new rooms look hundred years old.Watch at 7:15
Exterior
Let the forest win
The exterior work is all about undoing the newness: vines crawl up the walls, willows and oversized mushrooms swallow the lot lines, and a homemade fire pit glows in the yard. By the time the build is done, the house should look found, not placed.
- 4
Let the ivy climb
The plants catalogue carries climbing vine pieces that stick to walls, and this build layers them from the ground up — thick at the base, thinning as they reach the eaves — until the tower and cottage walls look reclaimed. Vines can also cross window frames slightly; the house should be losing the argument with the forest.
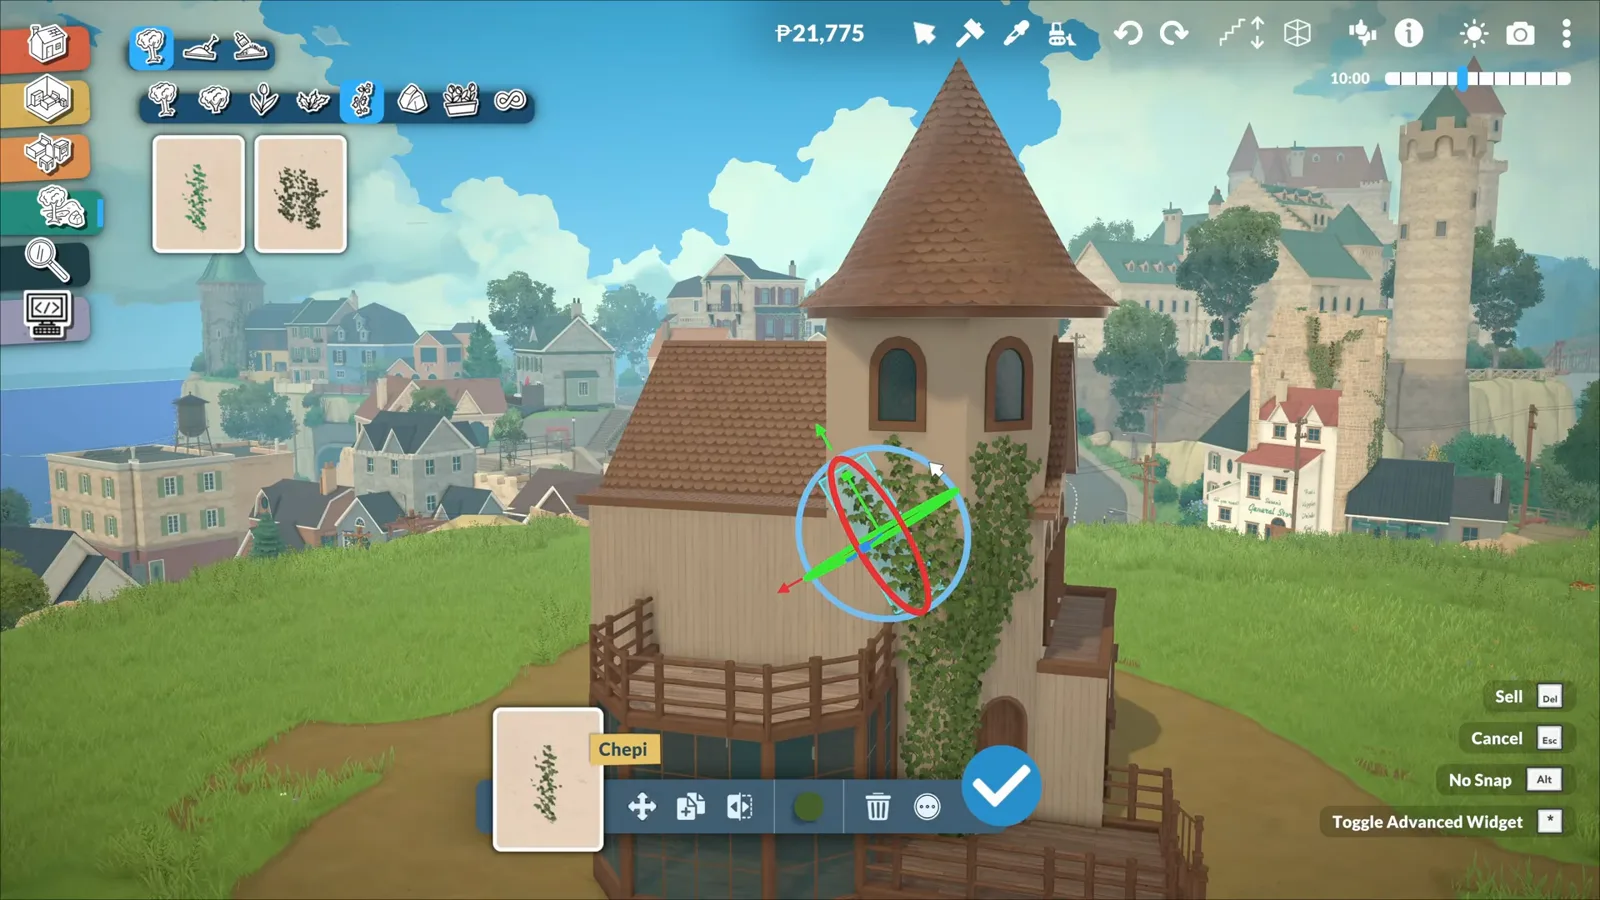
Layer vines heaviest at the base — nature reclaims a house from the ground up.Watch at 5:45 - 5
Bury the lot in willows and oversized mushrooms
Surround the lot with willow trees — their hanging branches soften every sightline and hide the neighboring town — then scale a few fly agaric mushrooms up until they are taller than the fence. A winding stone path is the only concession to visitors. When you stand on the lot, you should see forest in every direction.
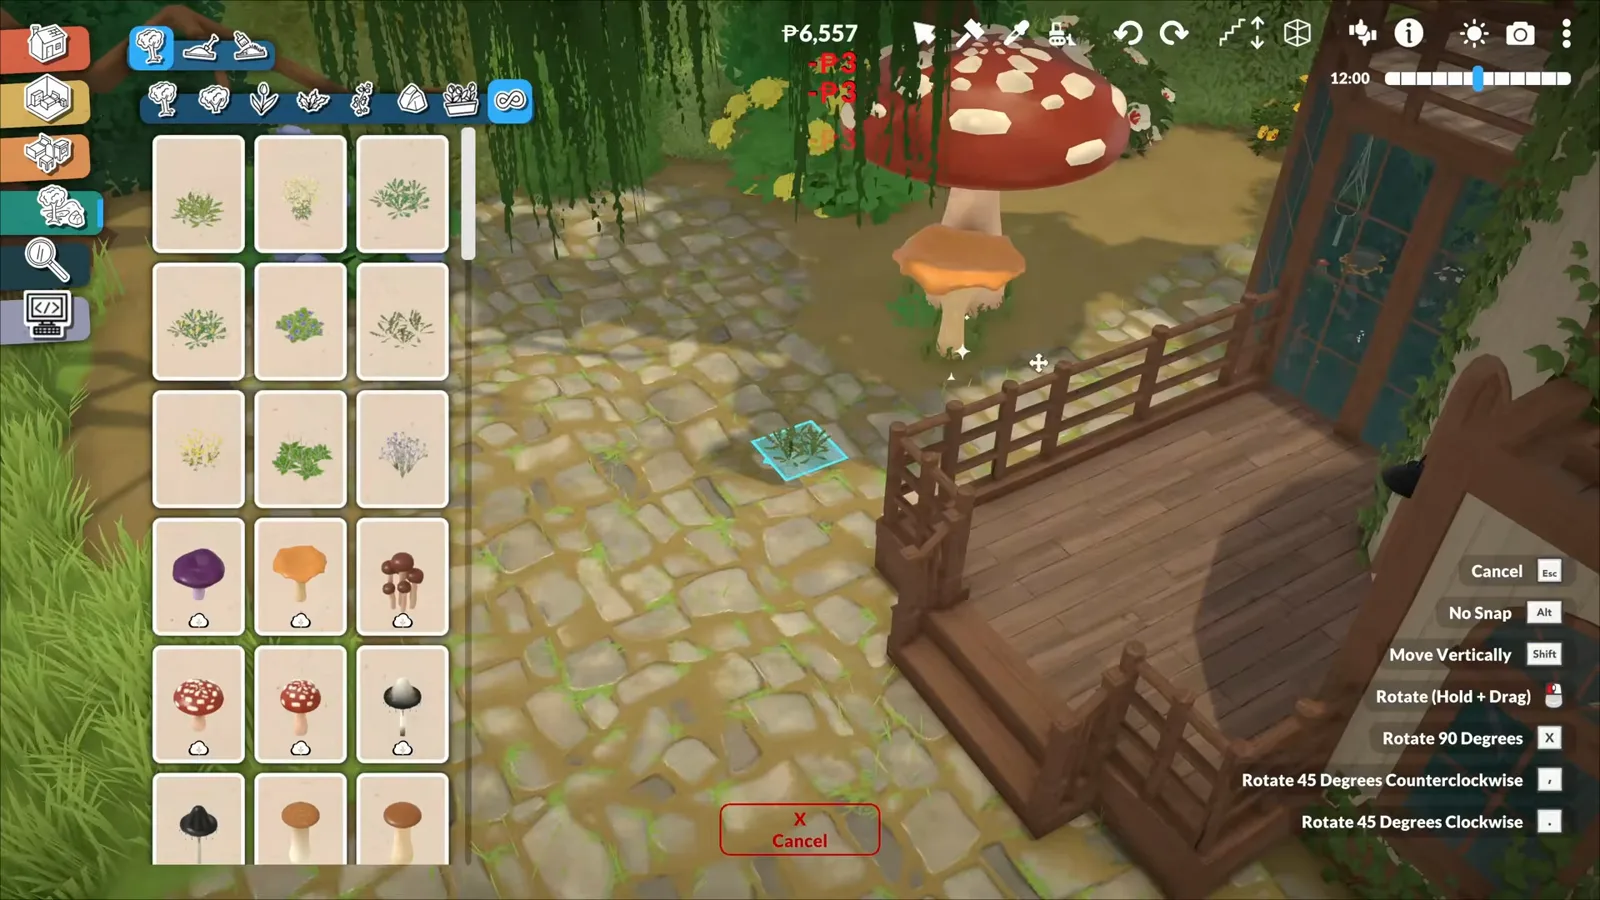
Willows close the sightlines; mushrooms scaled past believable finish the fairytale.Watch at 18:35 - 6
Fake a fire pit from rocks and a lamp
There is no outdoor fire pit object yet, so this one is staged: a ring of rocks, a cauldron set in the middle, and a warm glowing lamp tucked underneath until the light reads as embers. Park a couple of benches around it and switch the in-game clock to night — the glow does the rest.
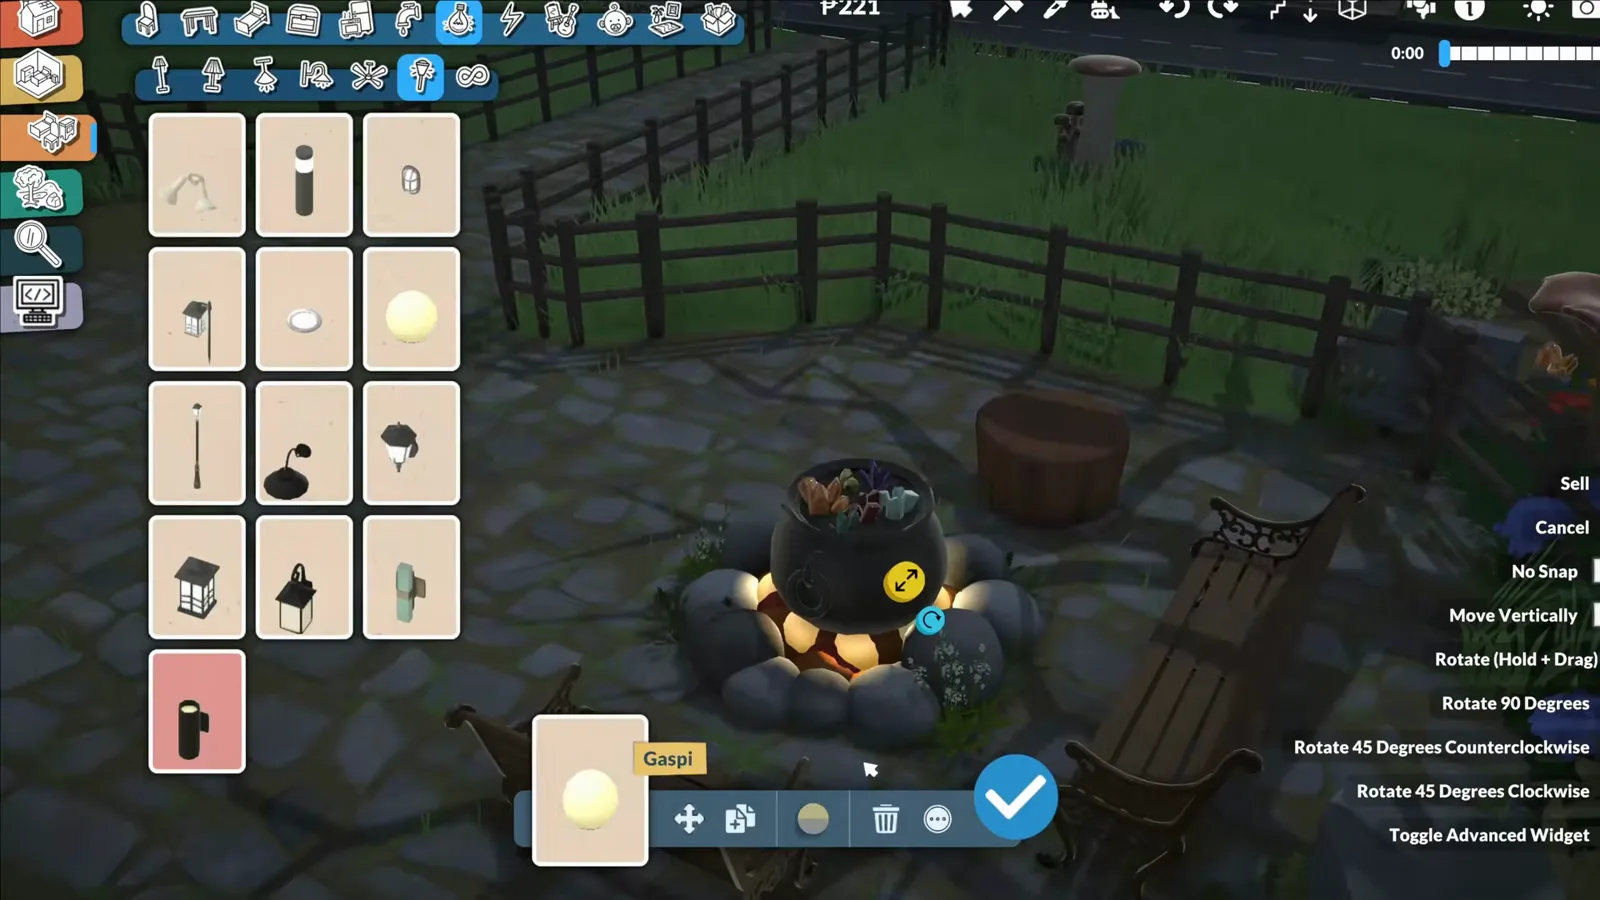
Rocks plus cauldron plus a hidden lamp: the ember glow is pure staging.Watch at 20:50
Inside
Shelves, herbs and one big brewing island
Inside, the theme lives in clutter with intent: built-in shelving under the stairs, an apothecary cabinet of skulls and bottles, dried herbs over the counters, and a color palette of deep greens, rich wood and purple. Two builders worked this house — the second one dresses the fireplace with floating candles.
- 7
Build shelving into the dead space under the stairs
The wedge under a staircase is usually dead space; here it becomes the first display. Shelf planks are placed one by one up the slope — each rotates to follow the stair line — until the nook holds crystals, candles and old books. Built-in like this, the shelving reads as carpentry rather than furniture pushed against a wall.
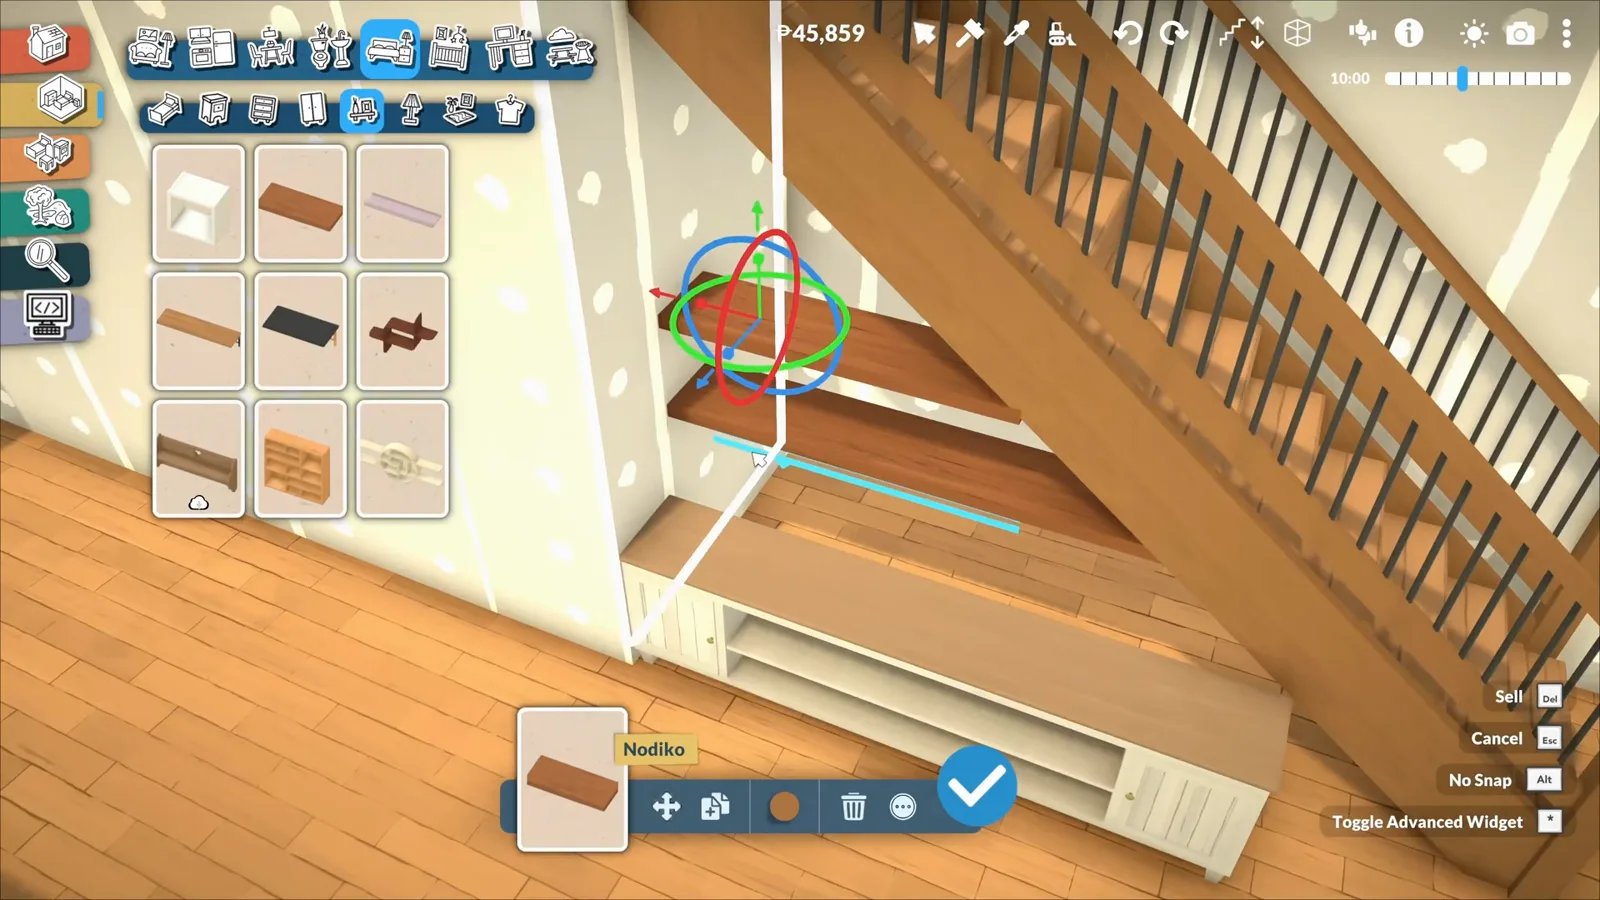
Plank by plank, the under-stairs wedge becomes the witch's first display shelf.Watch at 2:30 - 8
Merge the table into a brewing island
The kitchen's center of gravity is one large island: the dining table is merged straight into the counter run, giving a single work surface big enough for cooking, experimenting and eating. Then it gets stocked like a working bench — cauldron pots, jars, ingredients — while dried herbs hang from the shelves above it.
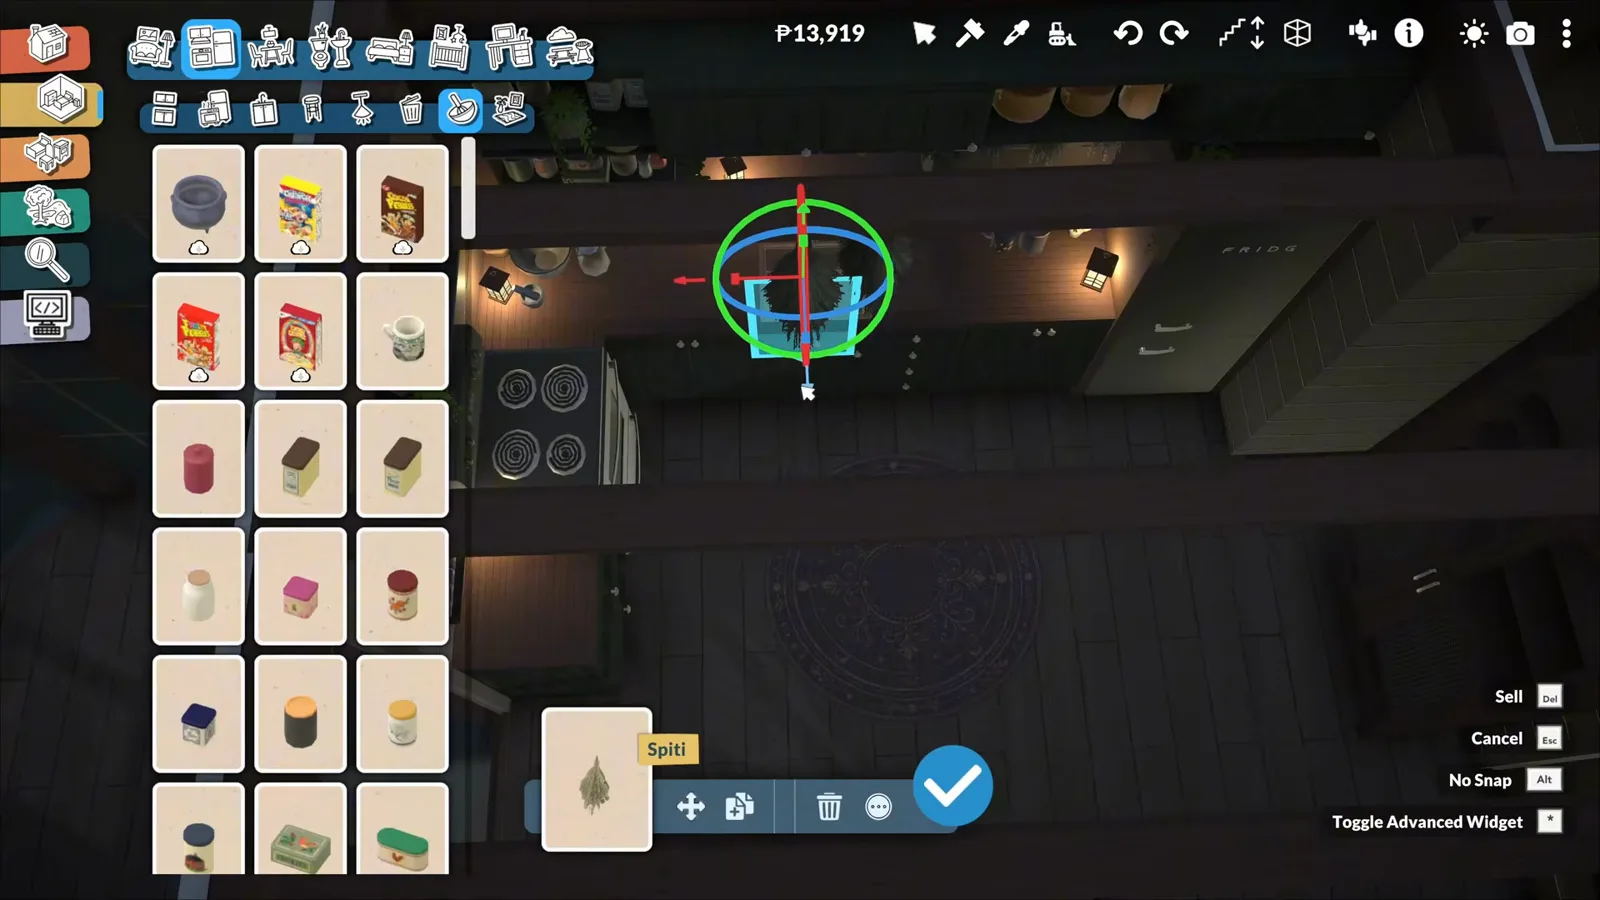
Table merged into counters, then cluttered like a bench someone actually brews at.Watch at 9:00 - 9
Dress an apothecary cabinet, shelf by shelf
A tall cabinet becomes the apothecary: skull canisters on the top shelf, potion bottles in blues and greens below, candles searched up by typing "cand" in the catalogue. The trick is uneven filling — some shelves crowded, some nearly bare — so it looks like a working stock rather than a set.
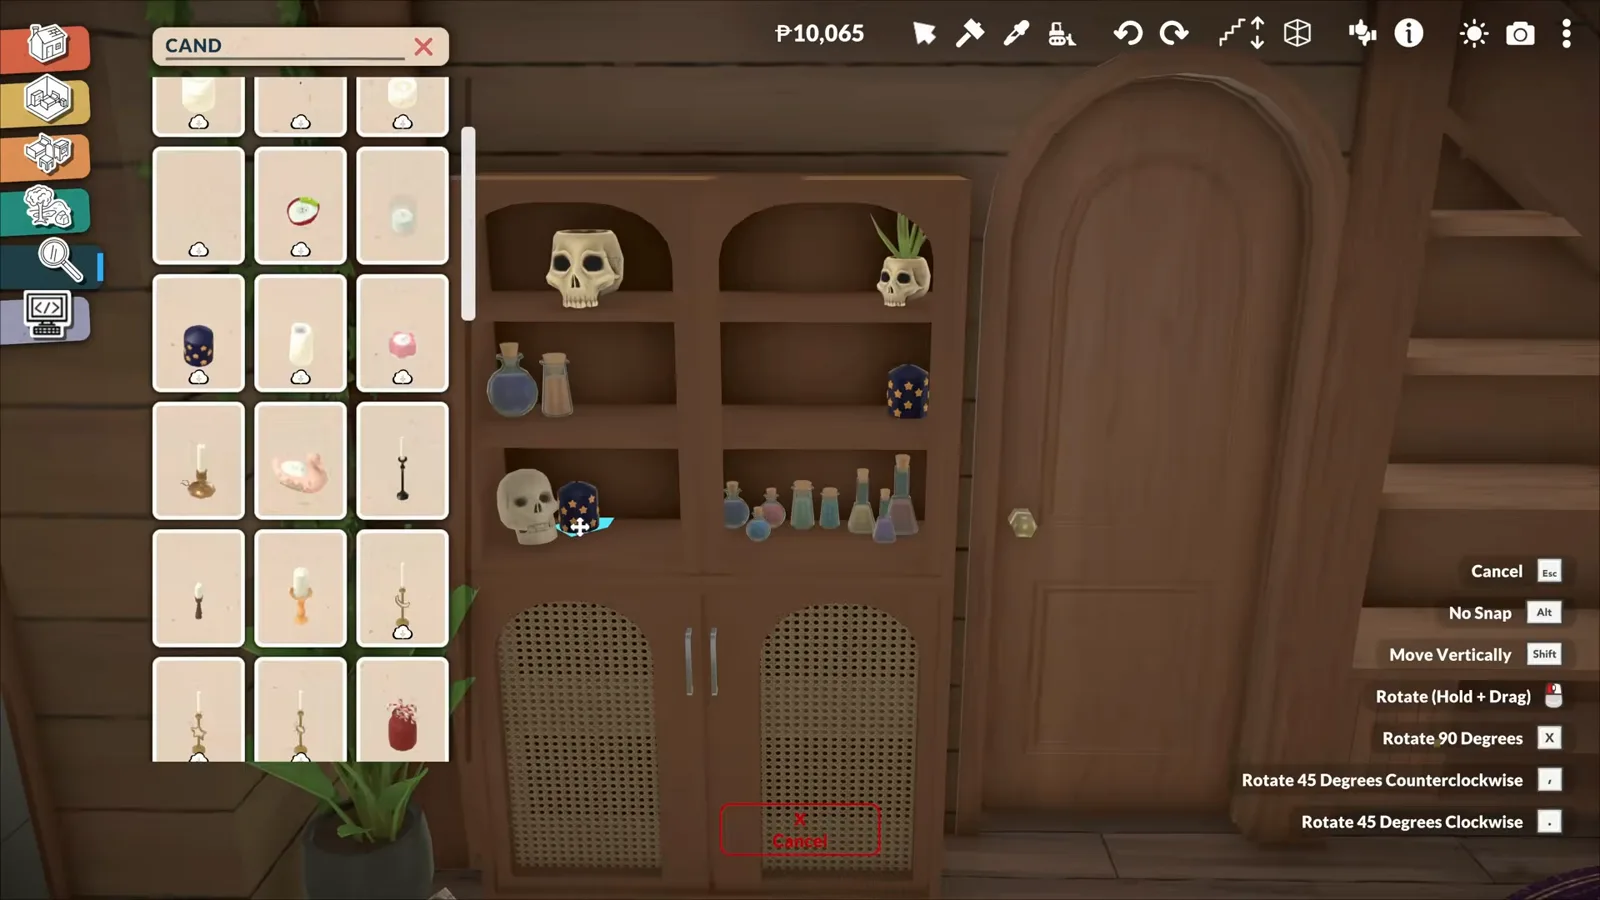
Search the catalogue by fragment — "cand" surfaces every candle at once.Watch at 10:35 - 10
Lock the palette: deep greens, wood, purple
Three colors carry the whole interior: deep greens on upholstery, rich wood tones everywhere structural, and purple for the mystical accents — a moon-phase rug, celestial trays, amethyst clusters. Keeping accents to one family is what stops witchy clutter from turning into plain mess.
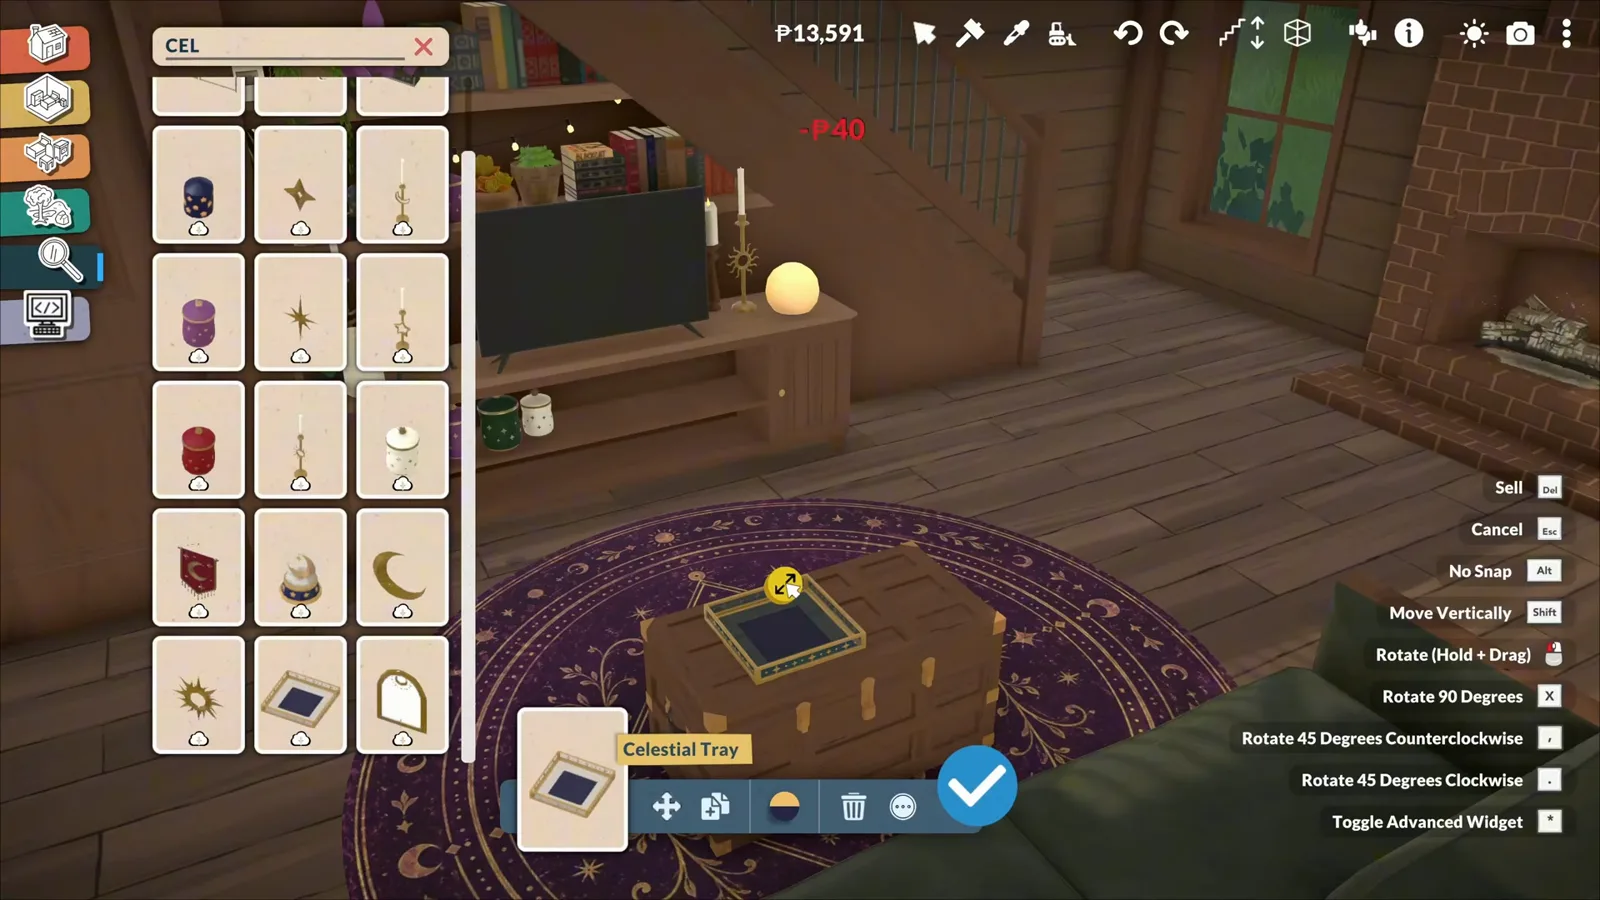
Green, wood, purple — repeat those three and the clutter stays cohesive.Watch at 11:00 - 11
Hang floating candles over the fireplace
The second builder makes the fireplace the focal wall: the mantel is dressed with crystal balls, crystal clusters and candlesticks, then floating candle pieces from the Steam Workshop are placed in mid-air above it. Search the catalogue for "candl" to pull every candle at once — the floating variants hover exactly where dropped.
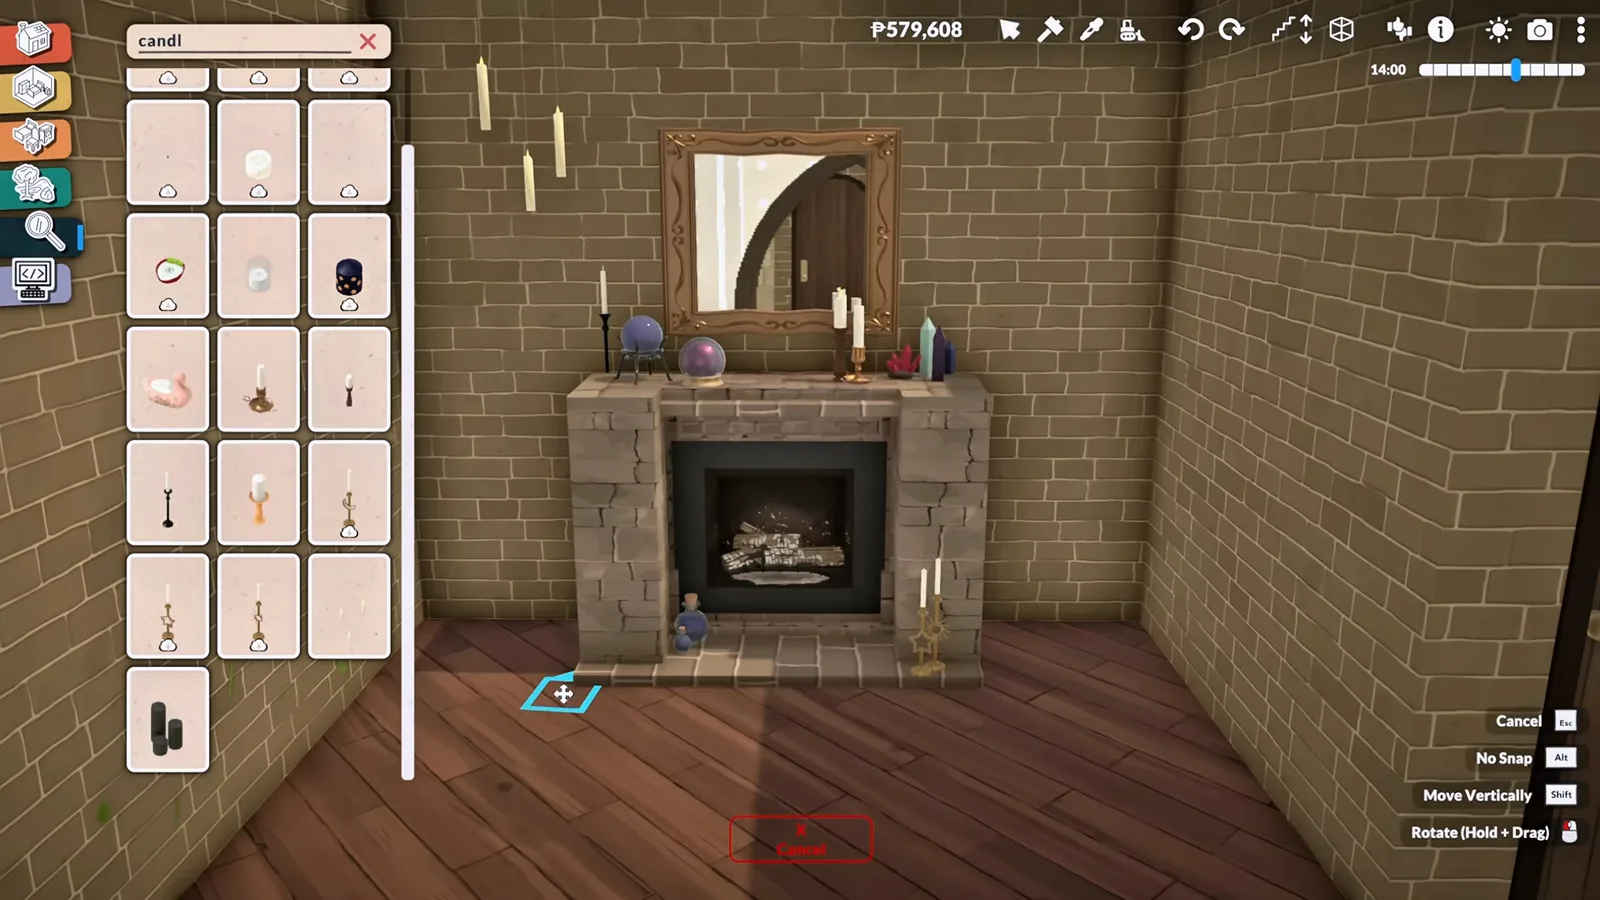
Workshop floating candles hover in mid-air — the mantel becomes the room's focal point.Watch at 4:10
Upstairs & below
Greenhouse upstairs, potion shop in the basement
The top floor hides a four-poster bed under the rafters and a greenhouse full of potion ingredients; the walkout basement opens as a spells-and-potions shop. Somewhere between them, a bookshelf swings open onto a secret workroom with a large cauldron.
- 12
Grow the greenhouse onto the house
Instead of a separate garden shed, the greenhouse is part of the home itself — glass and ivy walls directly off the living space, so the walk from picking fresh herbs back to the cauldron is a few steps. Inside, planters and stumps hold the ingredients: potted herbs, mushrooms, flowers, everything a potion needs.
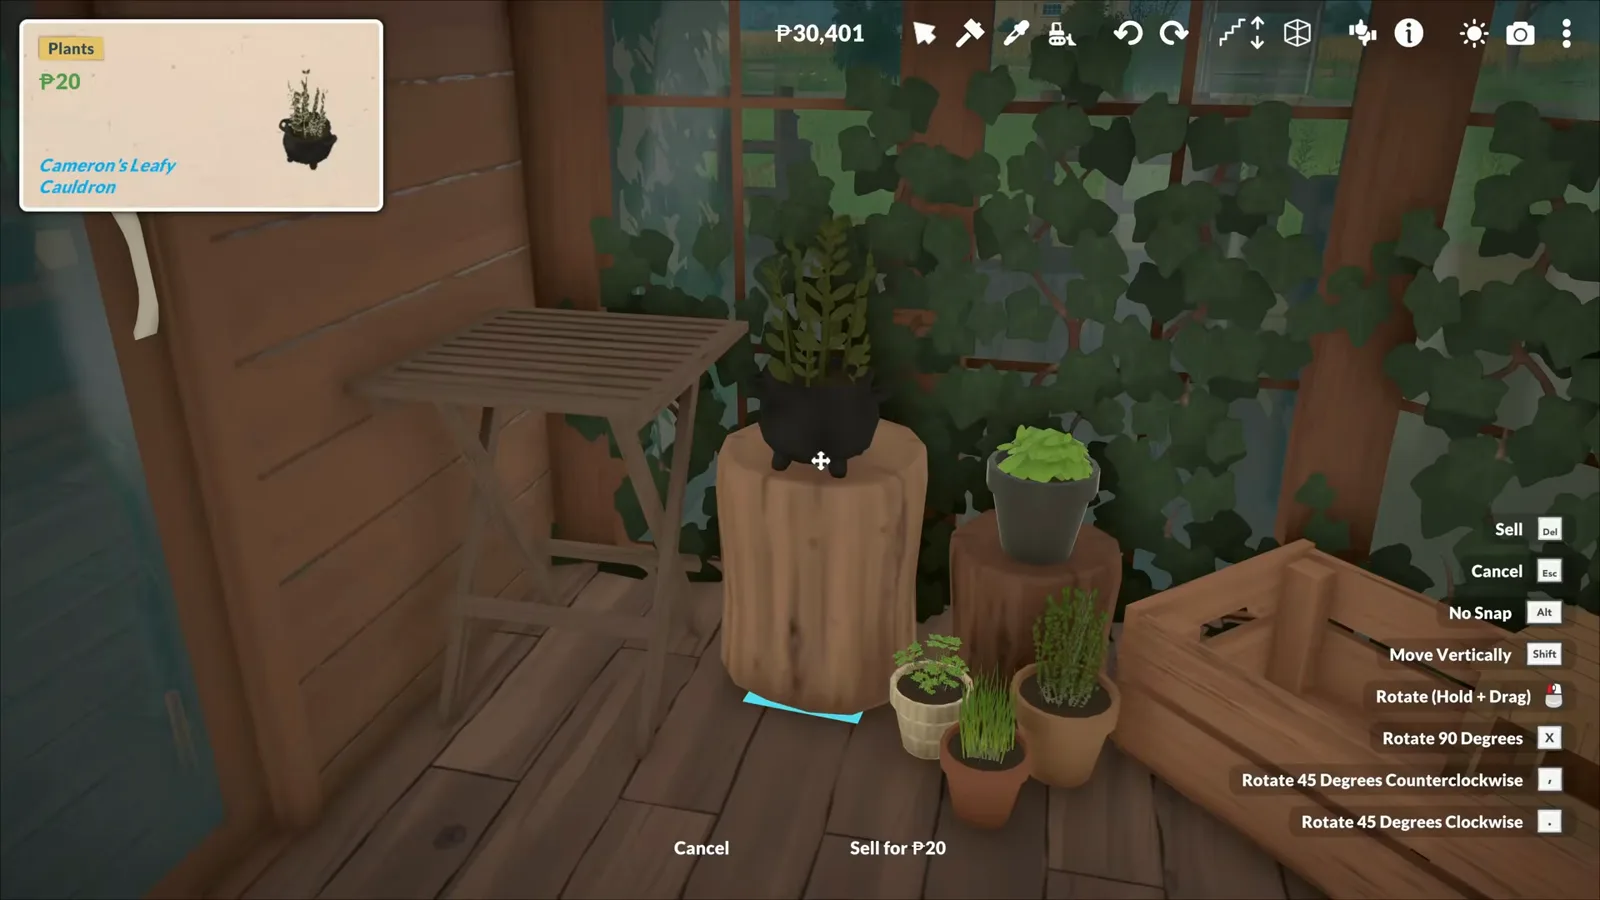
Attached to the house, the greenhouse works as a pantry she can step into mid-brew.Watch at 12:30 - 13
Tuck a four-poster bed under the rafters
The upstairs bedroom lives under the sloped roof, and the bed is the centerpiece: a four-poster with curtains hung rail by rail, the drapes flowing on all sides. Rotating the assembled bed with the gizmo is easier than building it in place — set the frame against the low wall first, then dress it.
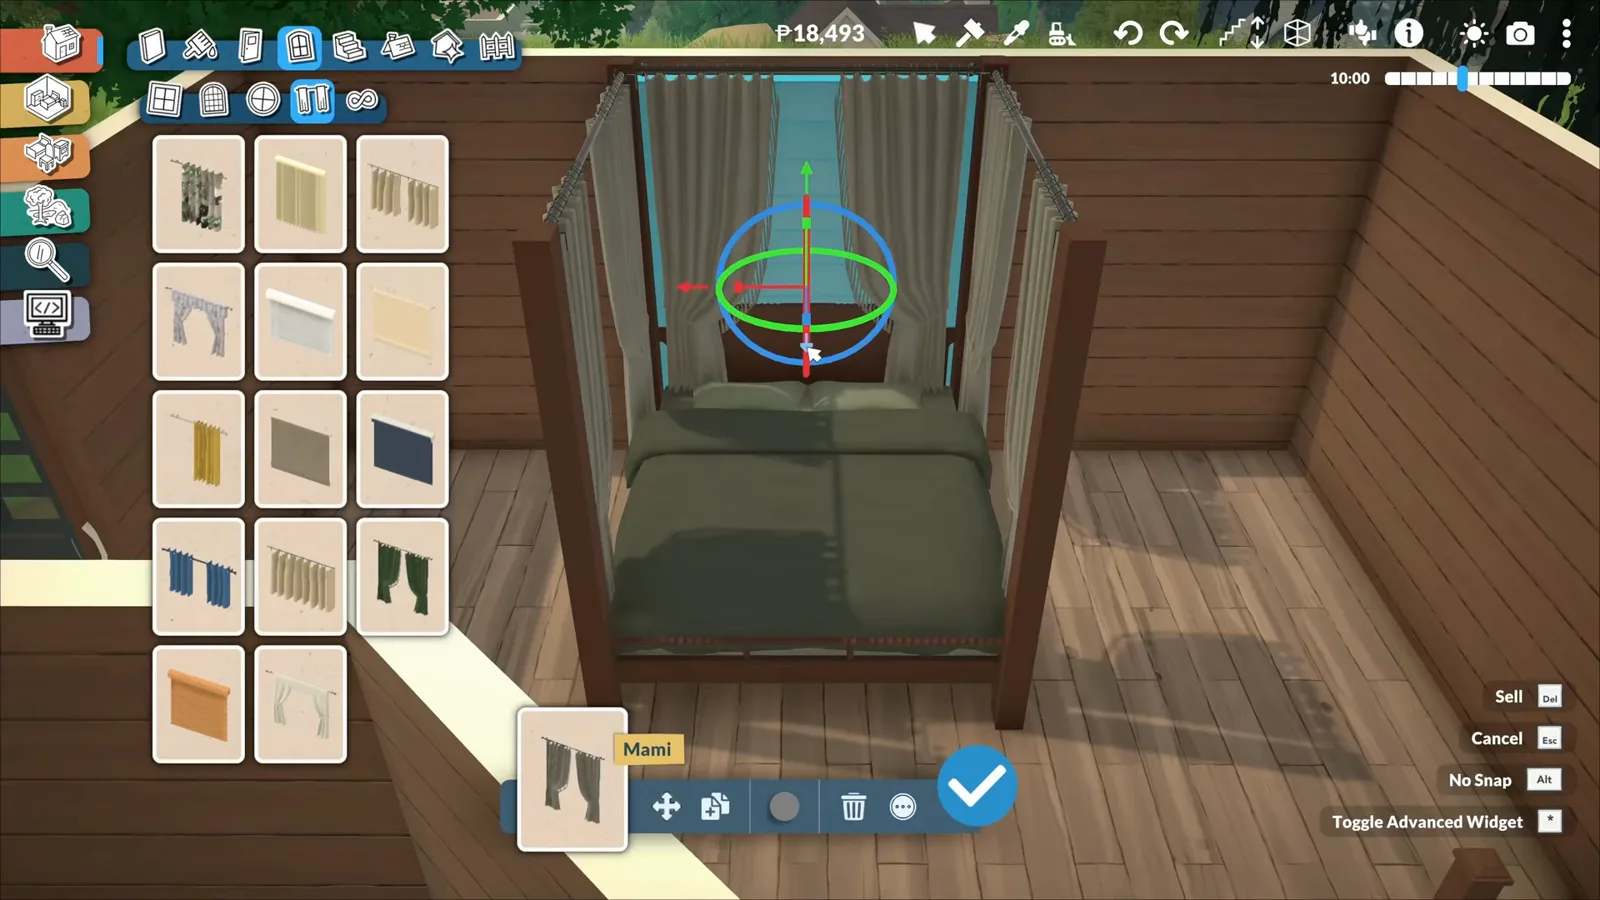
Curtains hang rail by rail — rotate the finished bed into its corner afterward.Watch at 14:30 - 14
Open a potion shop in the walkout basement
The basement level opens to the garden as a real little store: a striped counter with a cash register, a framed Spells & Potions menu on the wall, a shop-policy sign with the small print no customer should ever read, and display cabinets of crystals and bottled potions. The idea is an old-village shop where the witch lives right upstairs.
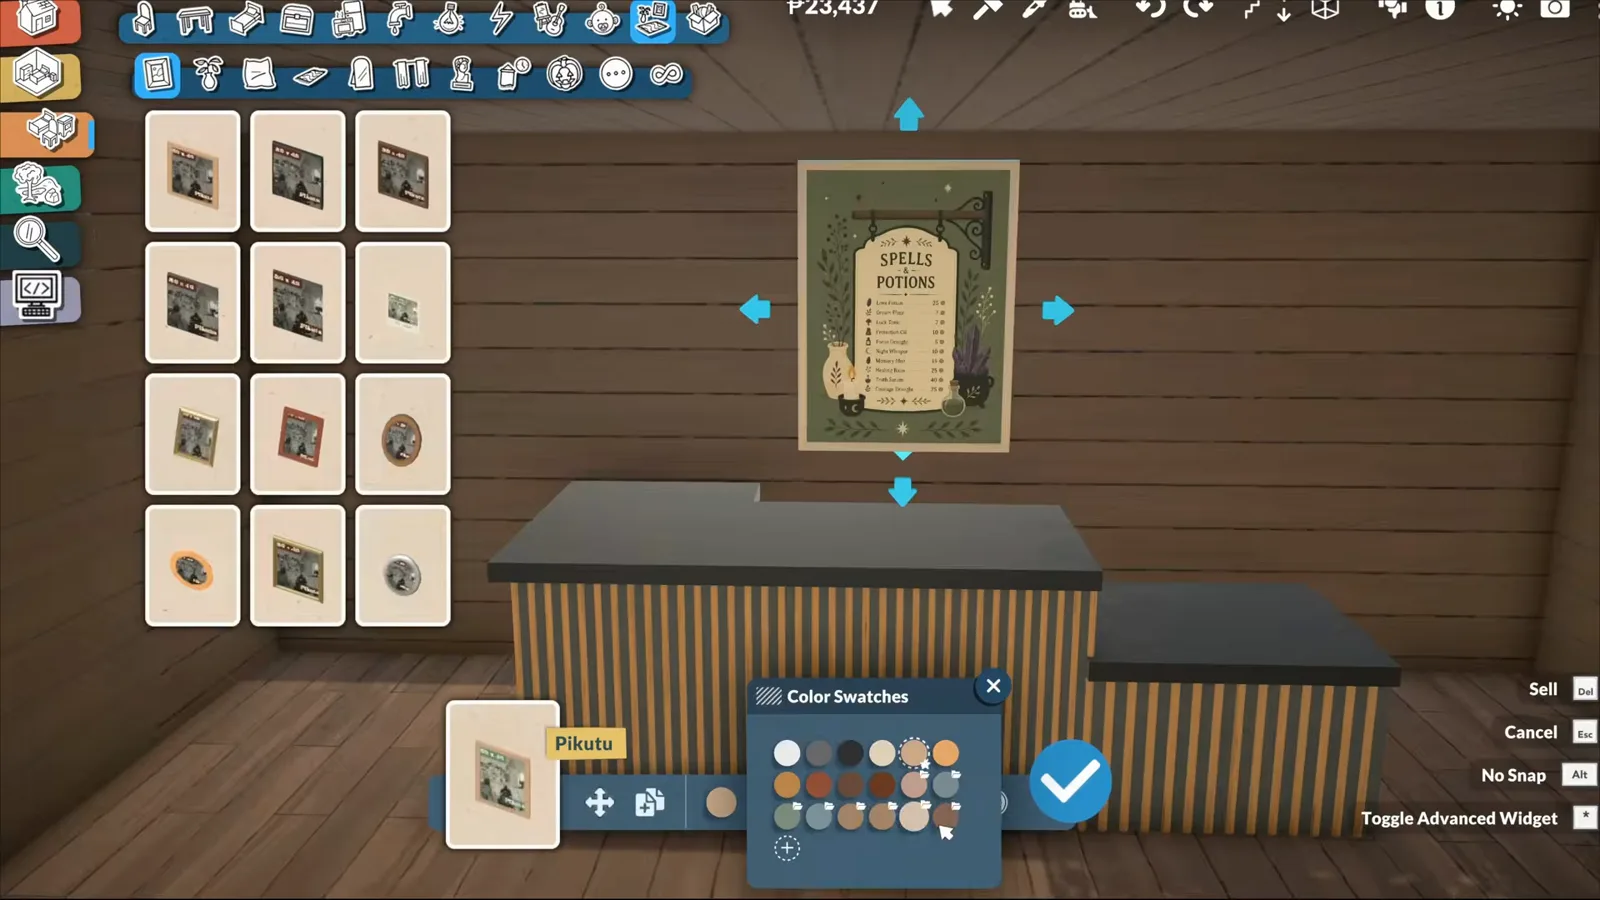
Counter, menu, register: the basement reads as a shop the neighbors can actually visit.Watch at 22:30 - 15
Hide a workroom behind the bookshelf
The shop's best secret is a room behind a bookshelf: a private workshop where everything on the sales floor gets made. Inside sits the largest cauldron, on a moon-phase pentagram rug, with mushrooms and ingredients close at hand. Customers see shelves; the witch steps through the back and starts brewing.
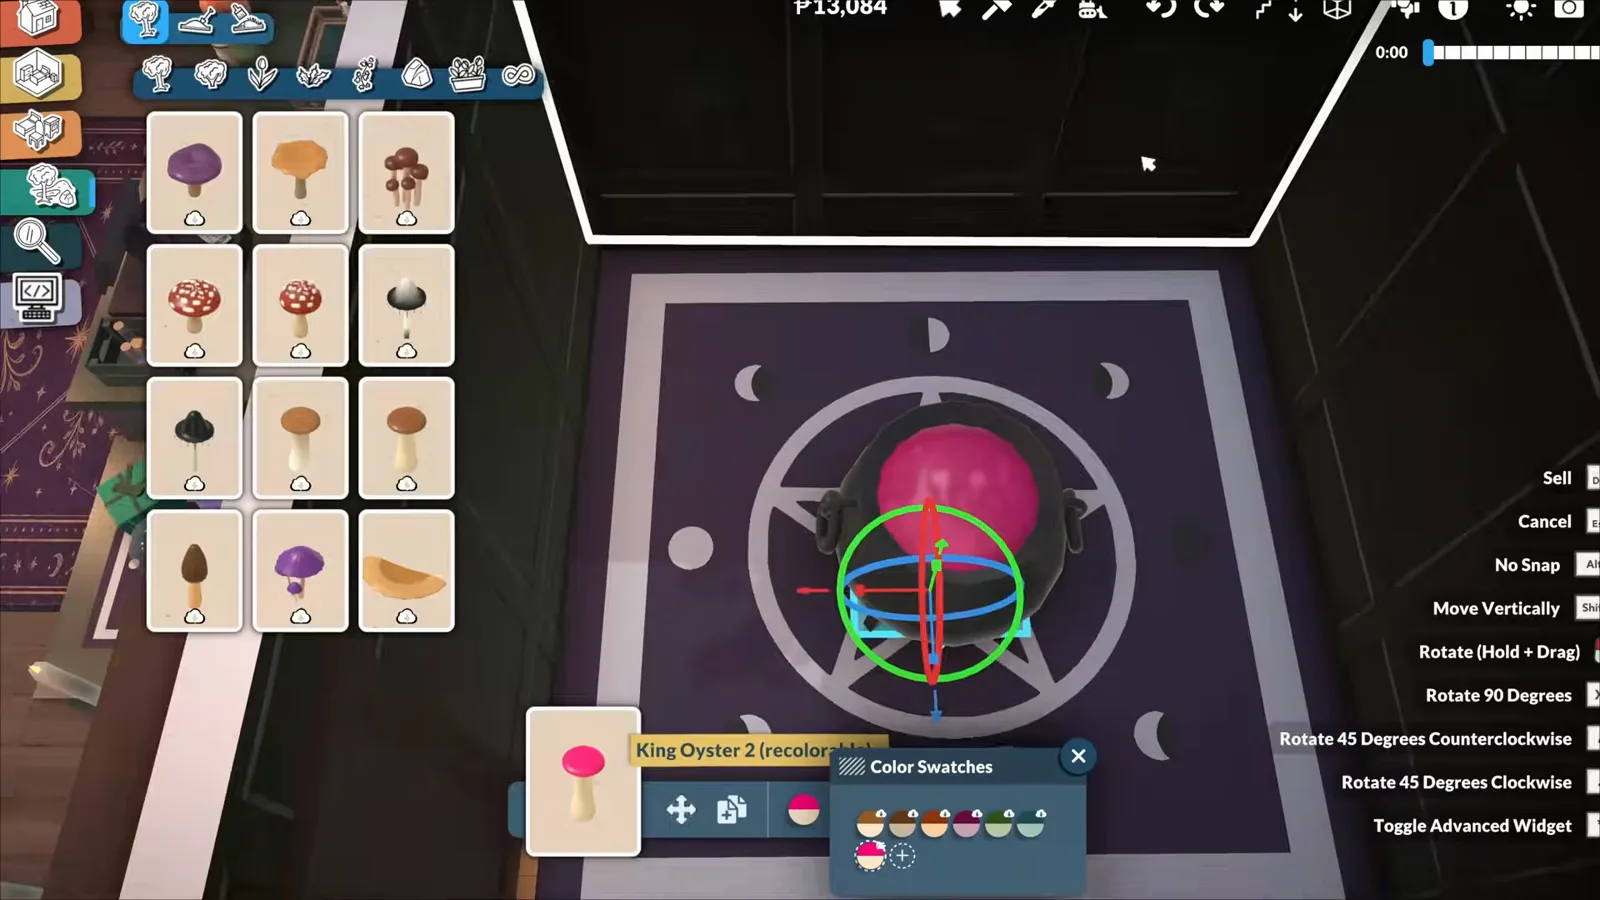
Behind the bookshelf: the workroom where everything the shop sells gets made.Watch at 25:45
Paralives witch house FAQ
- Can you build a witch house in Paralives?
- Yes, and nothing about the shell needs cheats or mods: freehand walls, resizable roof pieces and free placement are core build-mode tools. Both builds this page follows used the standard catalogue for the structure and saved the Steam Workshop for dressing — floating candles, prints and a few themed props.
- Is there a cauldron in Paralives?
- There is a cauldron as a decorative item — both builds place one, perched on a rock ring outside and inside the hidden workroom. What Paralives does not have yet is potion-brewing gameplay: the crystal soup in the cauldron is set dressing, not a system. For witch-flavored careers there is a player-made Witchy Occupations mod on the Steam Workshop.
- How do you get witch furniture and custom content in Paralives?
- Through the Steam Workshop. Downloaded items appear in the build catalogue next to official ones — the floating candles and several apothecary pieces in these builds are Workshop content. ParalivesEmmy also publishes a Cozy Witchy Prints pack (rugs, the shop sign, framed prints) alongside the downloadable cottage itself.
- Can Paras actually live in a witch house like this?
- Yes. One builder ends the video with a functionality test: the Para cooks at the merged island, sleeps in the canopy bed and uses the bathroom with no routing trouble. Both cottages are playable homes first and dioramas second — clutter is decorative, but every appliance is real.
- How do you make ivy and vines grow on walls in Paralives?
- The plants catalogue includes climbing vine pieces that attach directly to walls. Place them individually and layer the effect: dense at the base, thinner toward the roofline, with a few vines crossing window frames. Everything resizes, so one vine asset can stretch from a metre of wall to the full tower height.
- Where should a potion shop go in a Paralives witch house?
- The build on this page uses the walkout basement: it opens straight onto the garden path, so customers never walk through the house. The formula is a counter with a register, a menu or price sign, display cabinets for crystals and bottles, and — if you want the full story — a hidden workroom behind a bookshelf where the stock gets brewed.
Keep building
Paralives house ideas
A gallery of build concepts to steal from — the lots, the footprints and the houses that fit them.
Paralives cottagecore build
The witch house's gentler sibling: the same forest palette with the mystery swapped for sunshine.
Paralives tiny house build
A full home squeezed onto the smallest wedge lot in town — small-space tricks that also work in a cottage.
Related guides
Decorating guide
Color, clutter and the free-placement habits that make rooms feel lived in.
Victorian house build
Ornate trim, heavy roofs and period drama — the other house that wears a costume.
Build mode tips
The settings, shortcuts and workflow habits worth setting up before your next build.
Gothic house tutorial
The darker sibling of this build — pointed glass, dark stone and a spire.
Hobbit house tutorial
A hillside hobbit hole with a round door, step by step.