
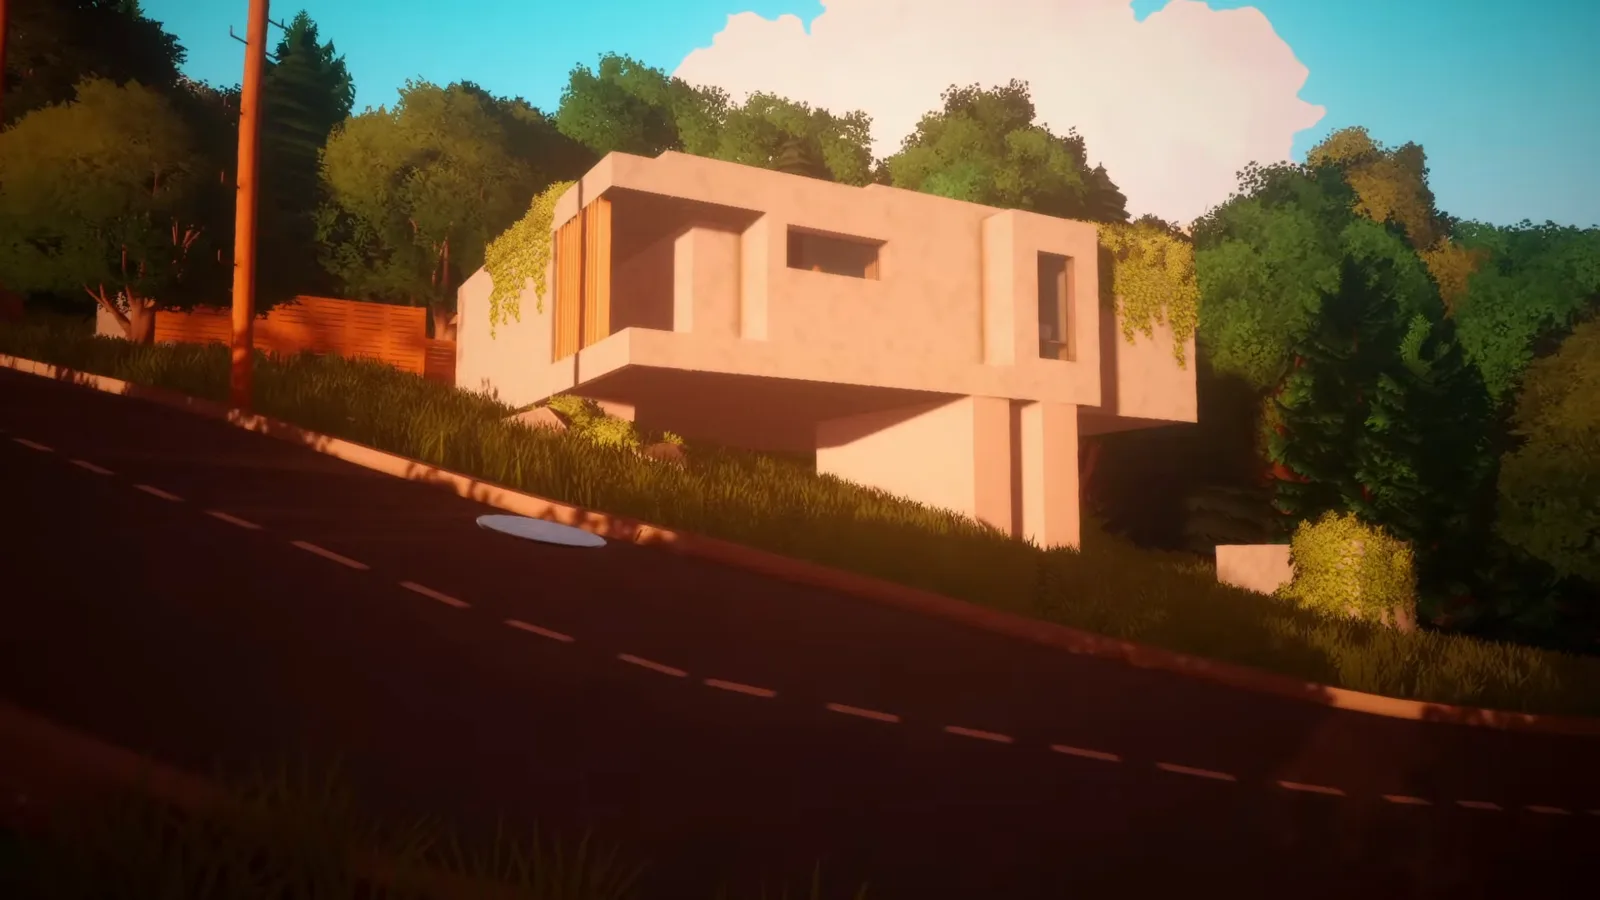
The short version
The hill lot in this walkthrough is never dug or flattened first. The house starts as a flat plate set across the slope, walls rise straight on top of it, the view side cantilevers past its supports, and only then does the terrain get graded around the entry. Build the house first; argue with the hill on the house's terms.
- Set a flat floor plate across the slope and draw walls on it — the length and price tags read as you go
- Set storey height with the vertical arrows instead of stacking floor pieces
- Pull the slab edge past the walls over the downhill side and prop the span on a pillar
- Grade, rock and paint the hillside path only after the shell stands
- Close deck edges with posts and glass; half walls are the fix on curved edges
- Neither source video play-tests live mode, so entry pathing stays unverified here
Steps 1-4
Lift the main floor off the slope
The house begins as one flat plate bridging the grade. Walls, height and the first cantilever all come from the plate — nothing is dug, and no foundation piece is placed in this phase.
- 1
Start the ground floor as a box on the slope
The first structure is a single masonry box set straight onto the hillside grass — no digging, no foundation pass. Its height gets pulled with the vertical arrows until the downhill face clears the drop, and the dirt patches under the plate stay untouched for now; terrain comes last.
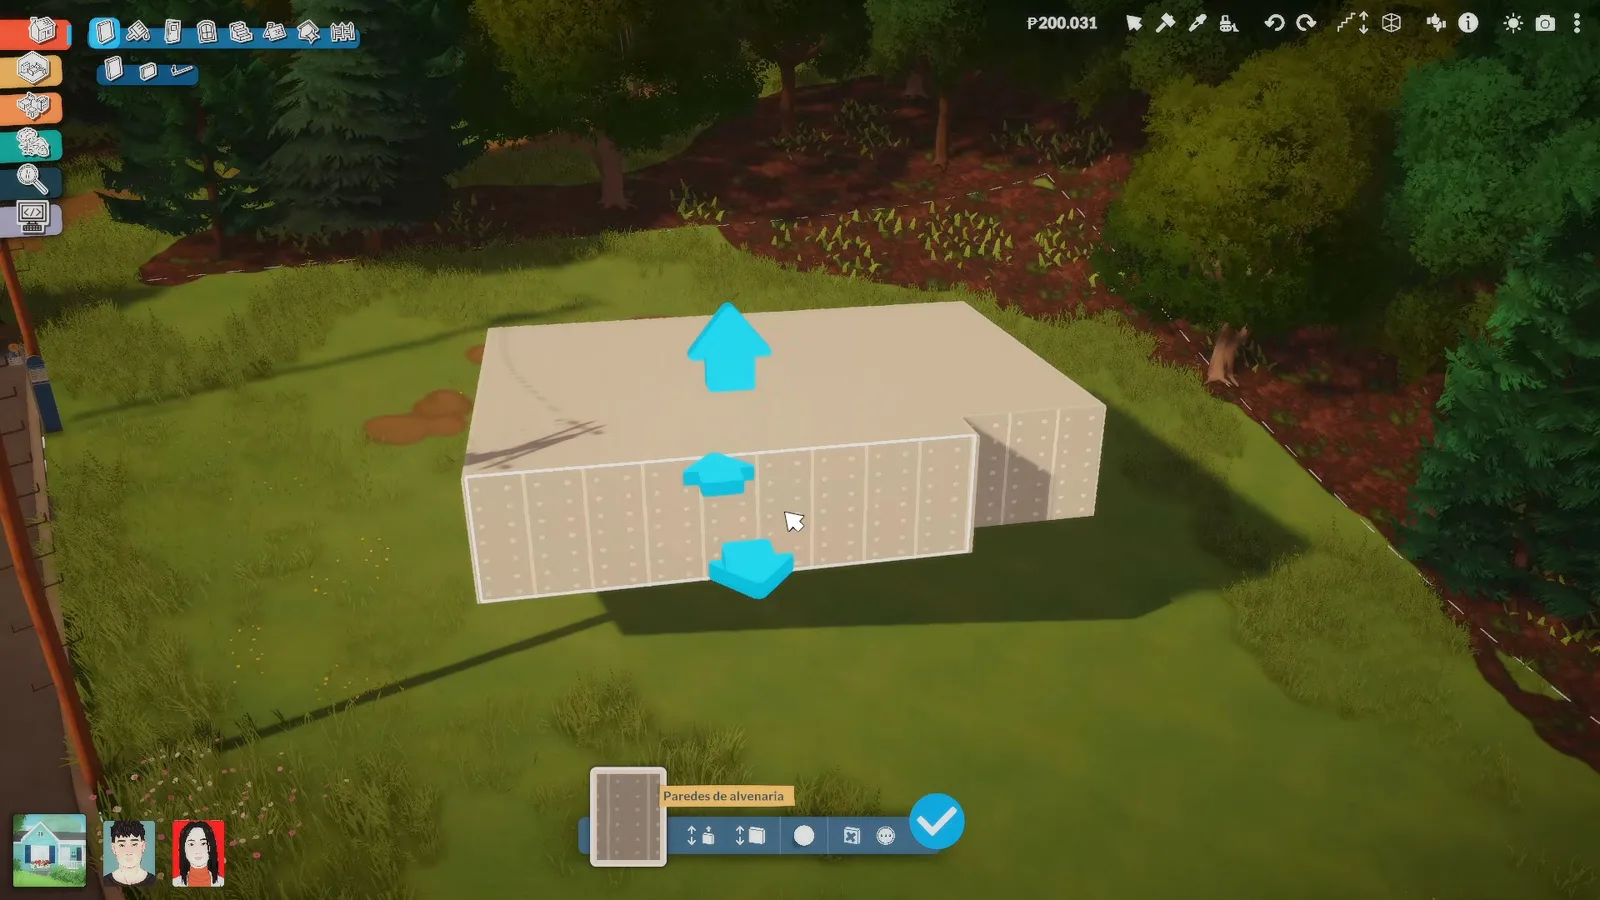
Ground-floor walls rise directly on the slope — height comes from the arrows, not from levelling first.Watch at 0:40 - 2
Draw the first walls on the raised plate
In wall placement mode a tag reads the running length — 13.0 m in the frame — while a green tag prices the segment at P$169. Watching those two numbers is the cheapest way to keep a hill house footprint honest, because the plate can follow the slope instead of the lot rectangle.
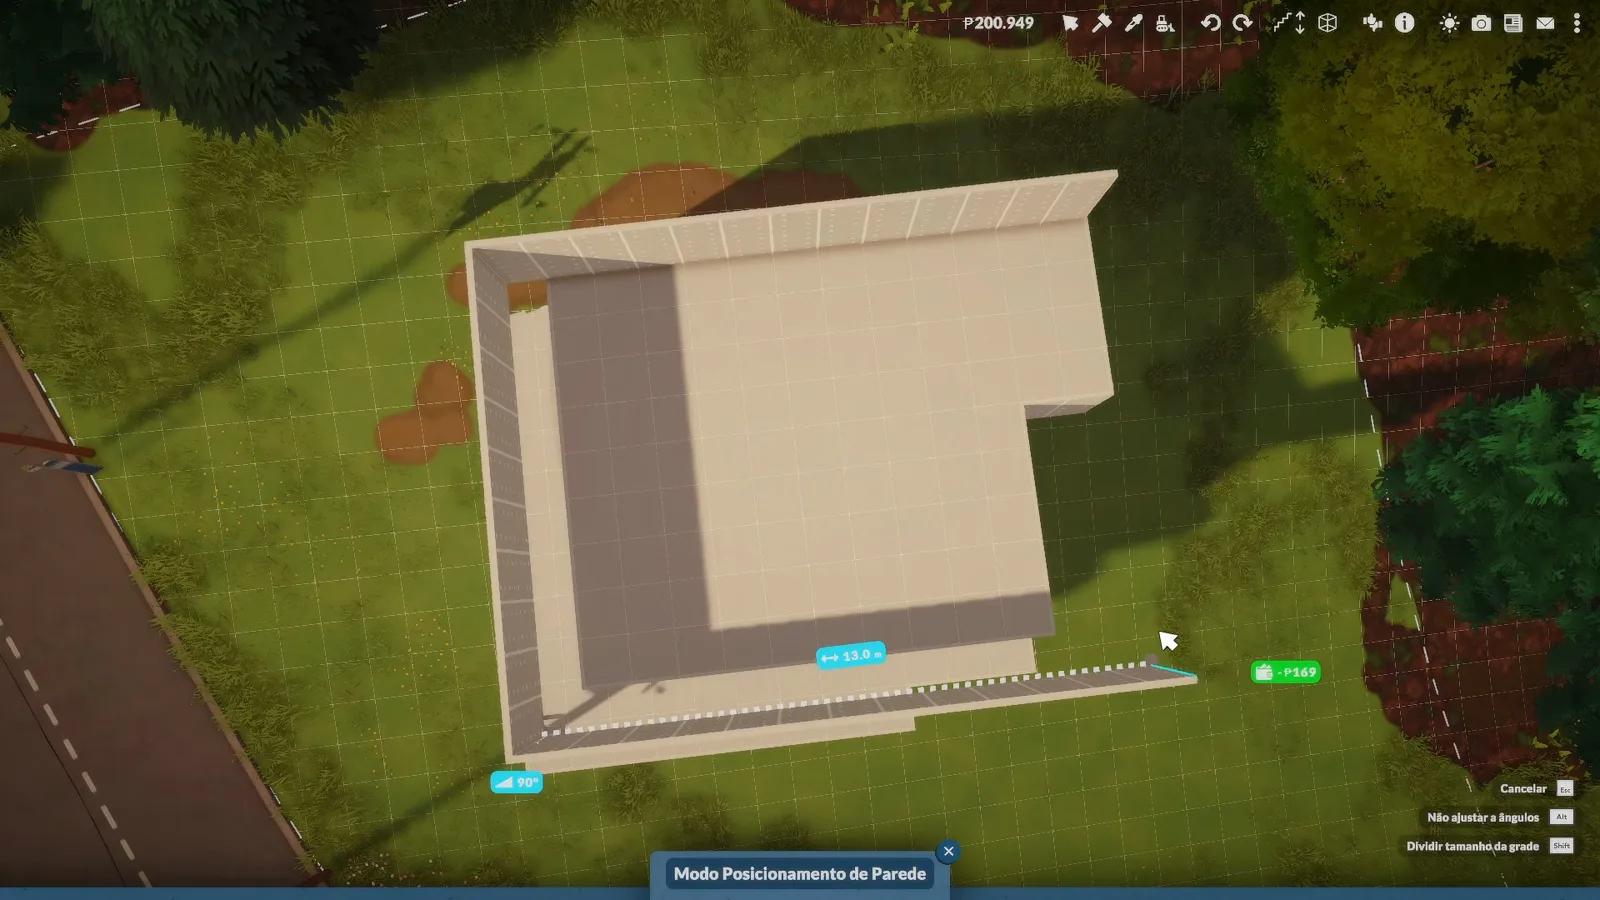
Length and price update live as the wall runs along the plate edge.Watch at 1:24 - 3
Set the storey height with the vertical arrows
The whole room box — floor and masonry walls together — carries cyan up and down arrows. One pull grows or flattens the entire storey, which is how this build gains headroom over the downhill face without stacking extra floor pieces. The narrated fact-source build uses the same gesture when a tall object needs one more unit of clearance.
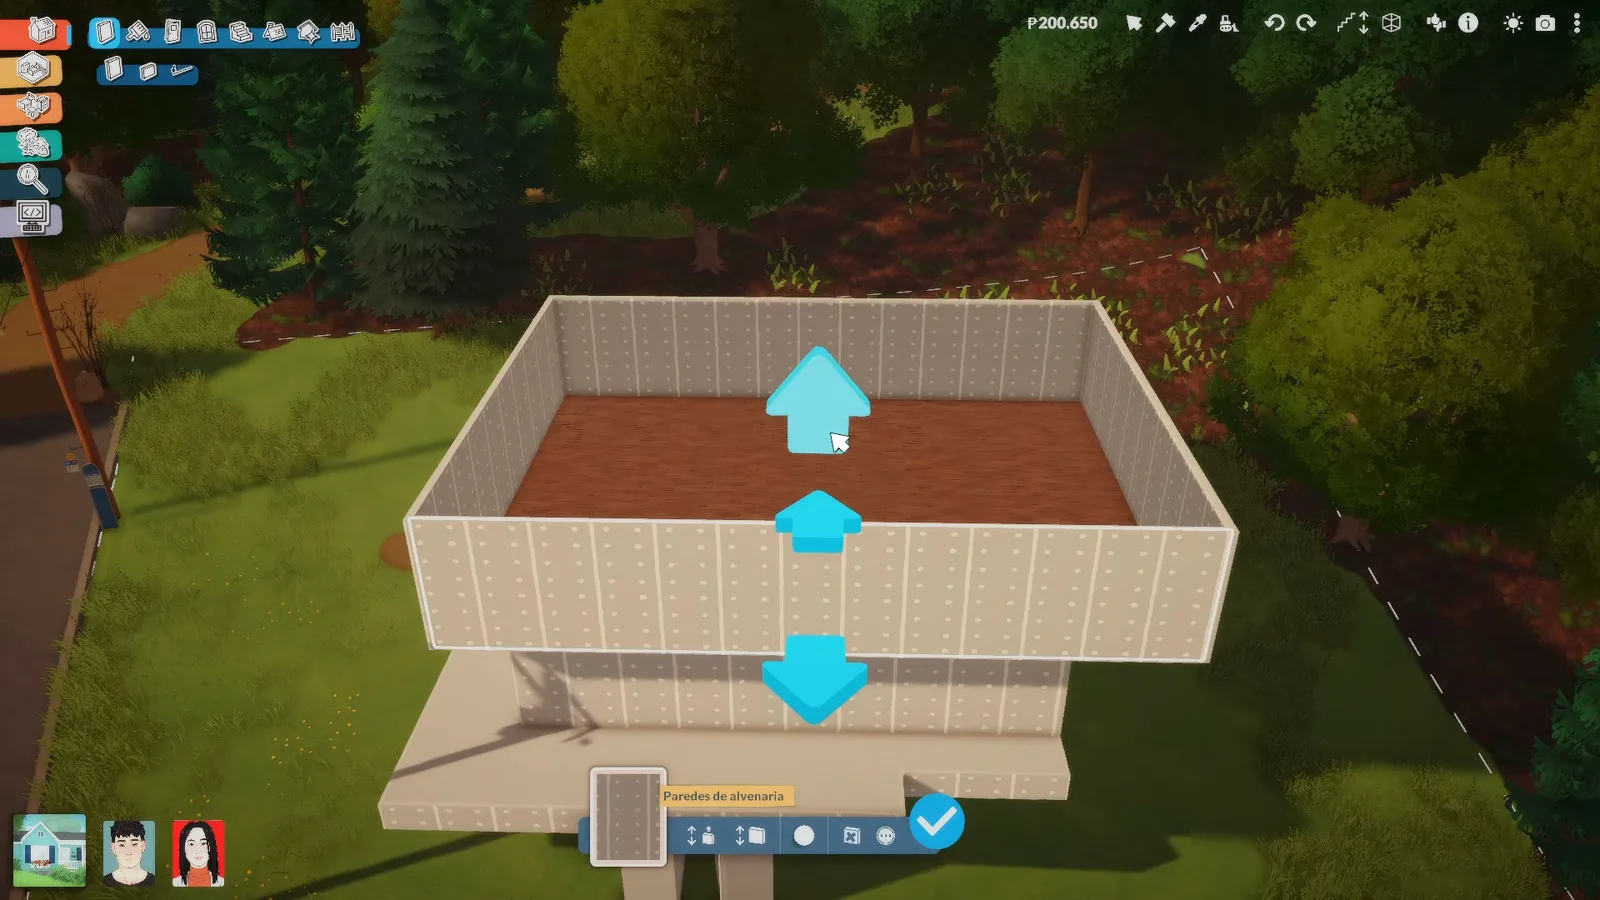
One drag sets the storey — the brown floor plate travels with its walls.Watch at 1:28 - 4
Pull the slab edge out over the downhill side
Wall placement mode highlights the plate edge in cyan and drags it outward past the walls below, cantilevering floor over the slope. Overreach and the game refuses the stretch — the same refusal any oversized platform pull gets — so walk the edge in smaller steps.
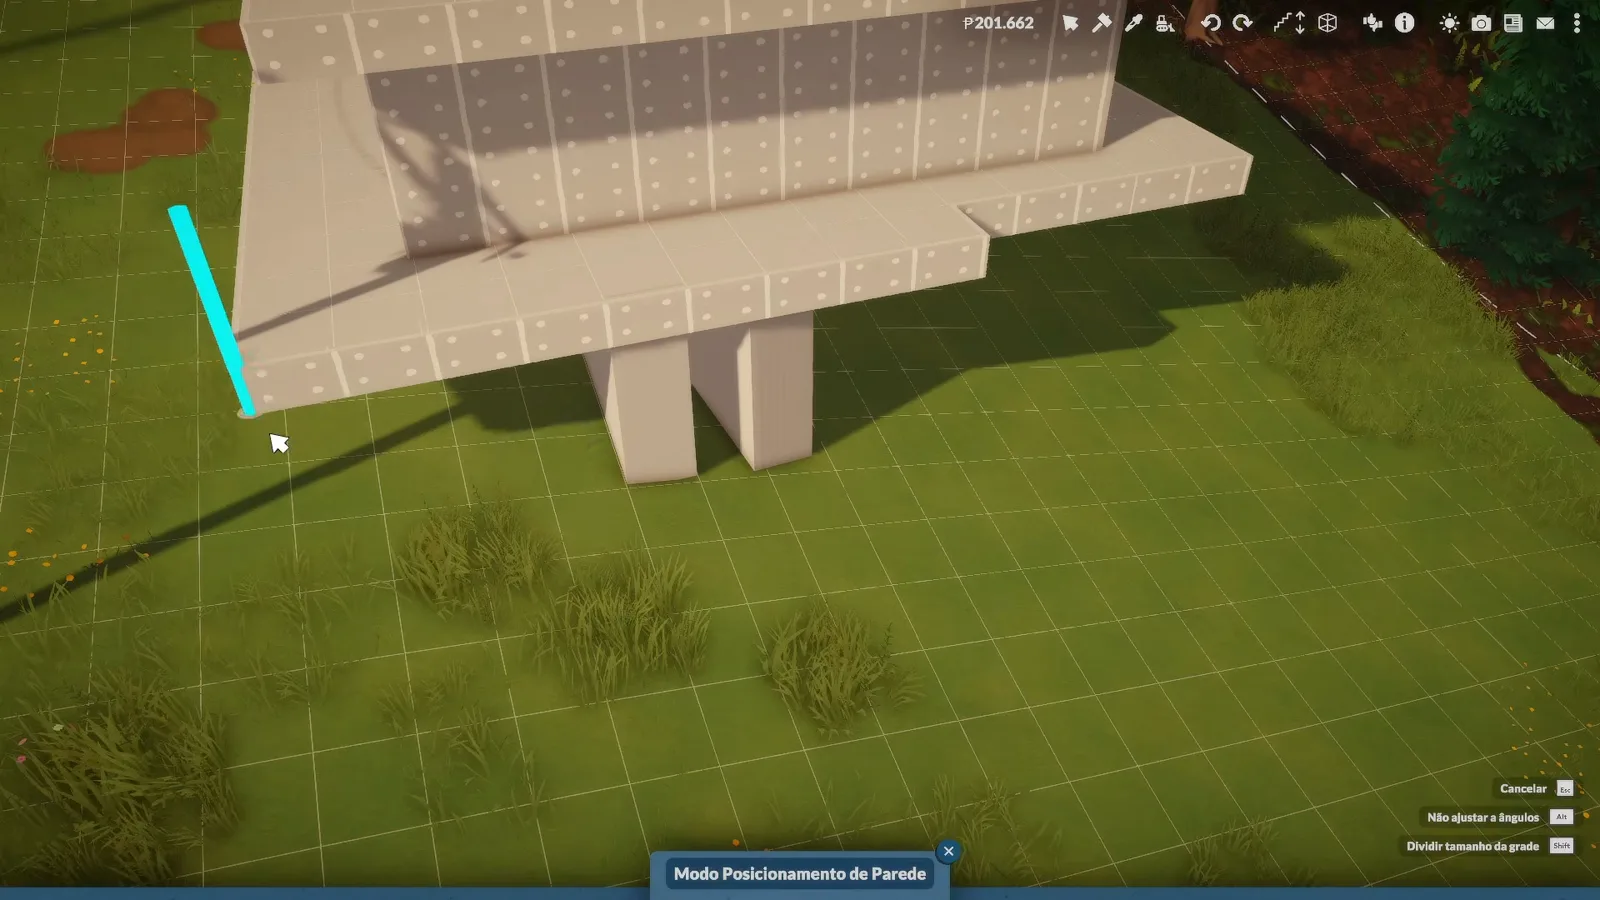
The highlighted edge is the one being pulled; the supports stay on solid ground.Watch at 1:40
Steps 5-8
Cantilever the view side
With the two-storey volume standing, the build pushes floor past the walls on the downhill face and checks the composition from the street. The payoff is a flat roof with a terrace that looks down the valley.
- 5
Prop the overhang on a pillar
Under the cantilevered volume a pillar piece — the Pilar tooltip in the frame — drops from slab to slope. Paralives does not force the prop, but the column sells the cantilever from the street, which is exactly why the narrated fact-source build adds pillars: to look like the structure needs them.
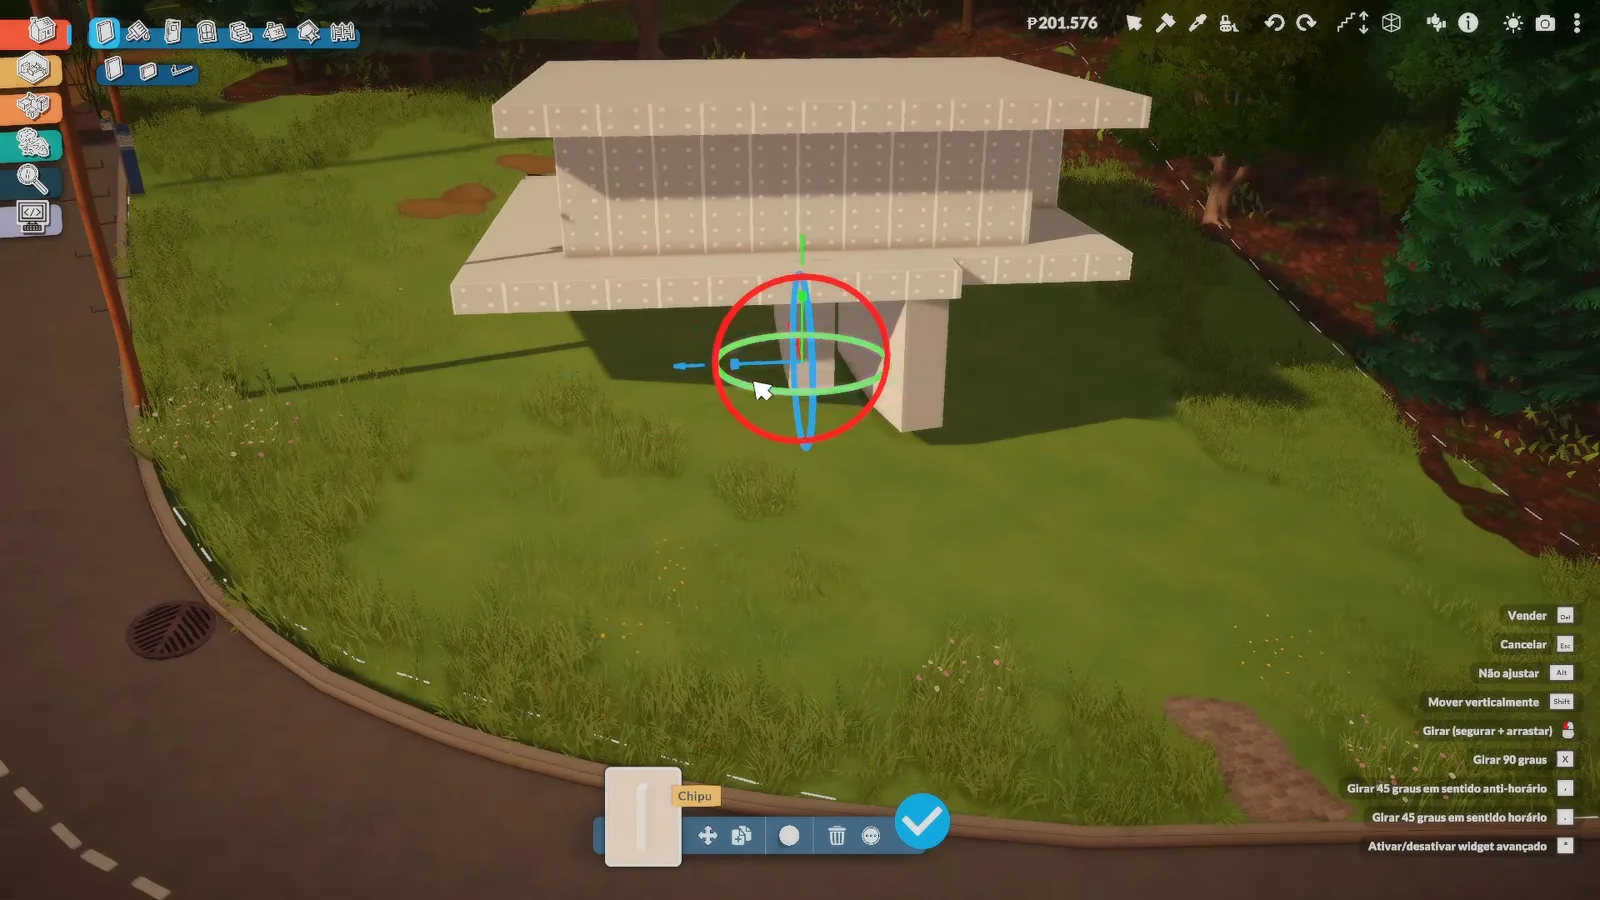
The Pilar tooltip marks the column carrying the overhang down to the slope.Watch at 2:00 - 6
Paint the lifted floors like any other floor
Floor paint mode runs across the raised slabs without ceremony — the concrete swatch reaches the very lip of the cantilever. Floors before furniture keeps mismatches out of finished rooms, and the narrated fact-source picks floors one concrete shade lighter than walls for exactly this raw look.
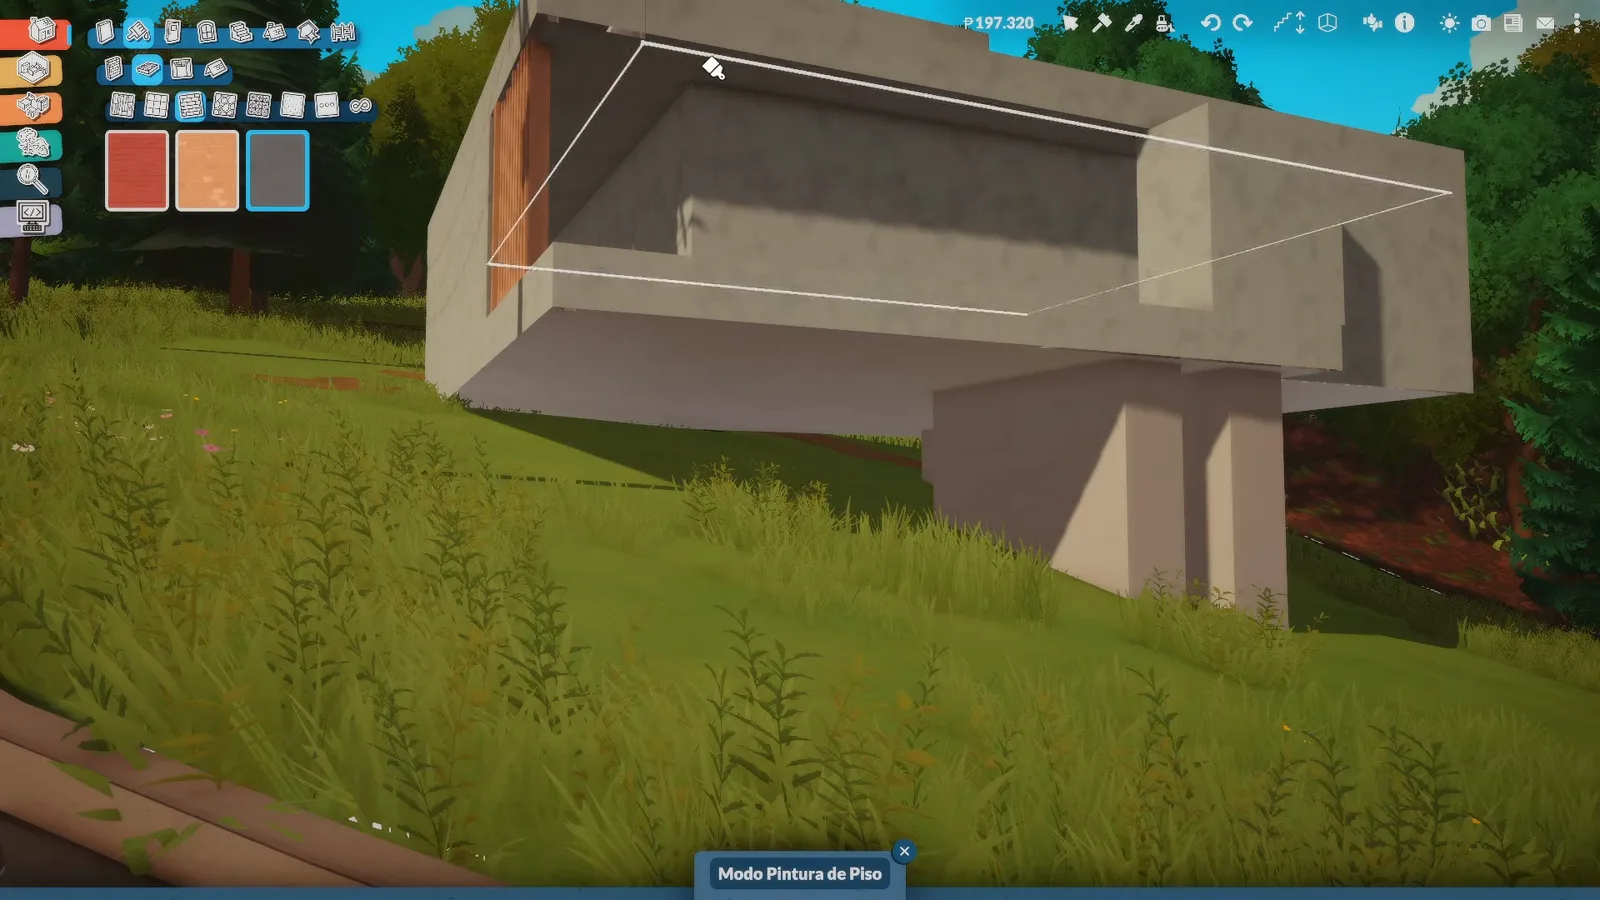
Floor paint mode reaching the overhang's lip.Watch at 3:20 - 7
Check the composition from the street
Drop to approach height before any furnishing: the upper box hovers on its supports and the whole downhill facade reads at once. A cantilever that looks daring from above can look clumsy from the road, and proportion fixes are cheap while the interior is still empty.
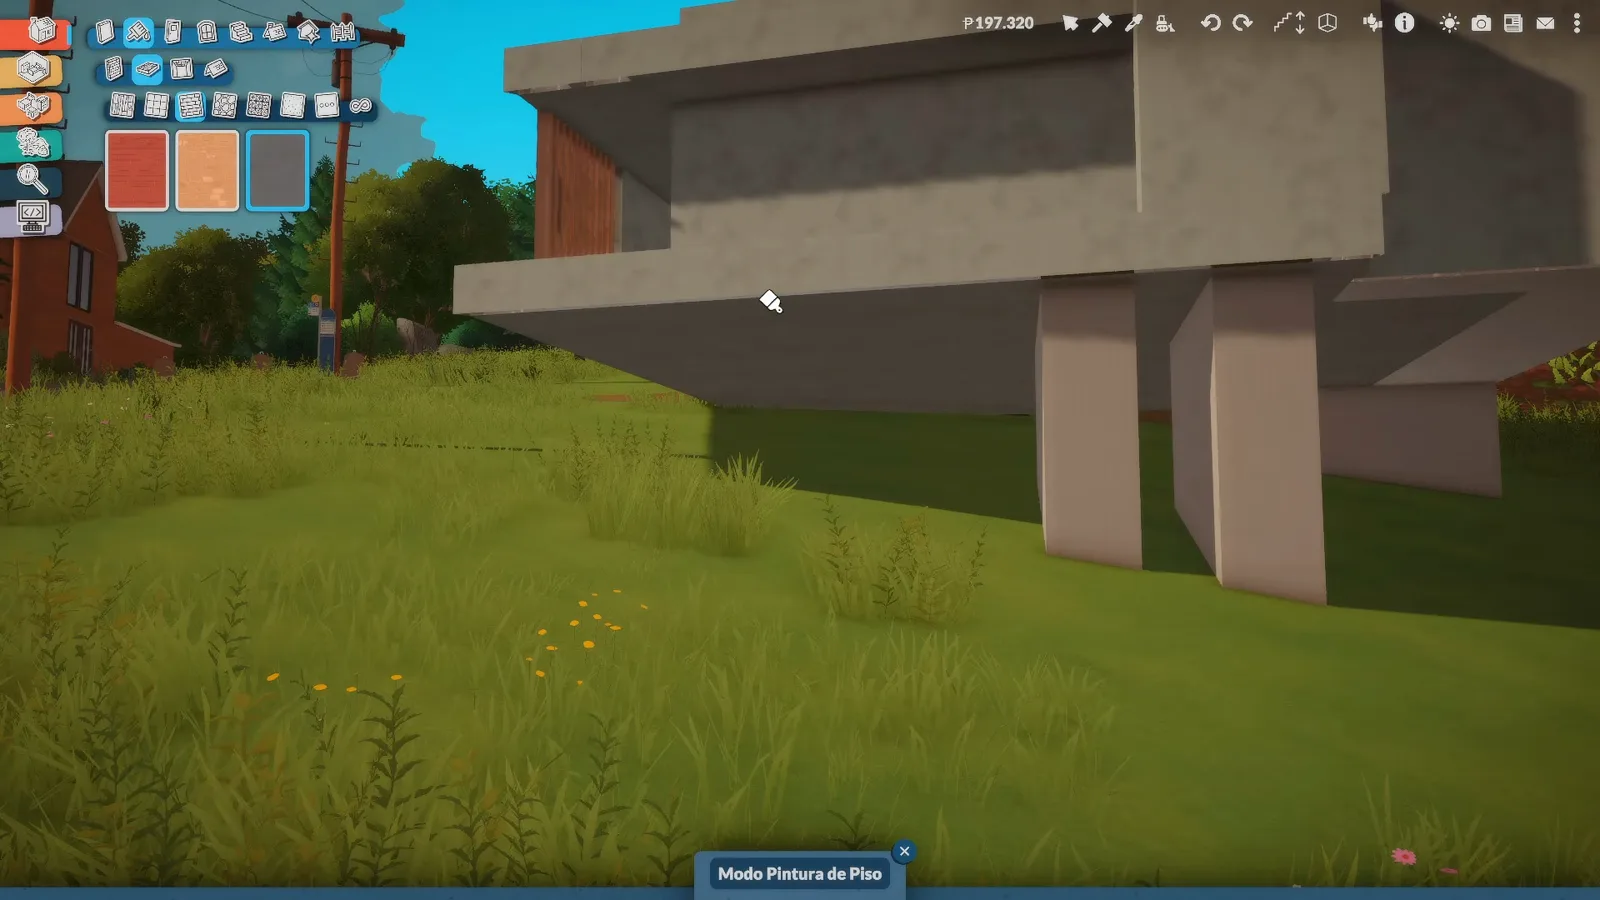
What a passer-by sees: supports, shadow gap, planting still to come.Watch at 3:24 - 8
Cut a terrace into the flat roof
The roof stays flat and a rectangle of it opens into a terrace with its own floor — the reddish infill in the frame. Up here the lot pays its rent: the view runs down the valley road, so keep the view side open and let planting spill over the parapet.
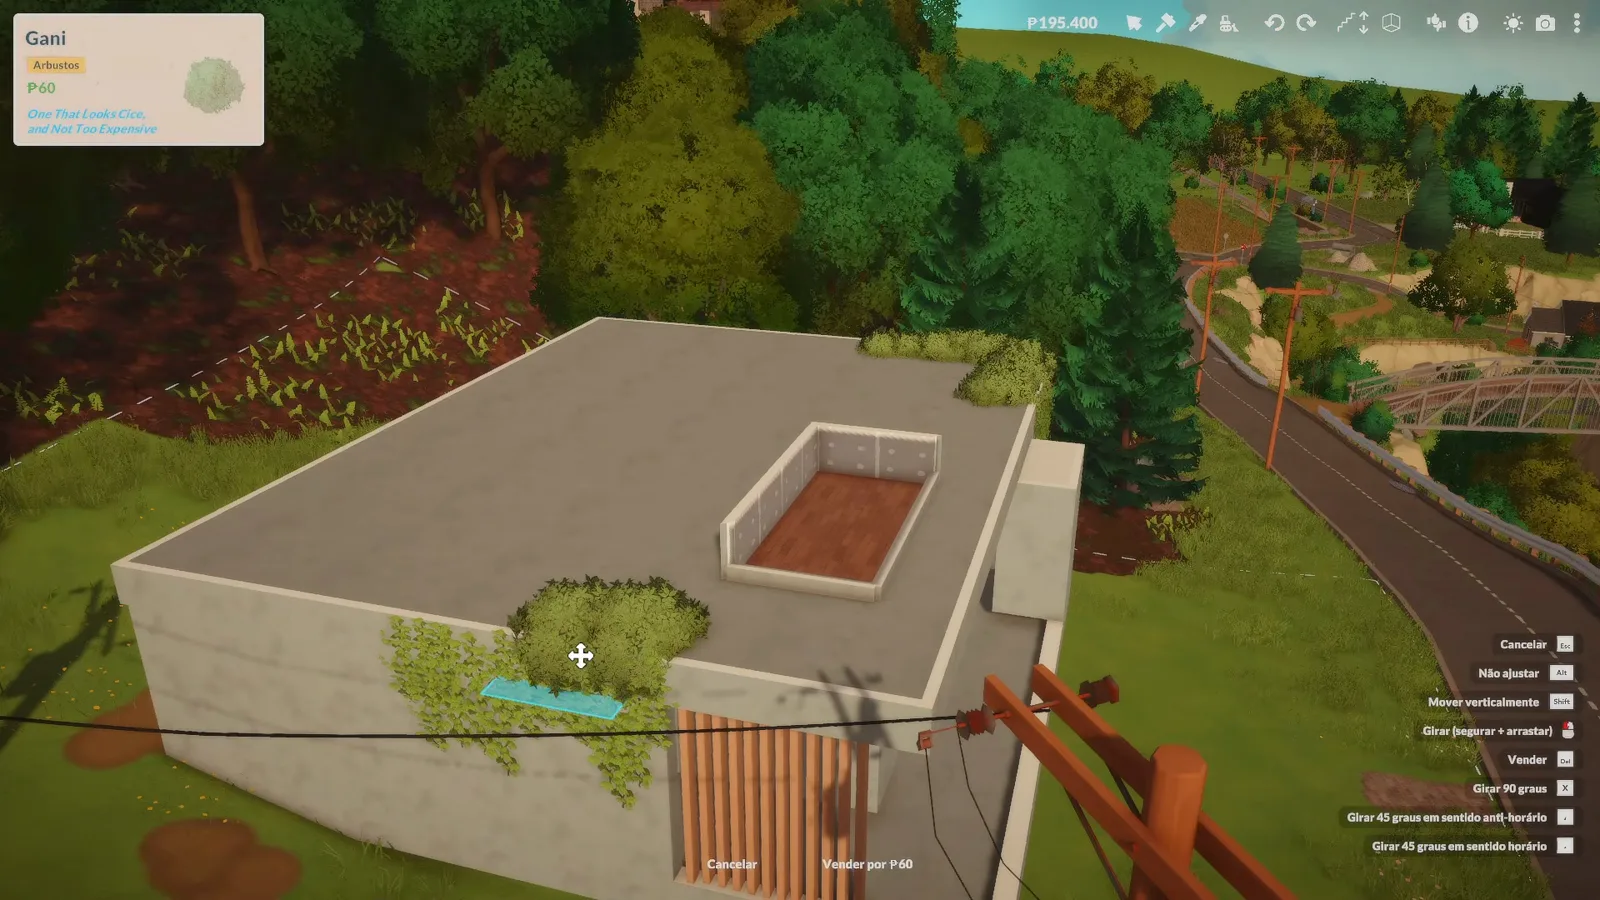
The roof opening frames the valley — the build's best view costs nothing.Watch at 5:00
Steps 9-11
Shape the hillside around the house
Only after the shell stands does the terrain get touched — and only where feet will land: the entry stairs, the boulders beside them, and the dirt path down the slope.
- 9
Level the ground at the entry stairs
Terrain work starts where feet actually land: a white brush circle from the terrain height tools flattens the dirt at the foot of the entry stairs so the steps meet sane ground. On a hill lot, sculpting after the shell stands is the right order — the house has already told you where the path must go.
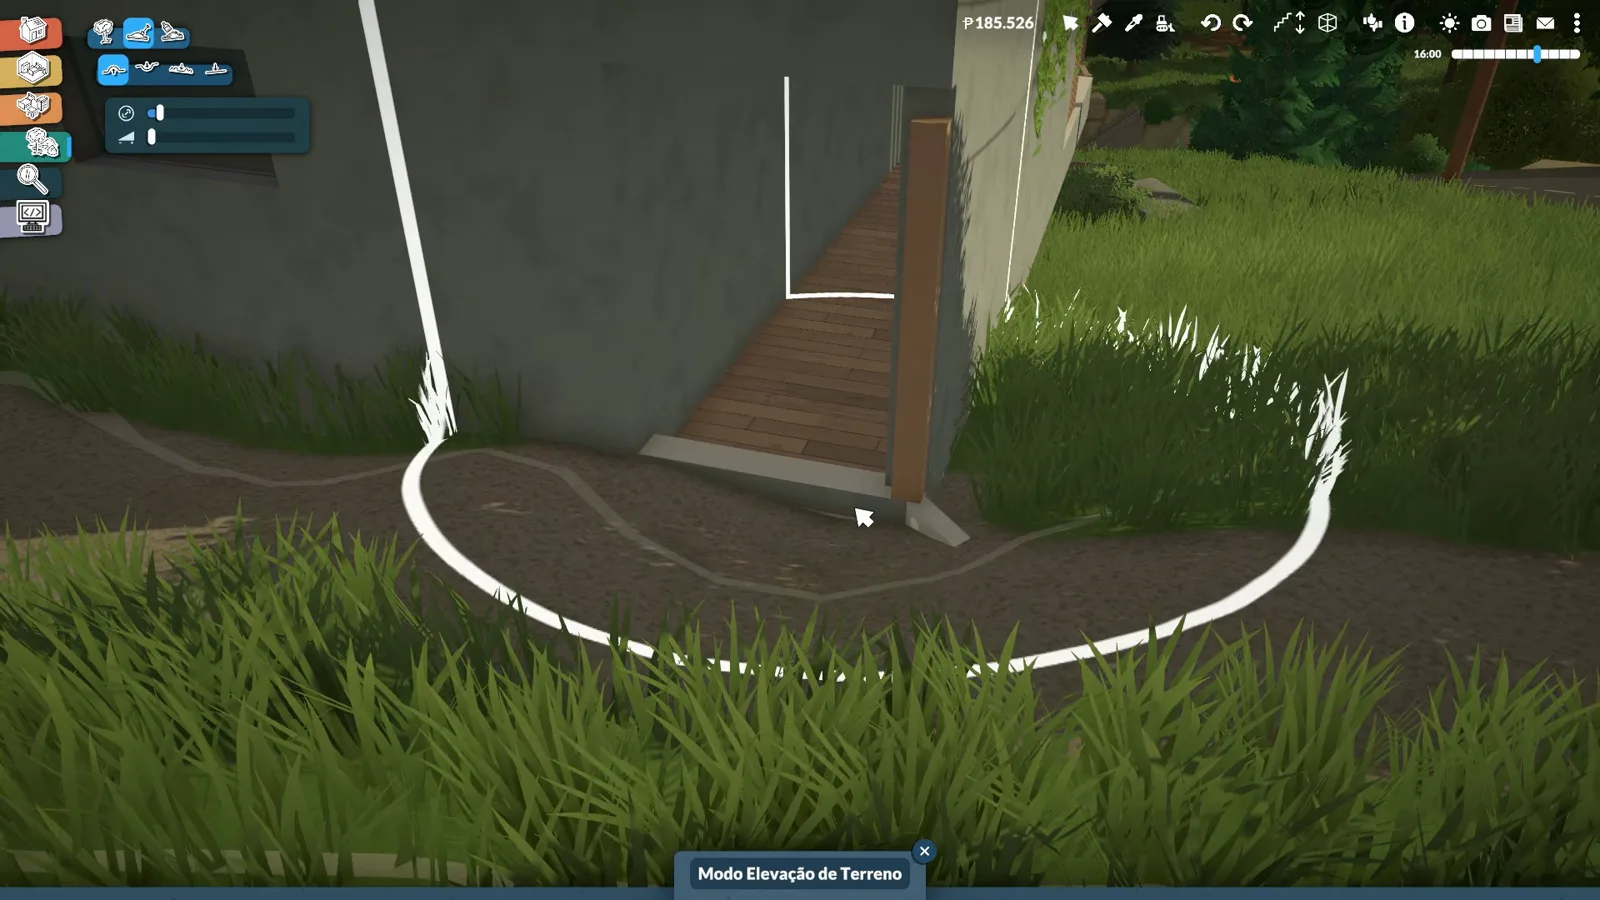
The terrain height tool working around the finished stairs.Watch at 7:00 - 10
Anchor the path with boulders
Boulders from the landscaping catalogue drop in along the climb, tilted into the slope with the rotate gizmo so they read as native rock instead of decoration. On a hill lot the stones do double duty — they break the sightline down the path and hold the visual edge of the grade.
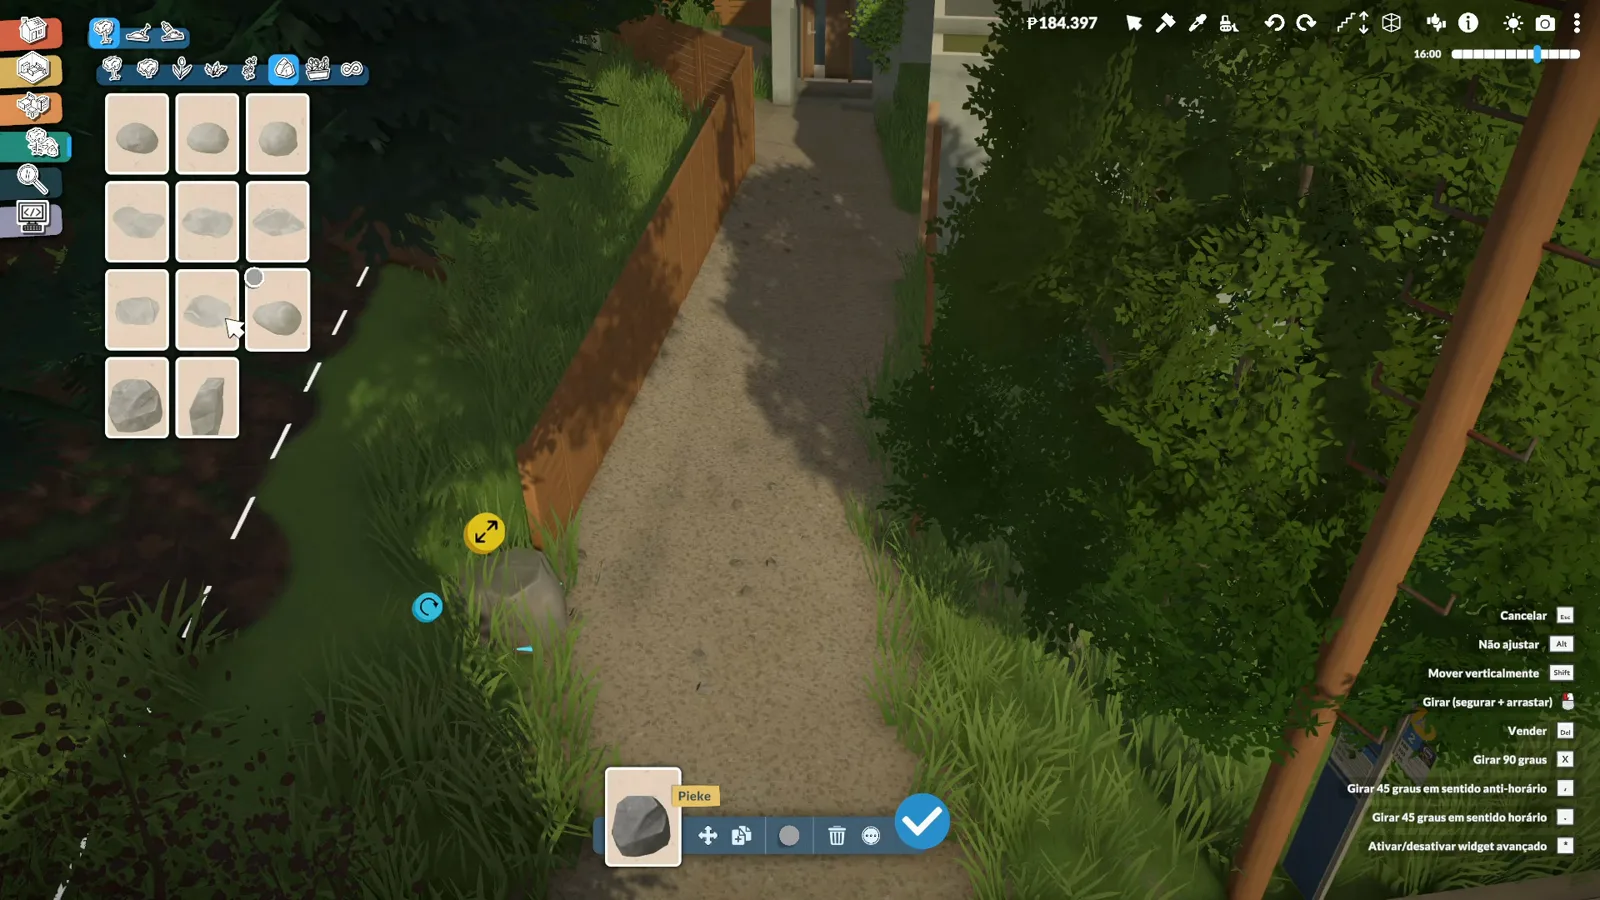
A rock, a rotation widget, and a path that looks like it was always there.Watch at 7:12 - 11
Paint the dirt path down the slope
Terrain paint mode lays the dirt swatch along the route the footsteps actually take, gate to stairs. Painting comes after sculpting so the texture hugs the final contours — and a worn dirt line is what makes the same lot read as a house on a hill rather than a house on a bump.
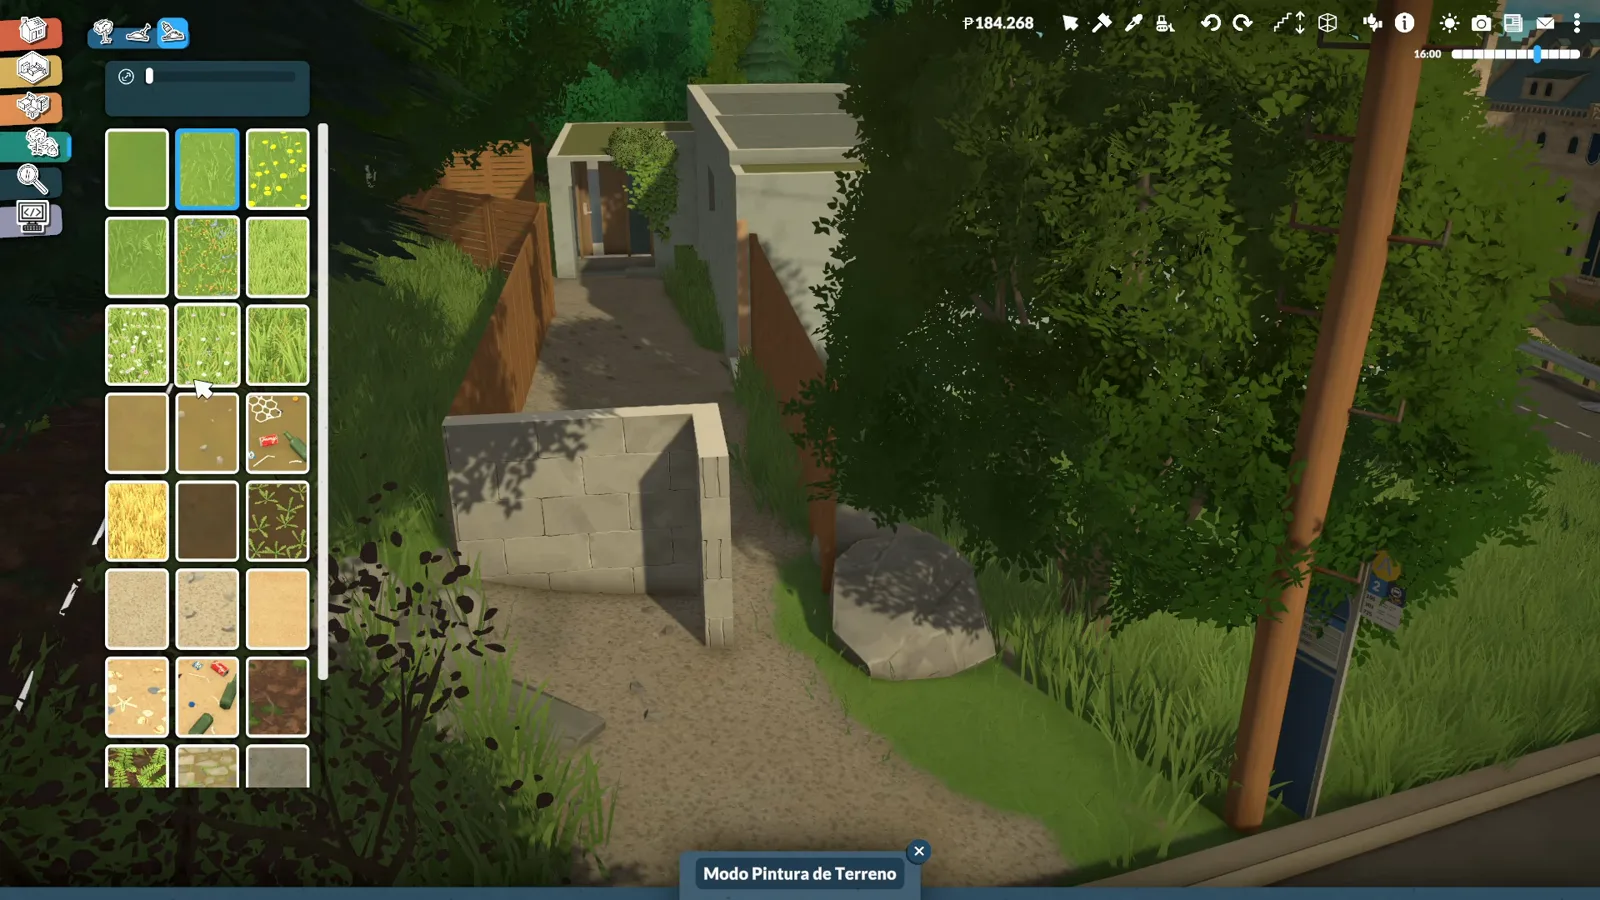
The dirt swatch following the graded approach.Watch at 7:48
Steps 12-14
Close the edges and light the night
Railings seal the high decks, path lamps mark the climb, and a last pass after dark turns the terrace into the build's beauty shot.
- 12
Light the climb before dark
Low path lamps from the outdoor lighting catalogue run along the fence beside the walk, spaced so their pools of light overlap. On a hill lot the lighting is wayfinding: the lamps mark every change of grade long before a player notices one in the dark.
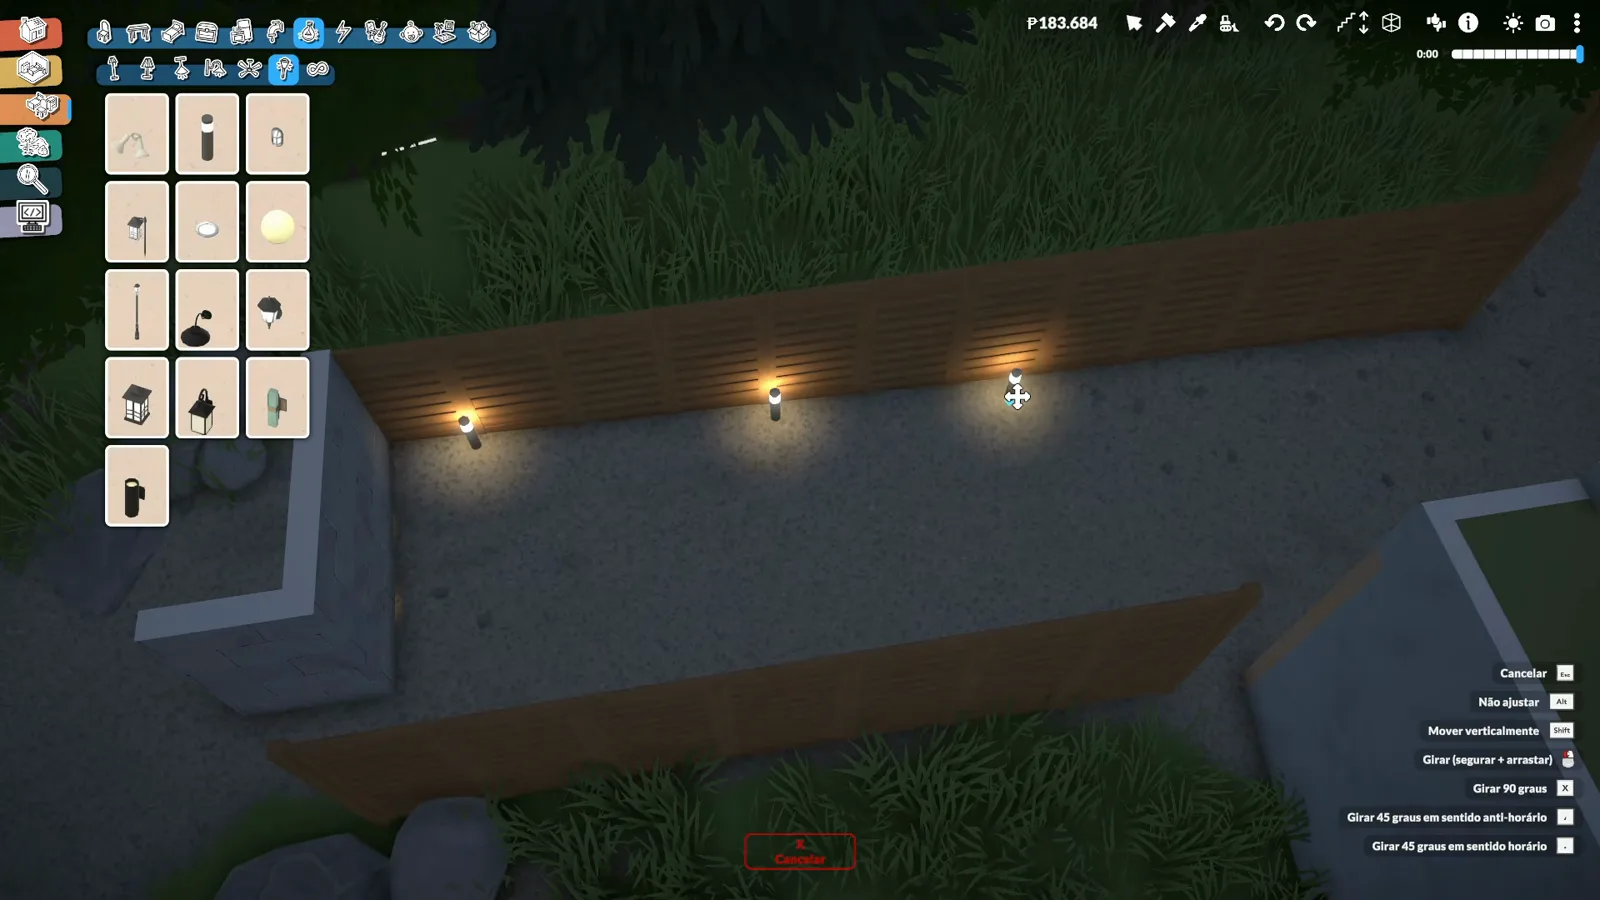
Three lamps, one message: the walk is safe to the door.Watch at 8:00 - 13
Close the deck edge with posts and glass
The upper deck takes slim posts from the column catalogue and a glass panel right at the edge — a wind break that does not steal the view. On any curved edge, remember the fact-source's limit: fences cannot curve, but half walls can, so a half wall is the closer on rounded terraces.
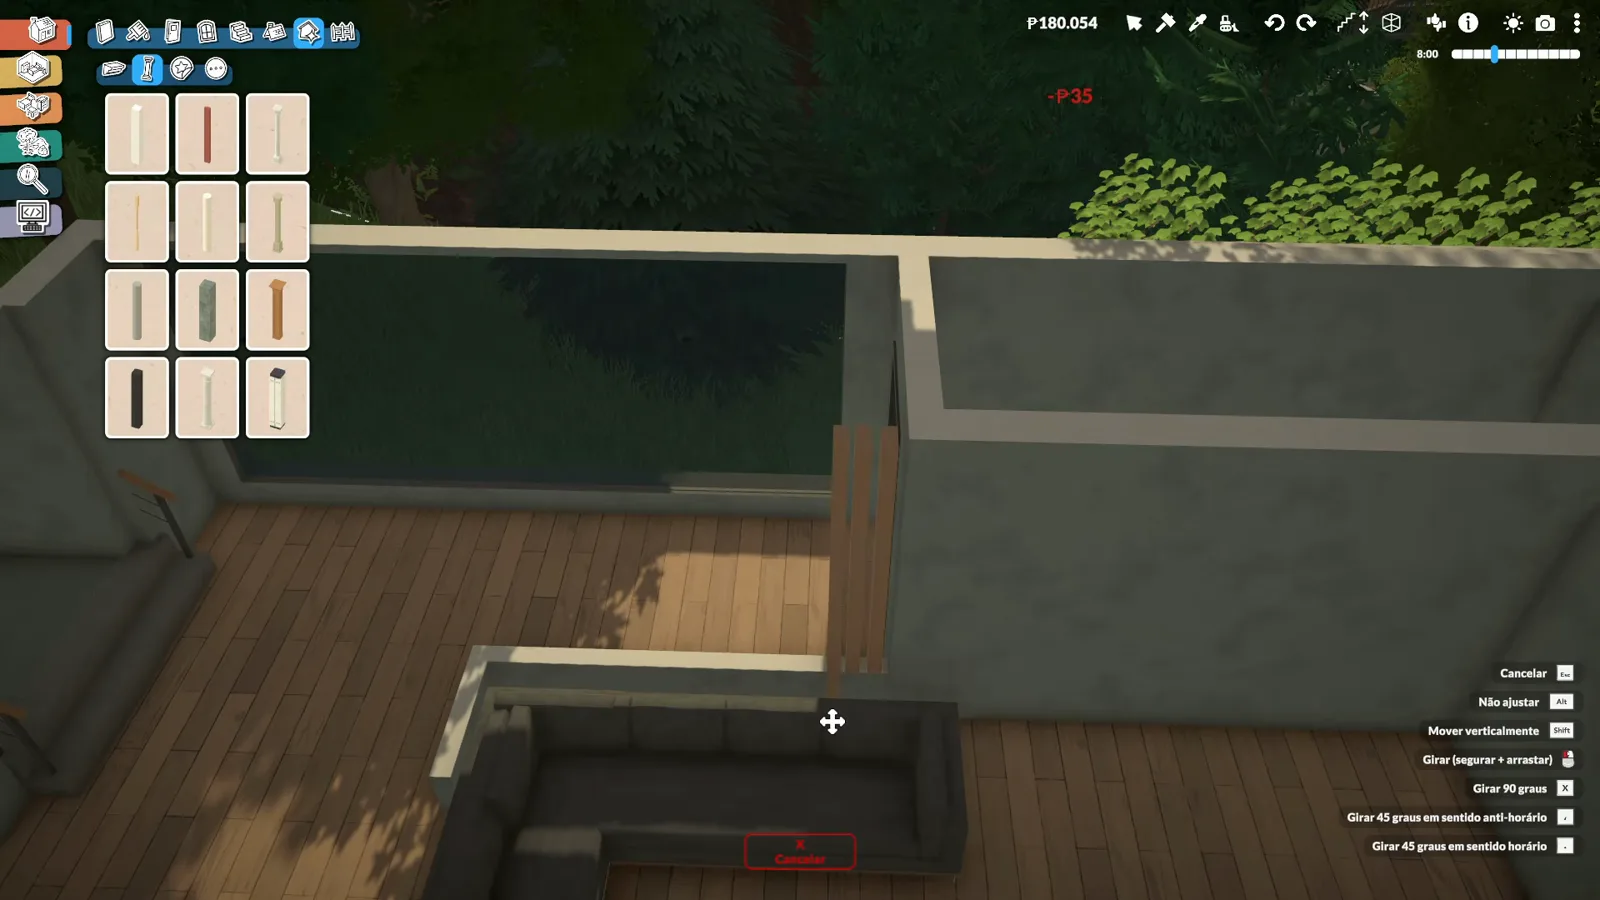
Posts, one glass panel, and the view stays wide open.Watch at 9:28 - 14
Furnish the night terrace
The last pass happens after dark: outdoor chairs and an egg chair land around a table strung with glowing globe lights, and the lit terrace becomes the build's beauty shot. Warm light against raw concrete is the hill-house mood — light the terrace last, once you know where you actually want to sit.
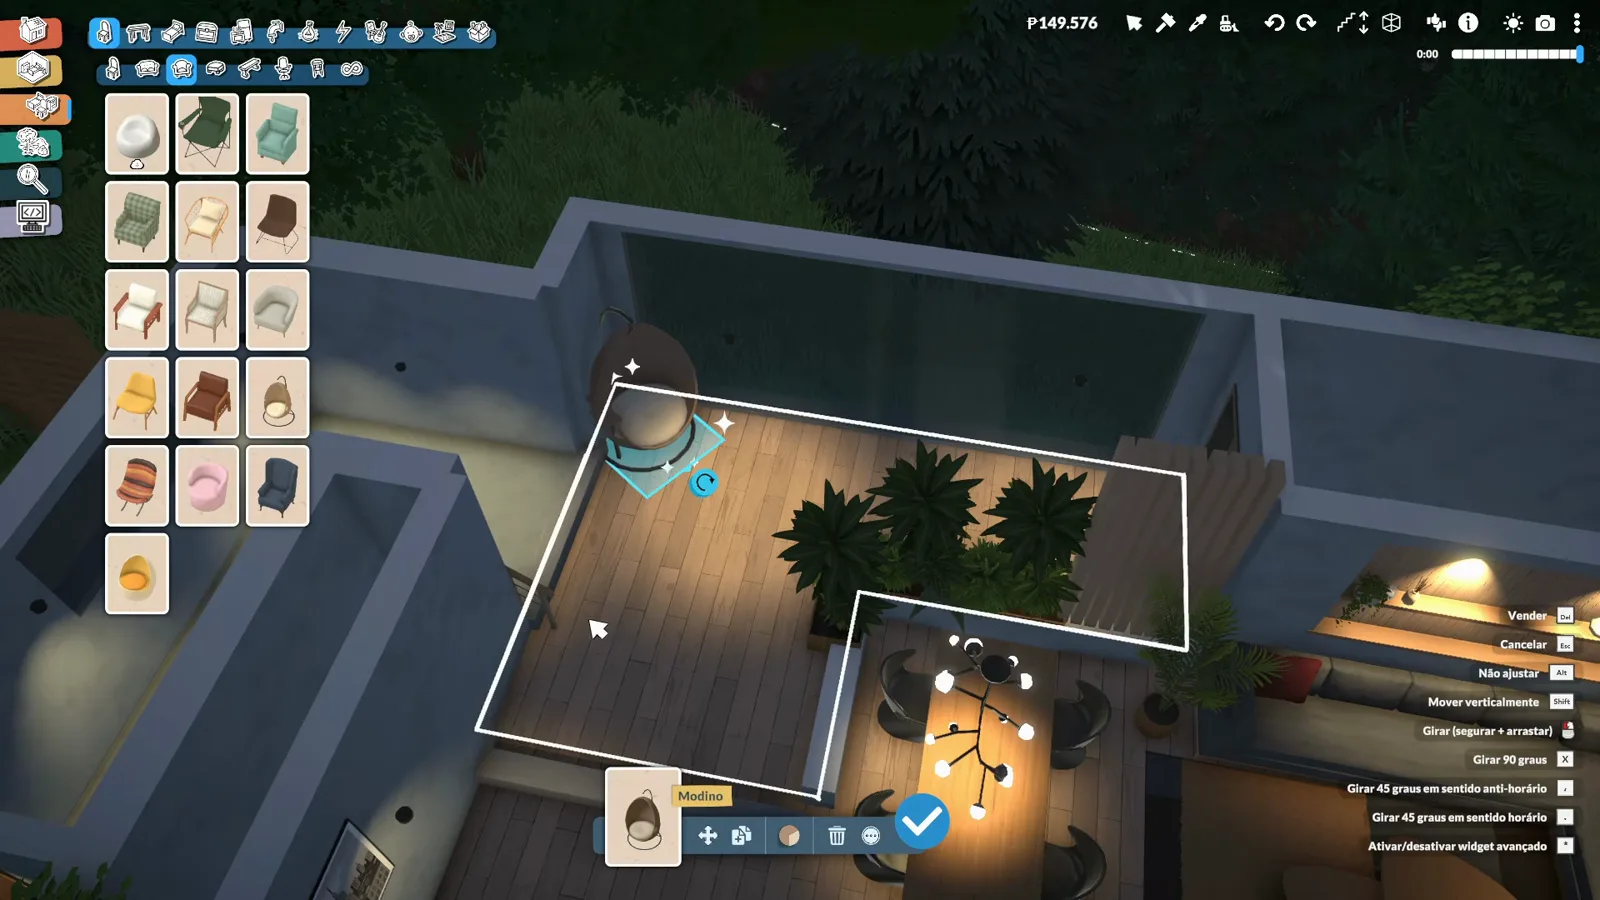
Chairs, an egg chair and globe lights — the deck becomes the best room of the house.Watch at 18:28
What the sources do not settle
Live mode: neither video plays the finished hill house, so how a Para actually paths the terrain-and-stairs entry — and whether the terrain brush fights the stairs' snap — is unverified on this page.
The lot itself: the hill lot's price, and whether this slope is a preset feature of the map or sculpted in an earlier pass, are never shown in the footage.
The only live-mode data point in either video comes from the narrated build: a shower pushed down into the floor with the advanced transform tool was unusable until the storey's wall height rose one unit. Watch headroom, not the slope, on split entries.
Hill house FAQ
- Can you build on a hill or sloped land in Paralives?
- Yes, two ways. Sculpt the lot flat with the terrain tools before walls — the conventional route — or do what this walkthrough does: set a flat floor plate across the slope, raise walls straight on top of it, and let the house bridge the grade. The build here never digs; it platforms.
- How do I raise or flatten terrain for a house?
- Open the terrain tools from the landscaping side of build mode and use the raise, lower, smooth and flatten brushes with an adjustable circle. Flatten the footprint before walls if you go the conventional route — walls on uneven ground often refuse to connect. The terrain tools guide has the brush-by-brush version.
- What is the raised house trick in Paralives?
- Place floor plates, lift the assembly with the vertical arrows, then close the gap with pillars or foundation pieces so the entry lands where the slope allows. The platforms guide covers the refusal warning and bit-by-bit extension; the foundations guide covers raised entries with stairs.
- Do hill houses work in live mode?
- The source videos never play-test the finished hill house, so treat live mode as unverified on this page. The one related data point: a shower pushed into the floor with the advanced transform tool could not be used by a Para until the storey's wall height gained one unit — headroom, not slope, broke it.
- Can you put fences or windows on curved walls?
- Windows do not accept curved walls, and fences cannot curve either — both limits surfaced in the narrated curved-wall build credited below. The workaround on rounded terraces is a half wall, which does curve; straight runs take normal fences and the glass railing shown in step 13.
- Is a hill house more expensive to build?
- Nothing in the sources says so. Walls read their P$ price as you draw, exactly as on a flat lot, and neither video budgets differently for the slope. The real cost is plan time — cantilevers and split entries take more retries than a rectangle.
Related hill and terrain guides
Terrain tools
Sculpt, smooth and paint the lot itself — the brush reference behind steps 9-11.
Raised foundations
The conventional way to float a house, with steps up to the front door.
Split-level houses
When the slope crosses the middle of the plan instead of the whole lot.
Floor platforms
Lifted plates, the refusal warning and stair snaps — the mechanics behind steps 1-4.
Modern house on flat land
The same concrete look with none of the grading — compare against this hill build.