
The short version
Saving and sharing a Paralives house is one loop: save the lot into the in-game Lot Library, dress up its listing, upload. The Workshop page is created for you.
- Zoom out until the green house icon appears over your lot, then choose Save lot to the library from the household panel.
- The in-game catalogue is the Lot Library — Paralives' answer to The Sims' Gallery. Everything saved or subscribed lives there.
- Cover images must be under 1 MB; you set one through the game's own Choose a cover image picker.
- The game calls your saved house a mod — Mod name, Mod description. It's wording, not a script mod.
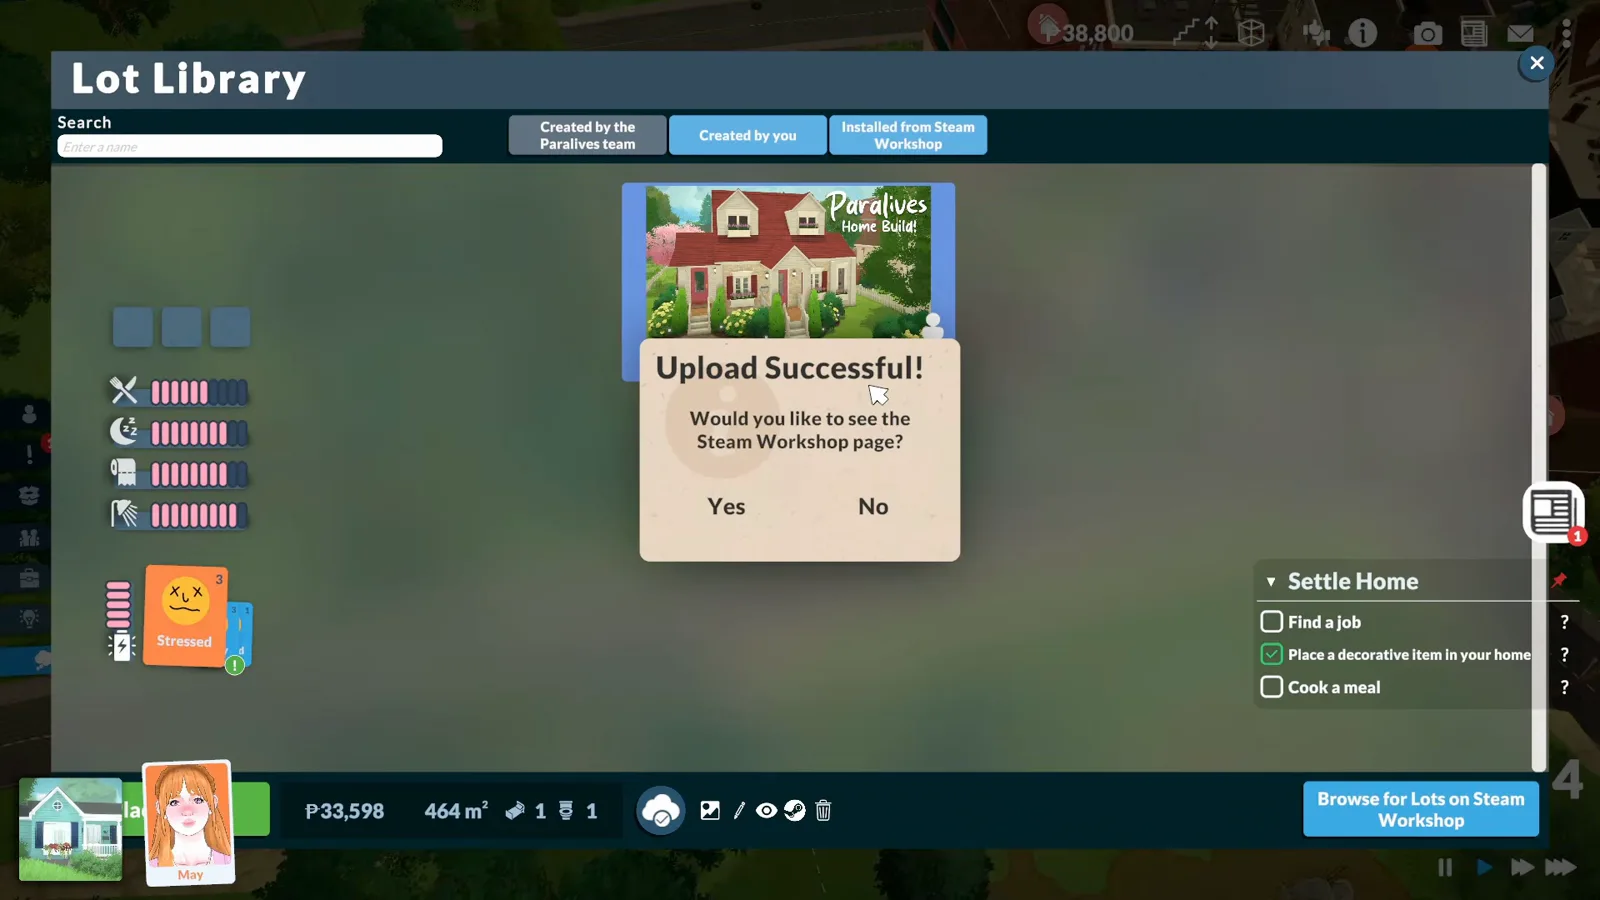
- Uploading runs from the same library: cloud icon, a short progress box, then Upload Successful! offers the Workshop page.
- Subscribers receive the house automatically; the Steam page carries your cover, description and extra photos.
Steps 1–3
Save it to the Lot Library
Uploading starts at home: the lot has to exist in your library before the Workshop ever sees it.
- 1
Shrink the view and find the green icon
Zoom out until a green house icon appears over your lot. On the household panel — beside Sell this lot for and You own this lot — hover the icon row and click Save lot to the library.
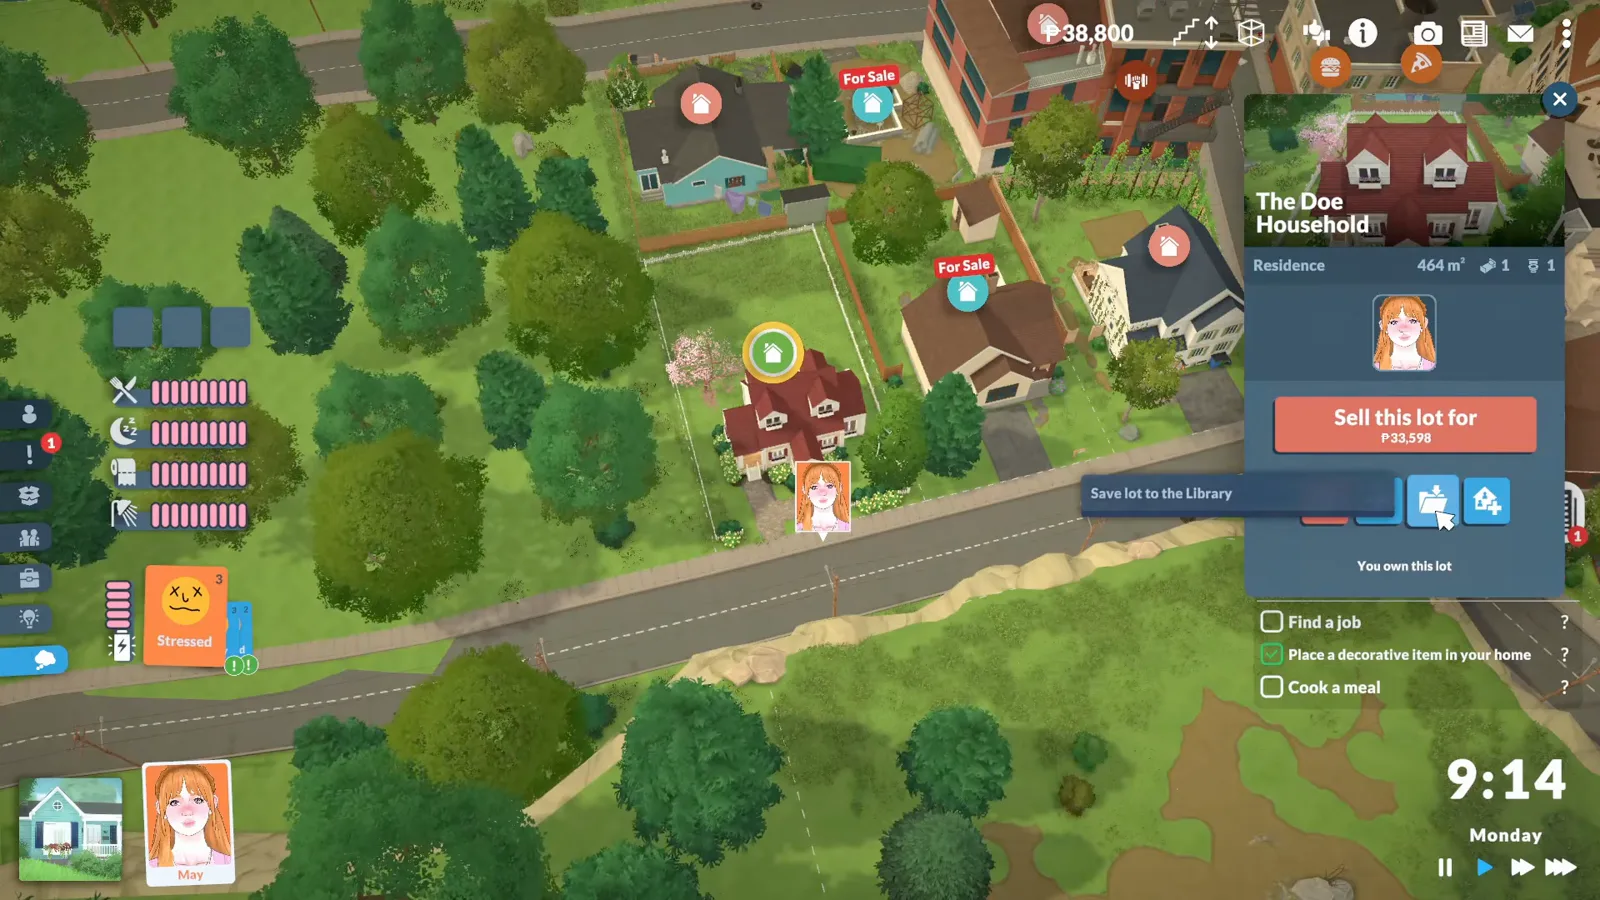
The household panel is where the sharing workflow begins.Watch at 1:12 - 2
Name your lot
The Enter a name for your new lot dialog opens with a Lot name field. The name becomes the Workshop listing title later, so name it like a Workshop item rather than a save file.
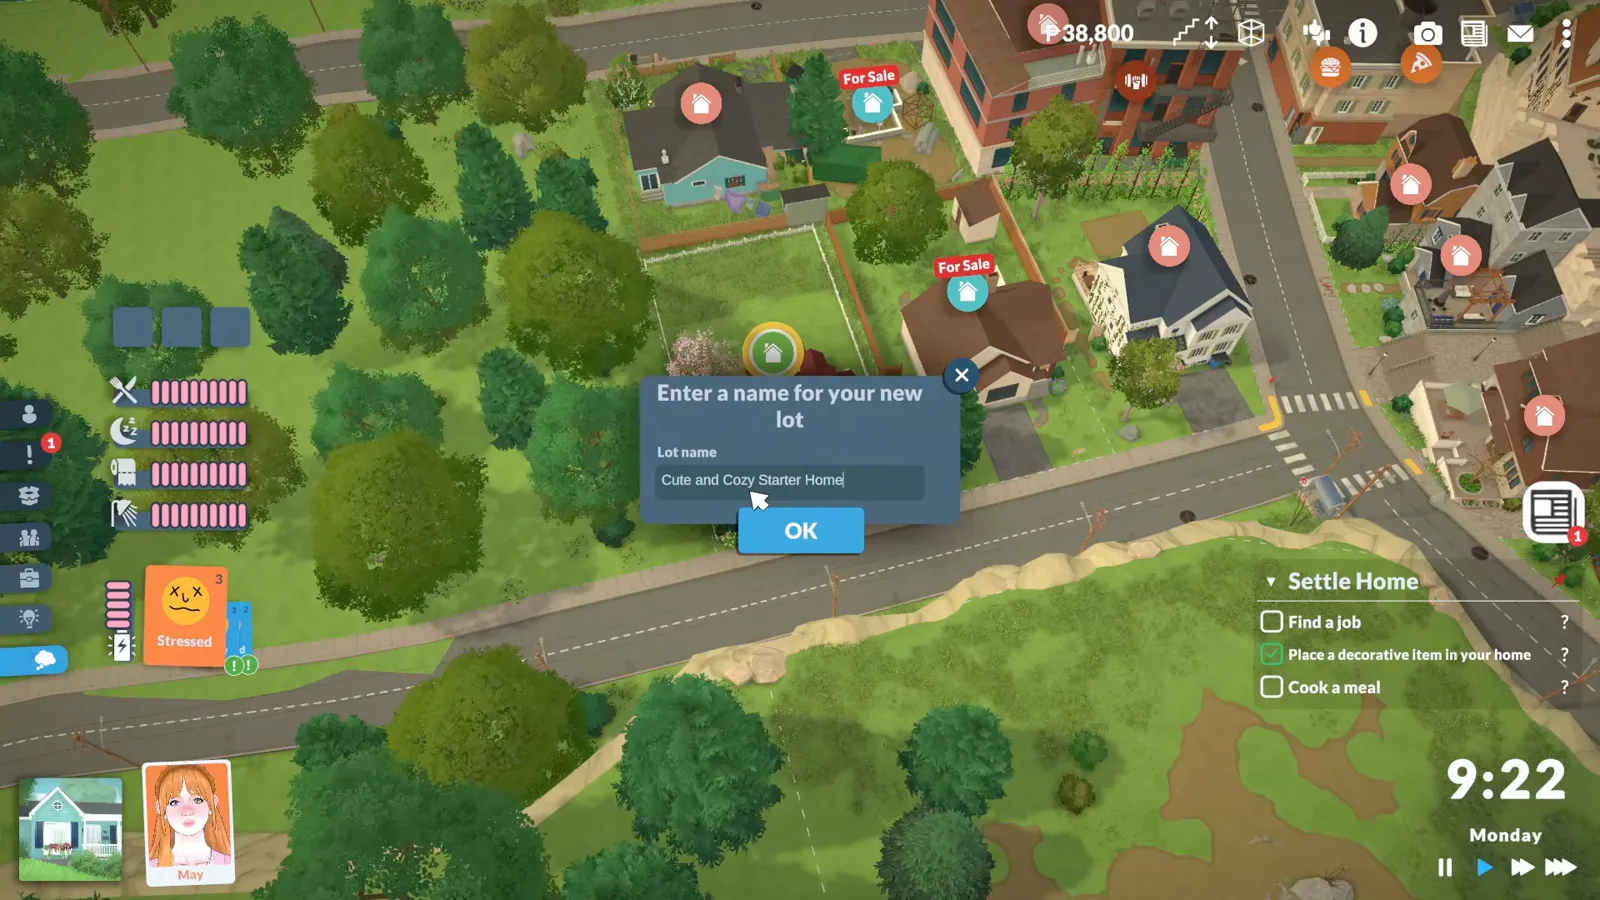
Cute and Cozy Starter Home later became the Workshop title.Watch at 1:24 - 3
Meet the Lot Library
The Lot Library opens as a full-screen grid. Out of the box it shows the Paralives team's prebuilt lots — floor plans, the community centre — plus anything you save. This is the in-game catalogue Sims players know as the Gallery.
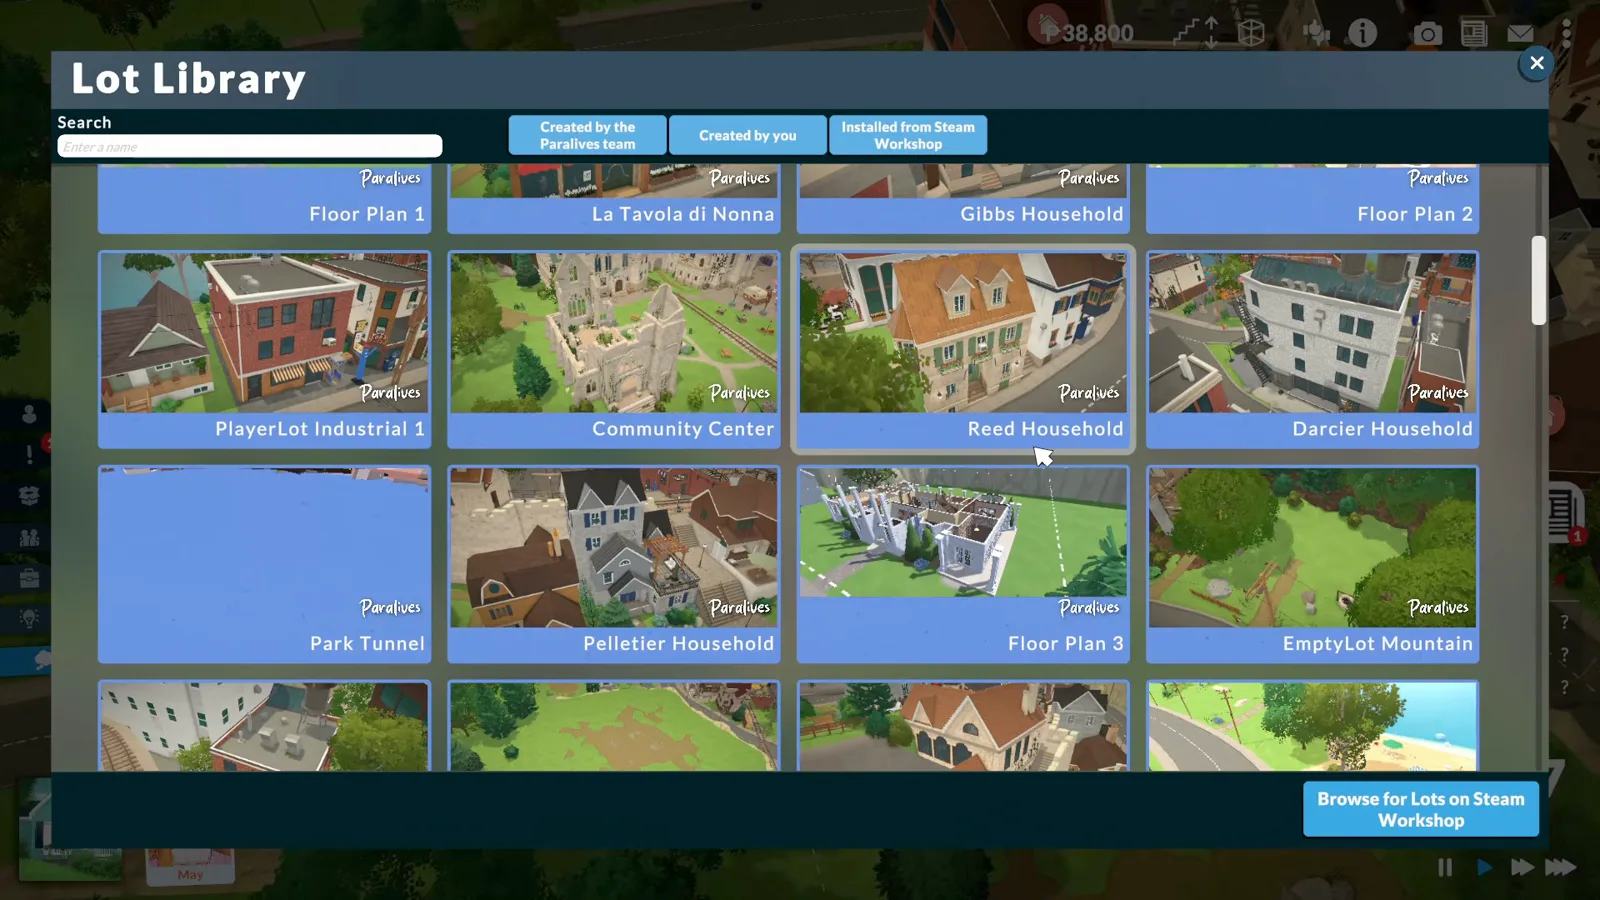
Prebuilt Paralives team lots fill the grid until you filter them.Watch at 1:47
Steps 4–5
Find your lot again
The library mixes the Paralives team's prebuilt lots with everything you save — two filters and a bottom bar do the bookkeeping.
- 4
Filter down to your builds
Three chips sit at the top: Created by the Paralives team, Created by you and Installed from Steam Workshop. Uncheck the first and only your own saves remain.
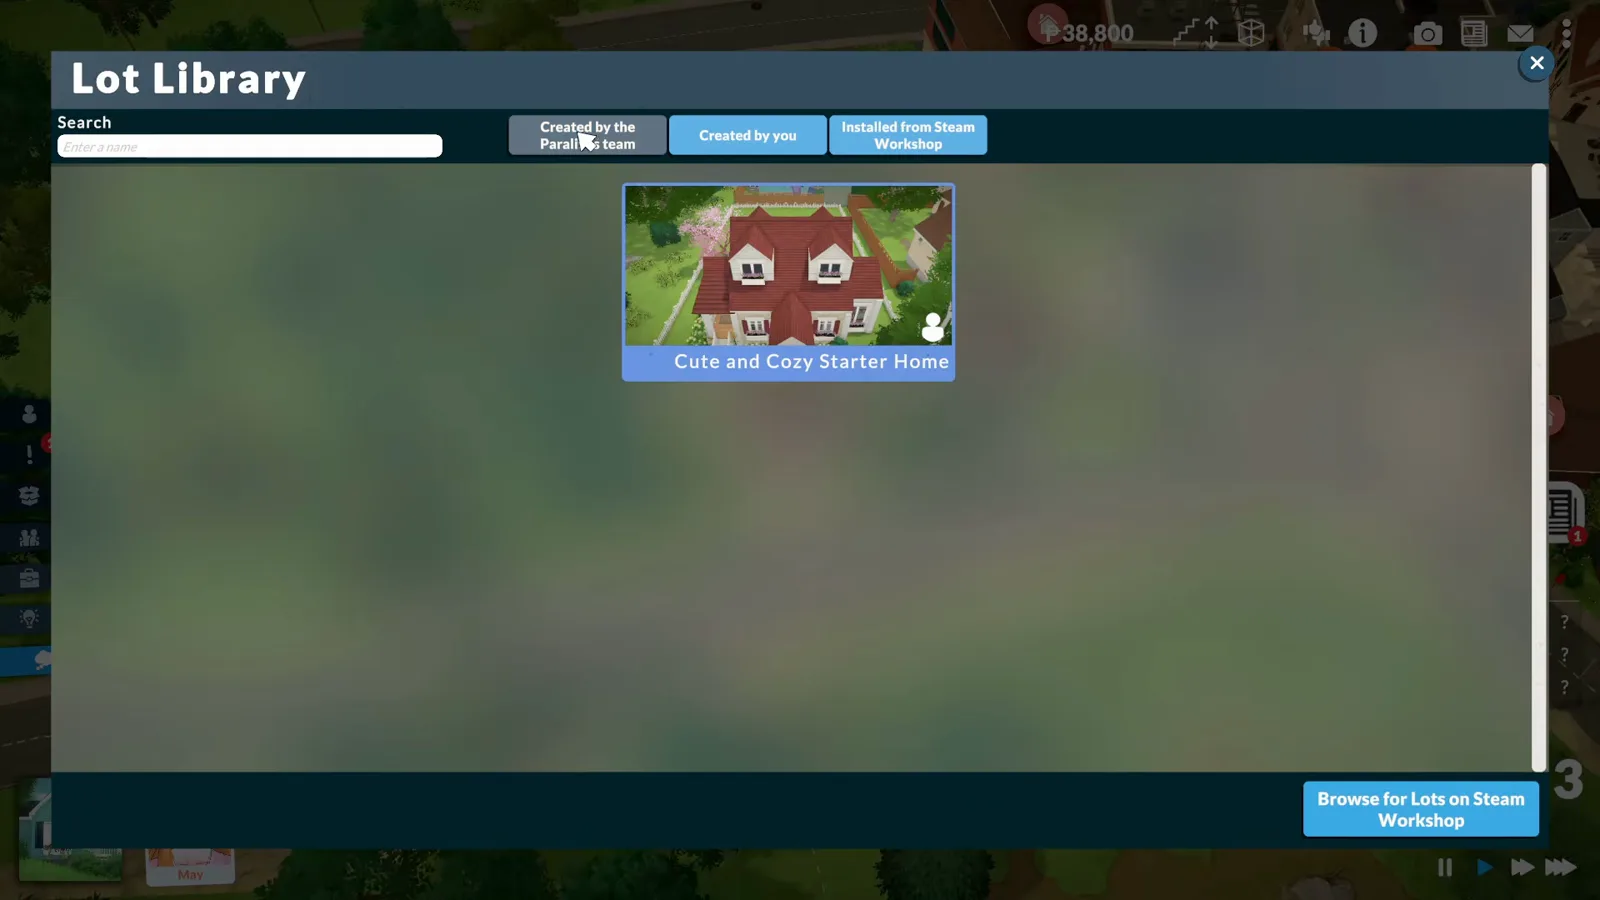
One unchecked chip, one lonely, beloved lot.Watch at 2:26 - 5
Read the bottom bar
Select your lot and a bar appears: Place on lot, the Paradimes price, the area, bedrooms and bathrooms, and four icons — upload (cloud), cover image (photo), edit information (pencil) and delete (bin).
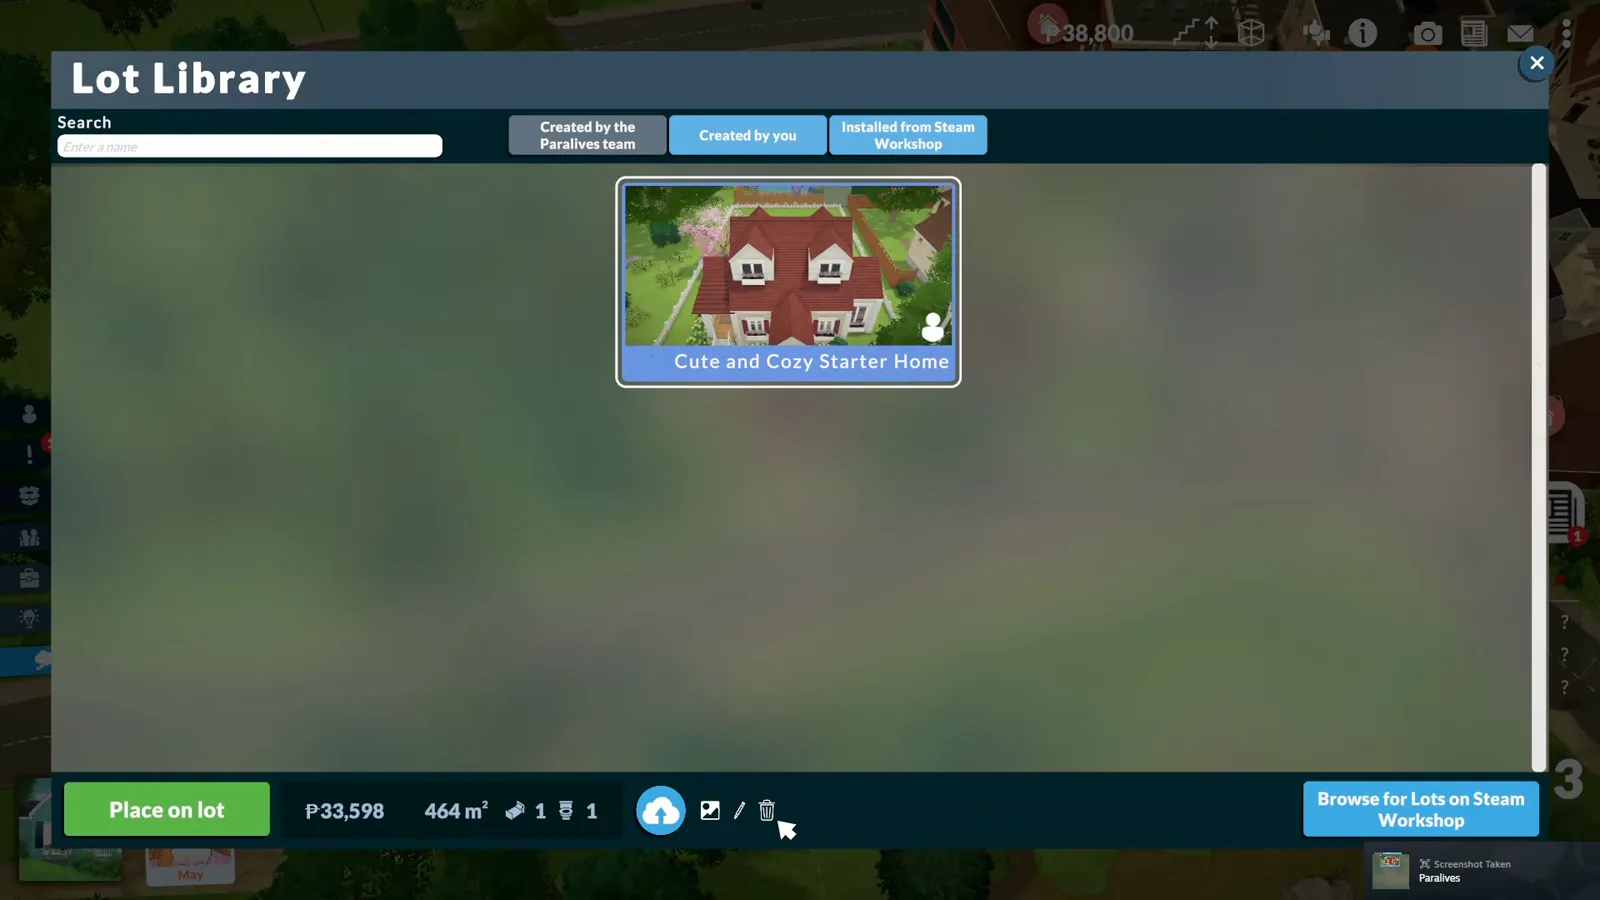
Everything the Workshop listing needs is one of these four icons.Watch at 2:41
Steps 6–9
Dress it up and ship it
A cover image, a name and a description turn a saved lot into a Workshop listing; one cloud icon then publishes it.
- 6
Set a cover image under 1 MB
The photo icon opens a Choose a cover image file browser — Desktop, Downloads, Photo Mode Pictures and the rest. Covers must be under 1 MB; the creator in the video pre-crops hers into Downloads because nailing the angle in-game is the slow part.
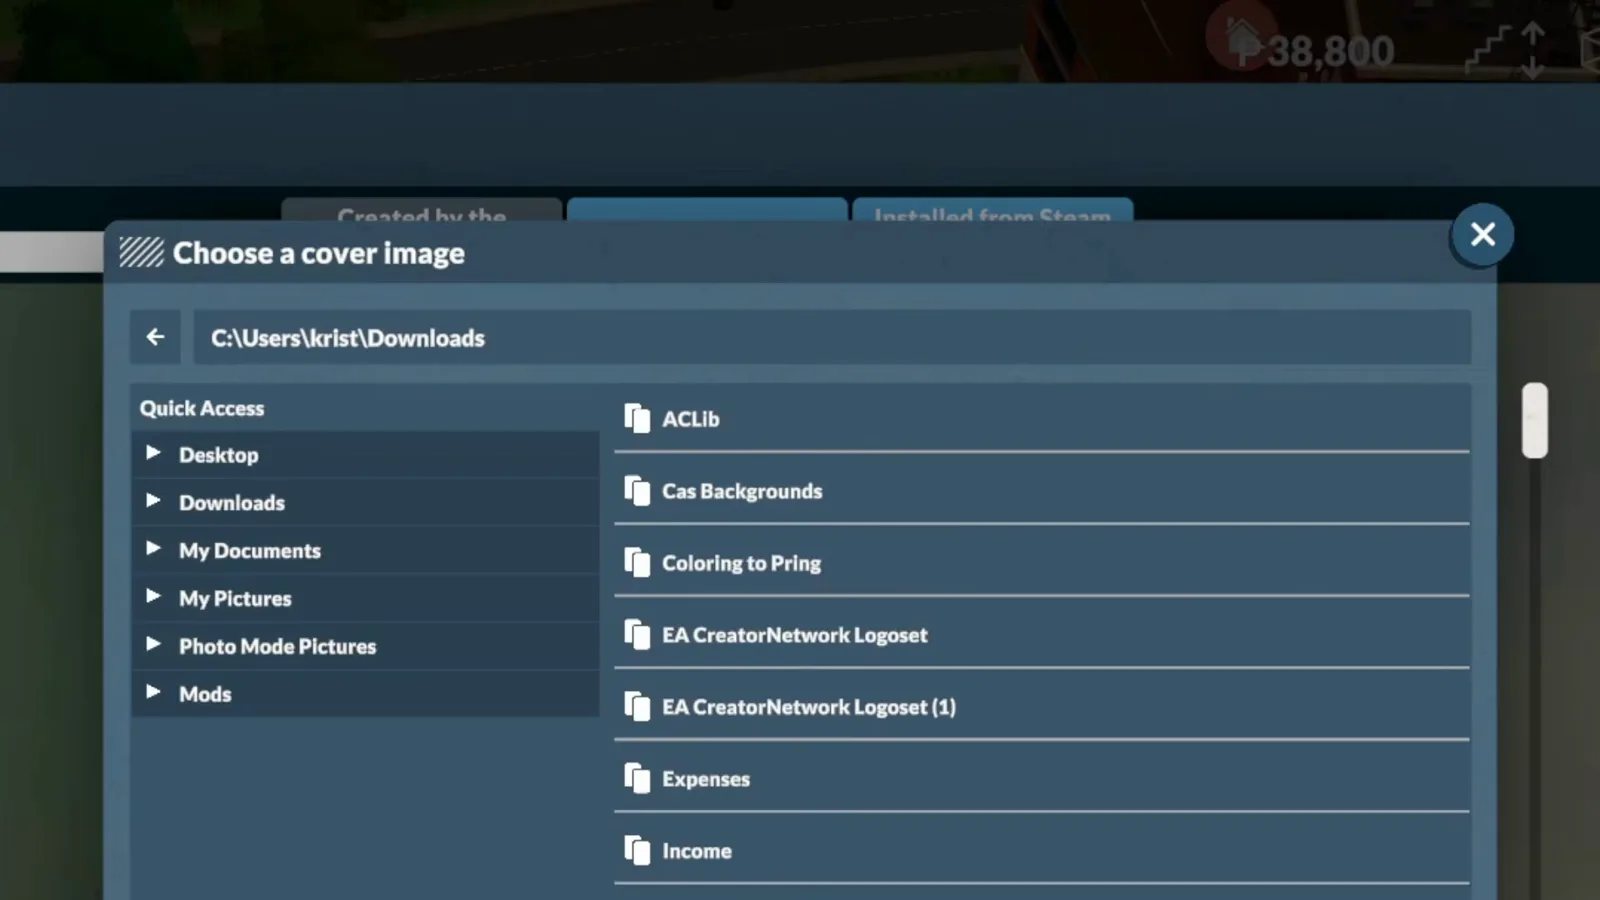
Pick the shot before you open the picker.Watch at 3:02 - 7
Write the listing in Edit Information
The pencil icon opens Edit Information with Mod name and Mod description fields. The game's own wording calls your house a mod — fill both so Workshop browsers know what they are downloading.
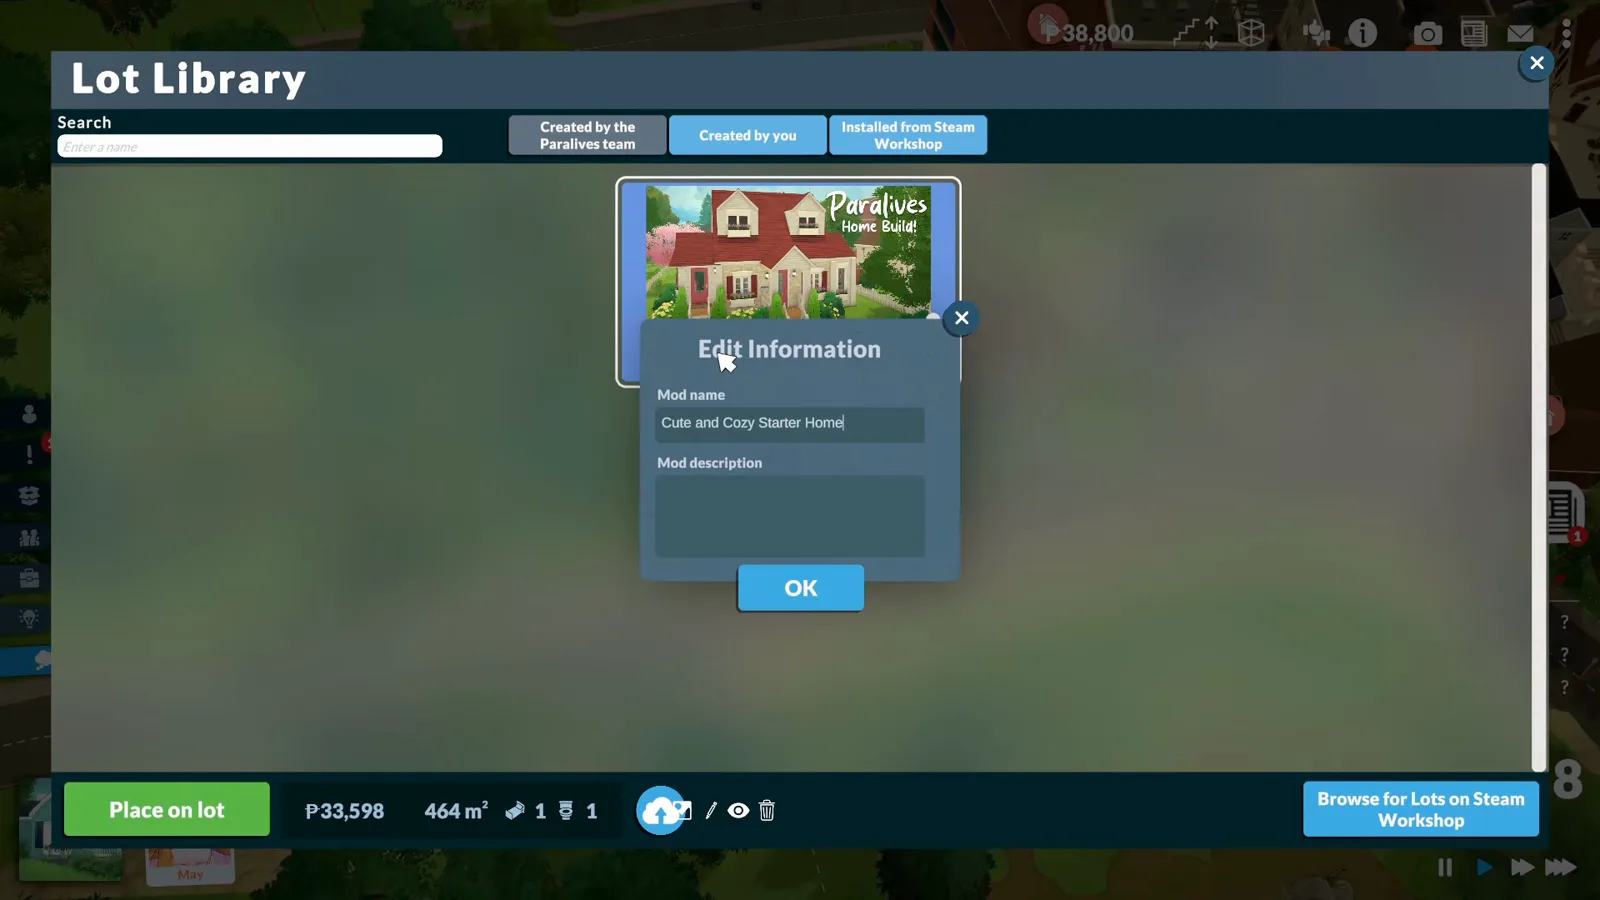
Mod name and Mod description are the game's wording, not a new category.Watch at 3:47 - 8
Upload to the Steam Workshop
The cloud icon sends the lot up. An Uploading progress box runs for roughly fifteen seconds on a starter home, then Upload Successful! asks whether to open the Steam Workshop page.
Yes opens the listing; No leaves it live all the same.Watch at 4:28 - 9
Check your live listing
The Steam page shows your cover, description, file size, posting date and change notes, with owner controls on the right to edit the title, add images and videos, or change visibility.
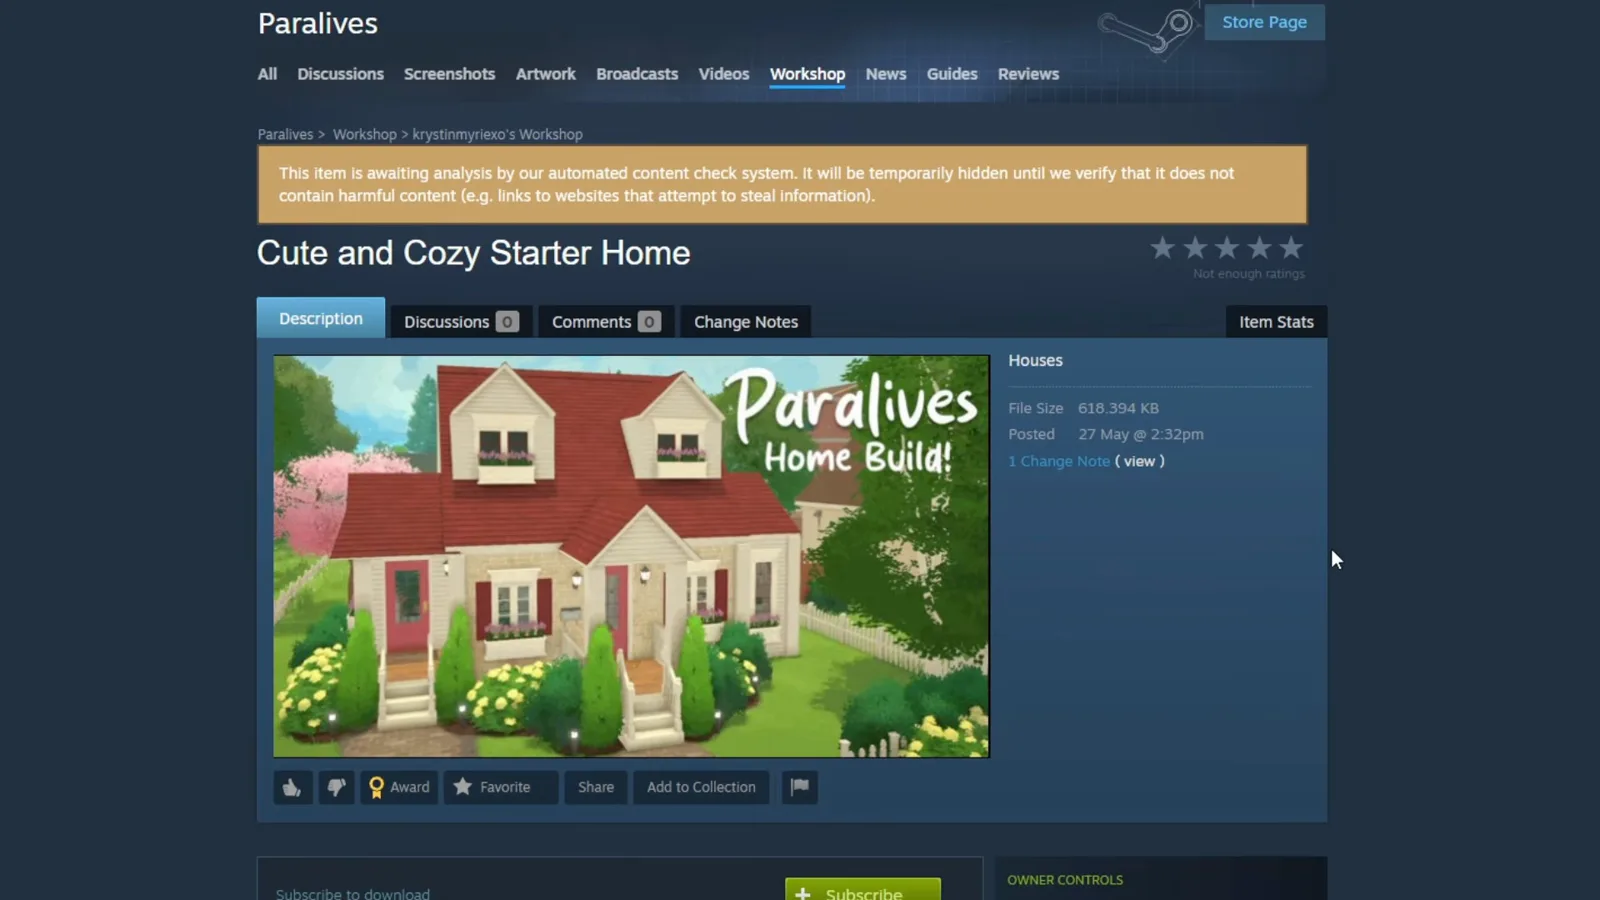
The listing Steam built for you — cover, description and stats included.Watch at 4:37
Steps 10–12
After the upload
The same library handles the traffic in both directions — browsing other lots, receiving downloads and removing what you no longer want.
- 10
See the Workshop the way buyers do
Browse for Lots on Steam Workshop opens the Workshop inside the game's flow. Filters split Modpacks, Households and Houses — your lot now sits among them.
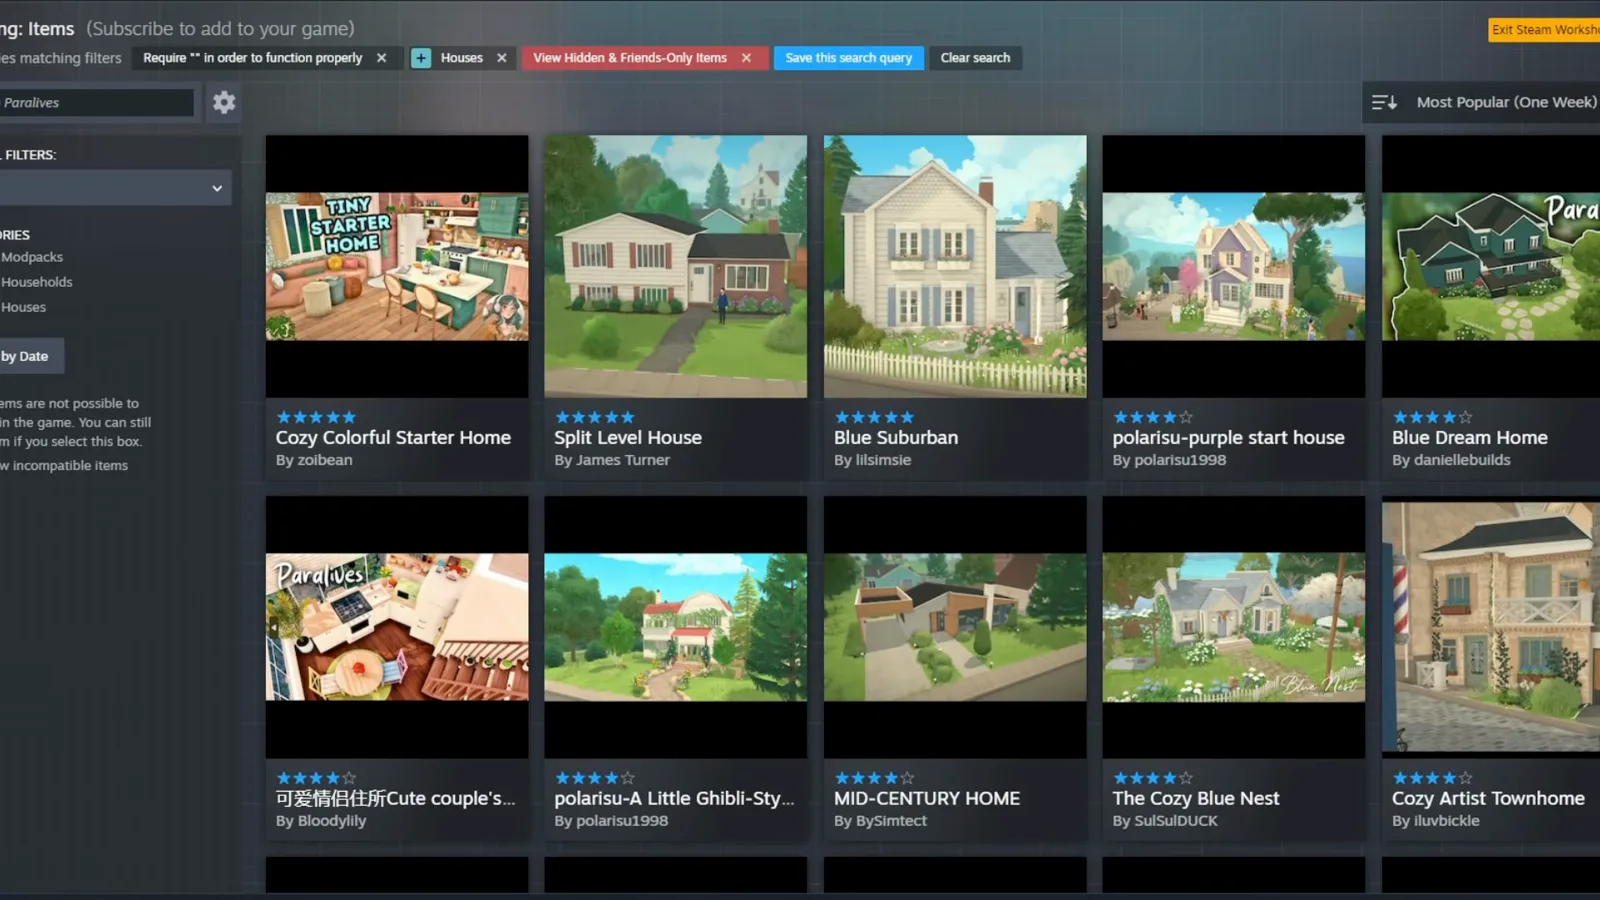
Your listing now competes on this shelf.Watch at 5:24 - 11
Where subscribers' downloads land
Anything a player subscribes to appears in their Lot Library automatically, marked with a cloud icon under Installed from Steam Workshop — no manual import step exists or is needed.
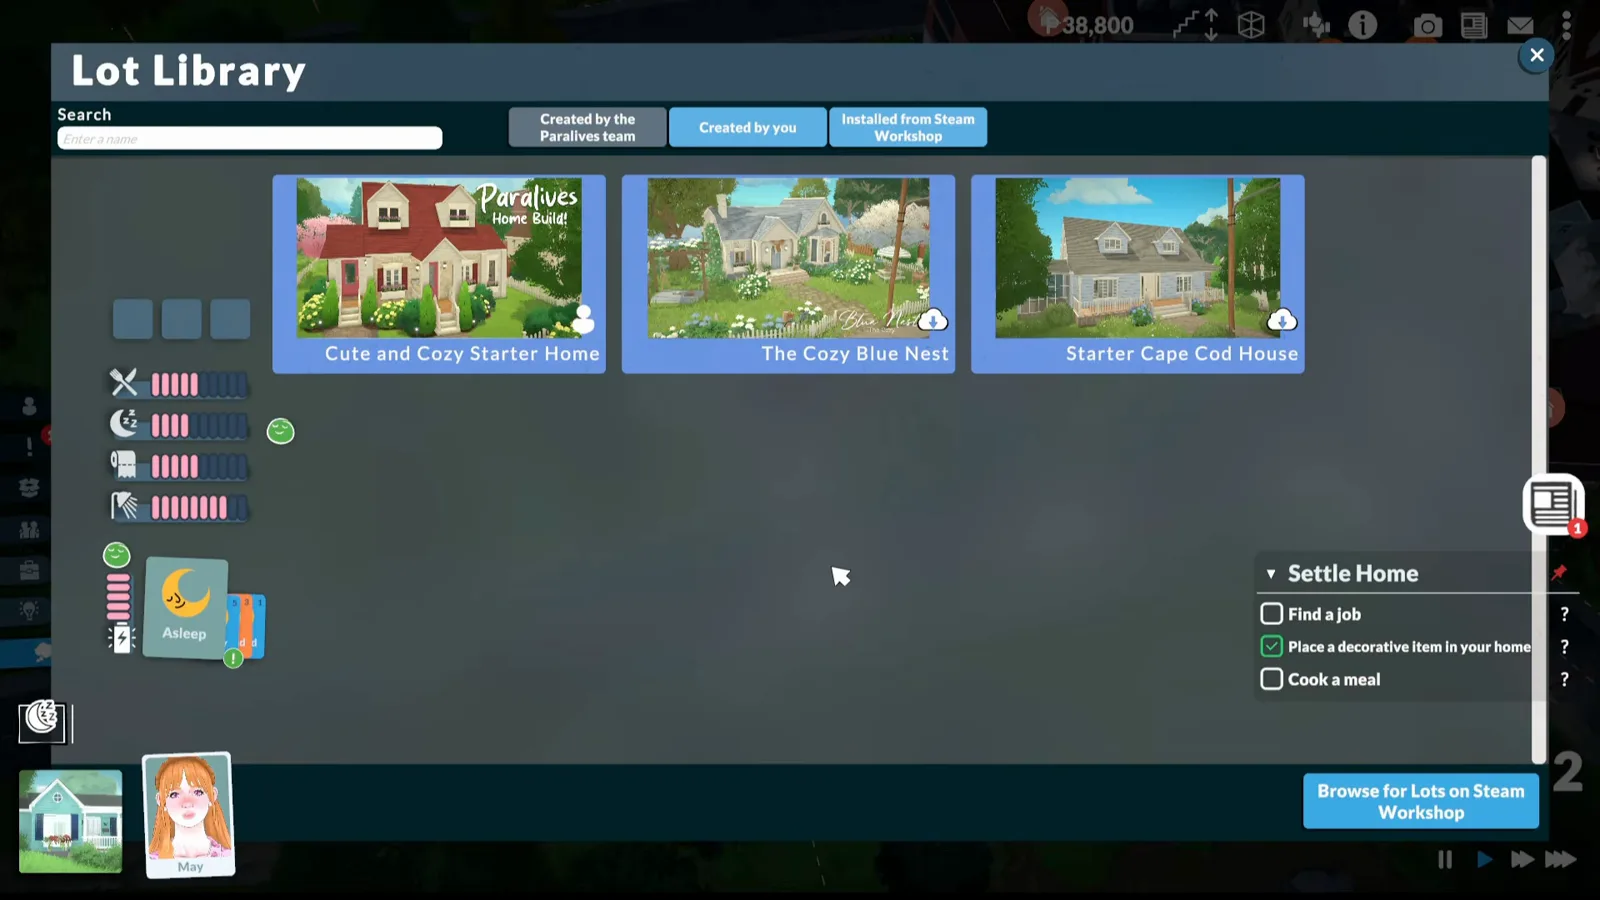
Cloud icon means it arrived from the Workshop.Watch at 7:00 - 12
Clean up with Delete and Unsubscribe
The bin icon on a selected lot asks: Are you sure you want to delete this mod and unsubscribe from it? One confirmation removes it from the library and the Workshop subscription together.
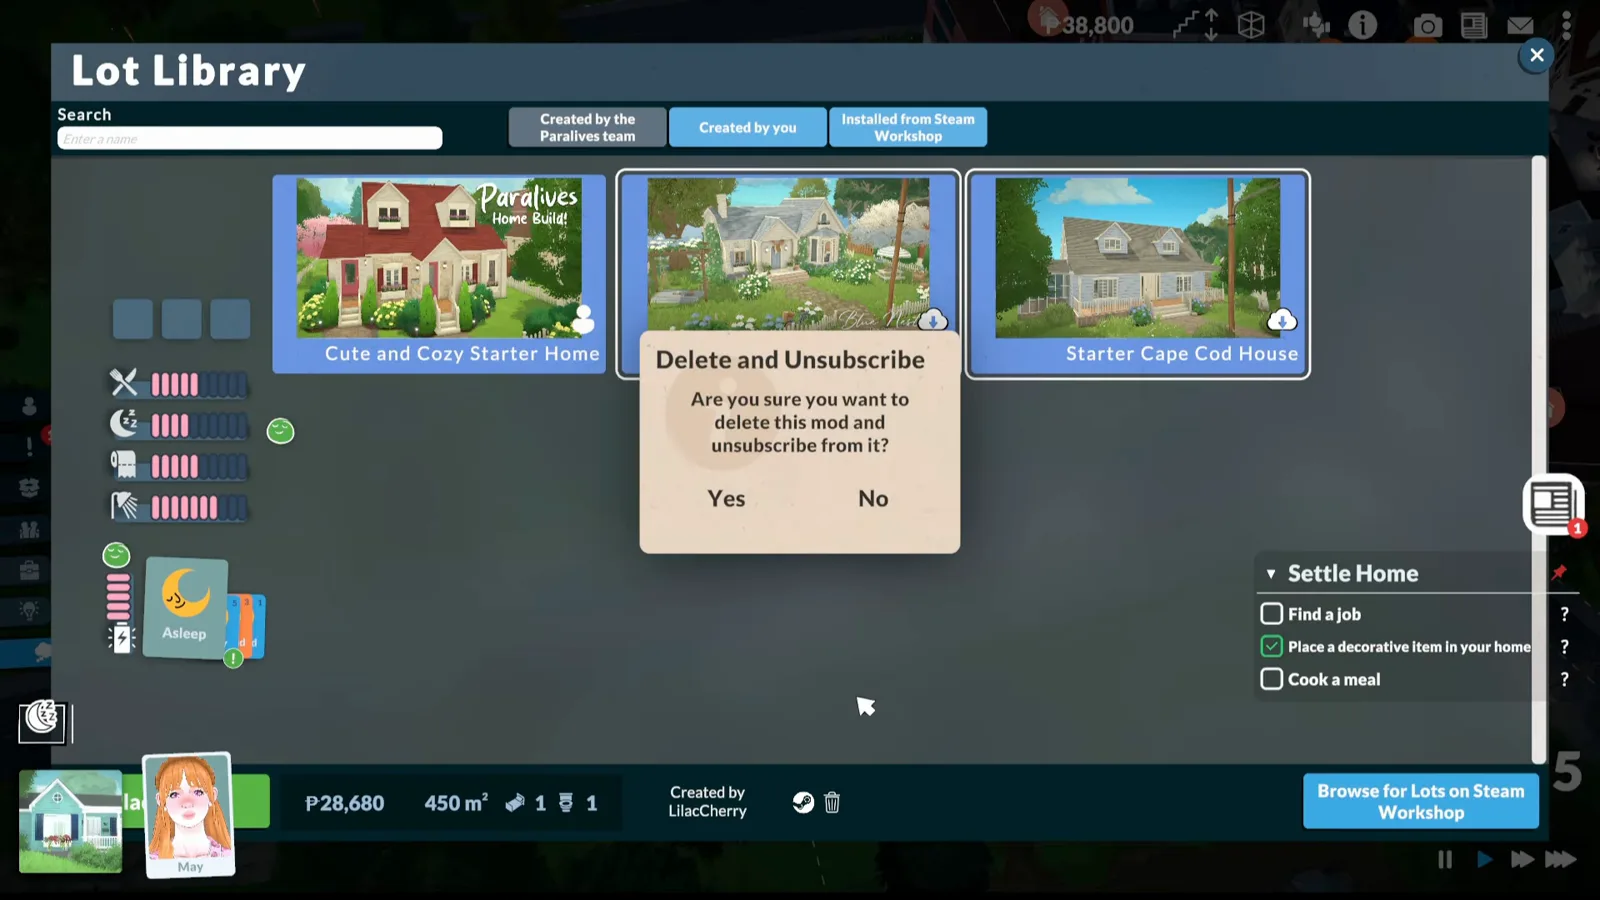
The game's wording again: your house is a mod while it travels.Watch at 7:19
Gallery, Lot Library or Workshop — which is which
Three names, two places. The Lot Library is the in-game catalogue — the grid this whole page works in — and it holds the Paralives team's prebuilt lots, everything you save and everything you install from the Workshop. The Steam Workshop is the public catalogue outside the game, where listings live and subscriptions happen.
Saving and uploading are different acts. Save lot to the library copies your build into your own game's library — nobody else sees it. Upload to the Steam Workshop publishes the saved entry as a listing. You can save fifty lots and upload none, and that is a perfectly good way to play.
Houses are not the only cargo. The Workshop's filters split Modpacks, Households and Houses, and the walkthrough shows households — Parafolk families — sitting beside houses in the same grid, shared through the same save-and-upload loop.
Sharing Paralives houses — FAQ
- Where is the Gallery in Paralives?
- There is no screen called Gallery — that is The Sims' name. Paralives calls its in-game catalogue the Lot Library, reachable from the main menu's Lots tab. Your saved lots and everything installed from the Steam Workshop live there, filterable by Created by the Paralives team, Created by you and Installed from Steam Workshop.
- Is uploading a house to the Steam Workshop free?
- Yes. Saving to the Lot Library and uploading to the Workshop cost nothing and need no in-game balance. The Paradimes figure on a lot's bottom bar is what placing a copy of the lot on a map plot costs — sharing it costs only the upload.
- Why won't my cover image work?
- Workshop covers must be under 1 MB — the creator in the source video says so outright, and keeps pre-cropped covers in her Downloads folder before opening the picker. What the picker does with an oversize file isn't documented on this page; downsize first and you won't find out.
- Can you upload households (Parafolk) too?
- Yes. The Workshop's filters split Modpacks, Households and Houses, and the walkthrough shows saved households sitting in the same Lot Library grid as houses — they travel through the same save-and-upload loop, icon for icon.
- Did my house become a mod? What are Mod name and delete the mod?
- It is Paralives' wording, not a new category. The game treats every shared lot as a mod entry — Mod name, Mod description, delete the mod — but a saved house is still just a build: no scripts, no file editing, nothing to install. The site's mods guides cover actual script and content mods.
- How do I edit or delete an uploaded house?
- Owner controls on the Workshop page edit the title, description, images and visibility, and extra photos can be added after the fact. In-game, the bin icon on a selected Workshop lot offers Delete and Unsubscribe, removing it from your library and your subscription in one step.
Related guides
Download & place houses
The other direction: subscribe on Steam, let lots arrive in your library and place them on empty land.
Install mods
Actual mods — script and content — ride the same Workshop but install differently.
Custom content
CC furniture and clothing: where it comes from and how it loads.
Blueprints
In-game blueprints copy builds between your own lots — the private cousin of uploading.
How to move house
Move lot, sell or split a household — managing the homes you keep to yourself.
House ideas
Finished builds to rebuild, upload or download for inspiration.