
The short version
Paralives needs no renovation mode because every house you can place, you can strip and rebuild. This walkthrough follows a real community makeover — a viewer's 'worst build' turned cozy — and pulls out the repeatable moves: read the house, redraw the layout, keep its colour soul, and fix what is actually broken.
- Any placed house is fully editable — delete furniture, sledgehammer walls, redraw rooms in build mode
- Creative custom staircases can break Para pathfinding; this video swaps theirs for a standard one
- Keep the original palette — this renovation keeps the house's green, white and orange identity
- Turn the empty upstairs room into a terrace for the biggest visual payoff
- A built-in kitchen and realistic clutter make rooms feel lived-in
- Leave a few rooms deliberately unfinished so the finished build stays yours
Step one
Get a broken house, then read it
The house in this walkthrough arrived the way most renovation projects should: someone else built it, and it needs help. Place any downloaded or saved house on an empty lot, walk through it, and write down what actually fails — which rooms fight you, what reads wrong, what is outright unusable. That list becomes the renovation brief.
- 1
Place the house you are going to renovate
Downloaded builds live in your Library, and any of them can become a renovation project. The community build in this video was sent in by a viewer and placed on an empty lot with the Lot Placement tool — confirm, and the house is yours to fix. Renovating someone else's build is also the best way to learn: every mistake in it teaches something your next build avoids.
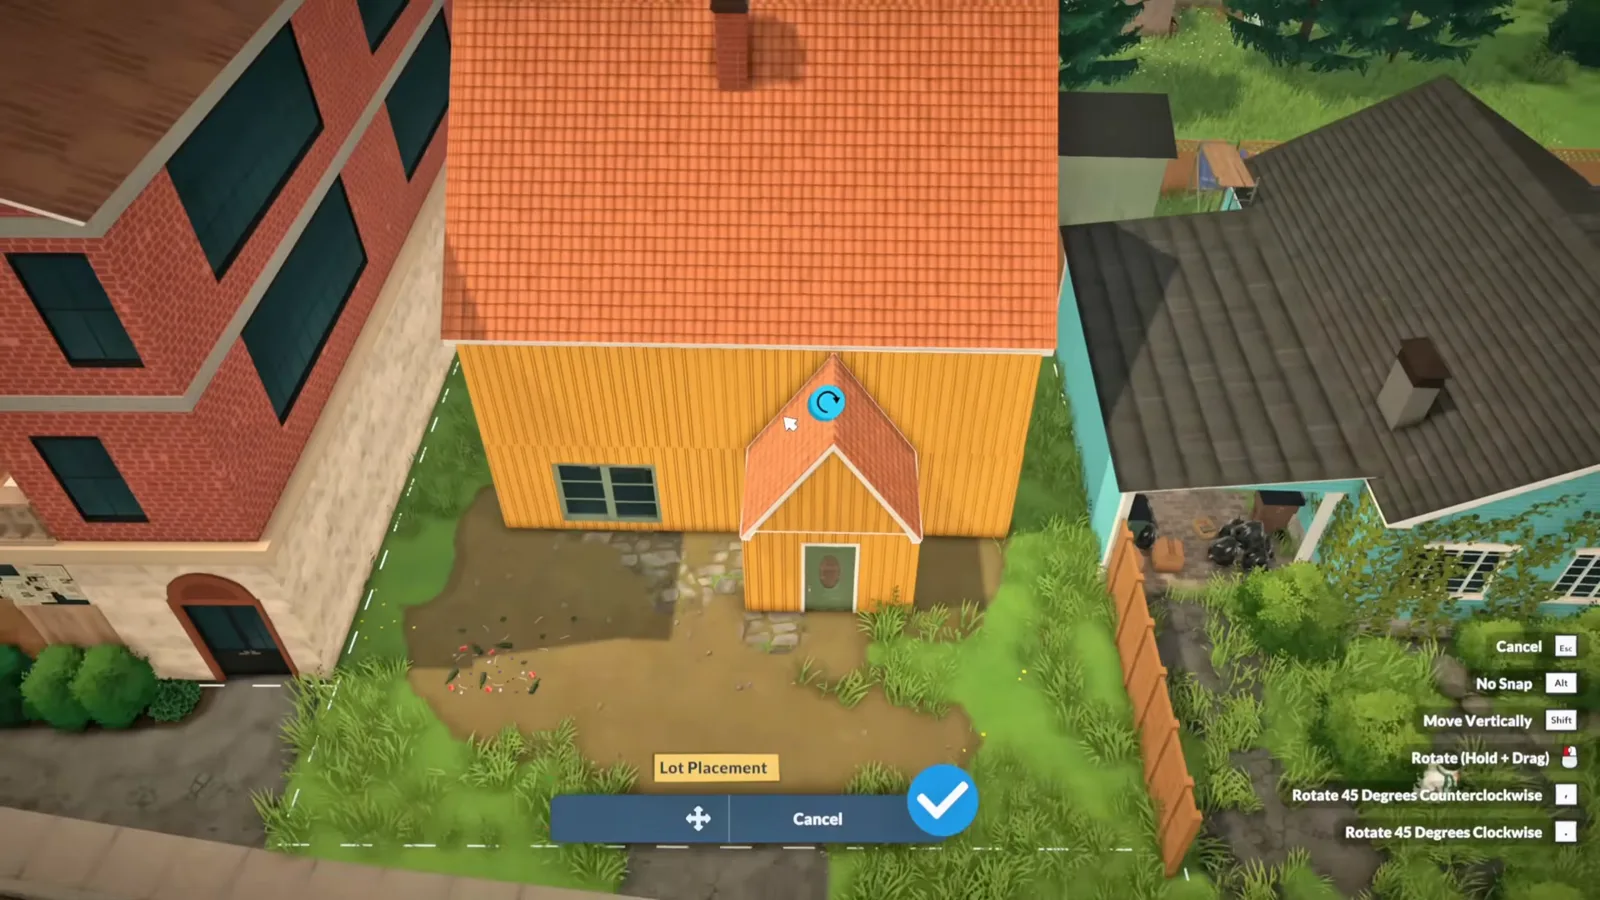
The project arrives the way zoibean's series works: viewers send builds, one gets the makeover.Watch at 0:42 - 2
Strip the house down to its shell
Out with everything. Delete the furniture, then take out the walls that make the layout fail. This is also the moment to study what you are erasing: in this house, a kitchen that looked like a gym locker room, a bedroom whose wallpaper and flooring fought each other, and a living-dining room with serious liminal energy.
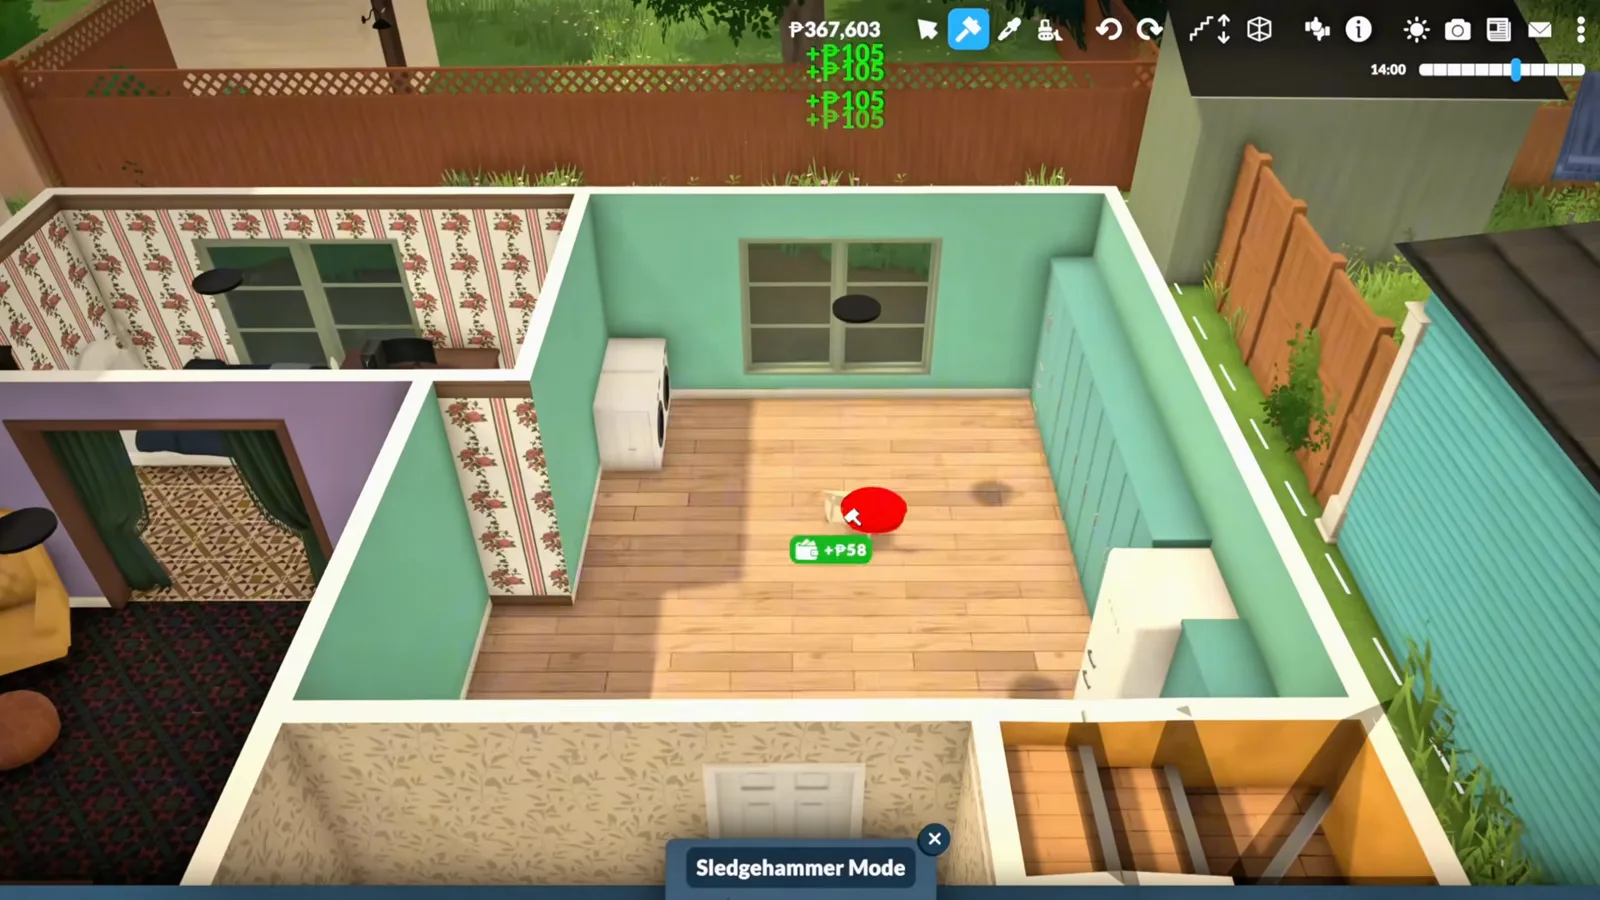
Erase everything — but note what the old rooms got wrong while you do.Watch at 1:24
The shell
Strip it out and redraw the layout
Renovation logic runs in one direction: fix the structure before a single cushion gets placed. Empty the house completely, redraw the walls around how Paras will move through it, and only then re-dress the shell — keeping the original colour identity so it still feels like the same house.
- 3
Redraw the floor plan around movement
With a clean shell, walls go back where they make sense: entrance and kitchen along one side, rooms sized to their purpose, sightlines opened up. The goal the video sets is simple — the whole place should feel more open and a little smarter, not just different.
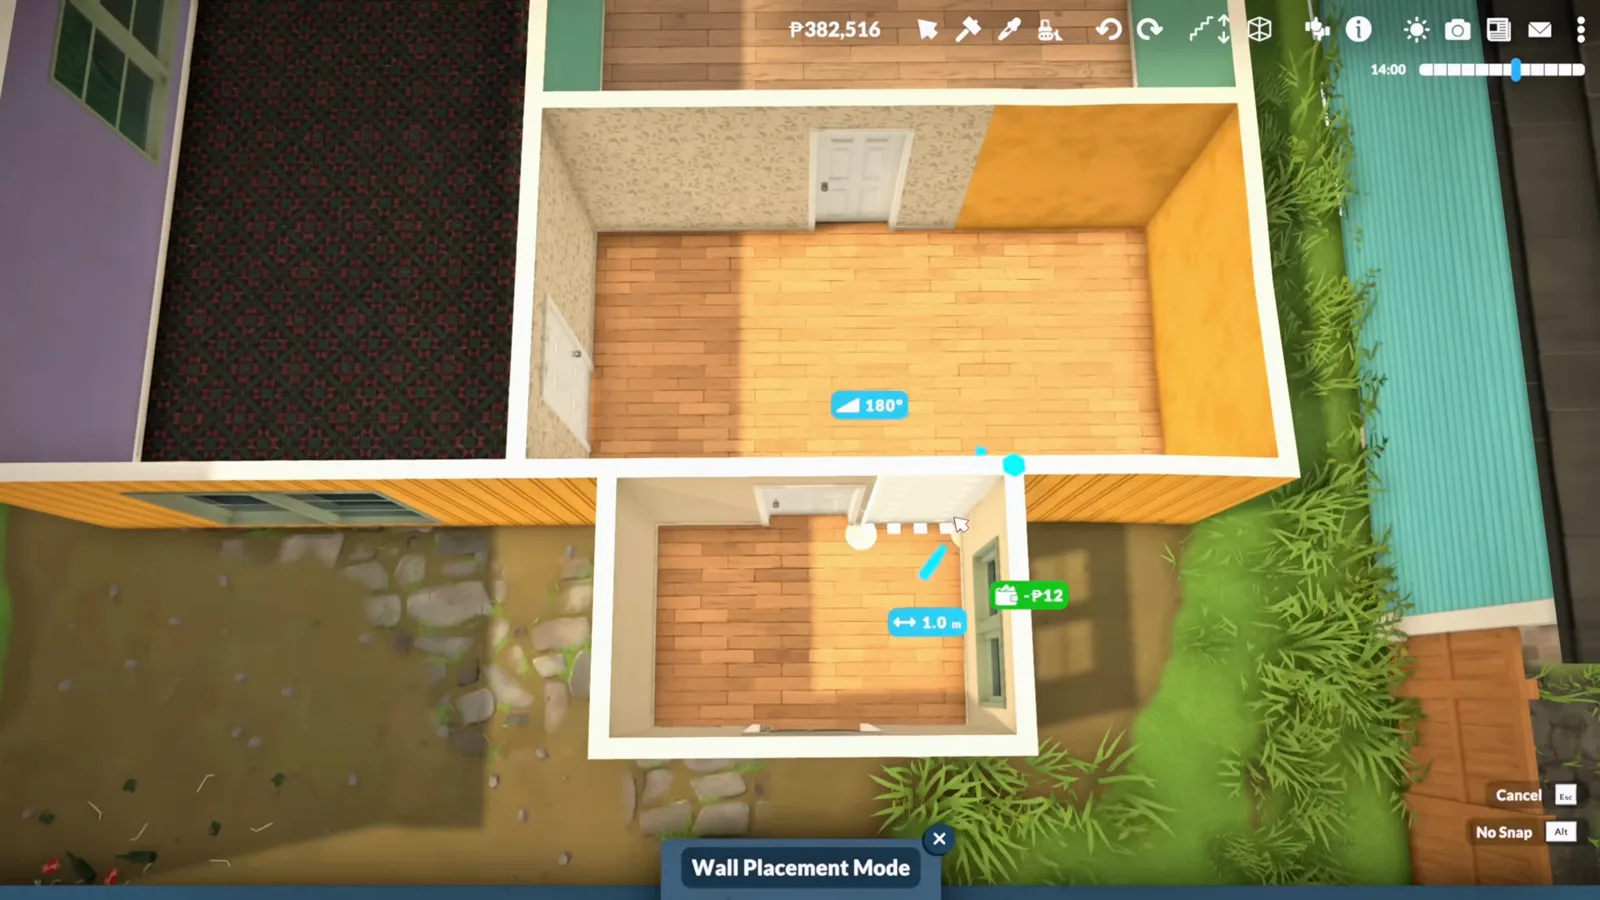
Structure first, styling later: the new layout is decided before a single decoration goes in.Watch at 1:36 - 4
Re-dress the shell without losing its soul
The builder's original green, white and orange combination was the one thing worth keeping, so the renovation keeps it deliberately — new panelling and details, same identity. Picking the palette before you re-skin anything is what separates a renovation from a rebuild.
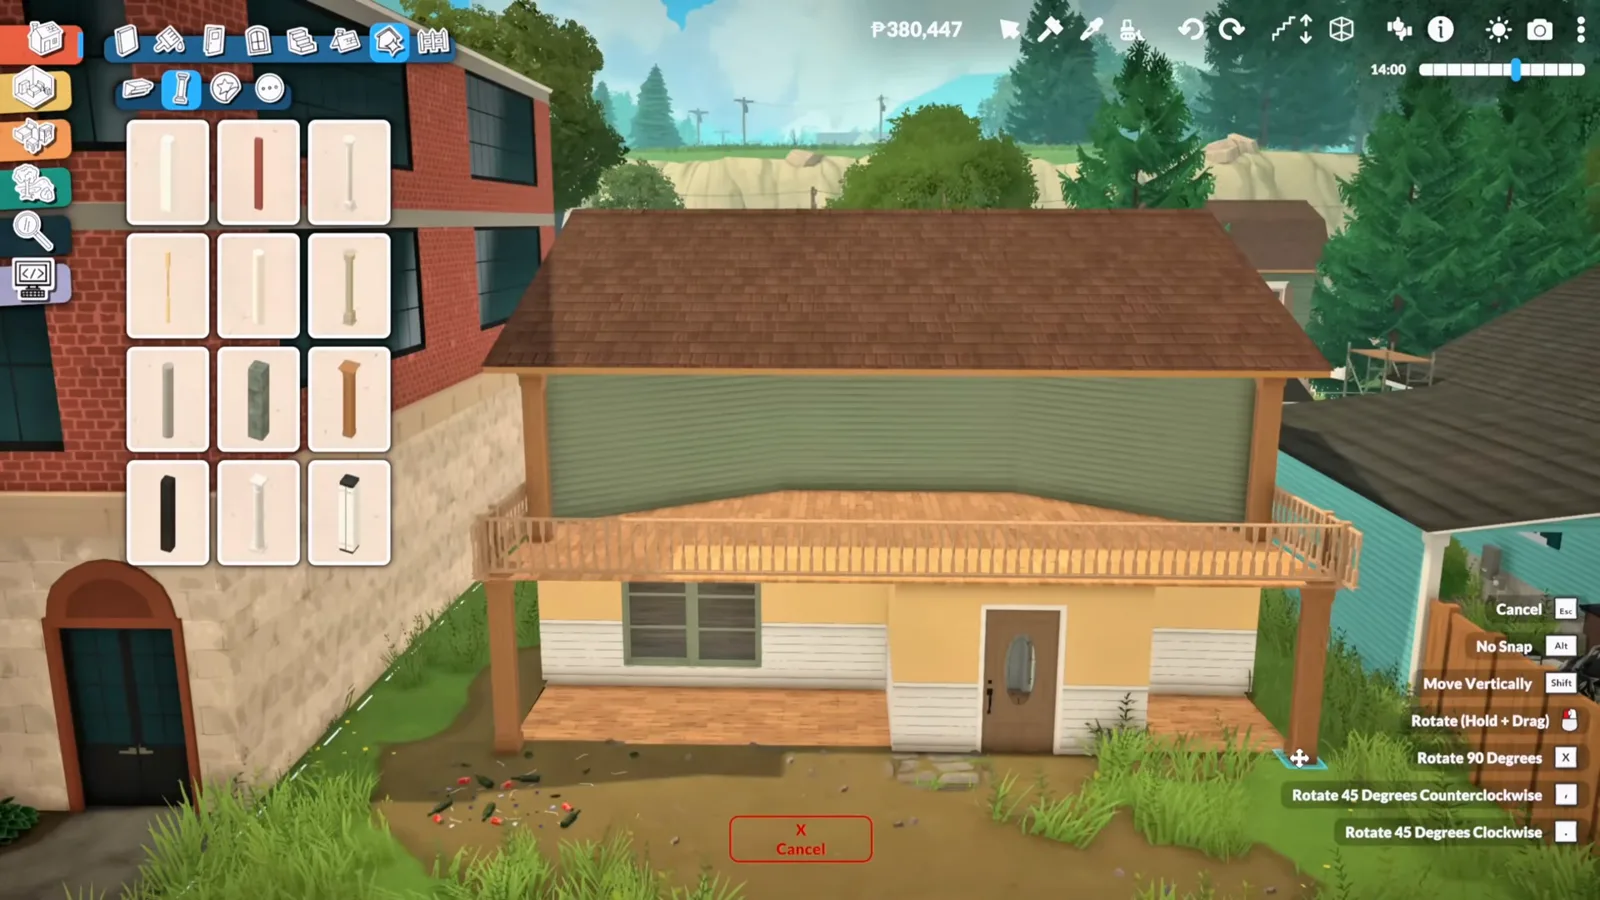
New skin, same house: the palette survives the renovation on purpose.Watch at 2:08 - 5
Replace fancy stairs Paras cannot use
The original staircase was genuinely creative — and genuinely broken. Custom stair designs like it are technically possible in Paralives, but the creator reports they still hit pathfinding problems: Paras refuse to climb them. The fix that worked in the video was boring and effective: swap in a standard in-game staircase, placed near the entrance for convenience. If your Paras queue up at the stairs and never climb, try this first.
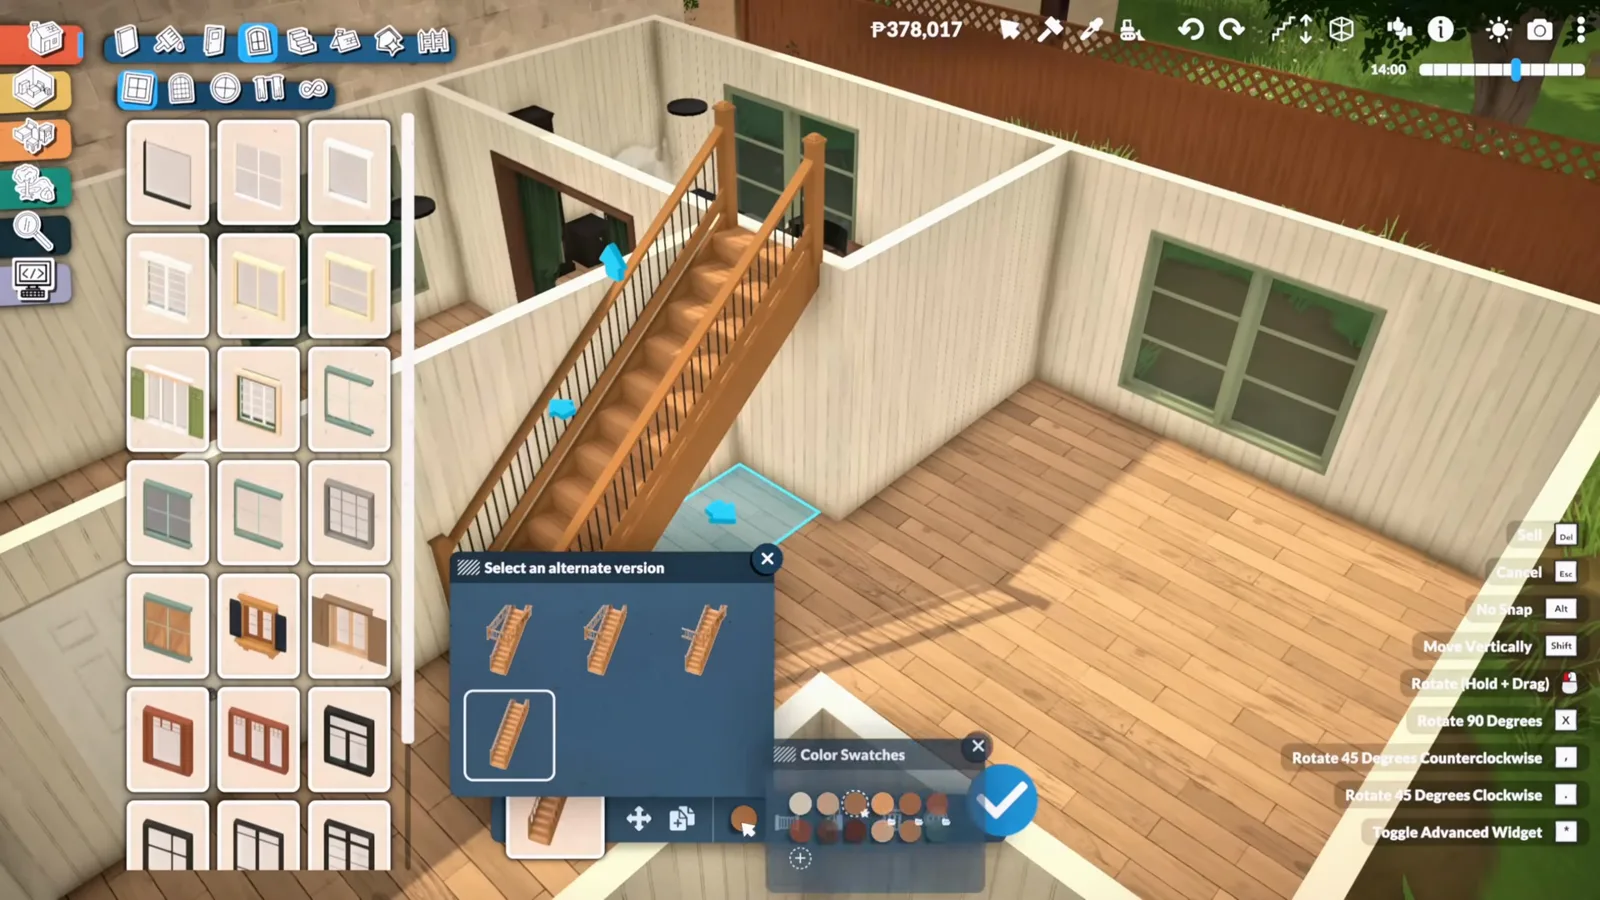
Creative but unusable is still unusable: a standard staircase gives Paras a route that works.Watch at 2:24
Ground floor
Rebuild the rooms Paras live in
This is where the advanced tools earn their keep: a fully custom built-in kitchen pushed along one wall, a bathroom relocated and enlarged, a living room that finally knows what it is, and the one room the original house was missing entirely.
- 6
Build a custom kitchen along one wall
The locker-room kitchen becomes a fully custom built-in kitchen stretched across an entire wall — and this is where you push the advanced building tools. Counters get placed, rotated and nudged with the advanced widget until they read as one continuous run of cabinetry instead of a row of misplaced items.
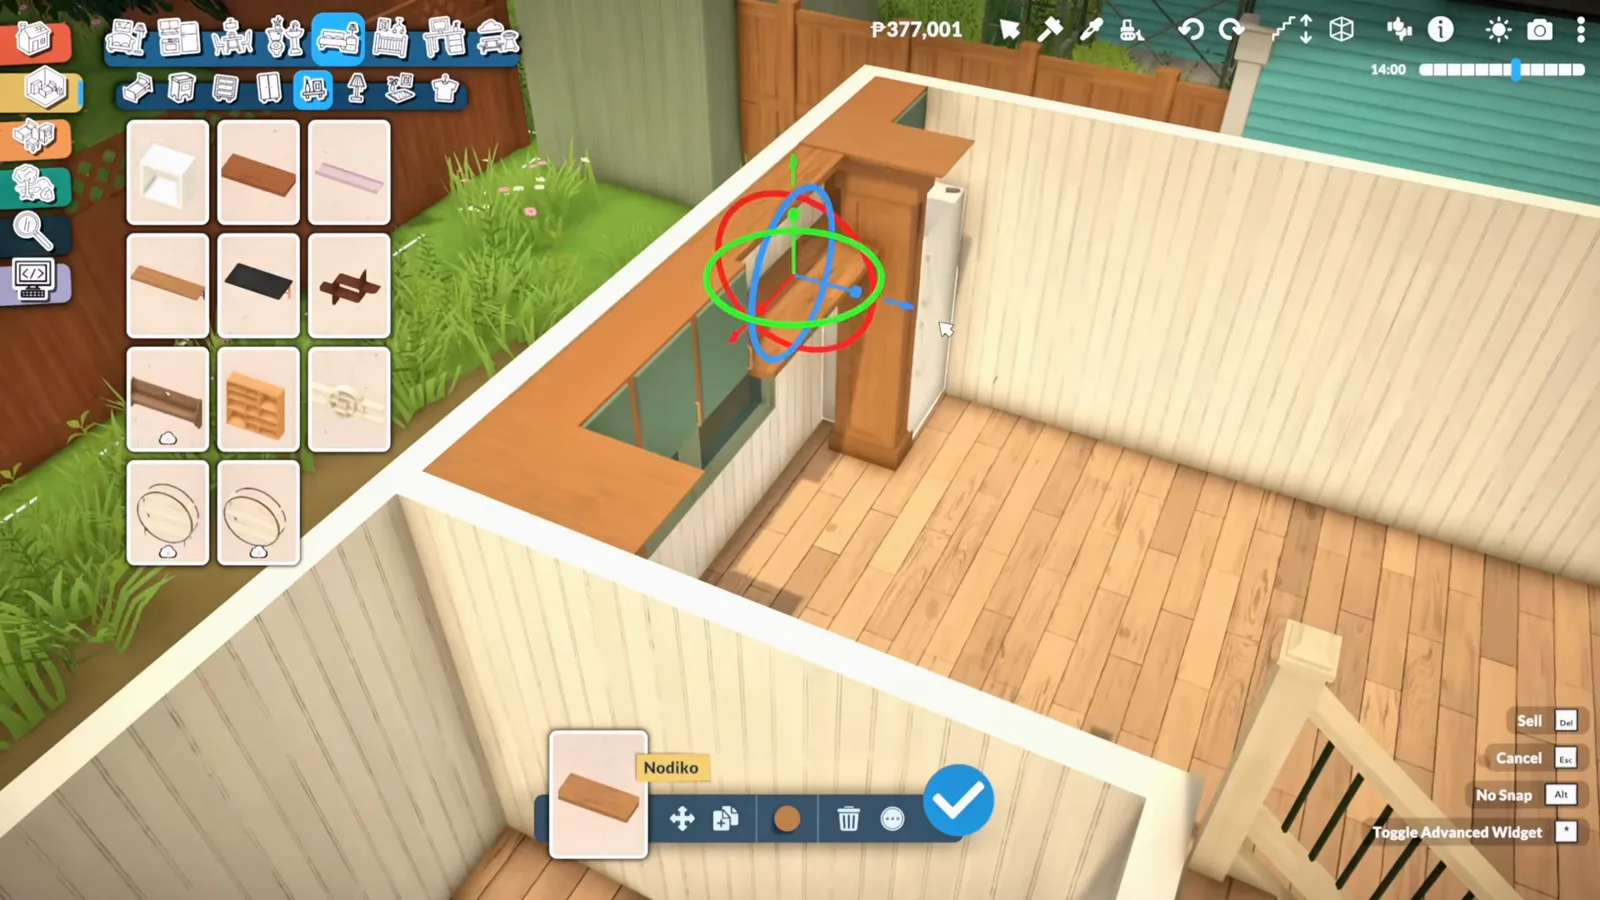
Free rotation and the advanced widget turn loose counters into one built-in run.Watch at 2:44 - 7
Clutter the kitchen until it feels lived-in
No cozy kitchen survives on cabinets alone. Small realistic details — a chalkboard menu, a dresser shelf, plants, busy countertops — are what instantly make the space feel lived-in. It might sound silly, and it is the difference between a showroom and a home.
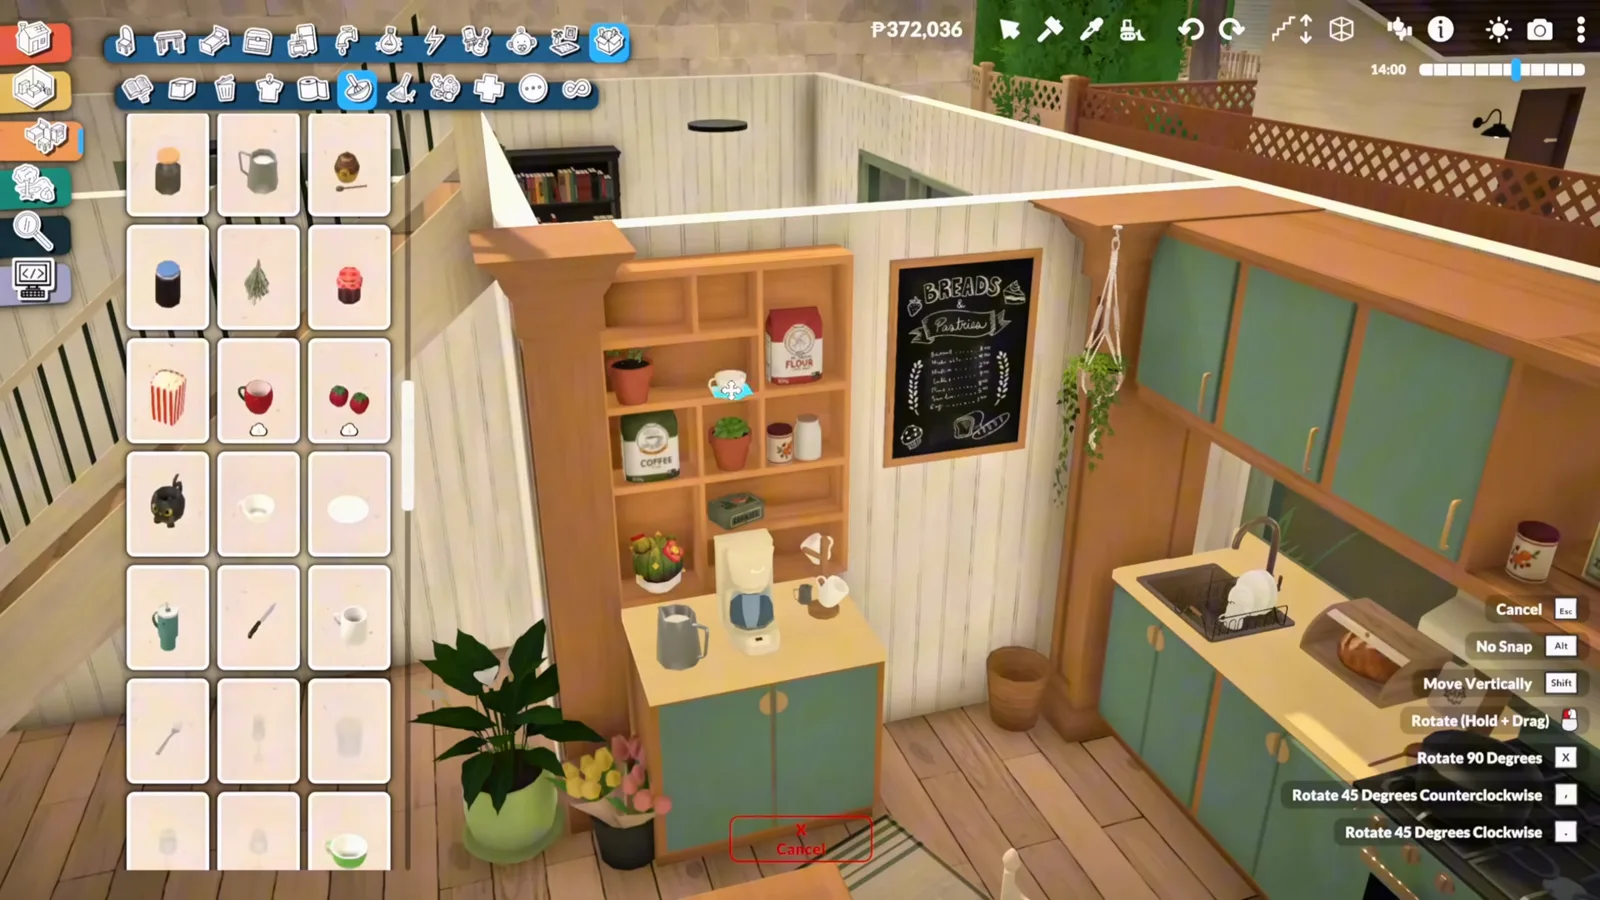
Chalkboard, dresser, plants: the locker room is unrecognisable.Watch at 4:00 - 8
Tuck a reading nook under the stairs
The space under the new staircase becomes a tiny reading nook — shelves, a chalkboard, warmth. It is such a small addition, and it adds so much: dead floor area becomes the room's favourite corner.
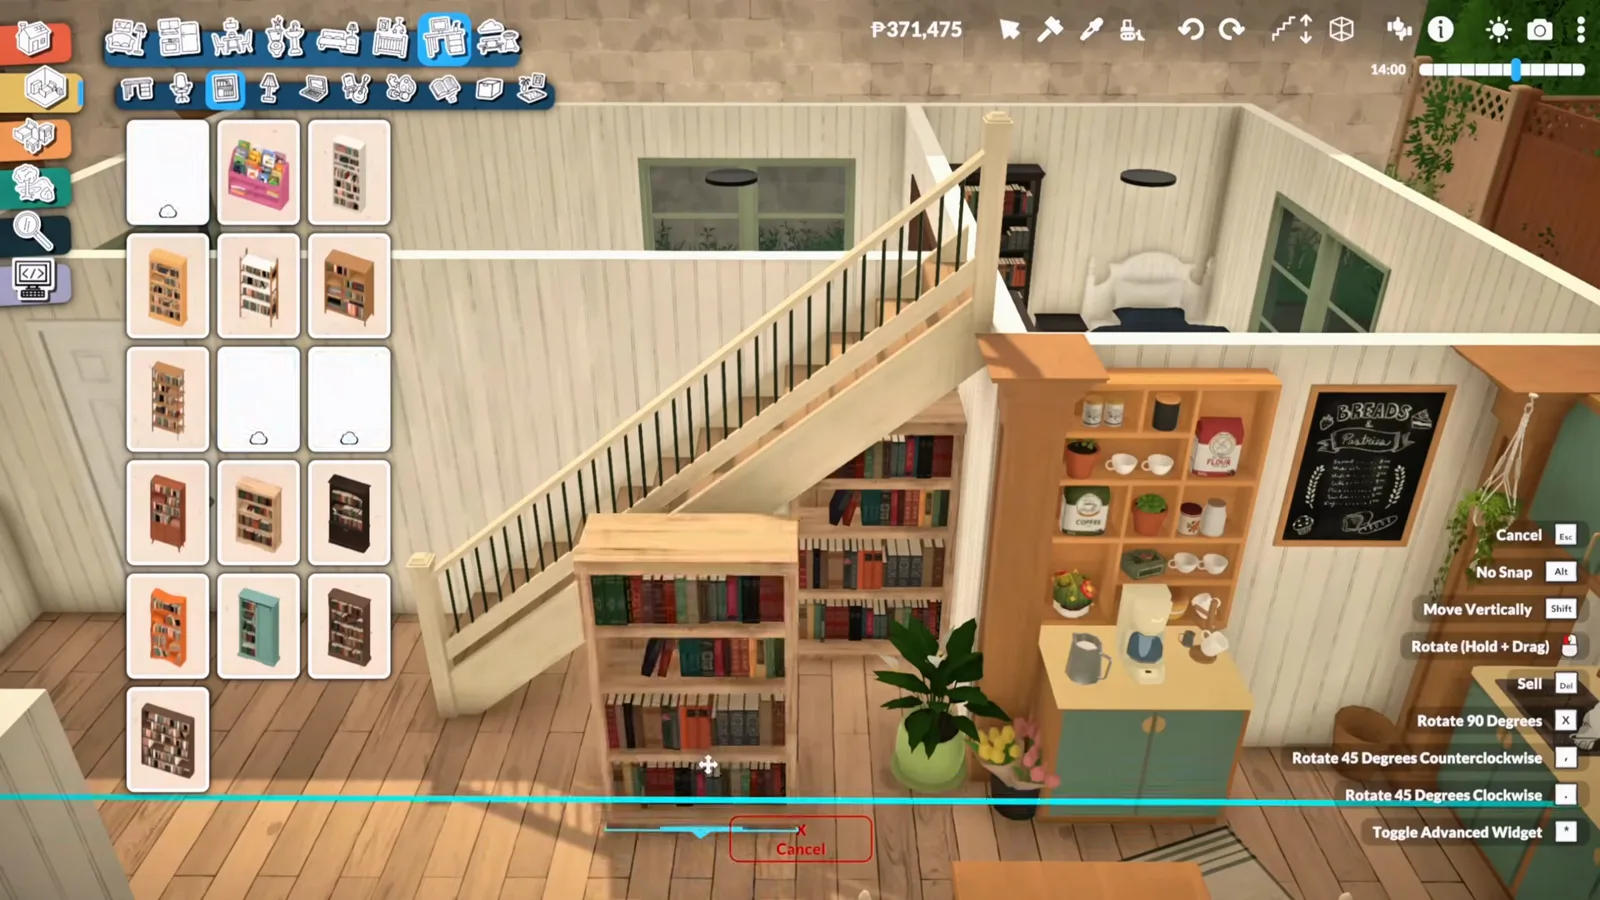
Dead space under the stairs becomes the room's warmest corner.Watch at 4:06 - 9
Move the bathroom, make it bigger
The bathroom gets relocated, a little more floor space, and the same overall colour palette as the rest of the house — dark green tiles, a glass shower, and a washer and dryer so laundry stops squatting in the kitchen. Keeping the palette is what makes a moved room feel like it was always there.
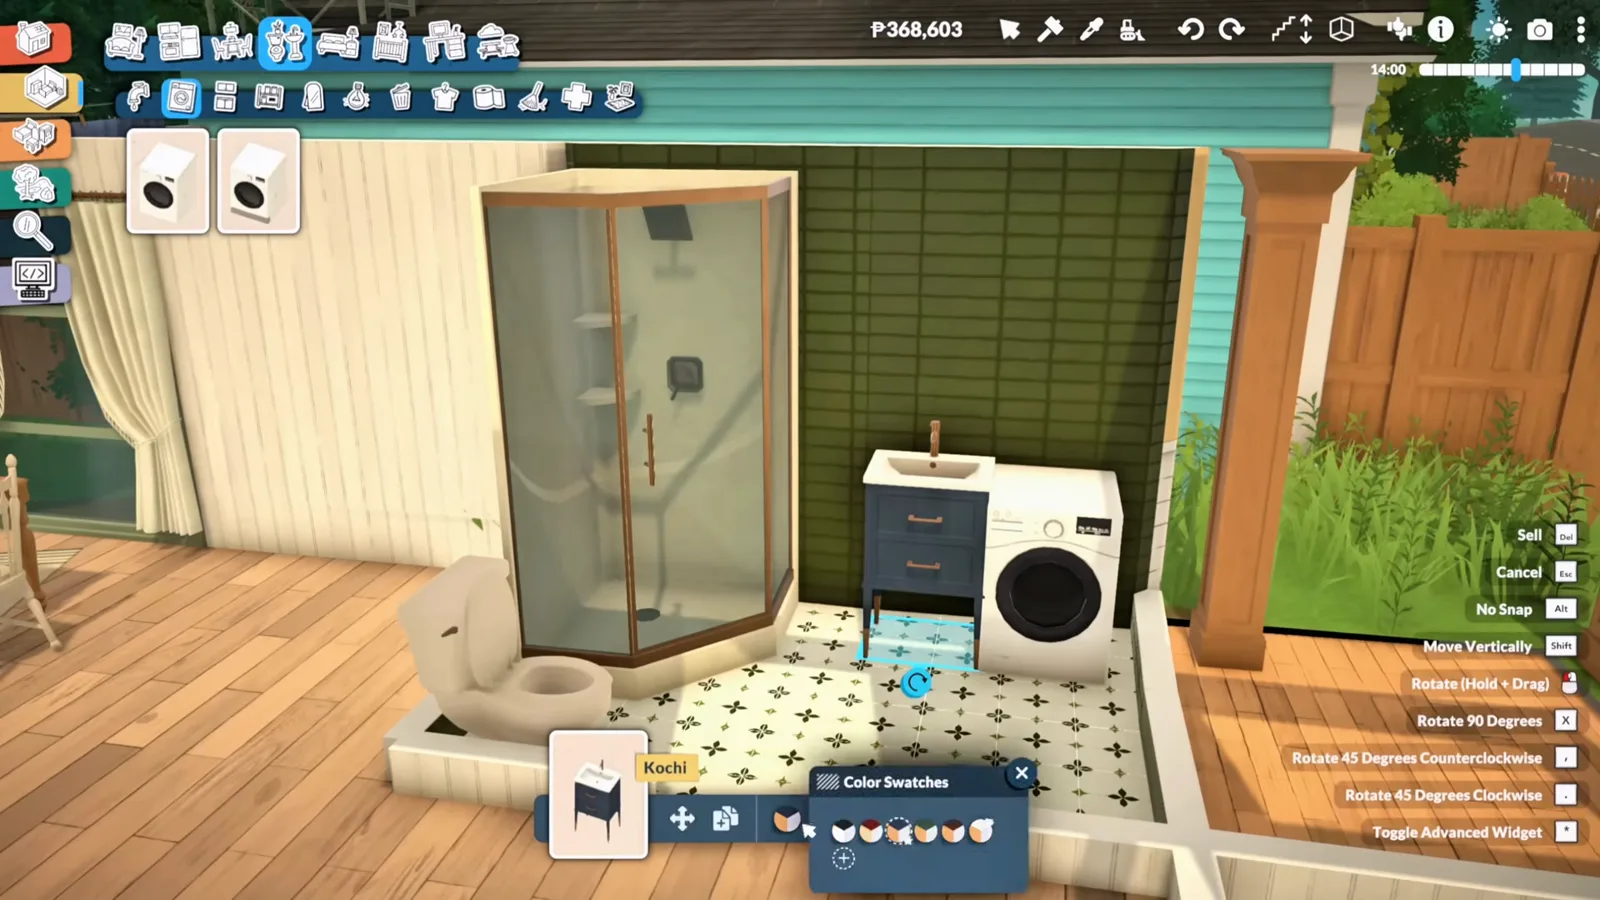
Bigger, relocated, and still belonging to the house: green carries through.Watch at 4:16 - 10
Give the living room a job
The liminal living-dining room is cleared out completely, then rebuilt with intent: white sofas, a TV wall, a piano, a telescope by the window, and the white-orange-green palette continued through every decorative piece. A room fails when it has no reason to be in it — give it one.
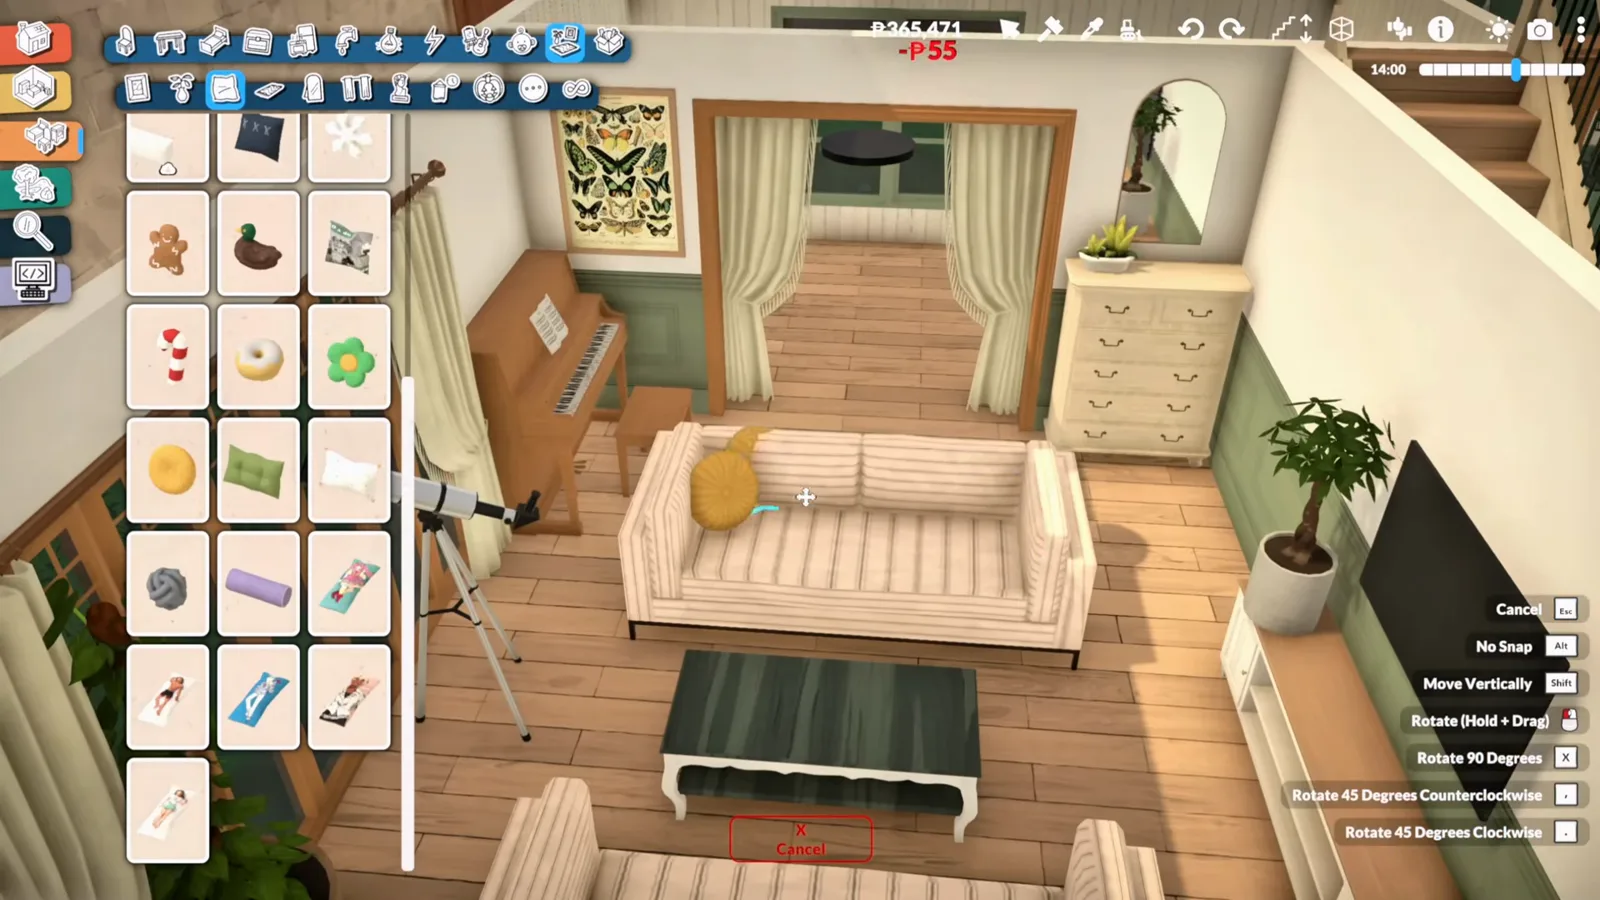
Sofas, TV, piano, telescope: the leftover space finally knows what it is.Watch at 5:04 - 11
Add the room the house never had
The room behind the living room becomes a dedicated office — something the original build lacked entirely. Whether Paras are studying, job hunting, or gaming all day, they now have a proper workspace: desk, computer, chair, lamp, done. It is the least glamorous room in the house and possibly the most useful.
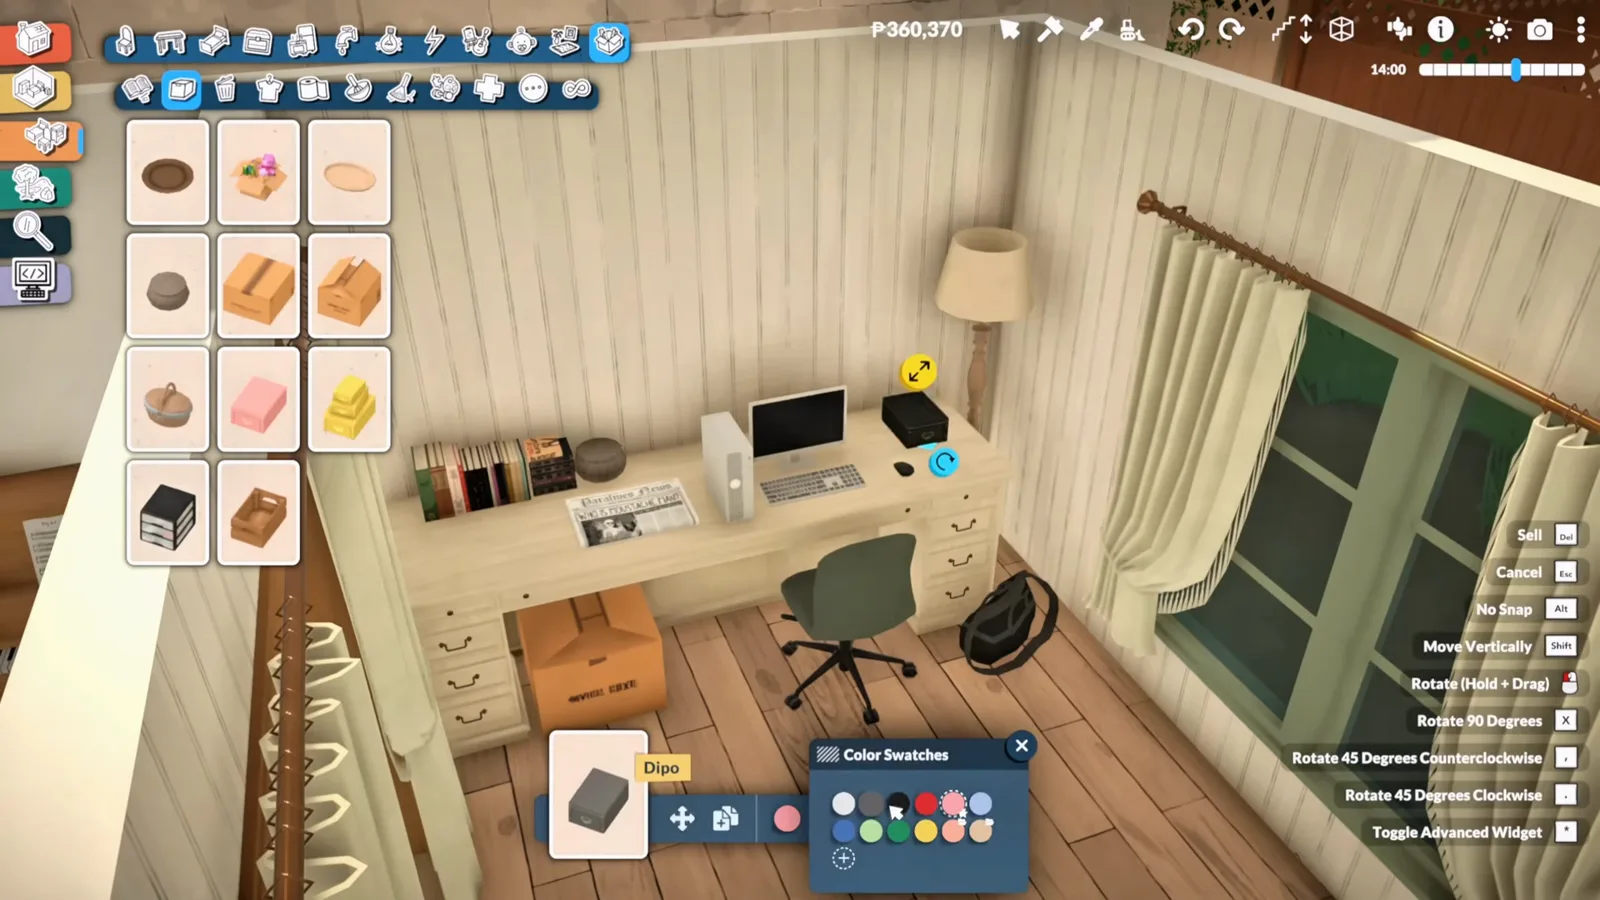
Study, job hunt, game: a proper workspace, in a house that never had one.Watch at 5:41
Upstairs and outside
Terrace, bedrooms and curb appeal
Upstairs, the giant empty room becomes the best thing about the house — a full-width terrace. One bedroom gets a full decorating pass, the rest are left open on purpose, and the lot gets pathways and planting to tie the rebuild together.
- 12
Turn an odd room into an artist's bedroom
Not every room upstairs gets decorated — and that is deliberate. The one with the unique shape and the most personality becomes an artist's bedroom: an easel and a creative corner right by the window, where the light is. Odd rooms are renovation gifts; they get to be specific.
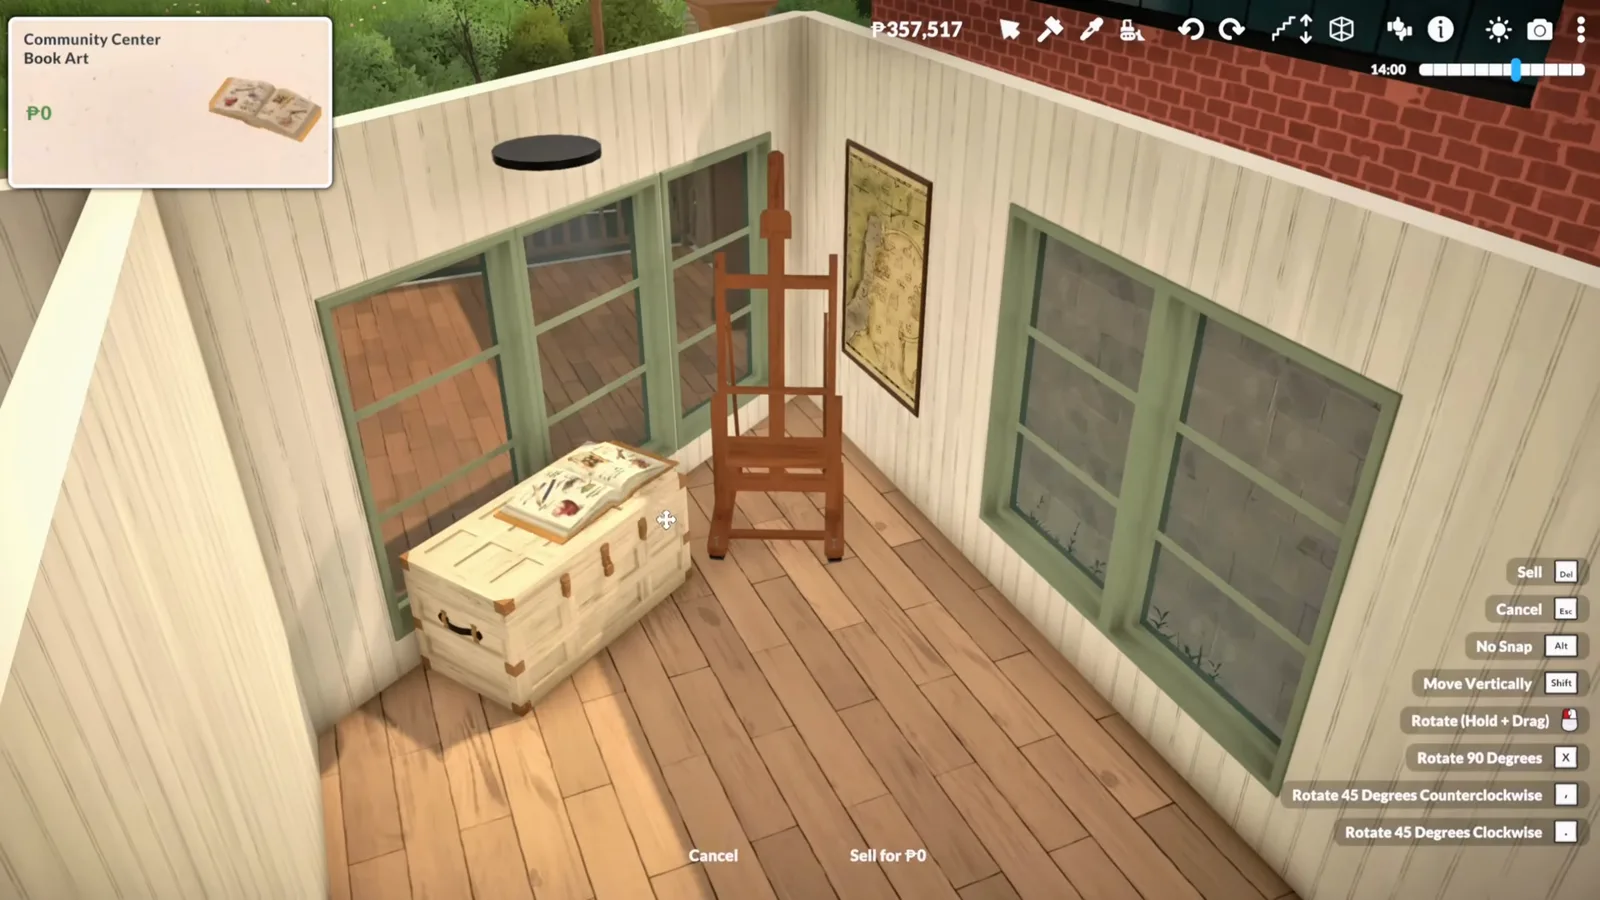
Easel by the window: the odd-shaped room becomes the artist's bedroom.Watch at 6:12 - 13
Decorate one bedroom properly, leave the rest
The artist's bedroom gets the full pass — bed, wardrobe, wall art and plants arranged around those big windows. The other rooms stay unfinished on purpose: leaving a few spaces open lets whoever plays the build make it their own. A renovation can end deliberately incomplete.
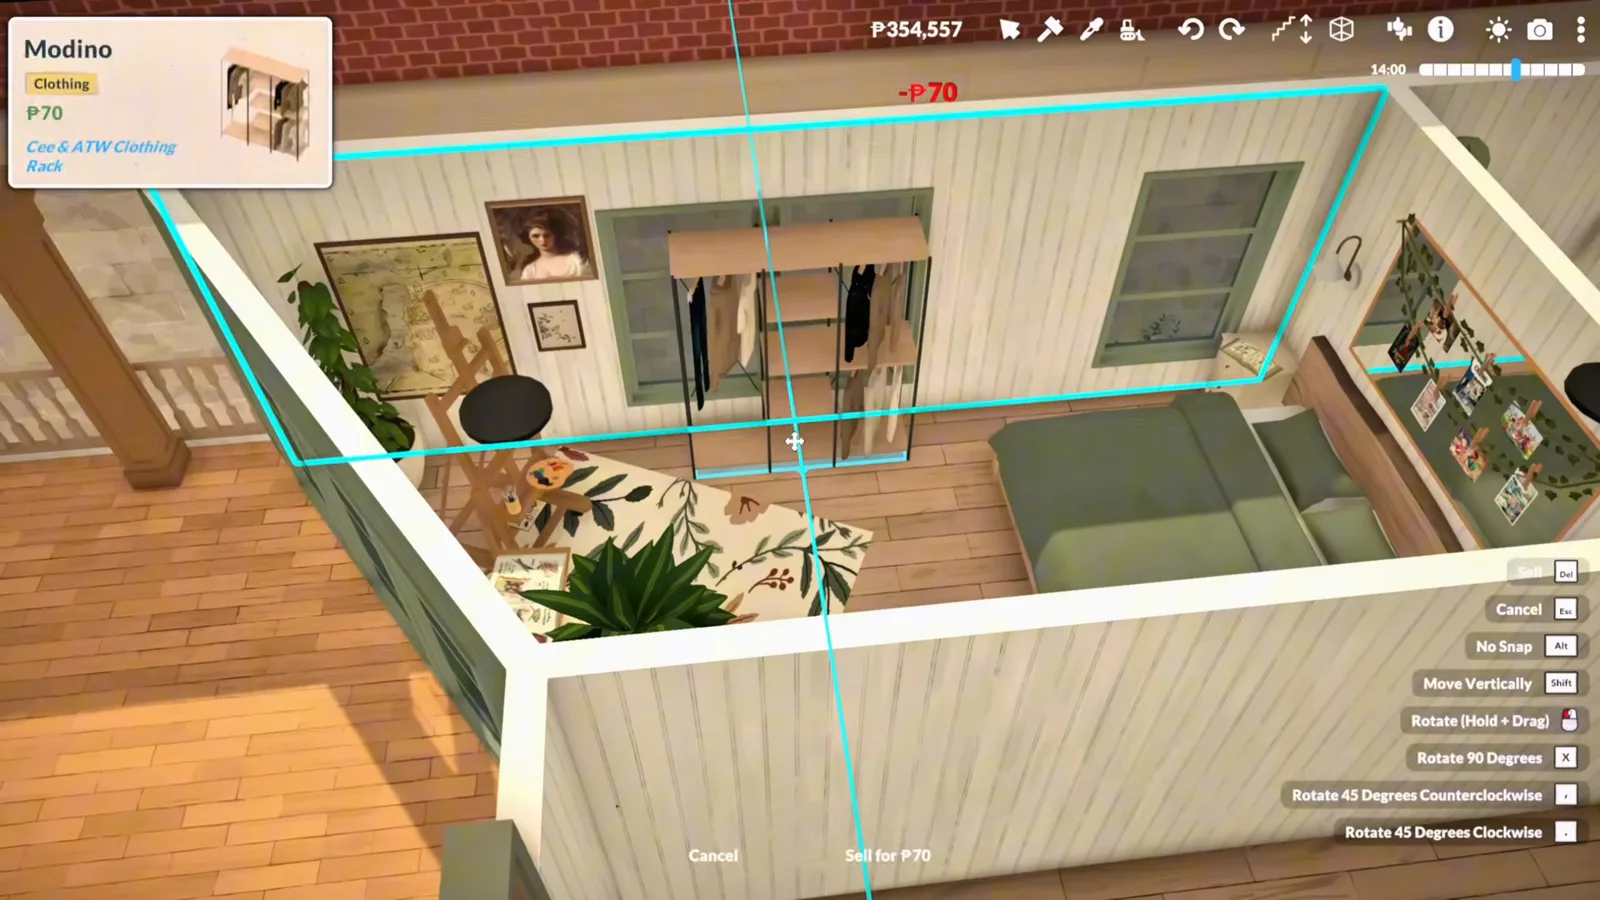
One bedroom fully styled; the rest stay open for the next player.Watch at 6:40 - 14
Turn the empty upstairs into a terrace
The giant empty upstairs room was the house's biggest weakness, so it stops being a room at all: walls come out, deck flooring goes down, and the level becomes a large terrace. It adds more personality to the house than anything else in the renovation — especially from the outside.
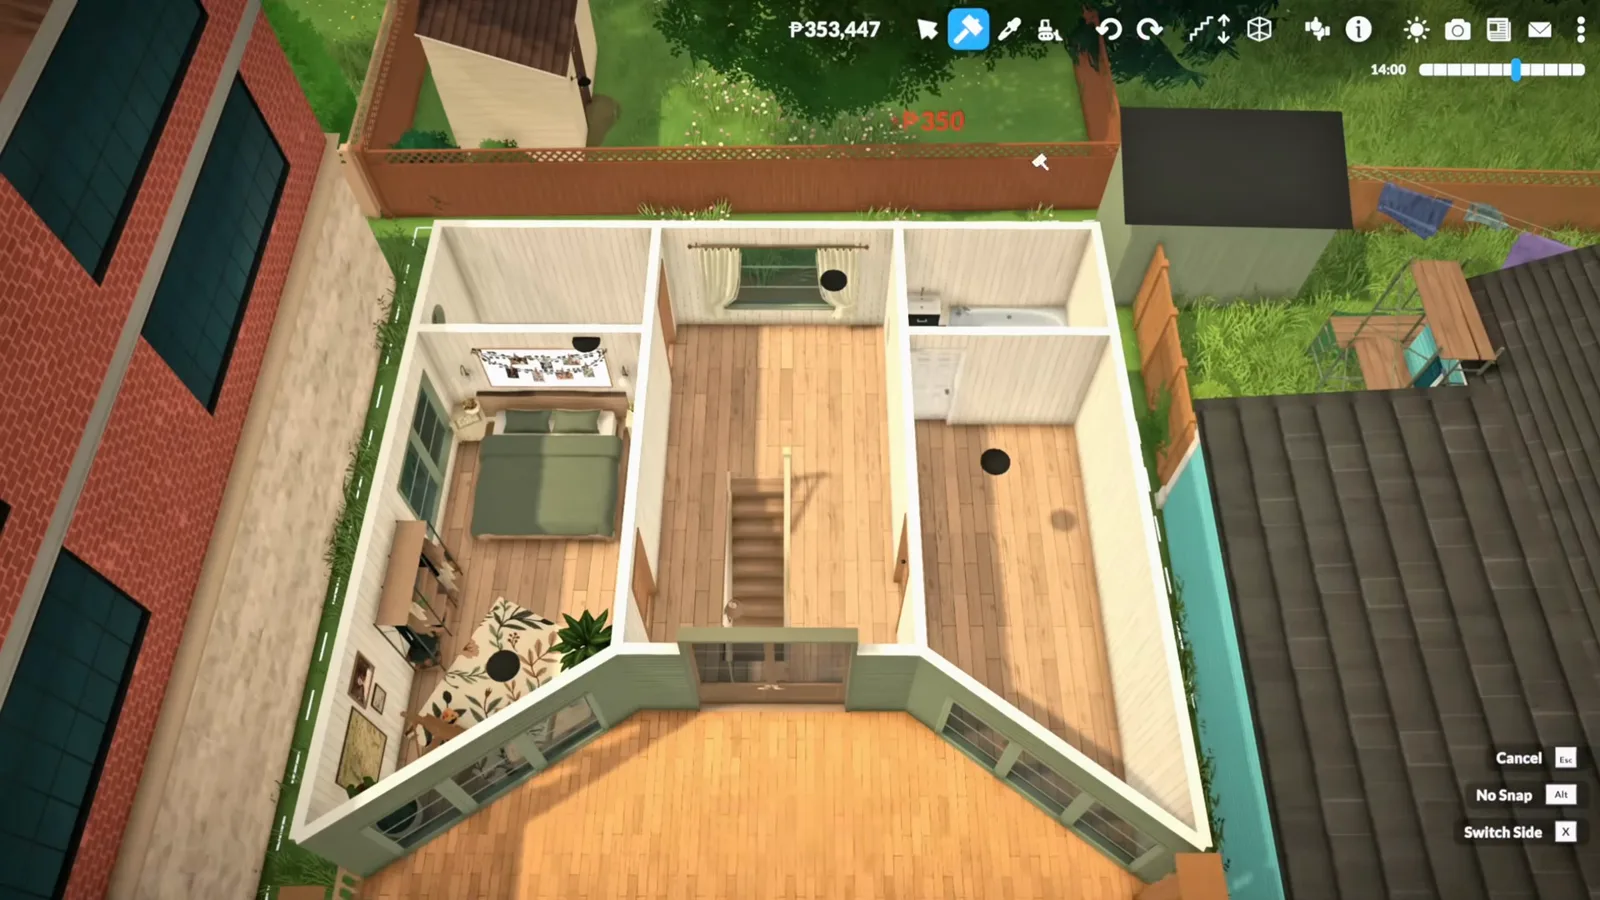
The biggest single move: the useless upstairs room becomes the house's best feature.Watch at 6:47 - 15
Furnish the terrace for outdoor living
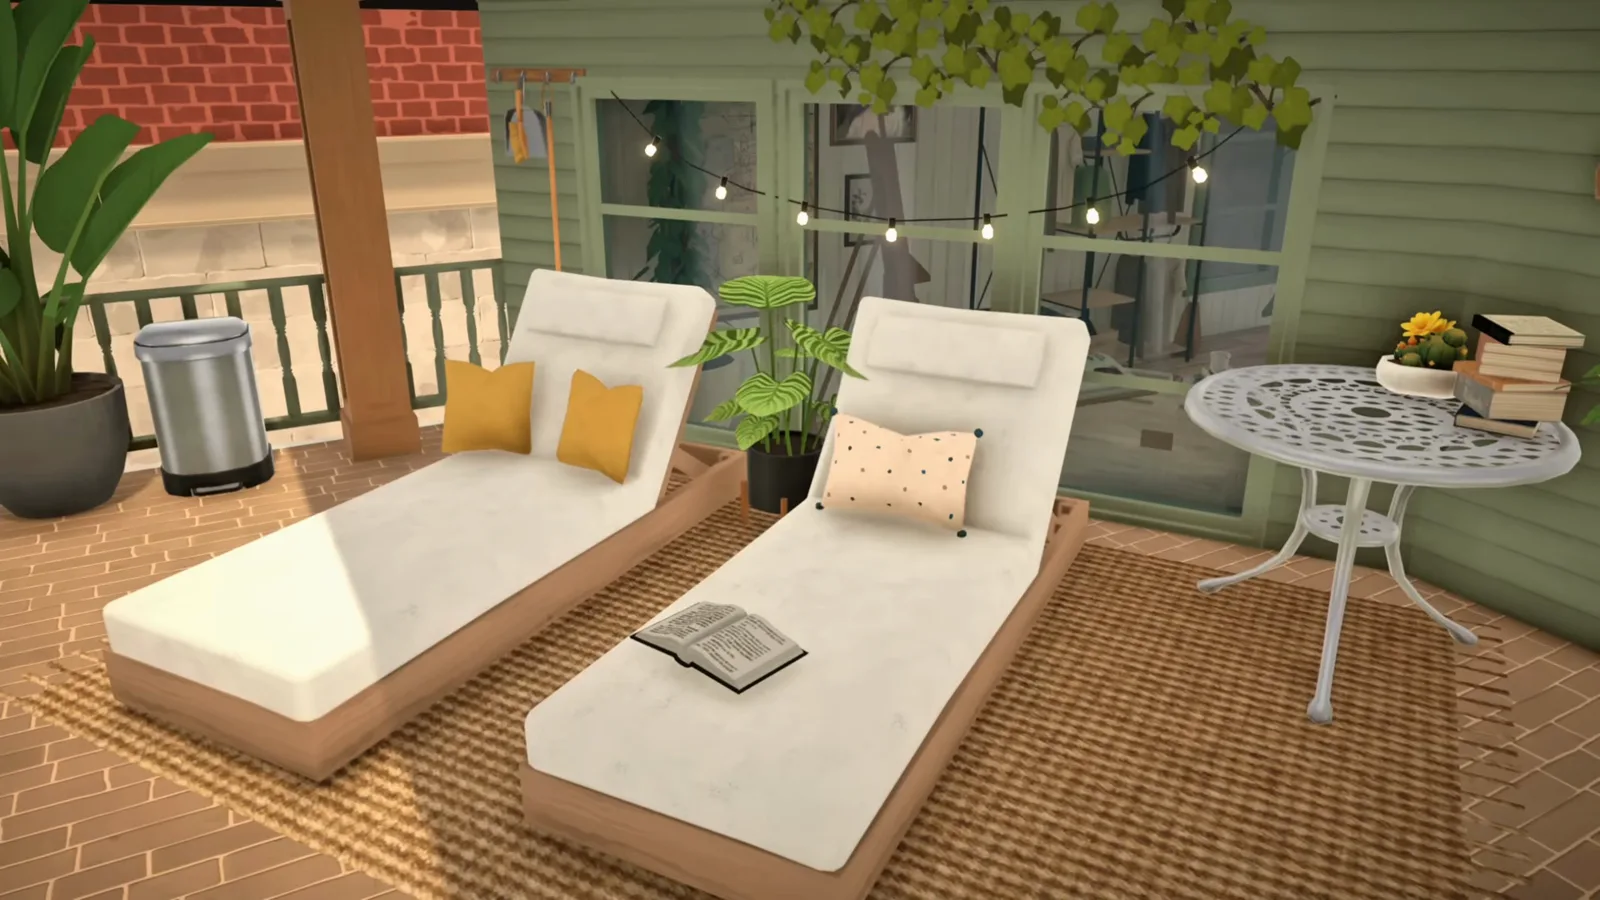
A space this size earns real furniture: a barbecue area, a small sunbathing spot, a dining table set for guests, and string lights overhead. There is plenty of room for all of it — outdoor living is the reason the terrace exists.
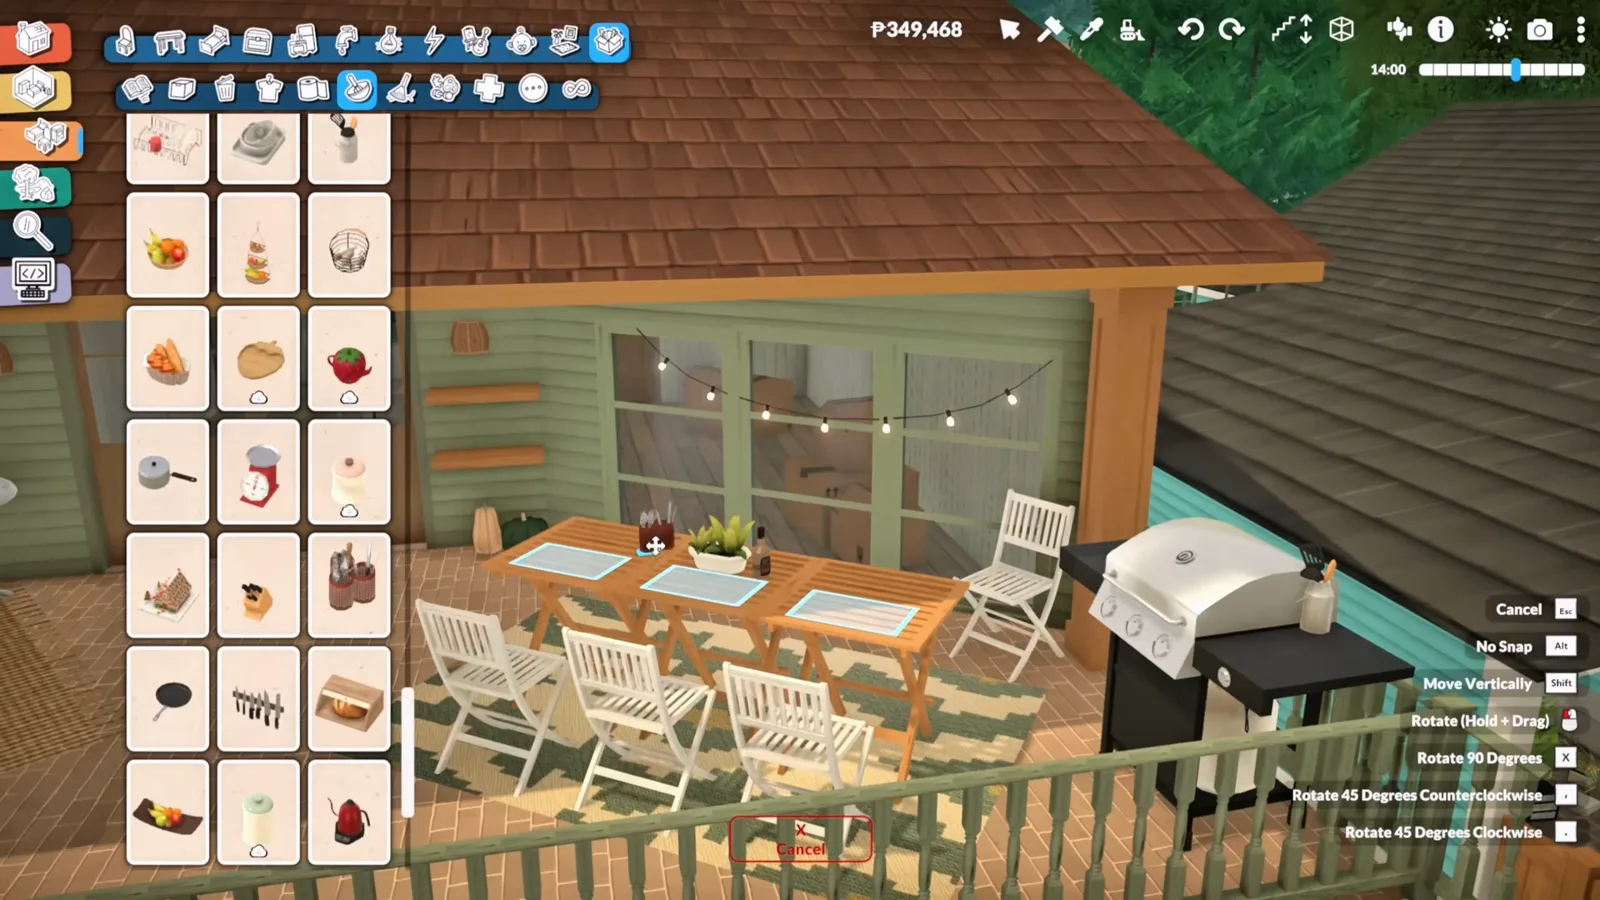
Barbecue, dining table, sunbathing, string lights: outdoor living, furnished.Watch at 7:26 - 16
Finish with pathways and planting
Before wrapping up, the lot gets its final touches: more relaxing spots, a proper pathway to the front door, planter boxes and landscaping that tie the house into the ground it stands on. A renovation is not finished at the walls — the lot is part of the read.
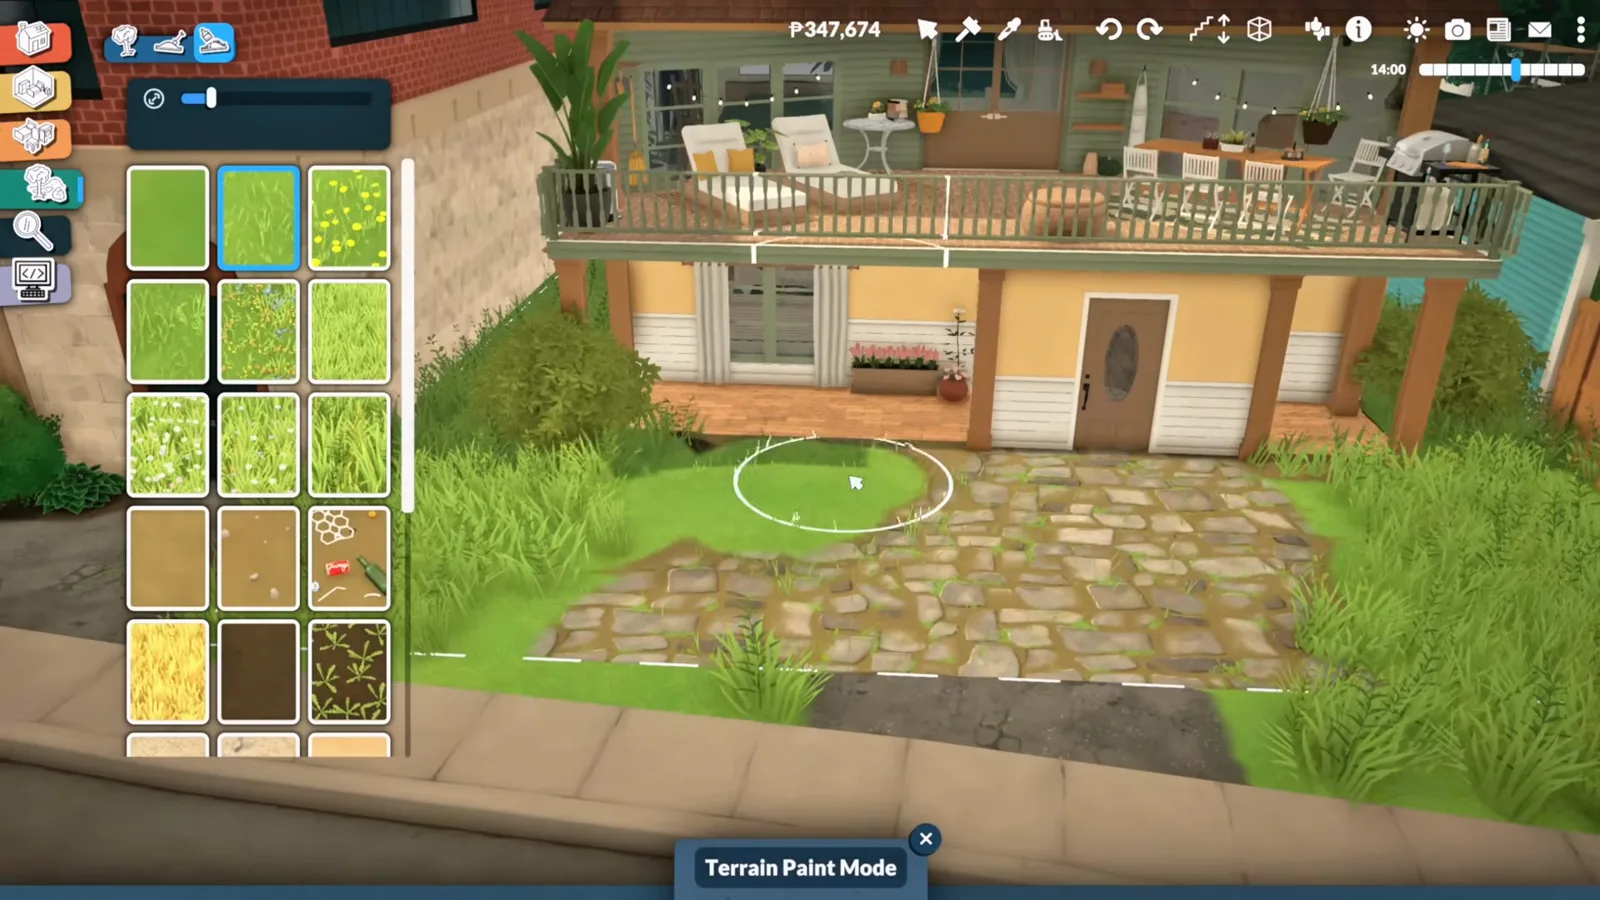
Pathway, planters, a bicycle by the door: the lot gets the same attention as the rooms.Watch at 8:14
Renovate, move house, or run it as a challenge?
Renovation keeps your household where it is and fixes the building around it. If what you actually want is to relocate your family, sell the old place or move into a downloaded one, that is the moving-house guide's territory — buying, selling and placing houses step by step.
If the takeaway from this page is that you would rather start from zero, the house-ideas catalogue is the better starting point — worked examples of complete builds to copy or crib from.
And if fixing a broken house sounds best as a game with stakes, the community's fixer-upper runs make it one: random or submitted builds, budget caps, no replacing the ugly wallpaper until it is paid off. Rule ideas live in the challenges hub.
Renovation FAQ
- Can you renovate an existing house in Paralives?
- Yes. Every house you can place — your own, downloaded, or saved — is fully editable in build mode: delete the furniture, sledgehammer the walls, redraw the floor plan and rebuild. This page walks through a complete community-build renovation exactly that way.
- Is there a fixer-upper challenge in Paralives?
- There is no official scenario type, but fixer-upper runs are a popular community format: take a run-down or submitted build and renovate it under self-imposed rules like a budget cap. The video this page follows is a creator-run version — viewers send their worst builds, and one gets the makeover per episode. Rule templates live in our challenges hub.
- Why won't my Paras use my custom staircase?
- Custom stair designs are technically buildable in Paralives, but pathfinding with them can fail — Paras walk up to the stairs and give up. The creator of this renovation ran into exactly that and fixed it by swapping the custom design for a standard staircase. It is a creator-observed issue, not an official changelog item; our known issues page tracks what else is currently rough.
- How do you build an upstairs terrace in Paralives?
- Delete the exterior walls of an upstairs room, lay outdoor decking on the floor, and surround it with railing and outdoor furniture. In this renovation the empty second floor became a full-width terrace with a barbecue area, dining table and sun loungers — the visual guide is step 14 above, and our decks and patios guide has the general technique.
- How do you keep a house's original style when renovating?
- Name the palette before you change anything, then enforce it: this house kept its green, white and orange, and every new room — kitchen, bathroom, office, terrace — reuses that combination. Recolour new furniture to the original shades instead of shopping for new colours.
- Where do you get houses to renovate?
- The Library and the Steam Workshop are full of downloadable builds you can place on an empty lot and strip. Zoibean's series takes submissions directly — instructions in his video description and pinned comment — or you can renovate your own older builds. Our moving-house guide covers placing saved and downloaded houses step by step.
Keep building
How to move house
Relocate the household, sell up, or place a saved house — the other half of living in somebody else's build.
Paralives house ideas
Complete build examples to copy or crib from — for when the renovation becomes a rebuild.
Paralives challenges
Rule templates for fixer-upper runs: budget caps, random builds, and self-imposed pain.
Known issues and workarounds
What is currently rough in Paralives — including the custom-stairs pathfinding this renovation dodged.
Paralives stairs guide
Every staircase type and the placement rules that keep Paras climbing.
Decks and patios
Decking, railings and raised outdoor floors — the technique behind the terrace.
Reading nook ideas
More under-stairs and by-the-window corners, beyond the one this renovation squeezed in.
Room-by-room decorating
The clutter-and-palette method this page uses, applied to every room type.